Integrate JIRA SSO with Zephyr OAuth
- Kevin Pham (Deactivated)
- Dominik Trygar
Starting October 11, 2024 (Zephyr Enterprise 8.2), the Zephyr Enterprise documentation moved from its current location on Atlassian to a dedicated, standalone Zephyr Enterprise documentation page. Please see: https://support.smartbear.com/zephyr-enterprise/docs/en/zephyr-enterprise/zephyr-administration-guides/system-setup/system-config/integrate-jira-sso-with-zephyr-oauth.html
Table of Contents
Steps to Configure JIRA for SSO:
Procedure:
In order to configure JIRA for SSO please use the following steps:
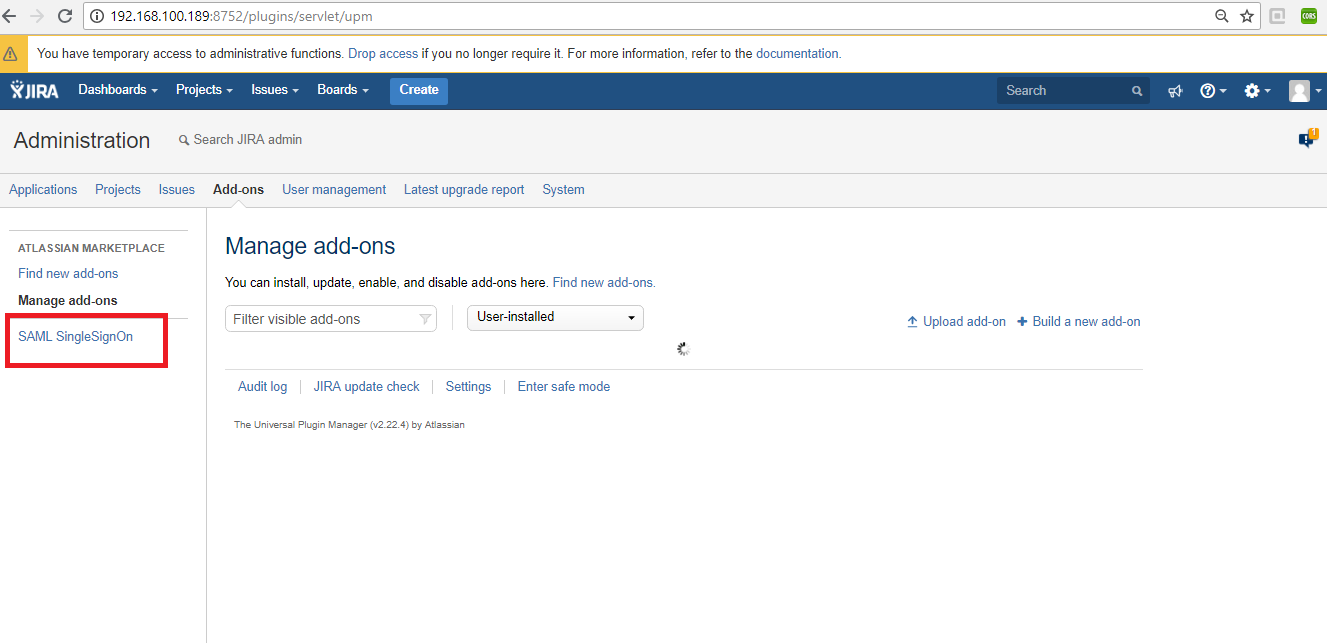
1. In JIRA → click on Add-ons
2. Search for SAML SingleSignOn for JIRA → Install it
- Once installed, it will show the SAML SingleSignOn within the left-hand side menu in JIRA.
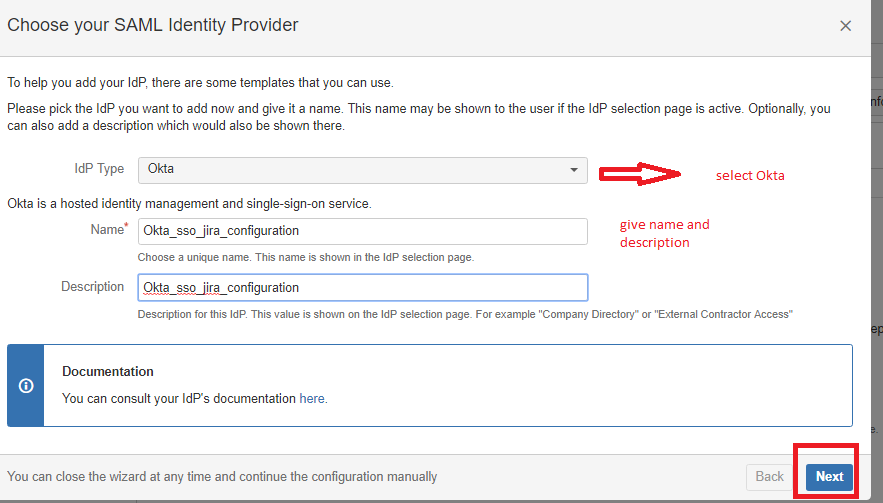
3. Select Okta → Give the Name and Description
4. Now log into OKTA
- After logging in, click on the Admin section located at the right side of the page.
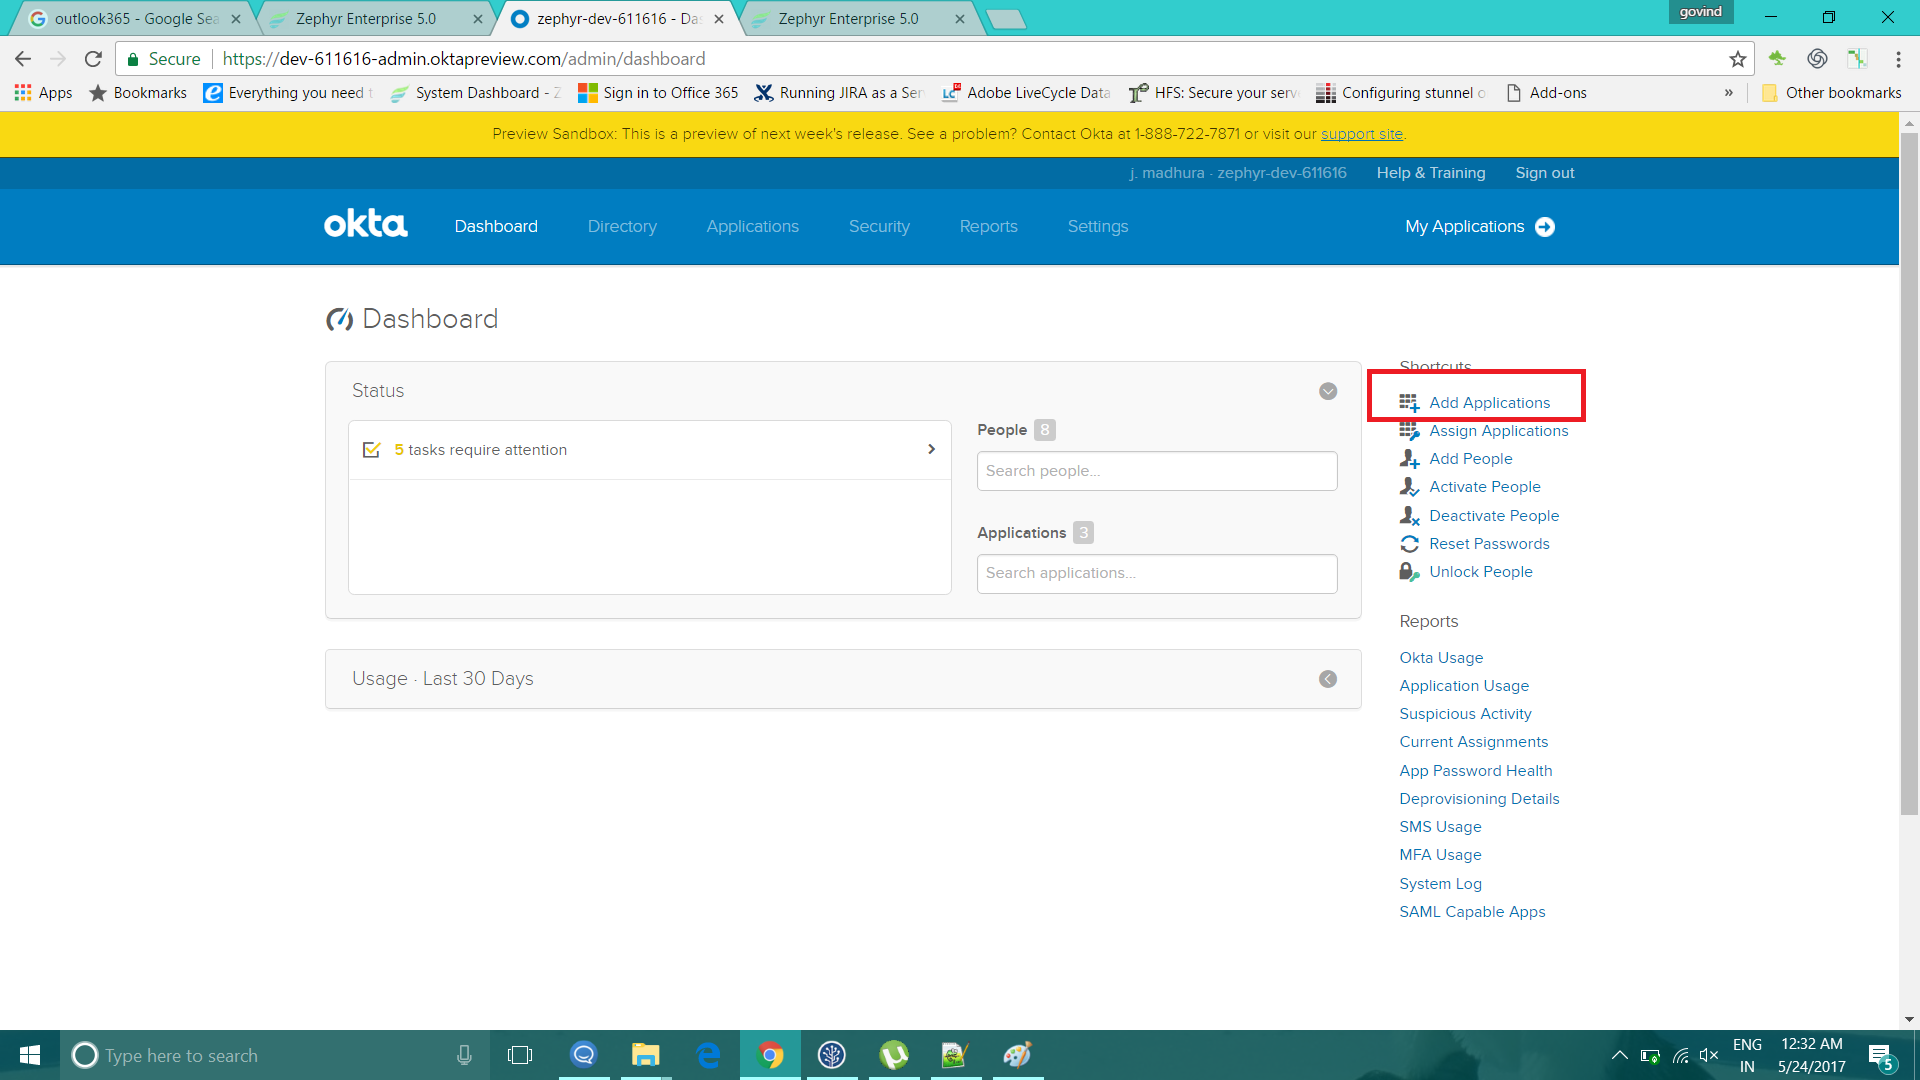
5. Click on Add Applications and then click on the 'Create New App' button.
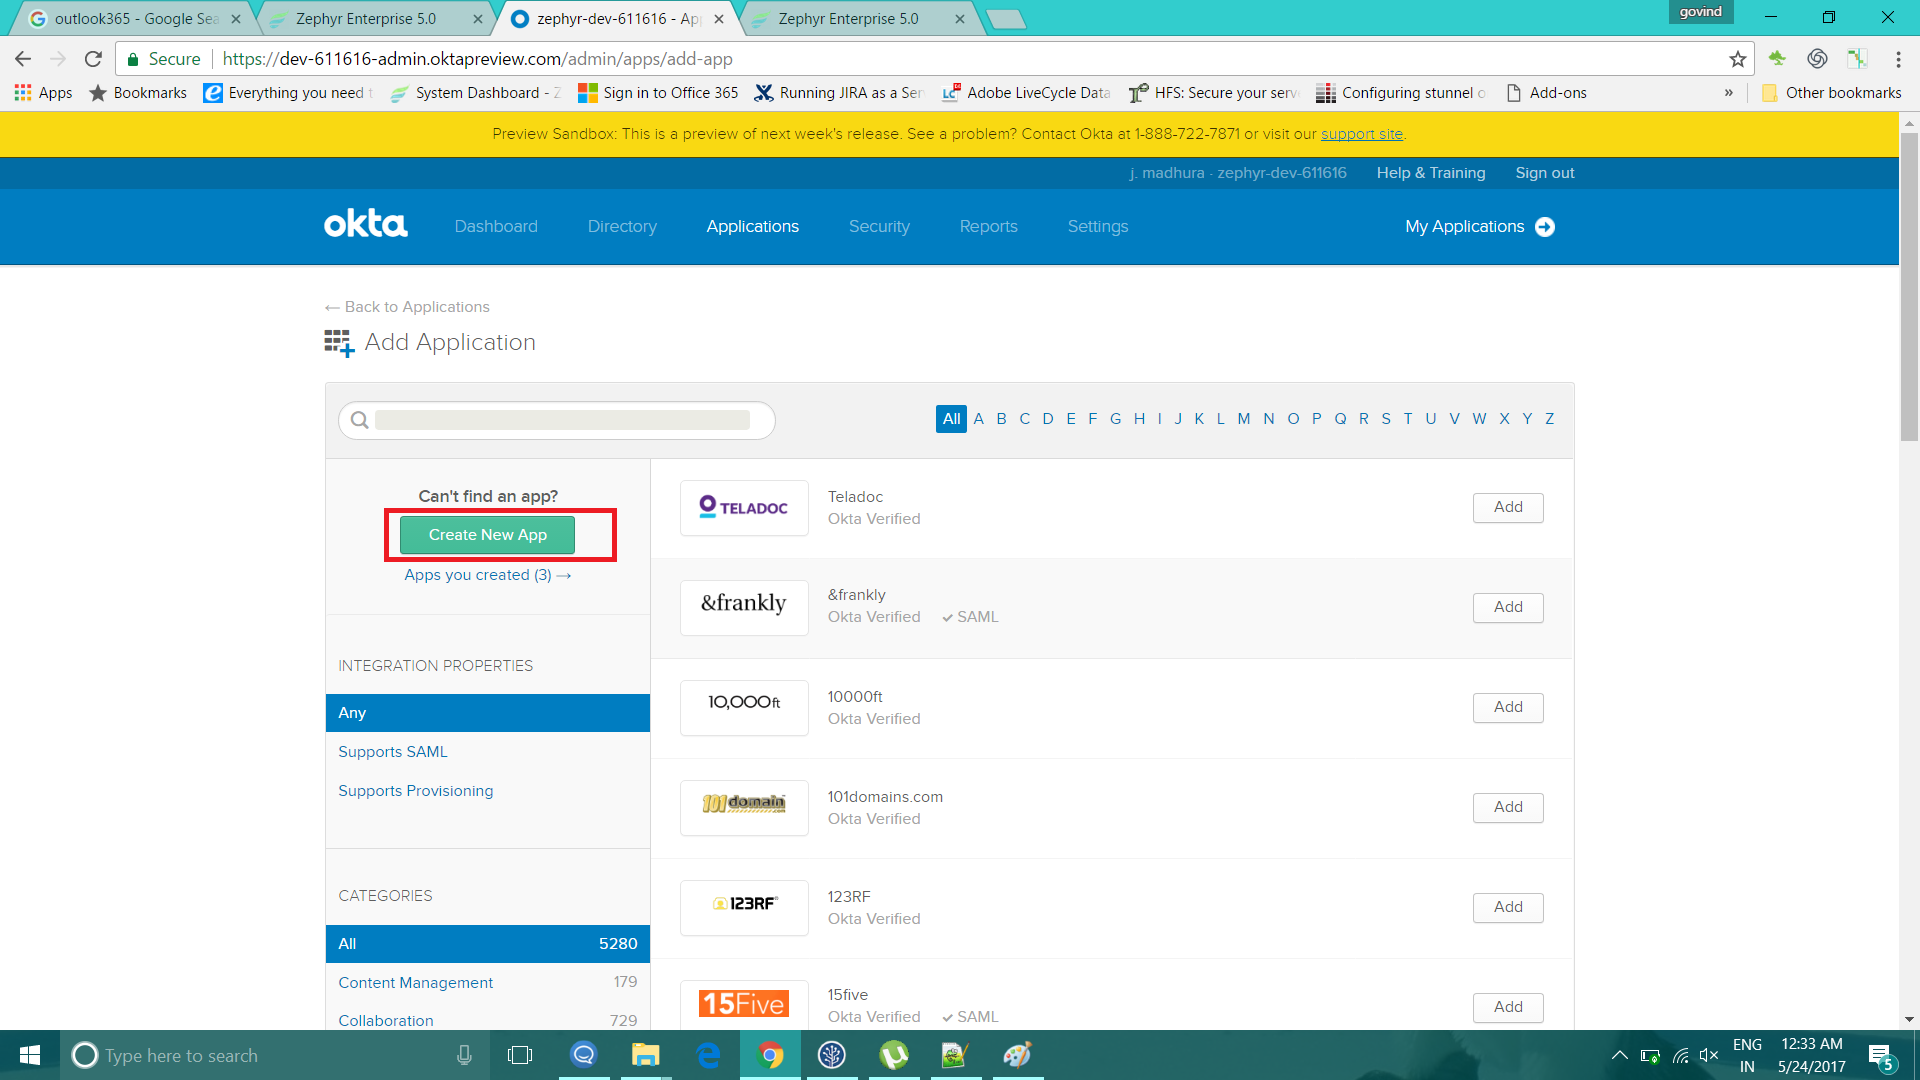
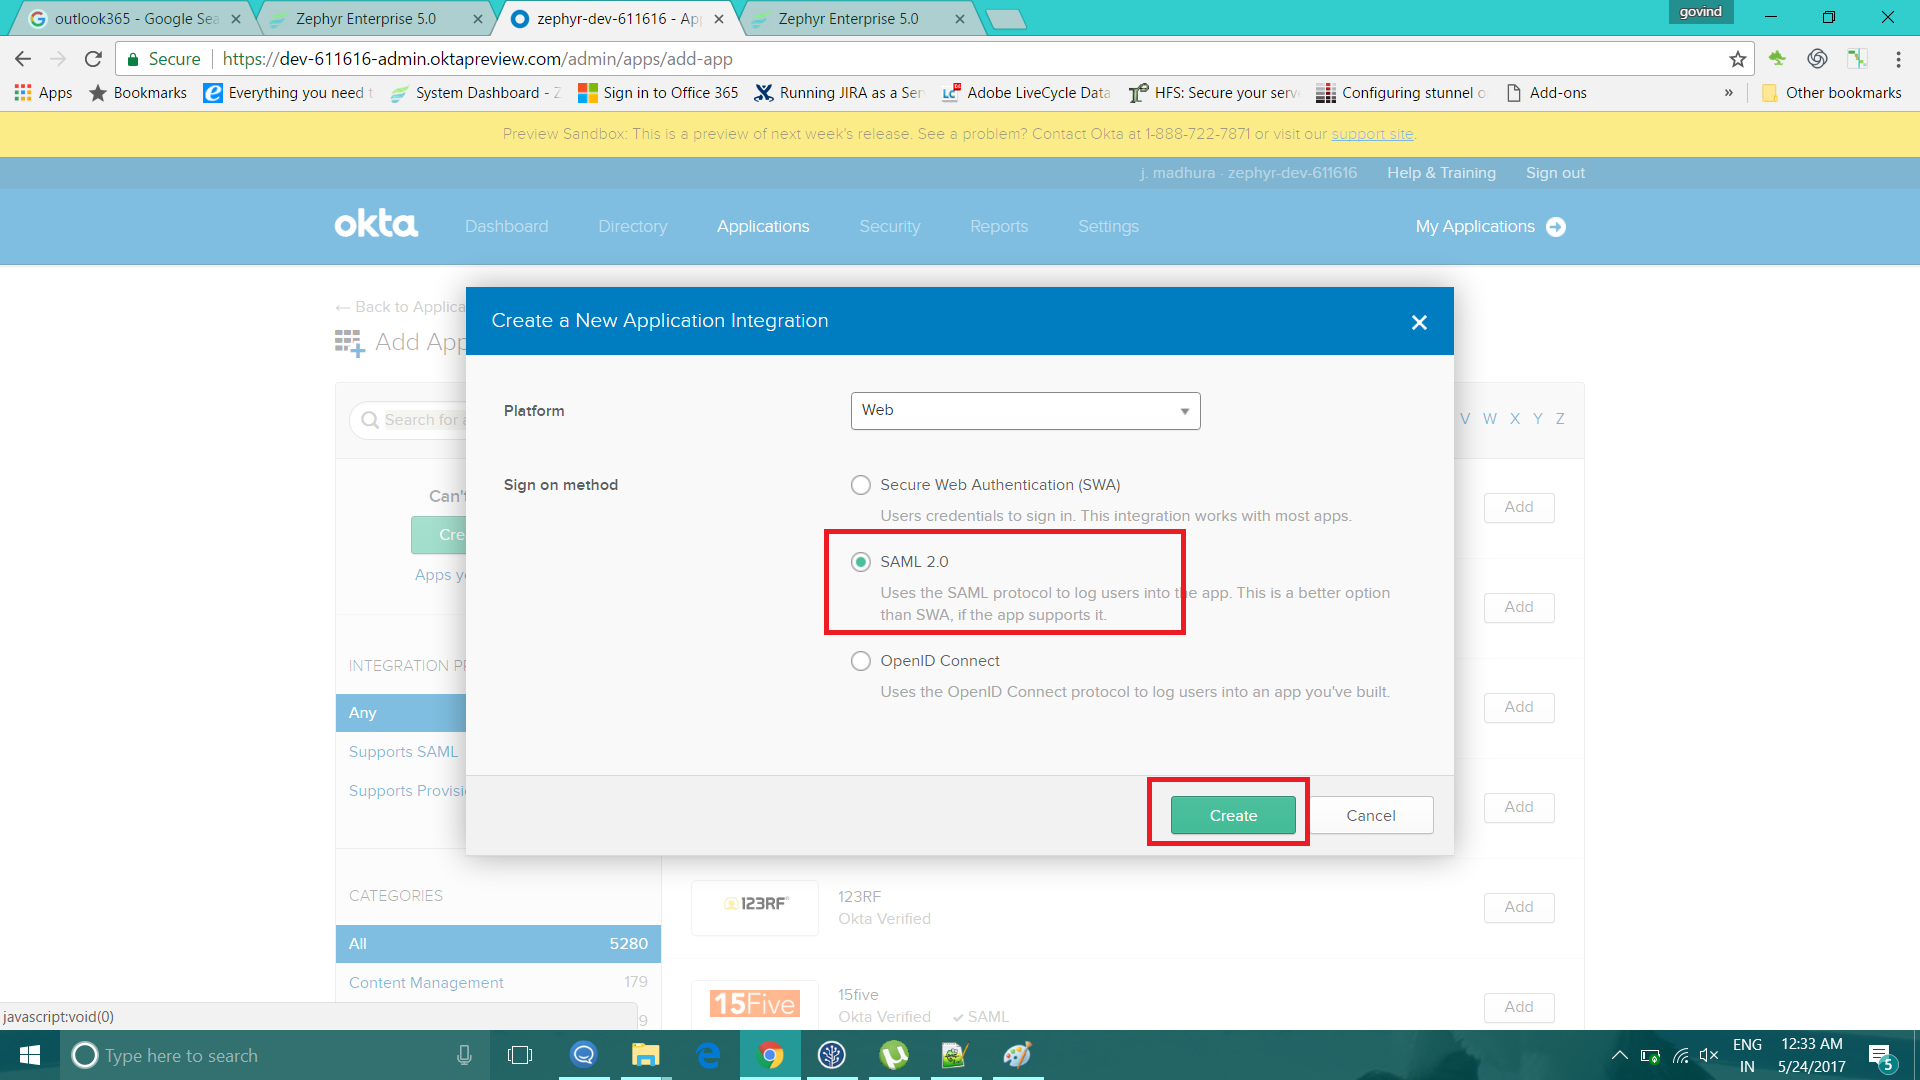
6. Select the SAML 2.0 in the 'Create New App' window and then click on 'Create'.
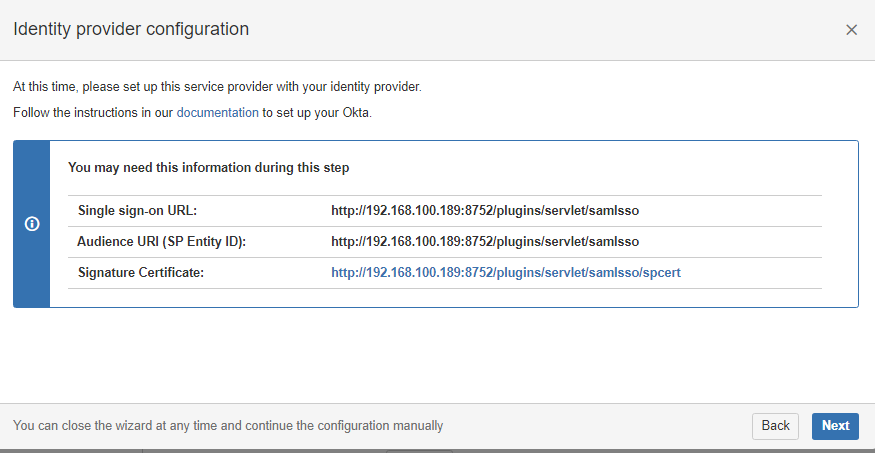
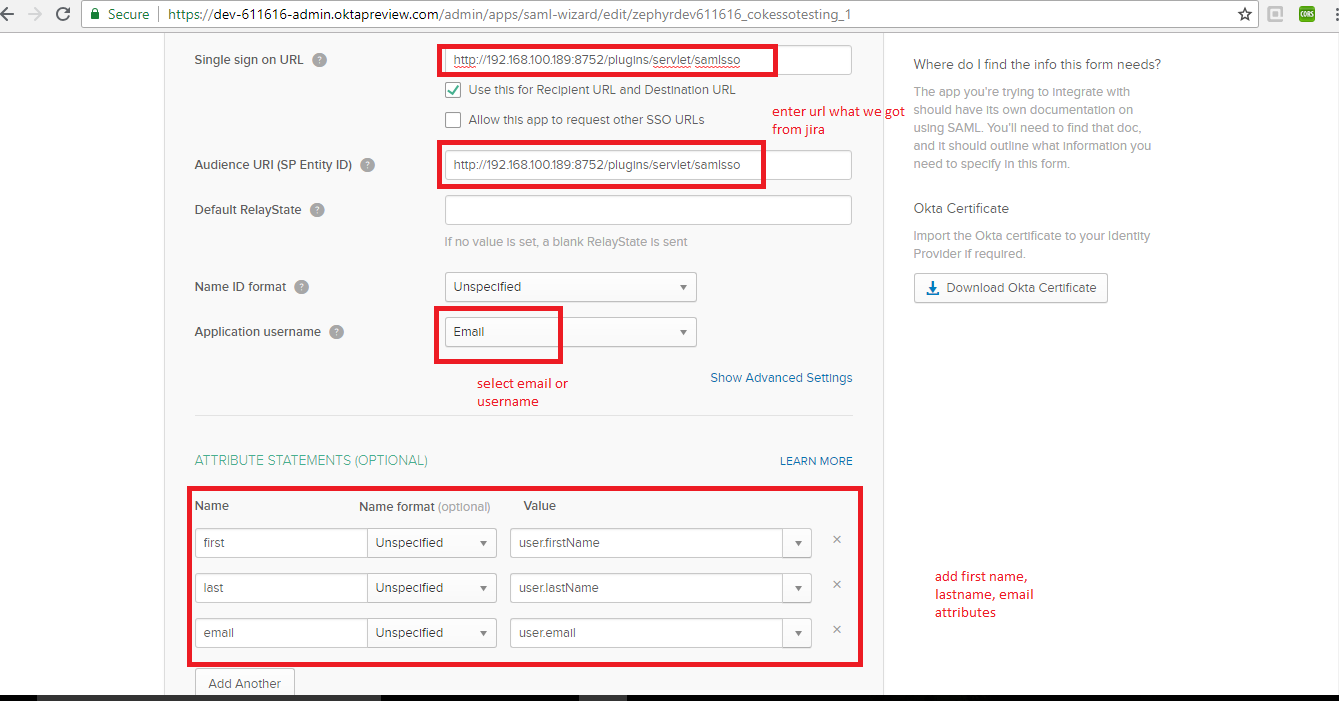
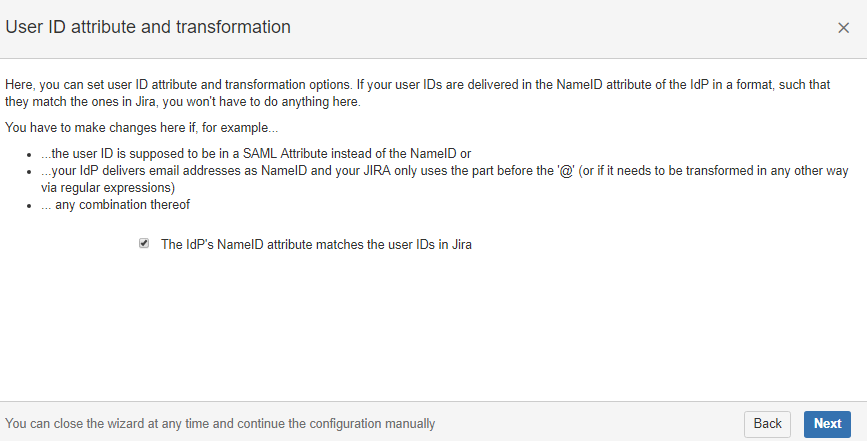
7. Provide the Single Sign-On and audience URL that we got from JIRA. Configure the first name, last name, and email attributes.
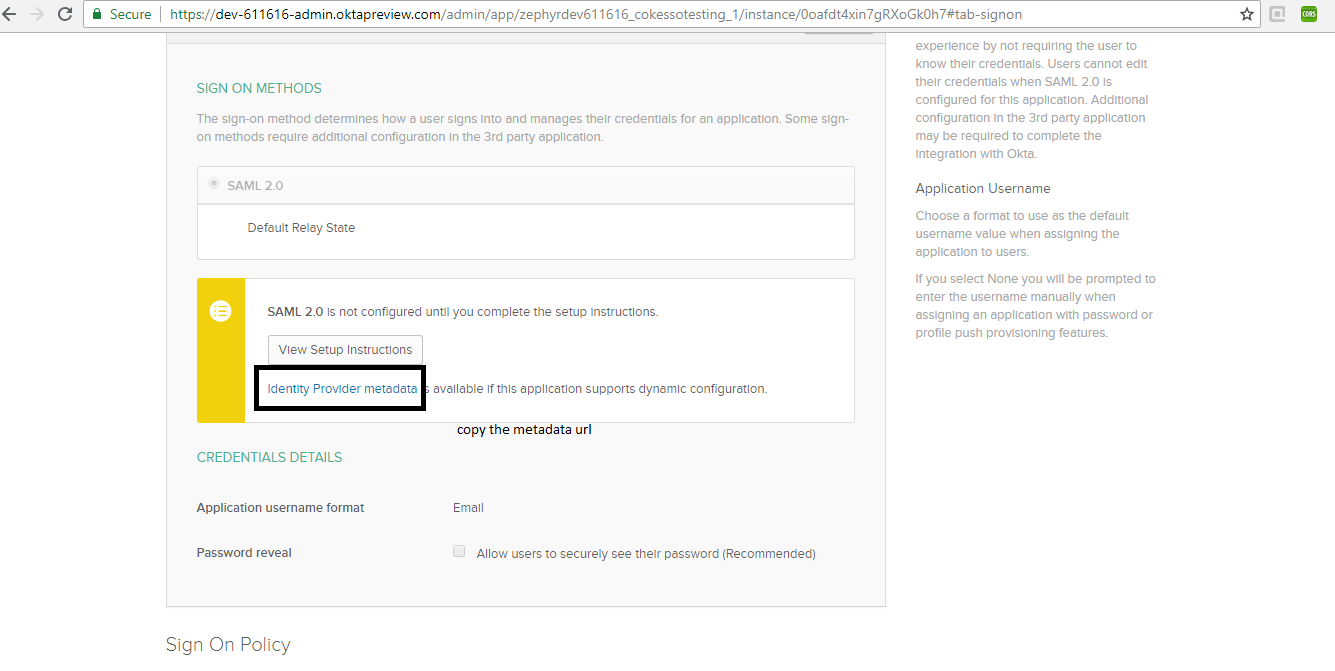
8. Once the application is done, it will generate the metadata URL. Afterwards, copy the metadata URL and configure in JIRA application.
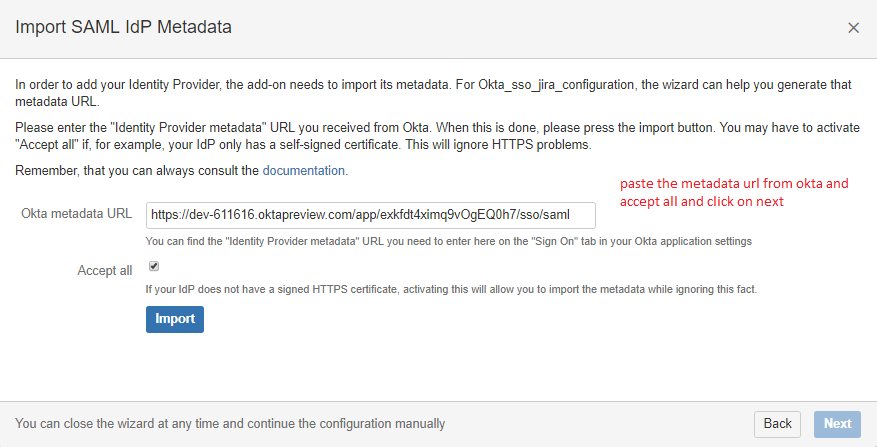
9. Click on 'Next' after clicking on import.
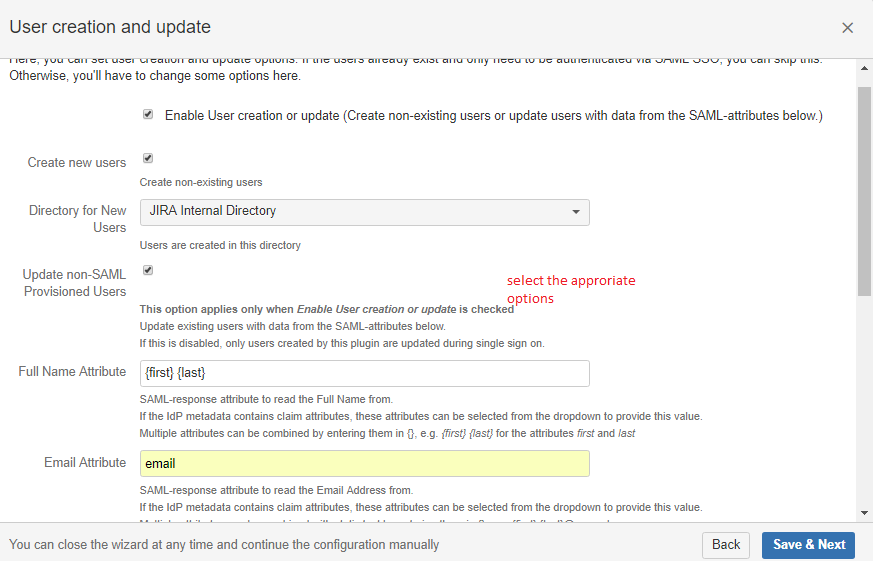
10. Select the user creations and update options.
11. Before testing the application, create the same user as an SSO user in the JIRA application and assign them to the JIRA software. Start the test by copying the URL in a new window.
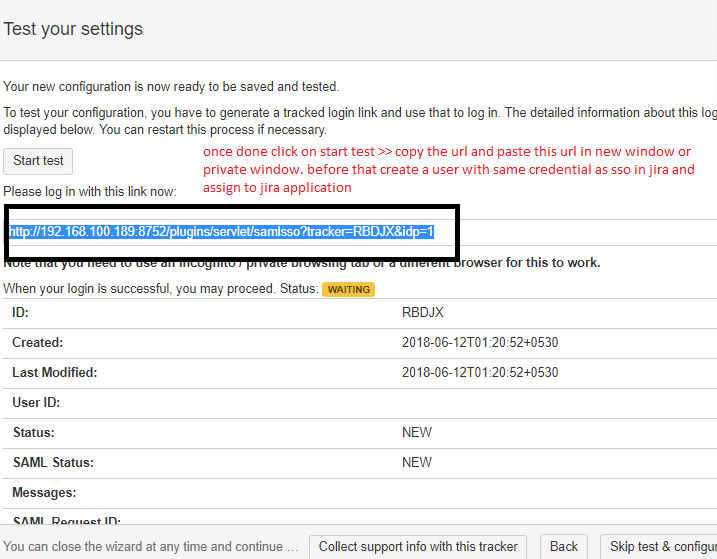
It will navigate you to the OKTA login page.
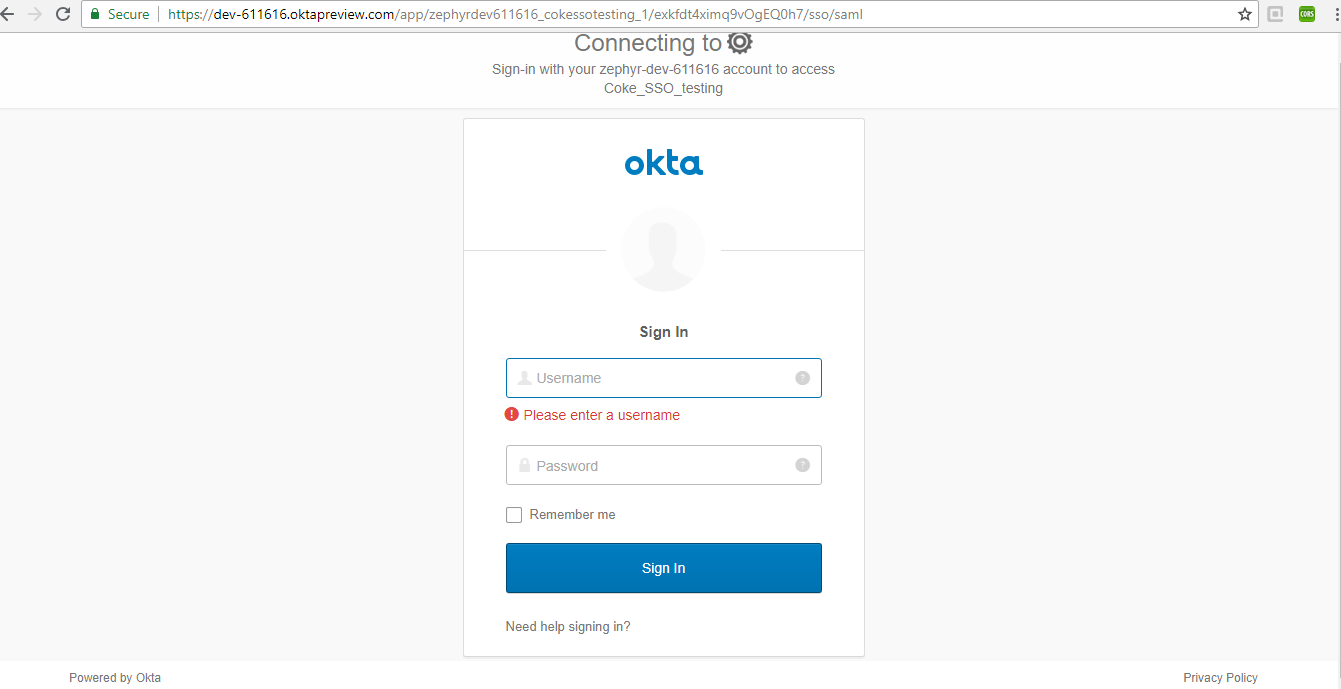
12. Enter the credentials and the test should be successful.
- Configure the additional login and logout redirection URLS
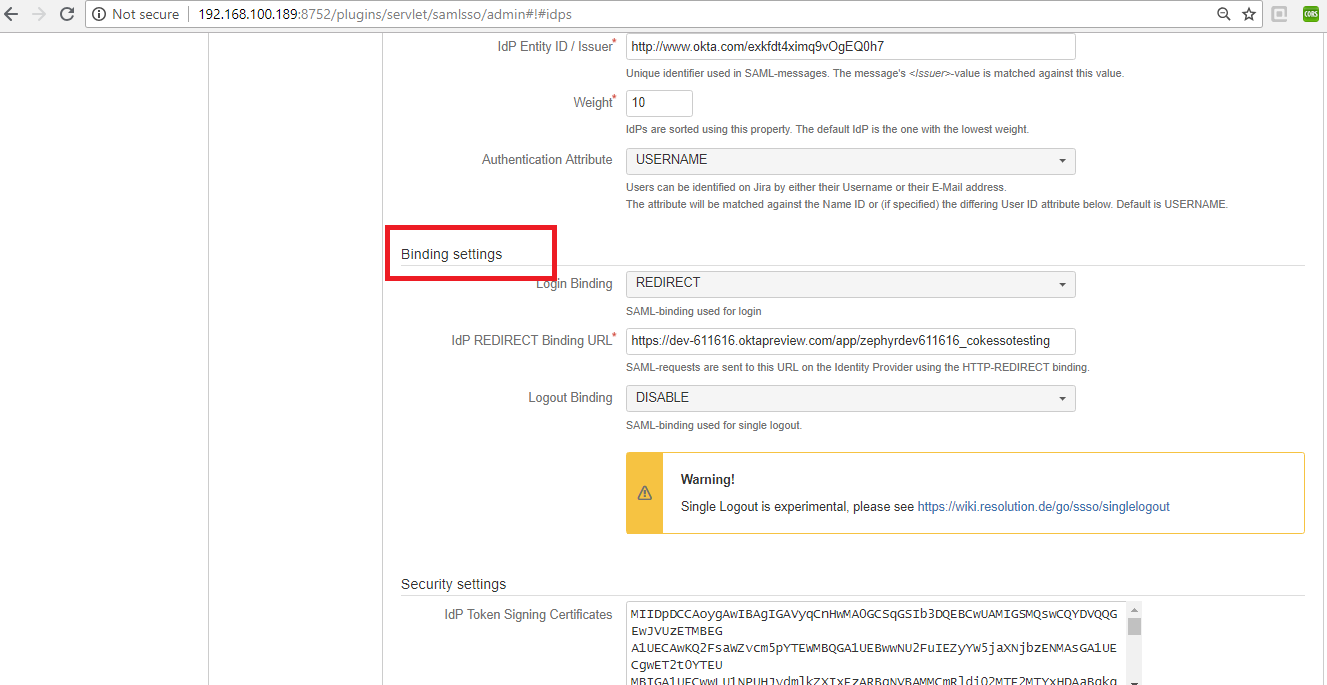
- Configure the Redirection URLs so that the user can log in with their SSO credentials as well as their normal JIRA credentials.
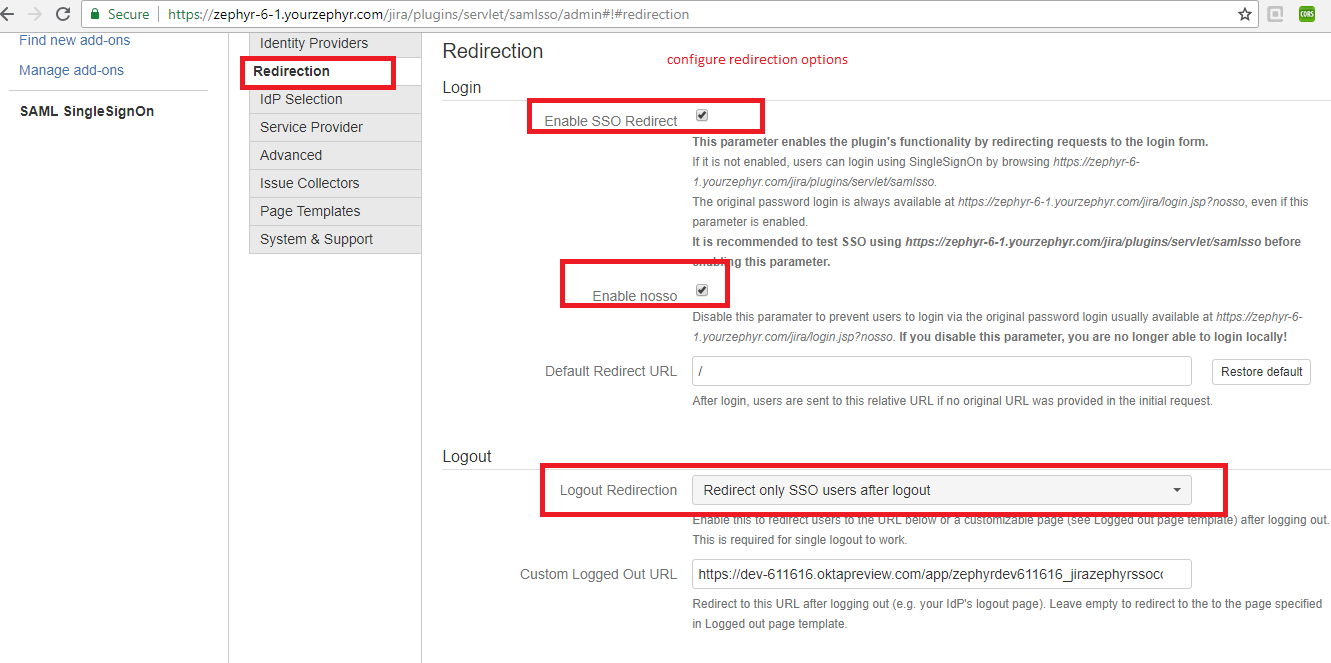
Now the user can log in with both their SSO credentials and their JIRA credentials.
Steps to Integrate JIRA SSO with Zephyr OAuth:
Procedure:
In order to integrate JIRA SSO with Zephyr OAuth, please use the following steps:
1. Configure your client application as an OAuth consumer.
- In JIRA, the OAuth consumers are represented by application links. Application links use OAuth with RSA-SHA1 signing for authentication. This uses a private key to sign requests rather than using the OAuth token secret/consumer secret.
- In the following steps, we'll be generating an RSA public and private key pair and then creating a new application link in JIRA that uses the keys.
Generate an RSA public and private key pair:
a. In the terminal, run the following openssl commands.
openssl genrsa -out jira_privatekey.pem 1024
openssl req -newkey rsa:1024 -x509 -key jira_privatekey.pem -out jira_publickey.cer -days 365
openssl pkcs8 -topk8 -nocrypt -in jira_privatekey.pem -out jira_privatekey.pcks8
openssl x509 -pubkey -noout -in jira_publickey.cer  > jira_publickey.pem
2. Configure the client application as a consumer in JIRA by using the application links.
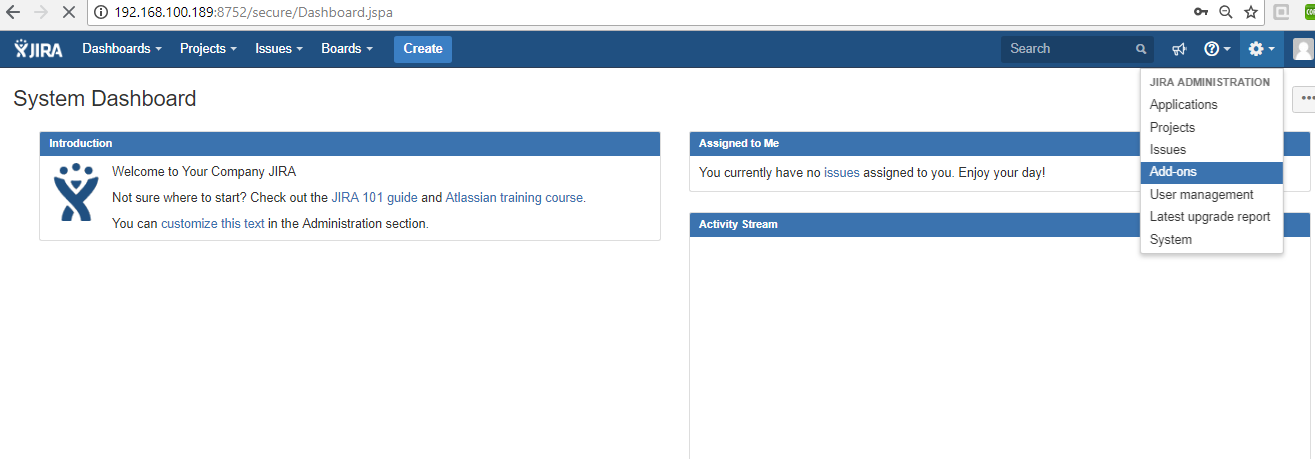
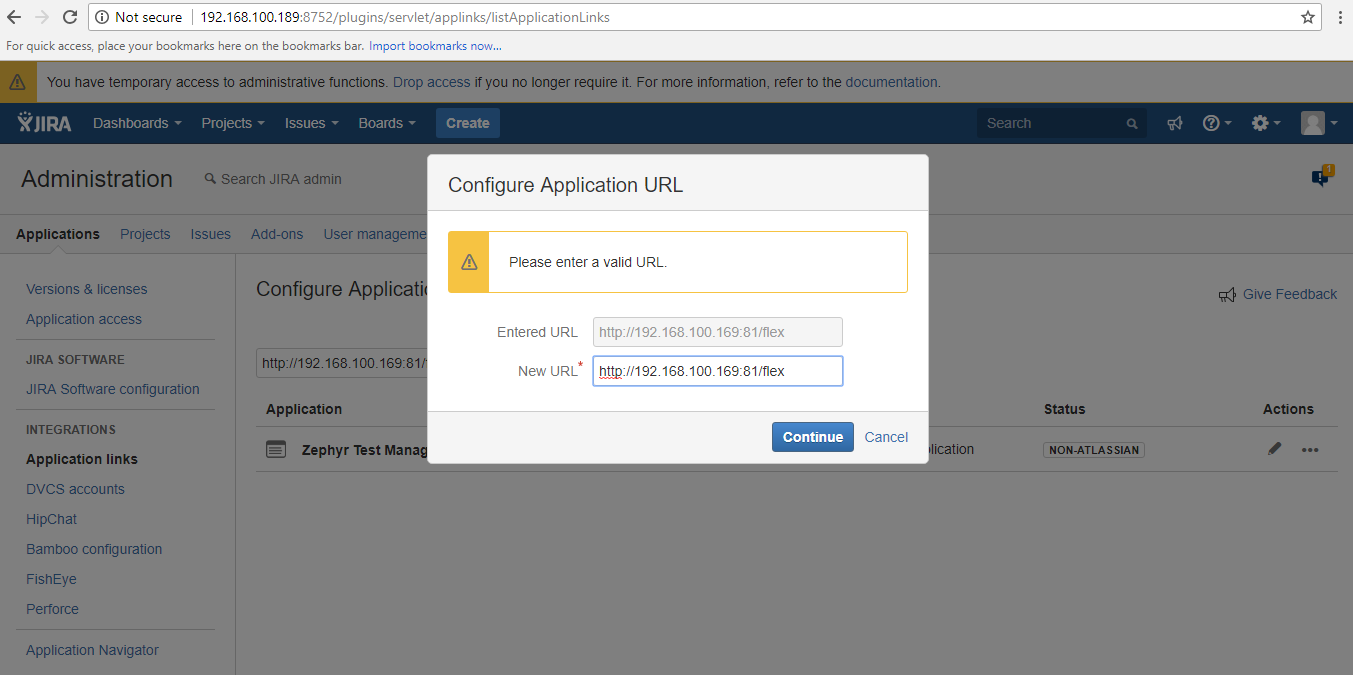
- In JIRA, navigate to the cog wheel icon → go the the Applications section → Navigate to the Application links page
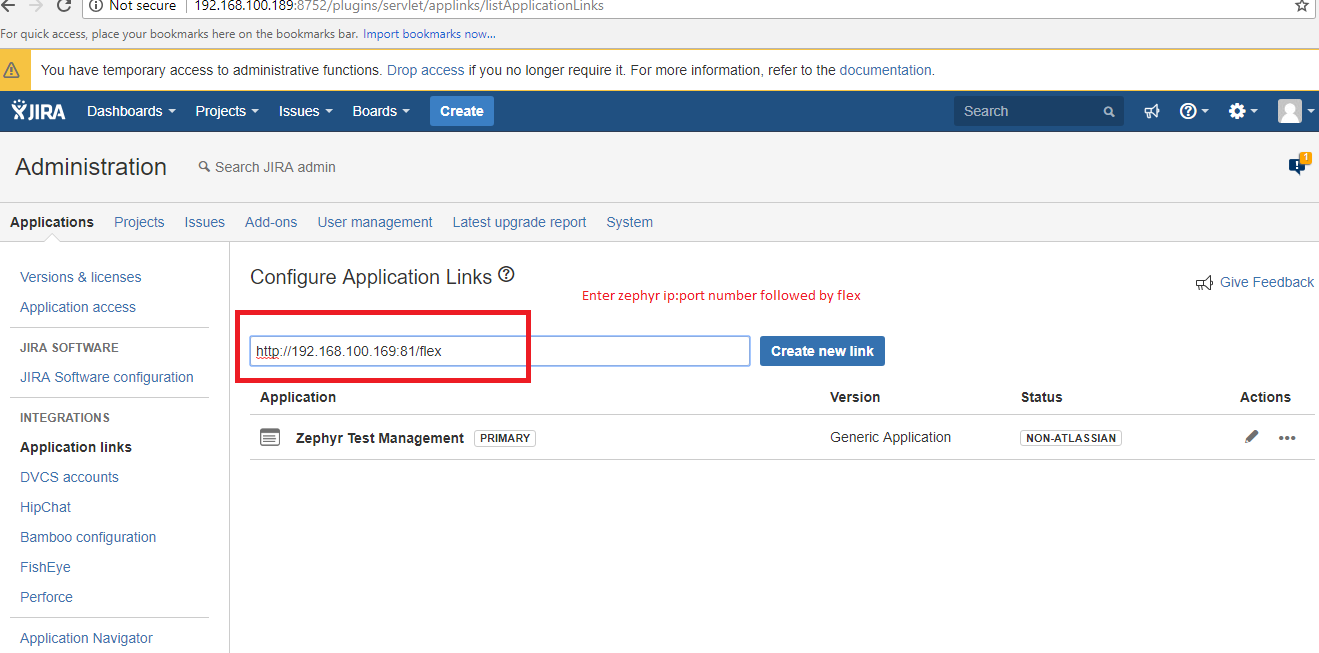
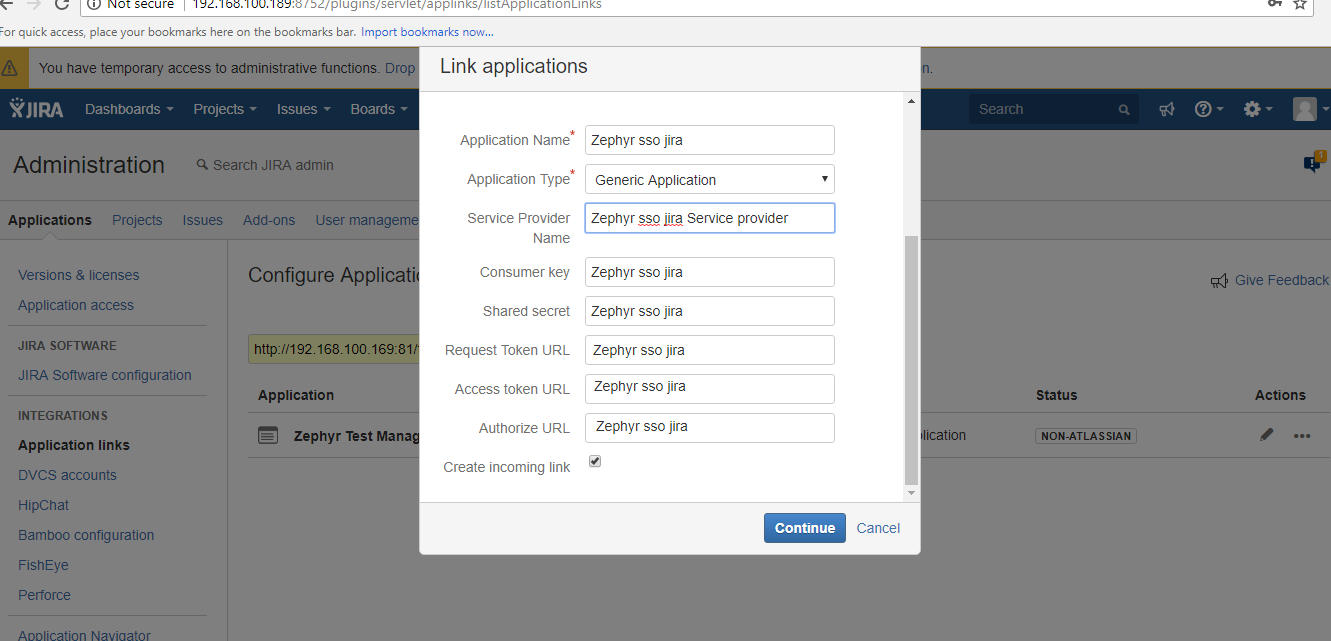
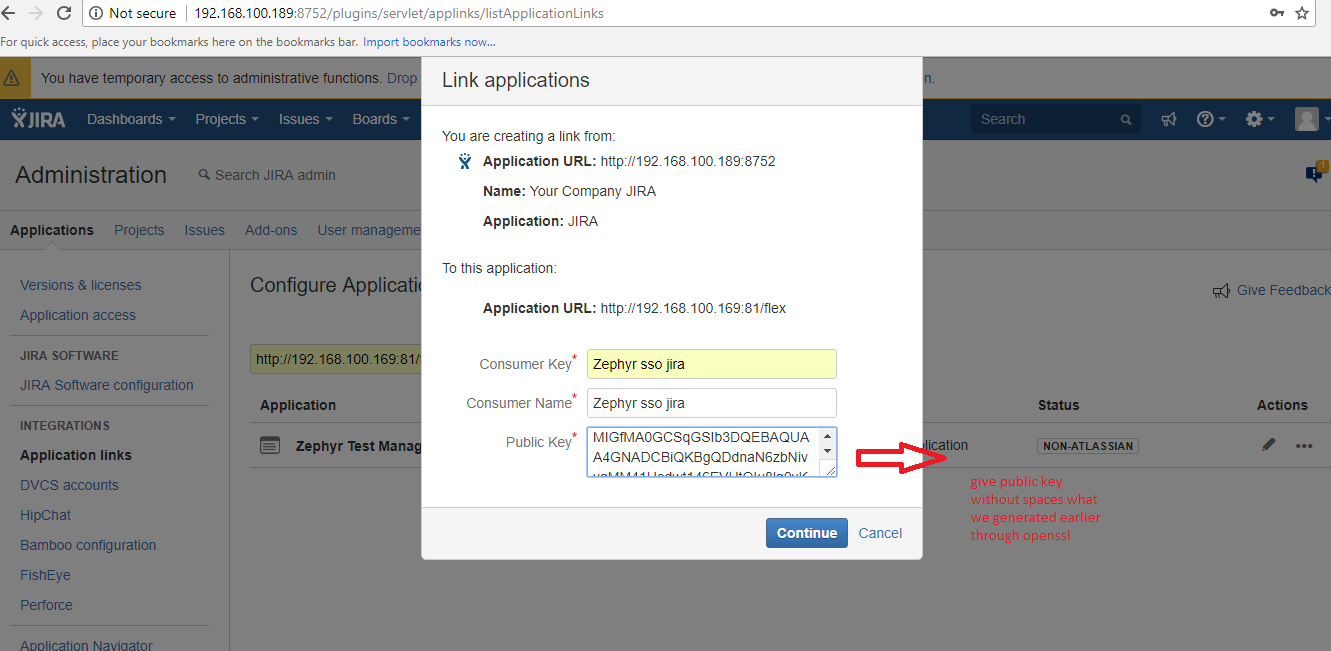
Now use the public key .PEM file

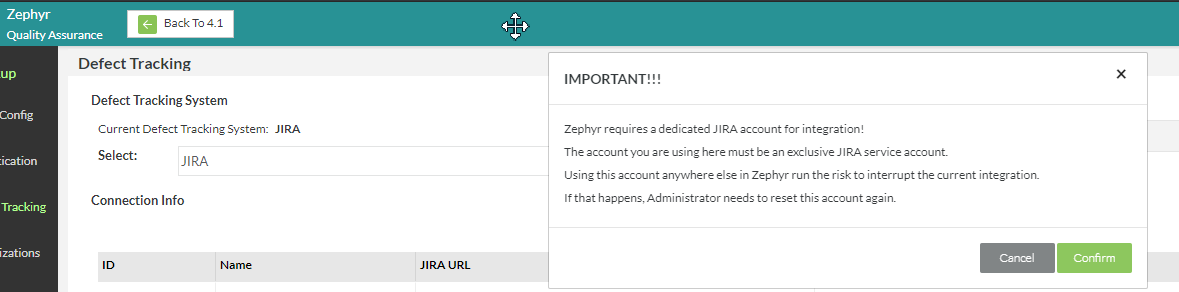
3. Make some changes in your Zephyr instance.
- Log into your Zephyr instance → go to the Administration section → Navigate to the Defect Tracking → Set the Defect Tracking with the admin credentials of JIRA.
- The user must select the 'OAuth option' and then click on the new dialog box that will appear to configure the save their authentication details.
- The OAuth details provide the following fields:
- Name
- JIRA URL
- Consumer Key Name (Should be the same as the above provided in JIRA)
- Consumer Private Key (The private key should be of type Use_privatekey.pcks8)
.png?version=1&modificationDate=1586960653072&cacheVersion=1&api=v2&width=800&height=449)
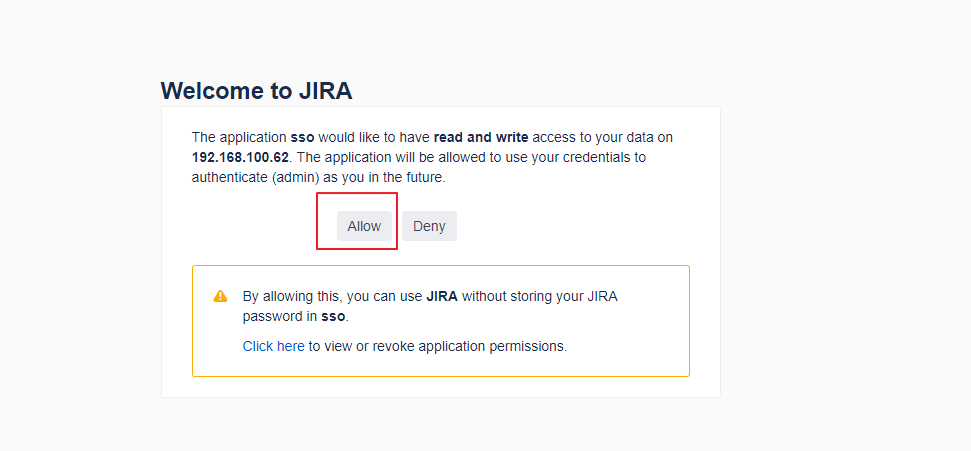
- Once the user saves the details above, the following pop-up with be displayed.
- Once you click 'Confirm' users may receive the following pop-up being displayed.
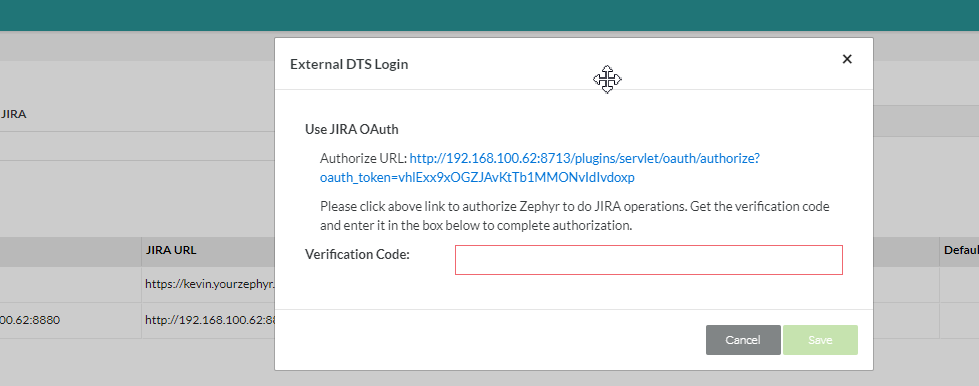
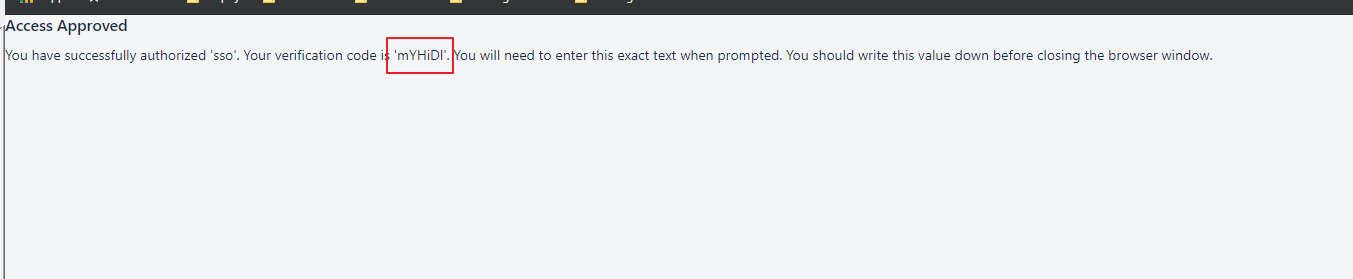
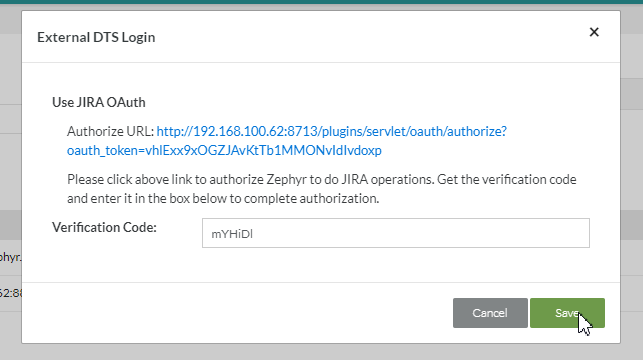
- Click on the 'Authorize URL' link within the pop-up. A new window/tab will be opened prompting the user to allow and copy the Verification Code. Once copied, it can be entered into the pop-up within Zephyr and then the user can save it.