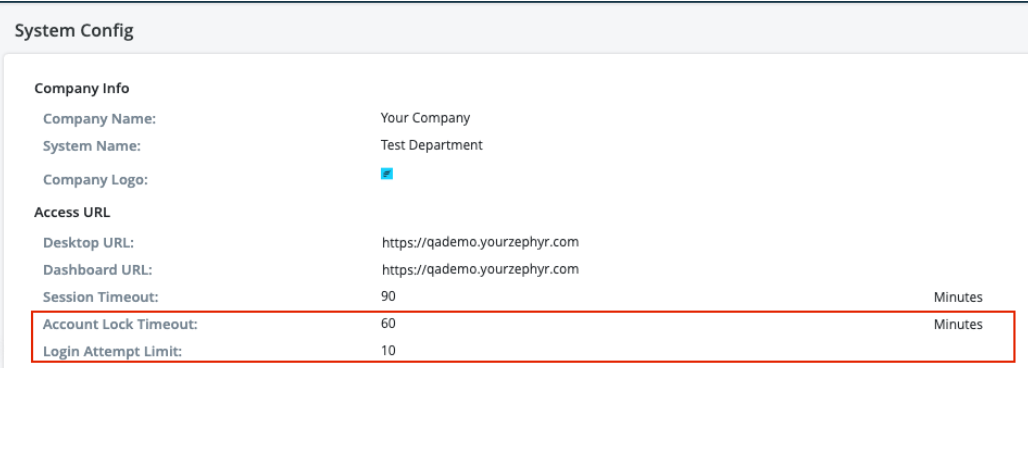
System Config
Starting October 11, 2024 (Zephyr Enterprise 8.2), the Zephyr Enterprise documentation moved from its current location on Atlassian to a dedicated, standalone Zephyr Enterprise documentation page. Please see: https://support.smartbear.com/zephyr-enterprise/docs/en/zephyr-enterprise/zephyr-administration-guides/system-setup/system-config.html
The Test Manager user role is the Administrator of Zephyr (unless other roles have been added to the system that have access to the Administration application) and these users are in charge of:
- Configuring and customizing Zephyr to fit your needs.
- Determining the name of the system.
- Customizing the logo of the system.
- Deciding which Defect Tracking and Mail Server that Zephyr will connect to it.
- Running some basic administration tasks on the server.
Company Info
Use these fields to co-brand your copy of Zephyr. The Company/Department Name, System Name, and Company Logo information shows up in the top-left corner of every interface for all users.
The Zephyr administrator is able to update and change the company logo that is displayed in the top-left header of the Zephyr interface with their own personal company logo. This can be done by simply uploading an image of their logo to replace the default logo.
- Click on the current company logo
- Browse for the image that you want to use for the updated company logo
- Click “Open” to use the new image as the logo.
Access URL
Zephyr is installed on a central server and the Desktops and Dashboards are accessed via any web browser. The URL used to access this on the local machine on which Zephyr is installed is typically:
- Desktop URL: http://localhost/
- Dashboard URL: http://localhost/
All other users need to enter the right URLs to access the Desktops and Dashboards. These URLs are typically:
- Desktop URL: http://<system_name_or_IP_address>
- Dashboard URL: http://<system_name_or_IP_address>
Mail Server
Zephyr uses this mail server information to send emails to your resources when the following events take place:
- When a user has been added to the system.
- When the user's password is reset.
Please contact your IT Administrator for this information: Name or IP address of the mail server, the Port on which it accepts incoming email (default is 25), whether it needs SMTP or SSL Authentication (and if so, the User Name and Password needed for it).


