View and Modify Tests
- Samir Shah (Deactivated)
- Edward Stolyar (Deactivated)
- Kevin Pham (Deactivated)
|
You can create new tests or import existing ones.
If you use the new Jira issue view, you must have the Edit Issues permission in the project in order to see Zephyr test information in the issue detail view.
See User Permissions for a full list of Jira permissions required by Zephyr.
Viewing and Modifying Tests
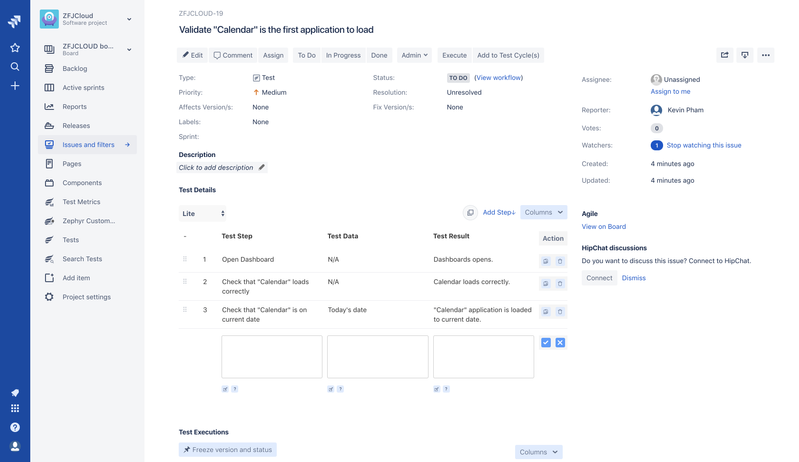
A test can be viewed and modified just like any other issue in Jira. If you know the issue key of the test, you can enter that in any search field or search through the Issue Navigator.
The view test screen shows the following:
- Header: This displays the project to which this test belongs, the issue key of the test and its one-line Summary.
- Toolbar: This toolbar allows you to access often used functionality:
- Edit: This button takes you to the edit mode of a test where many of the fields can be edited. This is very similar to creating an issue. Please note that Test Details have to be edited from this View Issue screen.
- Comment: Adding a comment to a test is a useful way to record additional details about a test, and collaborate with team members. Comments are shown in the Comments tab of the Activity section.
- Attach Files: You can attach one or more files to a test.
Note: Your Jira Administrator must have enabled file attachments. You also need the Create Attachments permission in the appropriate projects. - Attach Screenshot: You can attach a screenshot to a test if your Administrator has configured Jira and your permissions correctly.
- Clone: 'Cloning' (copying) a test allows you to quickly create a duplicate of the test within the same project. The clone test is a replica of the original test, containing the same information stored in the original test— e.g. Summary, Labels, Components, Test Details, etc. except for Test Execution details. A clone issue is a separate entity from the original issue. Operations on the original issue have no effect on the clone issue and vice versa.
Link: Allows you to link another issue or a web link to this test, typically a requirement or a story or an epic.
- Execute: This button allows you to immediately execute this test, either in an ad-hoc manner or as part of a Test Cycle.
Add to Test Cycle(s): This allows you to add this test to an existing Test Cycle. That then also shows in the Test Executions section below.
- Details: This section is almost exactly like the one for any other issue-type but note the following:
- Fix Version/s: This field is the one that is used to organize tests i.e. make it belong to a Version.
- Status: This field is not used.
- Resolution: This field is not used.
- Description: This section is exactly like the one for any other issue-type and can be useful for adding a high level description or pre-conditions for the test.
- Test Details: This section allows you to enter detailed test steps, any accompanying test data and expected results. Test steps can be reordered, cloned or deleted.
- Test Executions: This section shows the details of all scheduled and previous executions of this test. It also allows you to execute a test.
- Attachments: This section is exactly like the one for any other issue-type.
- Issue Links: This section is exactly like the one for any other issue-type.
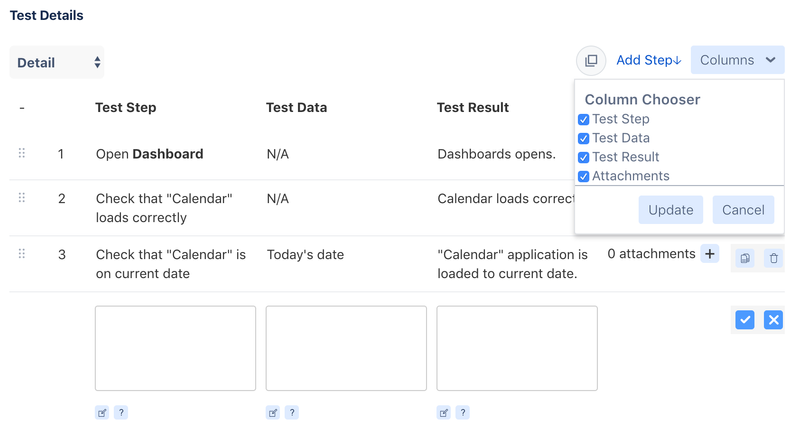
Test Details Lite View and Detail View
Lite View allows users to utilize a more condensed test step table under the test details section. Users can use this view if they only want to view the Test Steps, Test Data, and Test Results columns rather than any additional fields for test steps.

Detail View allows users to display and view the additional columns in the test step table under the test details section. Users can then customize the test details columns to show attachments, custom fields, etc.

Customize Test Details Columns
Users can customize which columns appear in Test issues Test Details area.
These changes will persist for that user permanently until the user changes them again.
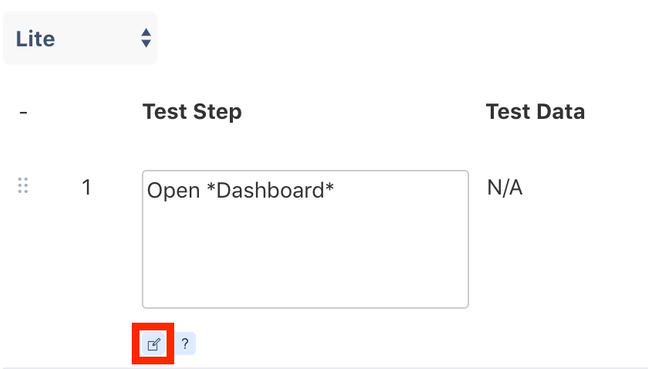
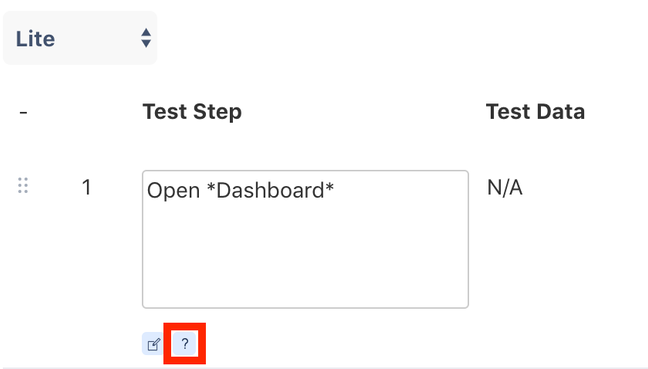
Using Wiki Markup in Test Details
You can use the wiki markup language to edit your test steps. Click on the little preview icon to verify you've got it right before committing that step by clicking on "Add".
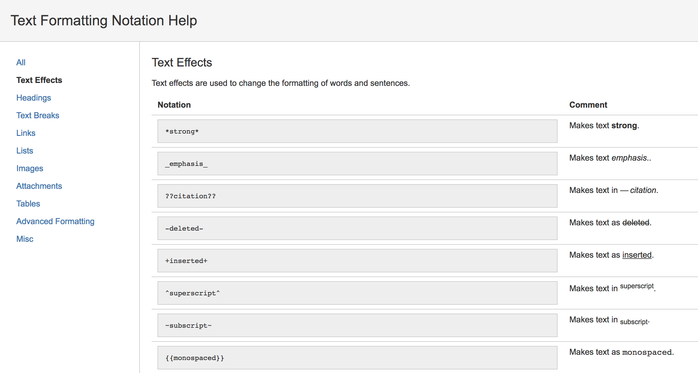
Clicking on the preview icon shows this:

Click on the "?" icon to get a list of available markup options.
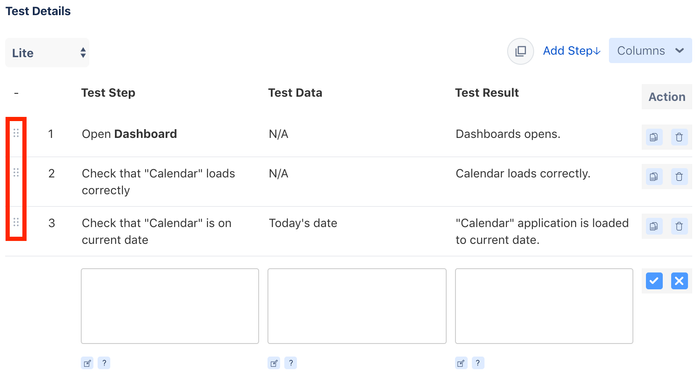
Test Step Reorder
Rearrange the order of steps by selecting and holding them on the far-left side handle and dragging them to the desired location. Release the click to drop them into their new location. This change is automatically saved.
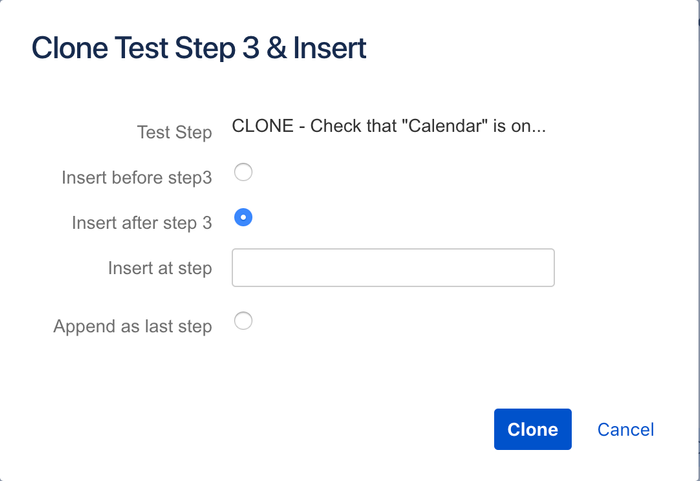
Cloning Test Steps
To speed up the test creation process, test steps can be easily cloned. Click on the copy icon in action column for the test step.
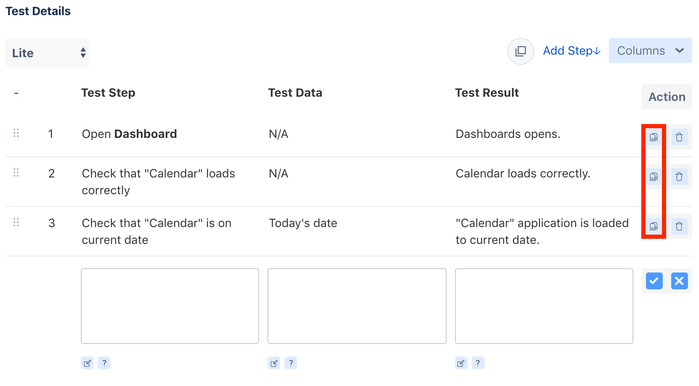
Selecting the "Clone" option allows for that test step to be cloned and inserted into a number of positions - either above the current test step, below it, at some specific number in the list of steps or appended at the very end.
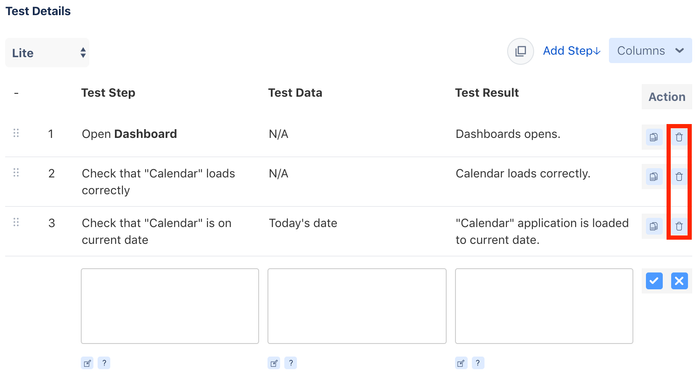
Deleting Test Steps
Just next to the Copy button, there is an option to delete a step. This deletion will remove the step completely and renumber the remaining steps. This cannot be undone.