/
Adding a Folder in Test Repository
Adding a Folder in Test Repository
- Kevin Pham (Deactivated)
Owned by Kevin Pham (Deactivated)
May 18, 2020
Analytics
Loading data...
Adding Folders
1. Click on the ![]() button on the folder that you want to create a folder for.
button on the folder that you want to create a folder for.
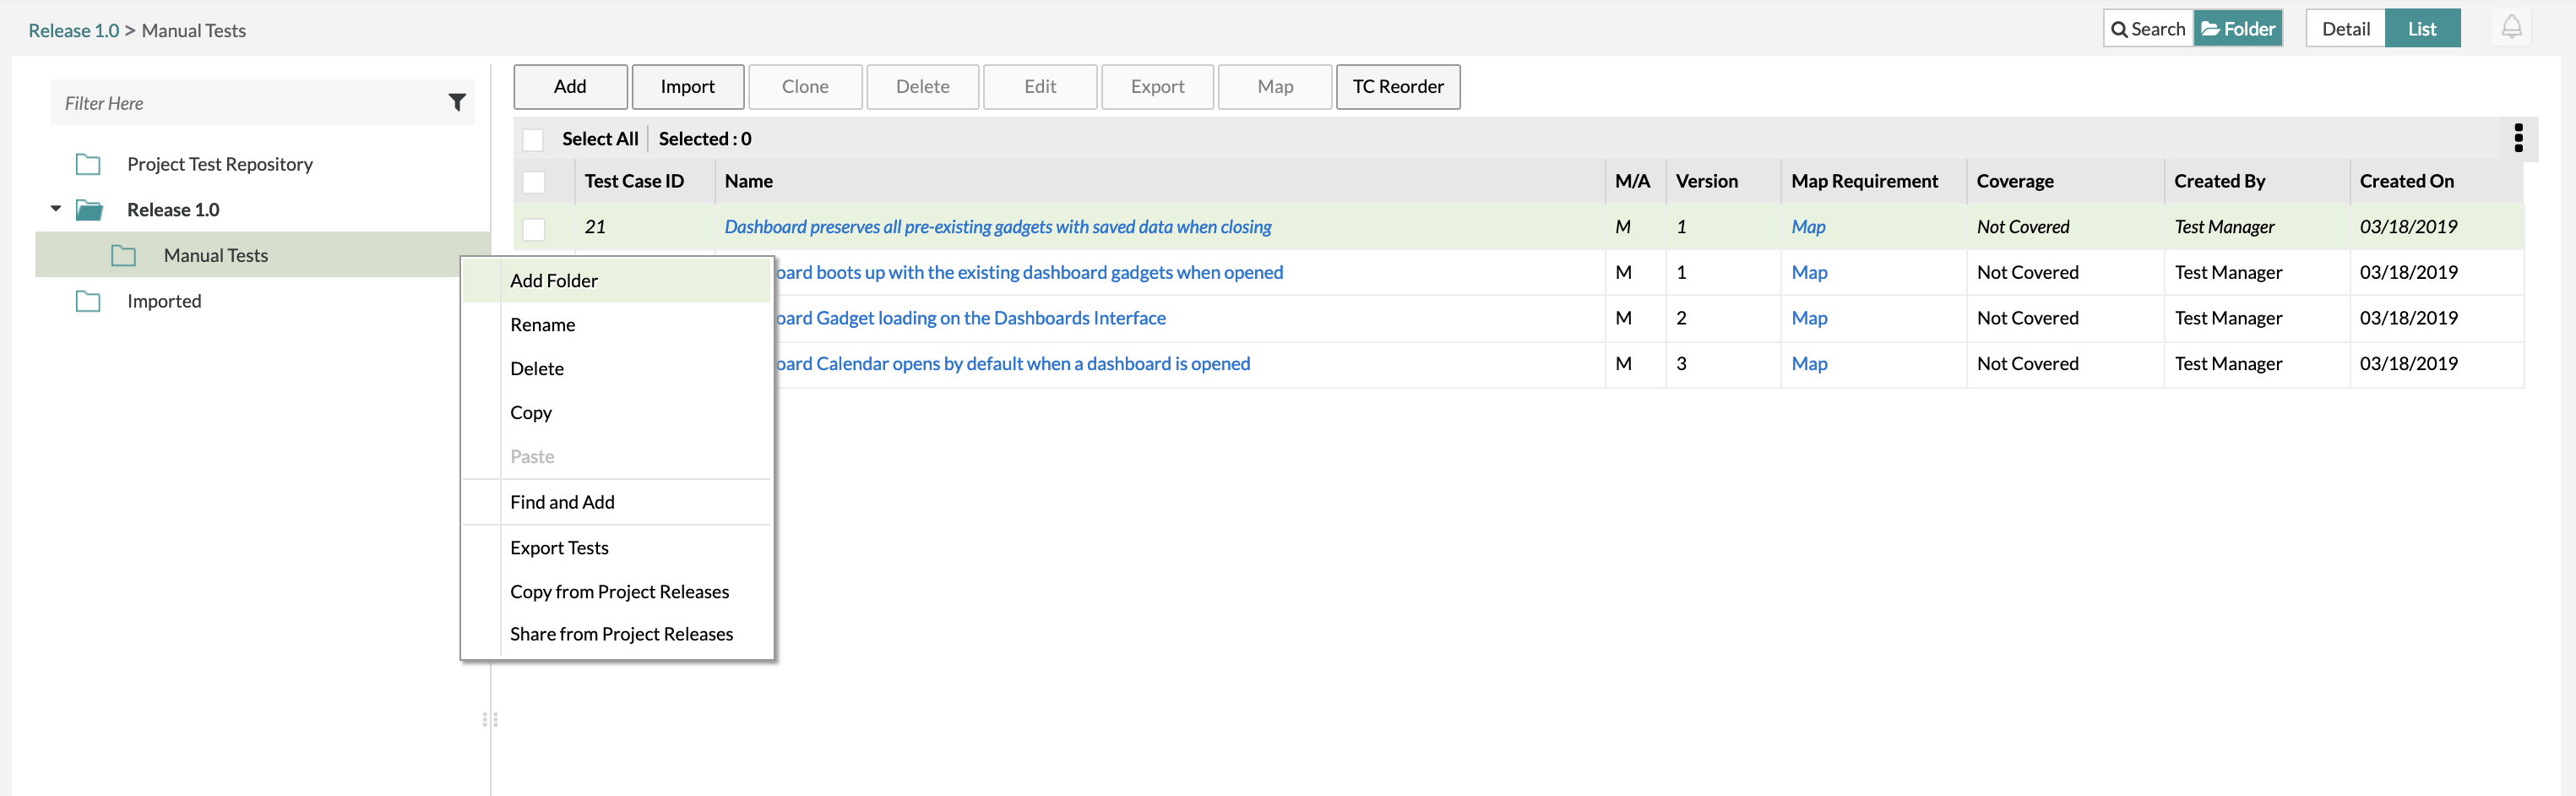
2. Click on the "Add" button at the top of the list. There are various other options when clicking the ![]() button such as:
button such as:
- Add - Creates a sub-folder under the currently selected folder.
- Rename - Edit the label of the selected test tree folder.
- Delete - Deletes a folder. Delete will remove the folder completely in both release and global. This action is not reversible.
- Copy - Select the folder and contents to be copied to a new location.
- Paste - Copy a previously selected folder.
- Find and Add - Use ZQL to find tests in the current release and add them to the folder.
- Export Tests - Create an export of tests in the folder and all sub-folders.
- Copy from Project Releases - Copy folders or test cases from the global tree.
- Share from Project Releases - Share folders or test cases from shared only projects within the global tree.
Quick Tip
Hold the Ctrl key down during drag and drop to copy the folder and all its contents
3. Fill in the mandatory fields for creating a folder: Name is a mandatory field while Description is an optional field
- Name - The name of the folder
- Description - A body of text describing the folder
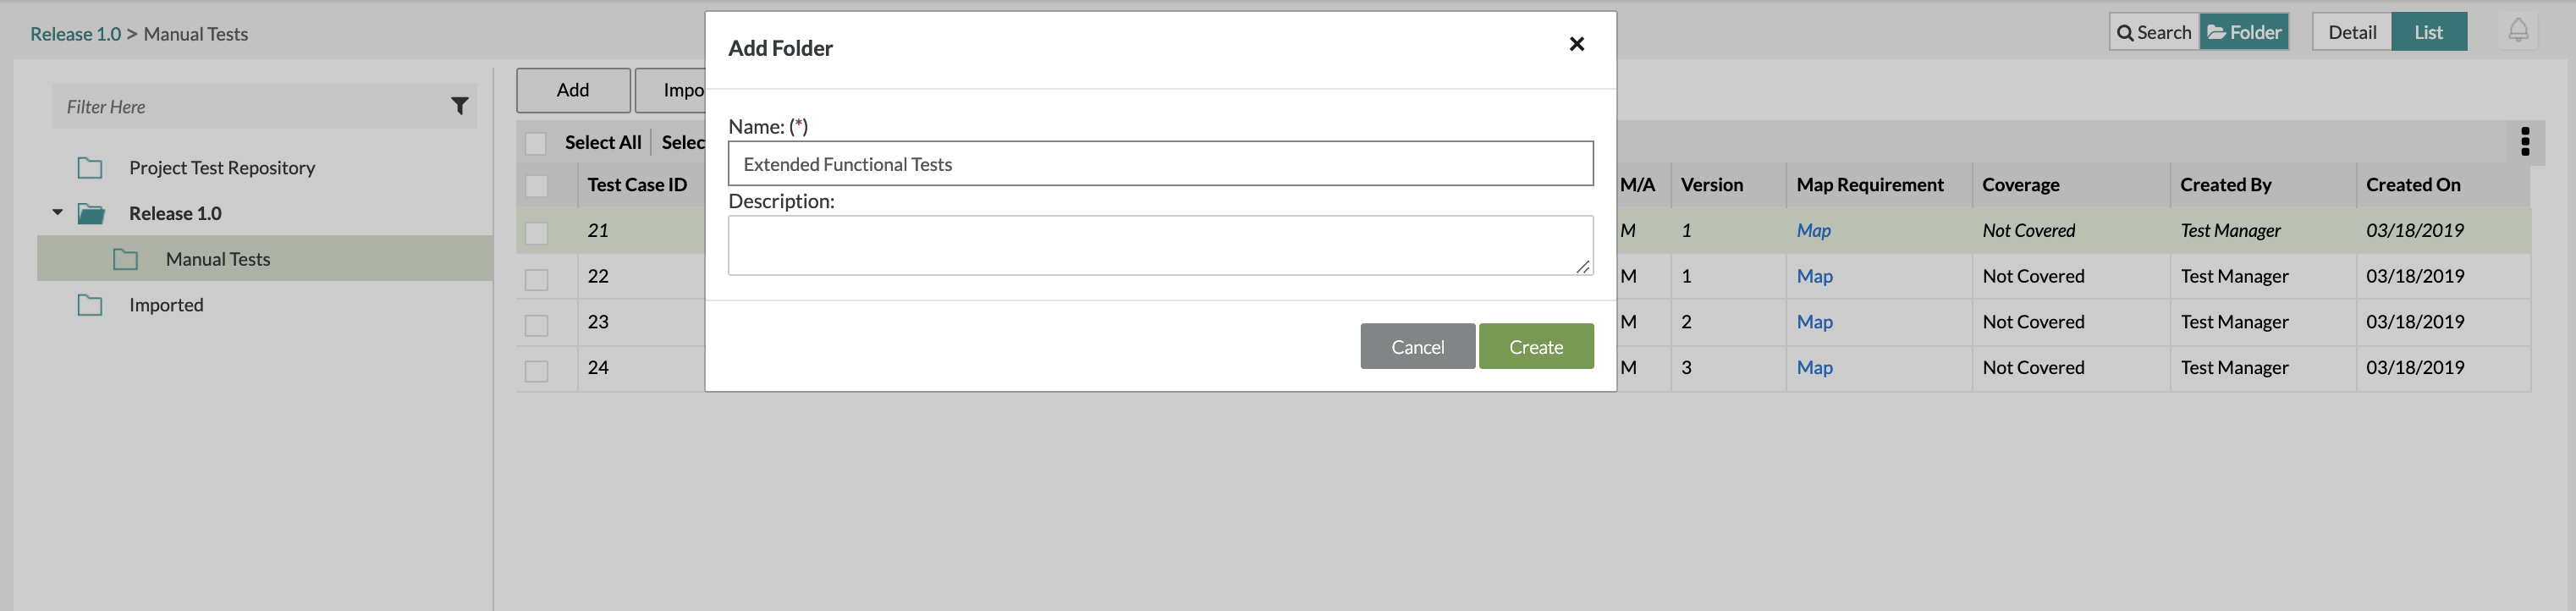
4. After filling in the fields, click on the "Create" Button to finalize any changes and create the folder.
Related content
Adding a Folder in Test Repository
Adding a Folder in Test Repository
More like this
Adding a Folder in Test Repository
Adding a Folder in Test Repository
More like this
Adding a Folder in Test Repository
Adding a Folder in Test Repository
More like this
Adding a Folder in Test Repository
Adding a Folder in Test Repository
More like this
Adding a Folder in Test Repository
Adding a Folder in Test Repository
More like this
Adding a Folder in Test Repository
Adding a Folder in Test Repository
More like this