Importing Requirements
- Kevin Pham (Deactivated)
Analytics
Overview
Jira Import
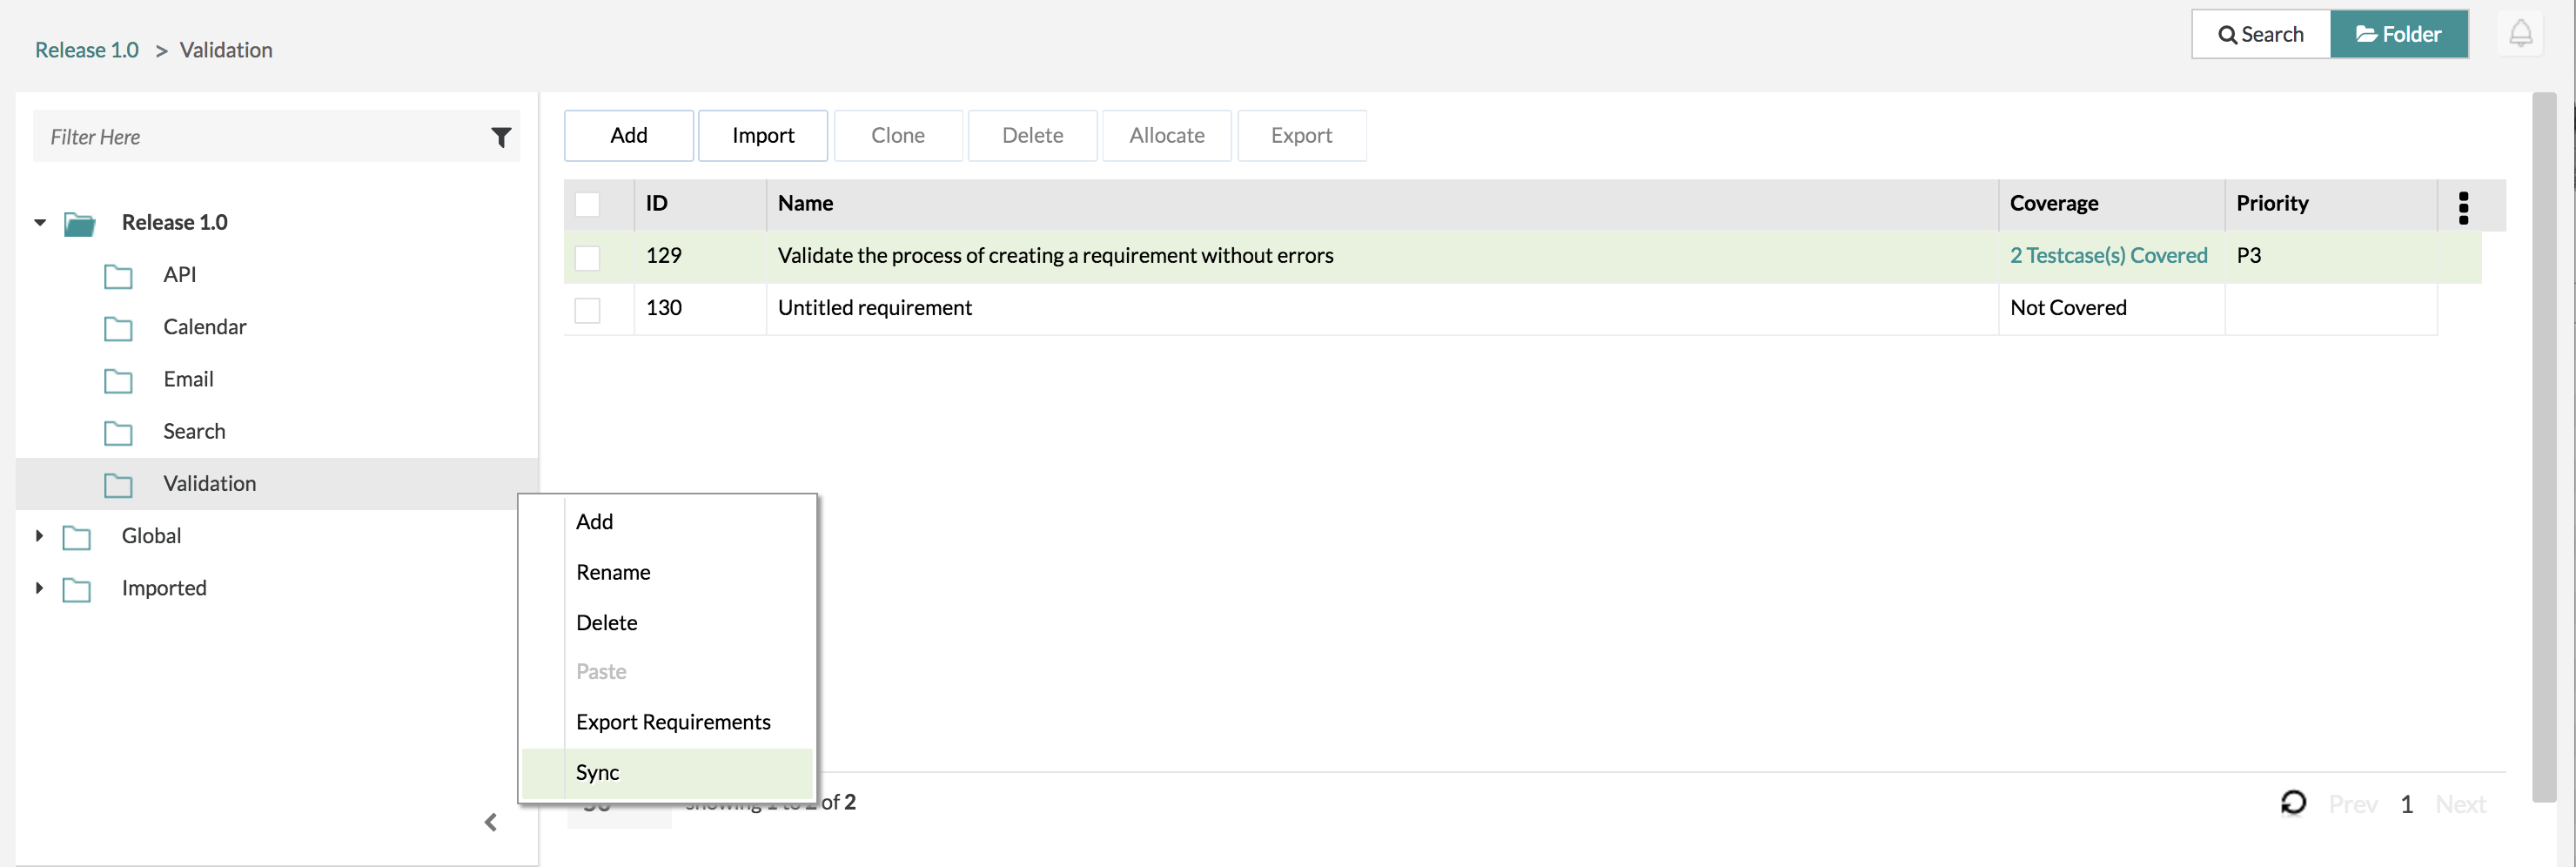
- If changes occur in the requirements after they have been imported into Zephyr, use the "Sync" button to make those changed in Zephyr.
- When a large number of requirements are being worked on in JIRA and changes occur, there might be a situation where your imported list of requirements in Zephyr can get out-of-sync with those in JIRA.
- A simple click of the "Sync" button fixes this issue.
- A simple click of the "Sync" button fixes this issue.
Excel Import
- Only requirements in Excel 97-2003 and 2007 formats can be imported (*.xls and *.xlsx)
- Only the first tab is imported
- Special formatting is not supported (merged cells, formulas etc.)
Steps to Import Requirements
The following sections will need to be followed to deallocate and allocate:
Importing JIRA Requirements
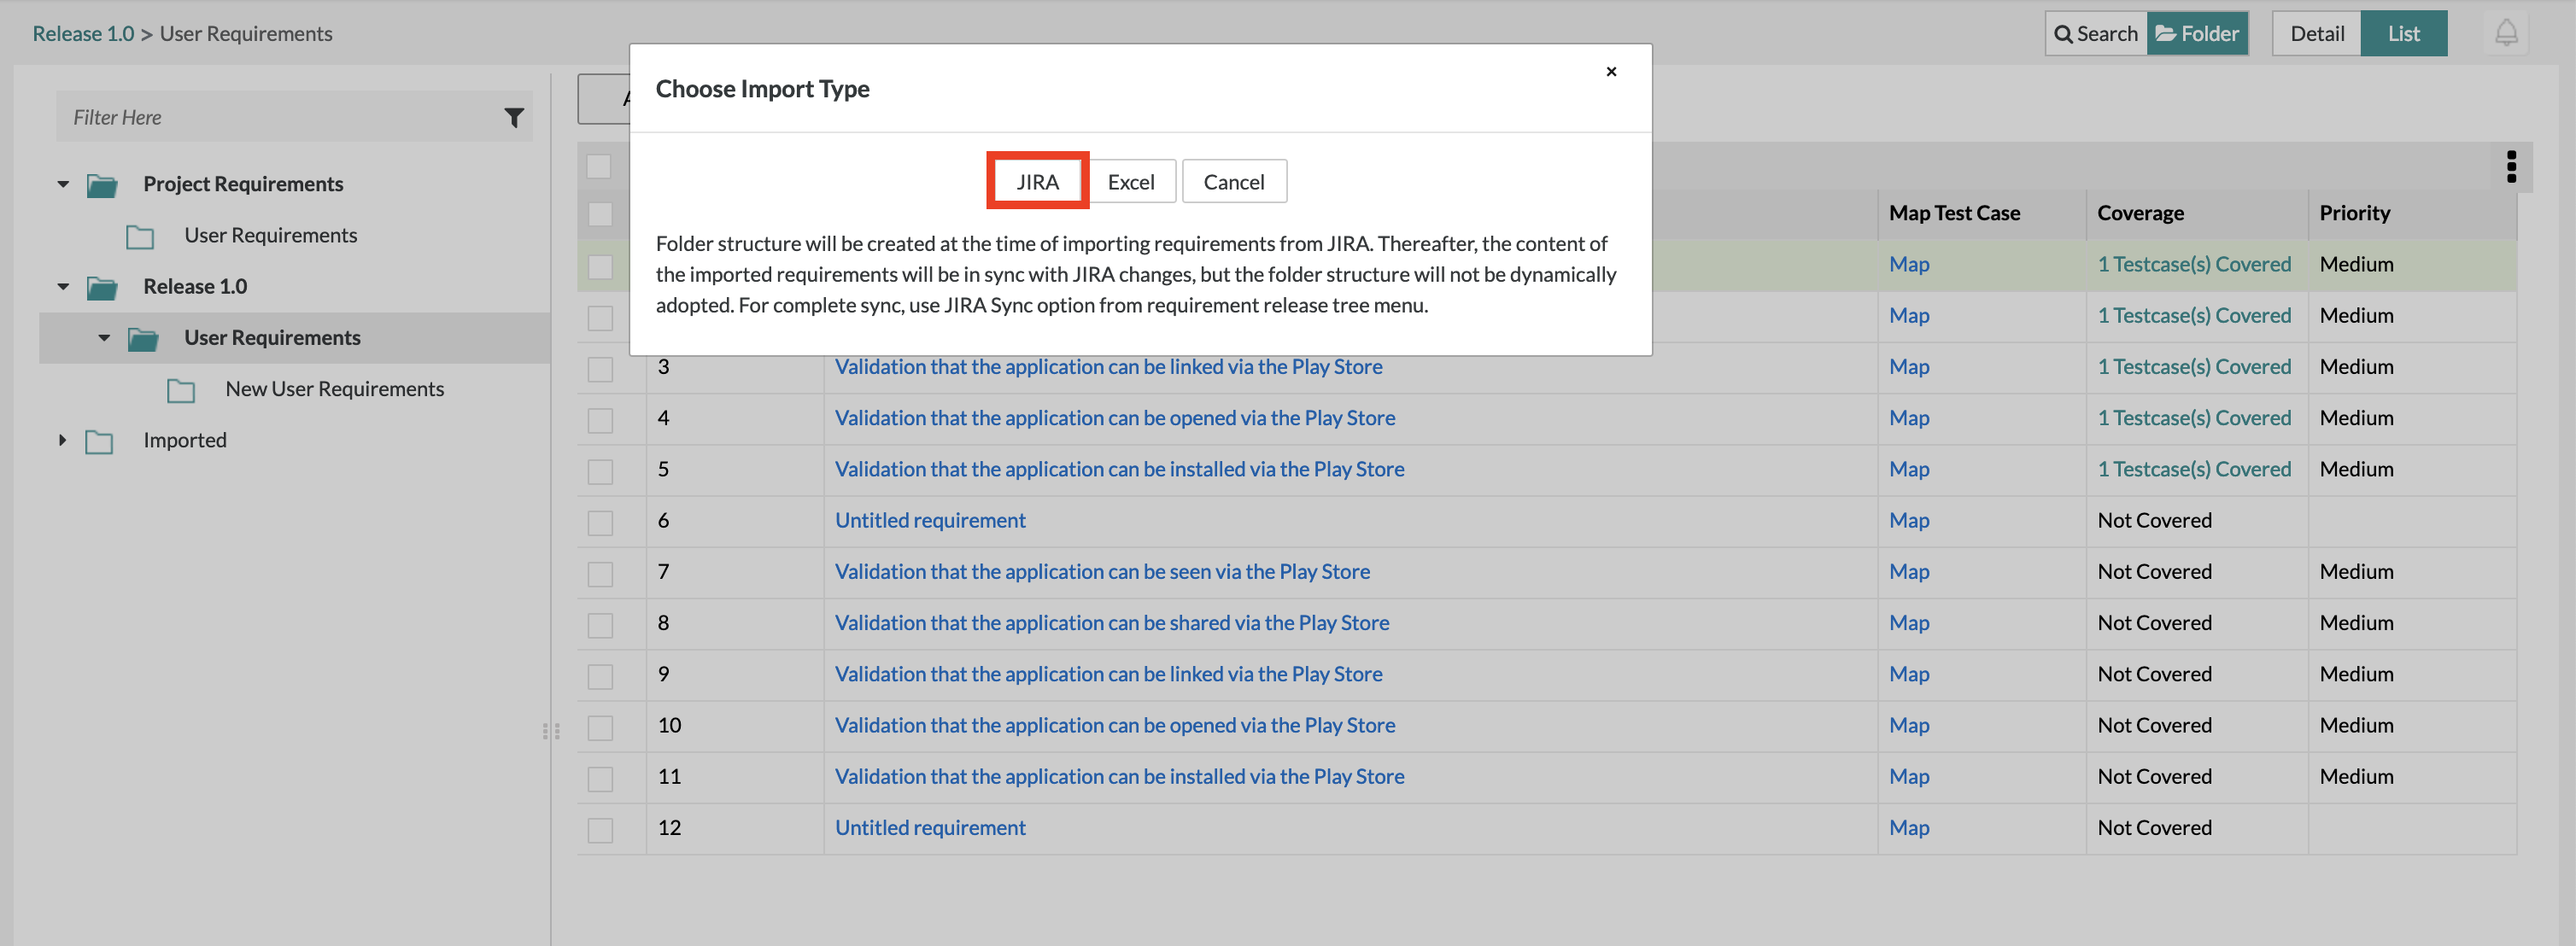
1. Click on the "Import" button at the top of the table.

2. There will be a pop-up that gives you three options:
- JIRA - This option provides users with the ability to import and transfer existing requirements from a JIRA instance to Zephyr.
- Excel - This option provides users with the ability to import and transfer existing requirements from an Excel document to Zephyr.
- Cancel - This option will just cancel the pop-up window for importing.
3. Simply click on the "JIRA" button.
4. You would enter a JQL command to filter your requirements or simply click search to view all of the requirements within the JIRA instance.
5. After that, you have the two option to import
- Import Selected: Select requirements individually by check them off on the left and then clicking the "Import Selected" button on the bottom right of the pop-up
- Import All: If you want to import everything filtered or searched, click on the "Import All" button on the bottom right of the pop-up.
6. You can then view the imported requirements within the "Imported" folder in the requirements hierarchy to the left side of the navigation.
Attachments when Importing
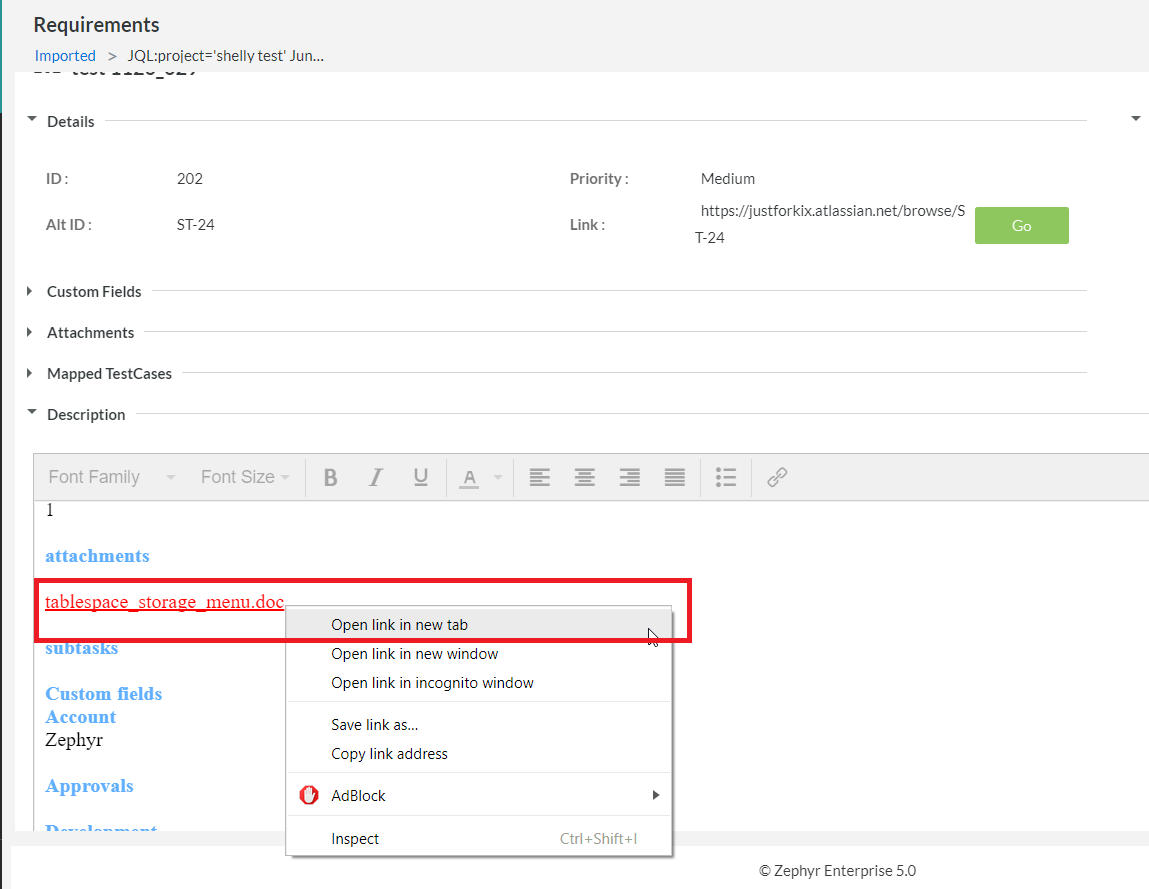
When importing a requirement from JIRA, if the requirement has attachment, the attachment link is shown in the description field.
You must right click on this highlighted attachment in the description and open it in new tab.
- The attachment will be downloaded once you select to open it in a new tab.
- If you just click on the attachment link in the description, it will not be downloaded.
Importing Excel Requirements
1. Click on the "Import" button at the top of the table.
2. There will be a pop-up that gives you three options:
- JIRA - This option provides users with the ability to import and transfer existing requirements from a JIRA instance to Zephyr.
- Excel - This option provides users with the ability to import and transfer existing requirements from an Excel document to Zephyr.
- Cancel - This option will just cancel the pop-up window for importing.
3. Simply click on the "Excel" button.
- You will be informed with further instructions to assist you with importing requirements from Excel.

4. After clicking the "Next" button, you click the "Add" button at the top right of the interface.
- This is where you'll be mapping your Excel rows/columns to match the Zephyr fields.
- Once you're done mapping, you simply click the "Save" button at the bottom right to save your mapping for future references and future imports.
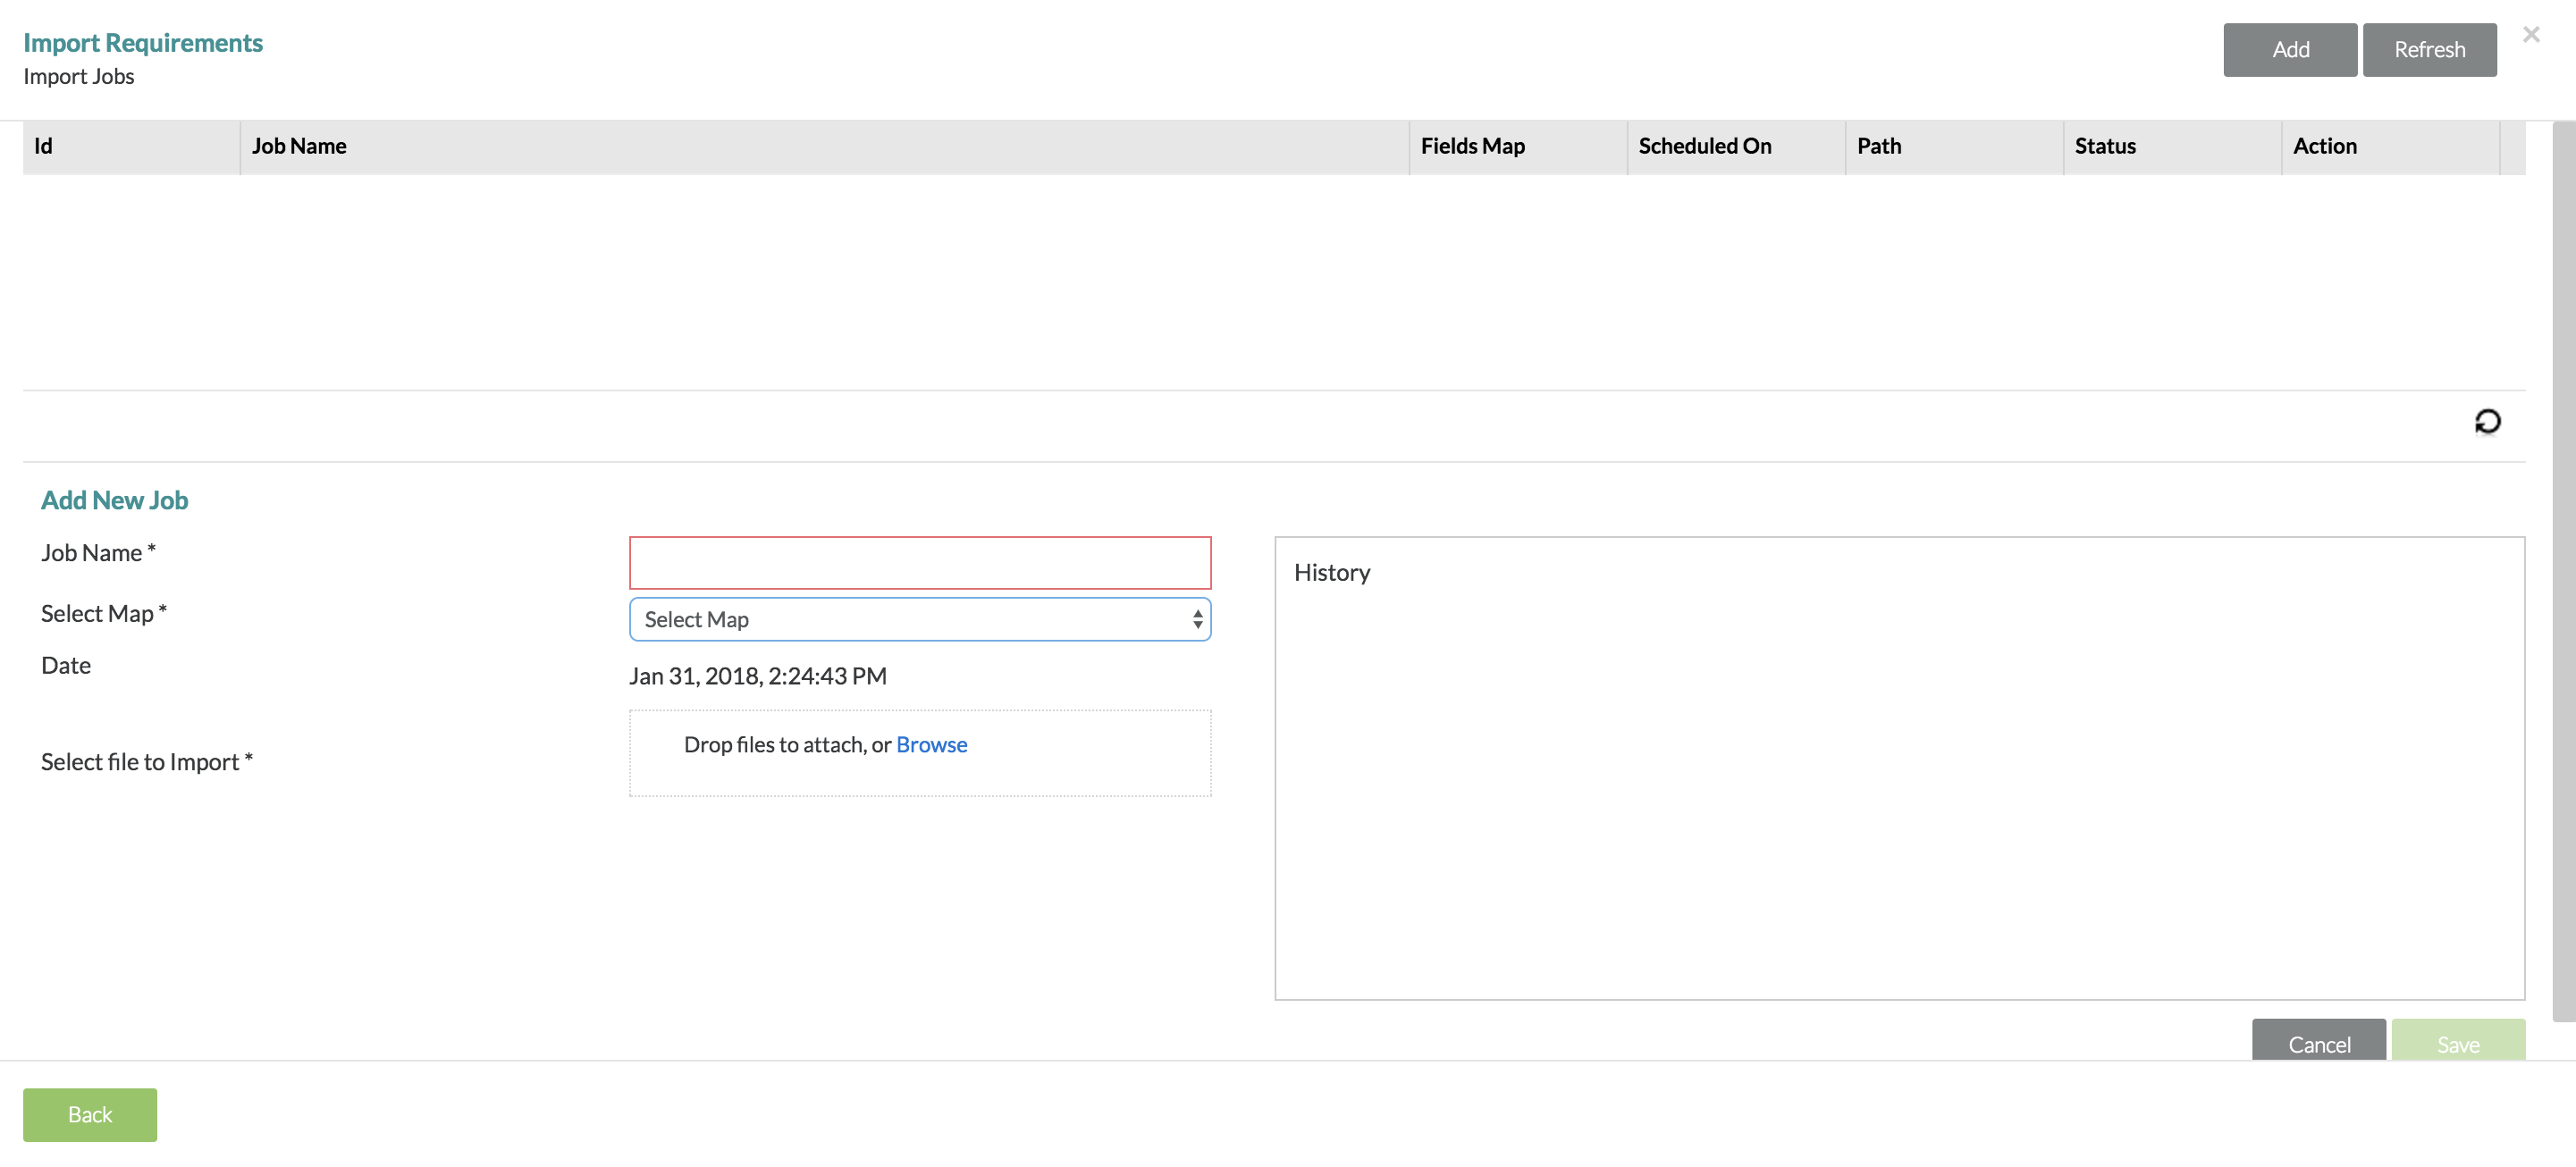
5. After mapping, you click the "Next" button and then click the "Add" button at the top right of the interface.
- From here, you'll create a Job Name for the import, Selecting the Saved Mapping that you just created or previously created, and then Attach the actual Excel document.
- Afterwards, you would click the "Save" button.
- You would then click the "Run" button to run the import job.
6. Afterward, you can then view the imported requirements within the "Imported" folder in the requirements hierarchy to the left side of the navigation.