Integrate JIRA SSO with Zephyr OAuth
- Kevin Pham (Deactivated)
Table of Contents
Steps to Configure JIRA with SAML 2.0 SSO:
Procedure:
In order to configure JIRA with SAML 2.0 SSO please use the following steps:
1. Install JIRA
2. Register at OKTA and purchase a license and log into OKTA.
- Enter your username: XXXXX
- Enter your password: XXXXX
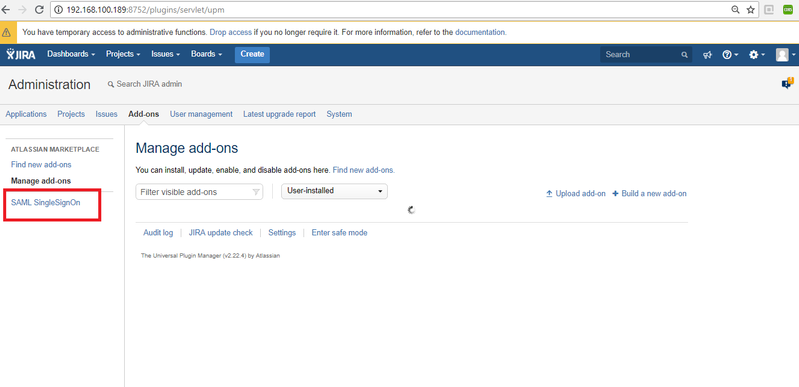
3. In JIRA, click on Addons
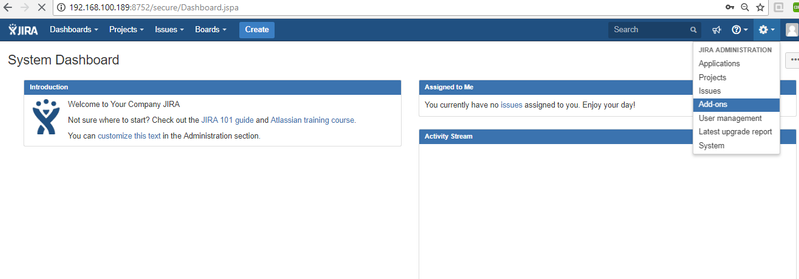
4. Search for SAML SingleSignOn for JIRA and install it.
- Once installed, it will show the SAML SingleSignOn on the left hand menu.
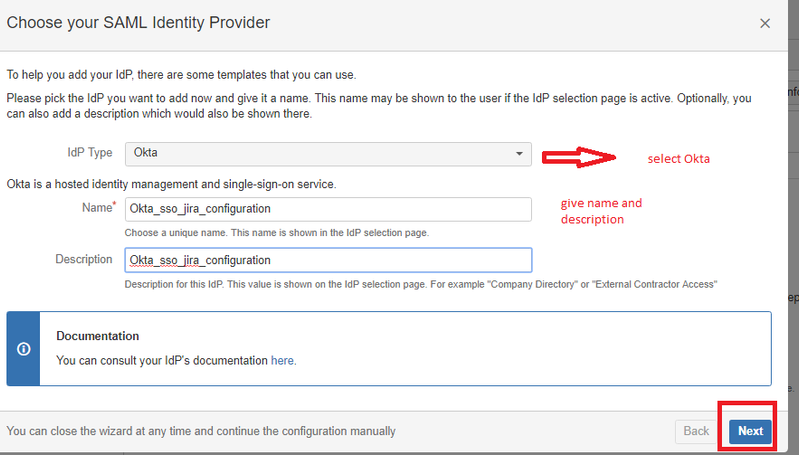
5. Log into OKTA. After logging in, click on Admin on the right hand side of the page.
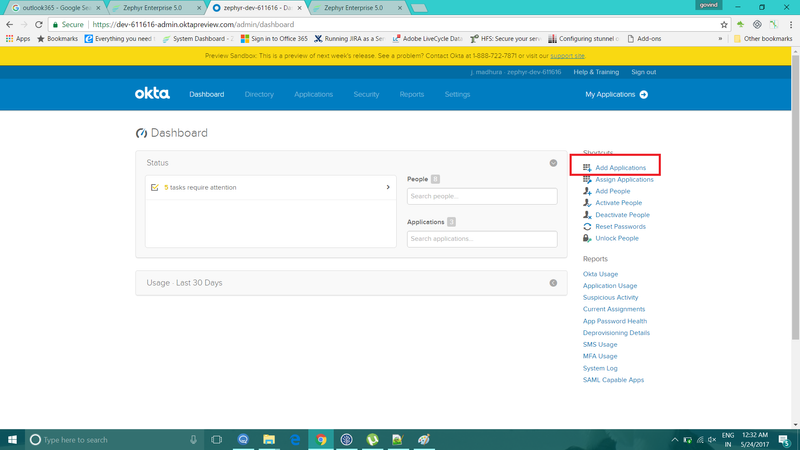
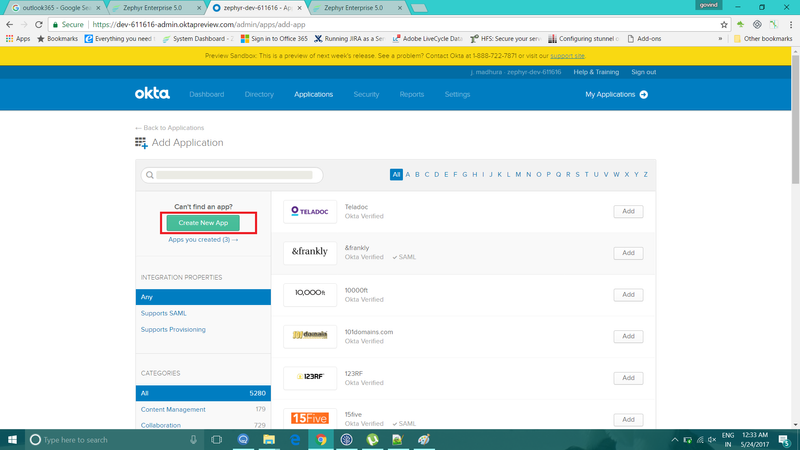
Afterwards, click on "Add Applications" and then click on "Create New App".
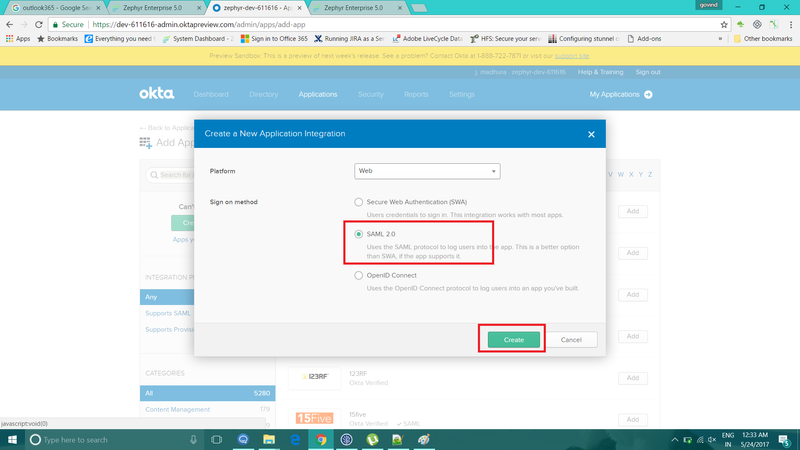
Select SAML 2.0 in the "Create New App" window and then click on create.
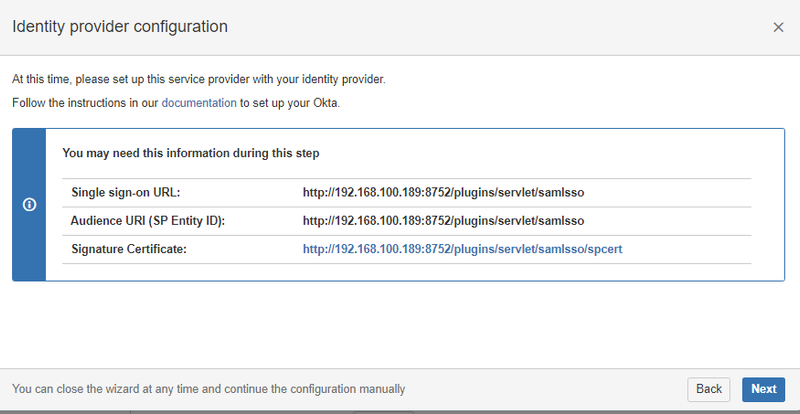
6. Fill in the Single Sign On and audience URL that we took from Jira and configure the first name, last name, and email.
7. Once the app is done, it will generate the metadata URL. Afterwards, copy the metadata URL and configure it in the JIRA application.
8. Click on next after clicking on the import.
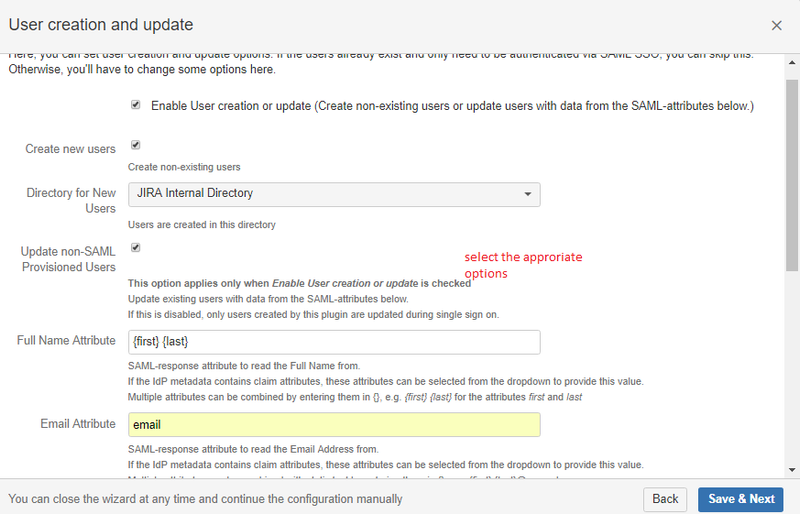
9. Select the User creation and update options.
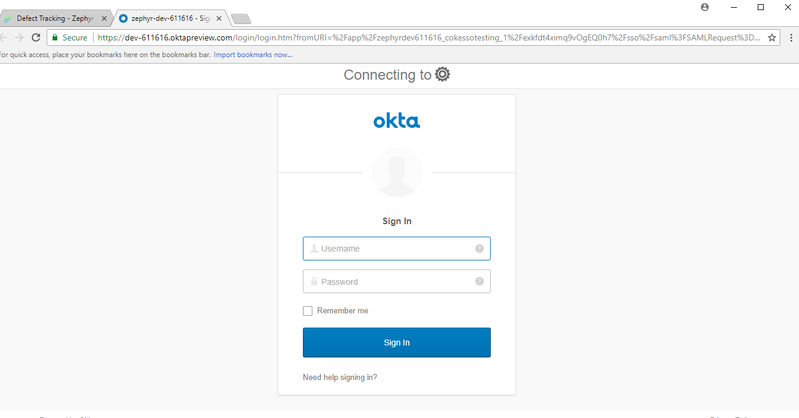
10. Before testing the application, create the same user as an SSO user in the JIRA application and assign it to the JIRA software and start the test by copying the URL in the new window.

11. It will now take you to the OKTA login page.
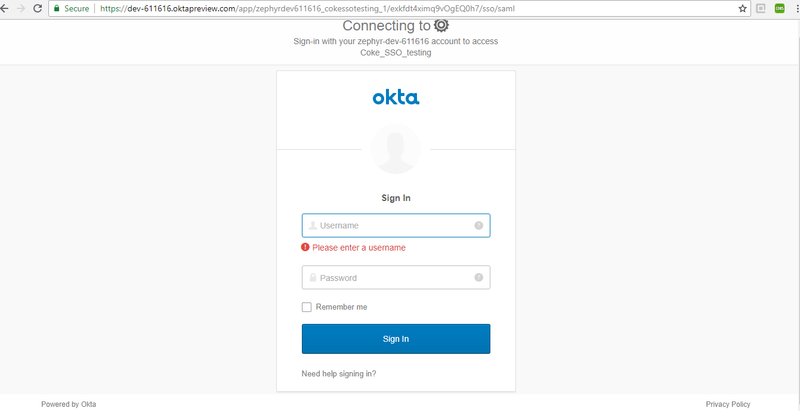
12. Enter the credential and test is successful.
13. Configure the additional login and logout redirection URLs.

14. Configure the redirection URLs so that the user can login with the SSO credentials as well as the normal JIRA credentials.
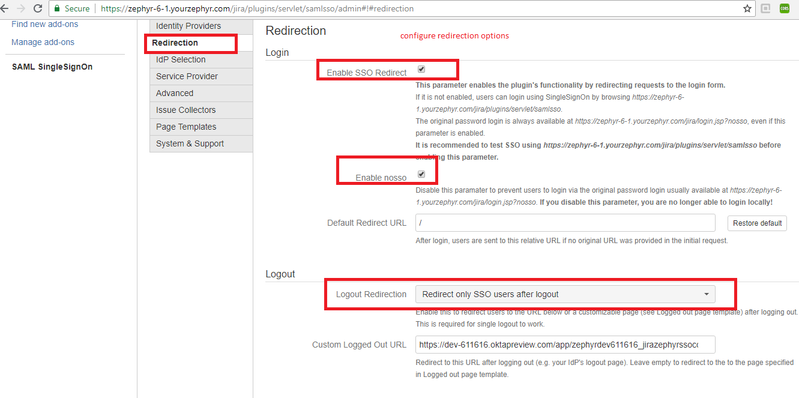
15. Now, the user can login with both SSO and JIRA credentials.
Steps to Integrate JIRA SSO with Zephyr OAuth:
Procedure:
In order to integrate JIRA SSO with Zephyr OAuth, please use the following steps:
1. Set the OAuth authentication in the database.
- Go to the database → Select ITCC → Run the below command:
insert into defect_preference values ('jira.authType', 'OAUTH', 'OAUTH' ,0,1,0,'General Configuration', 4 ,'JIRA OAuth Authentication')
- Set up this flag to enable OAuth authentication (this could be Null or change OAUTH to BASIC to enable basic authentication) - this enables you to use OAuth of the defect user authentication. This row can either be deleted or the value can be changed to "BASIC" to enable basic authentication (default).
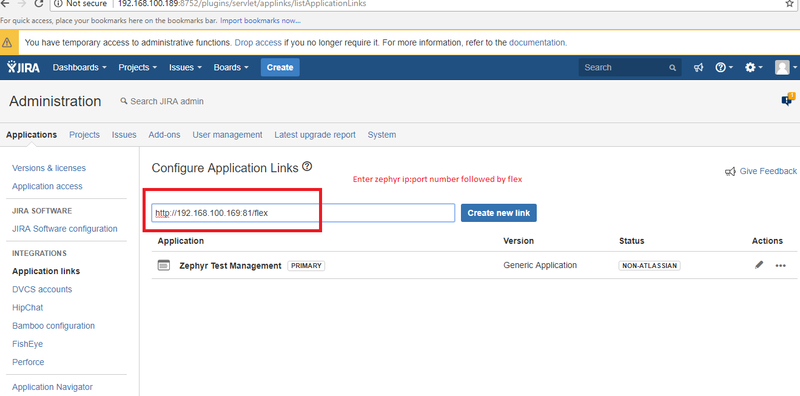
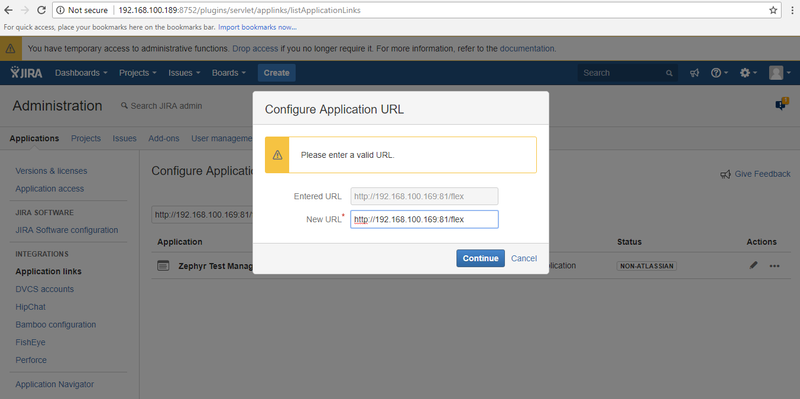
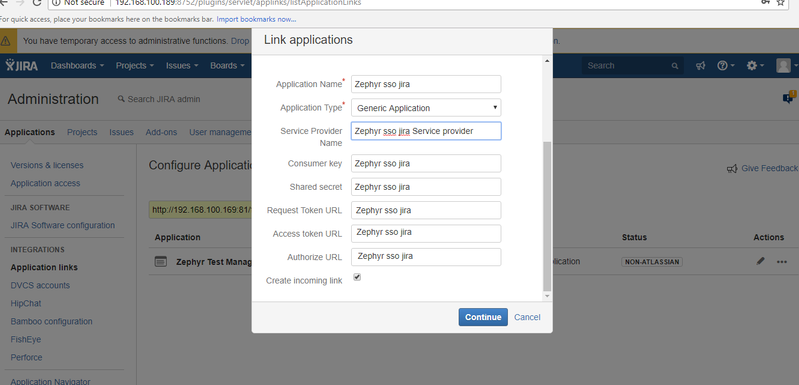
2. Configure the application as an OAuth consumer
- In JIRA, OAuth consumers are represented by application links.
- Application links use OAuth with RSA-SHA1 signing for authentication.
- This means that a private key is used to sign requests rather than the OAuth token secret/consumer secret.
- In the following steps, you’ll be generating an RSA public/private key pair, then creating a new application link in JIRA that uses the key.
Generate an RSA public/private key pair:
- In your terminal, run the following openssl commands
openssl genrsa -out jira_privatekey.pem 1024
openssl req -newkey rsa:1024 -x509 -key jira_privatekey.pem -out jira_publickey.cer -days 365
openssl pkcs8 -topk8 -nocrypt -in jira_privatekey.pem -out jira_privatekey.pcks8
openssl x509 -pubkey -noout -in jira_publickey.cer  > jira_publickey.pem
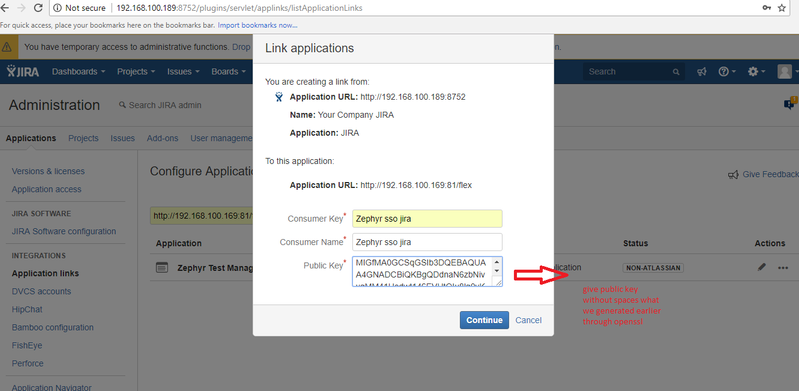
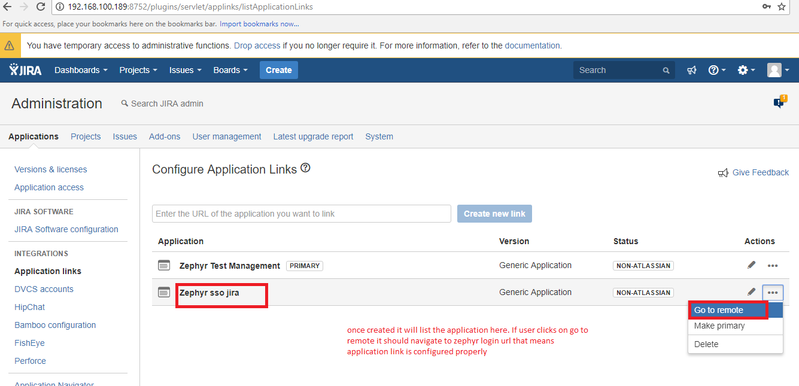
3a. Configure the app as a consumer in JIRA, using the following application links:
- In JIRA, navigate to the cog icon (
 ) → Applications → Application links (click on the shortcut dot (.) and then enter in the application link).
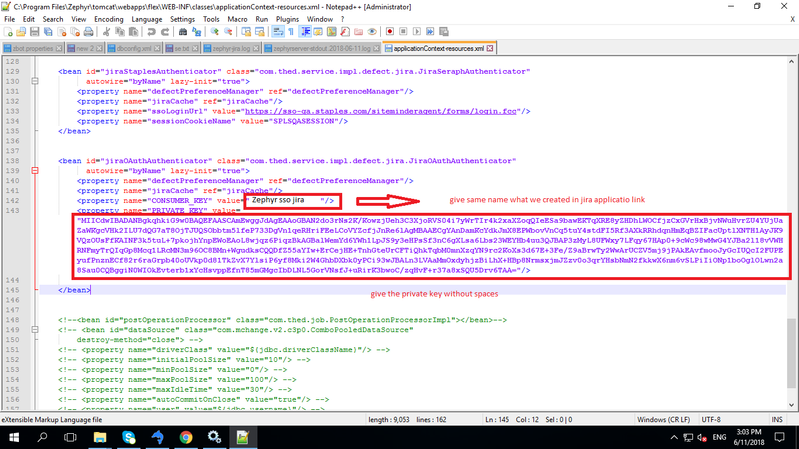
3b. Changes to do in Zephyr
- Go to the Zephyr Installation Directory → Navigate to the classes folder → Edit the applicationContext-resource.xml (path: C:\Program\Files\Zephyr\tomcat\webapps\flex\WEB-INF\classes).
- Update the consumer and private key
4. Once the above changes are made, restart the Zephyr server.
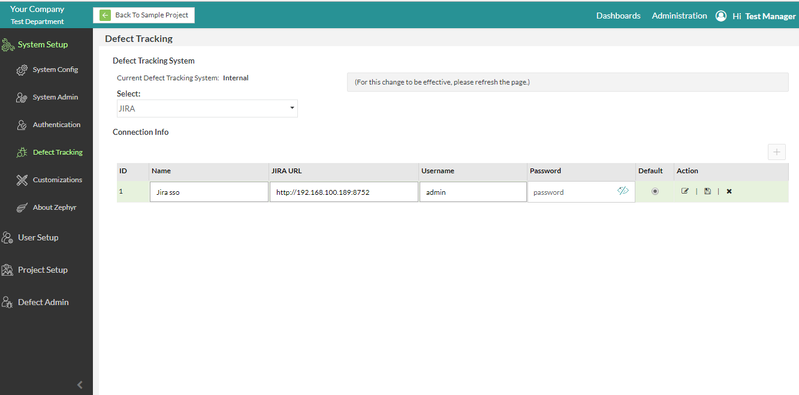
5. Log into the Zephyr instance → Click on Administration → Click on Defect Tracking → Set the Defect Tracking with the admin credentials from JIRA
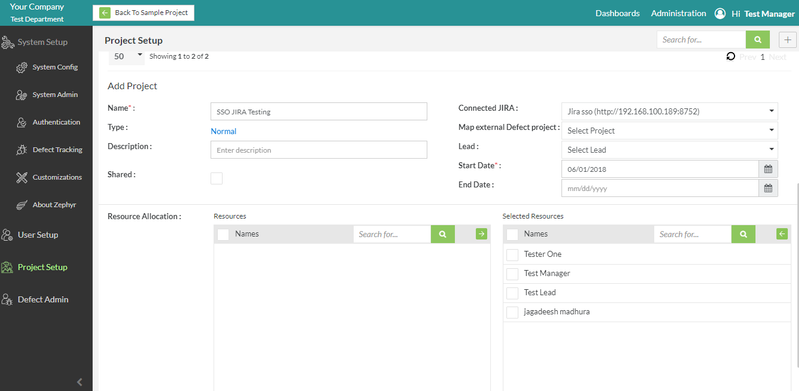
6. Once the JIRA is setup, Refresh the browser → Go to Project Setup → Create a New Project → Add an external Jira project to the new Zephyr project and save it.
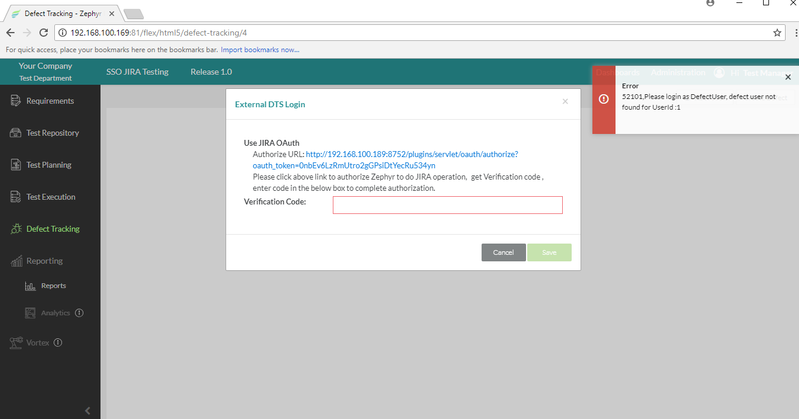
7. Go to the created project → Select a release → Click on Defect Tracking

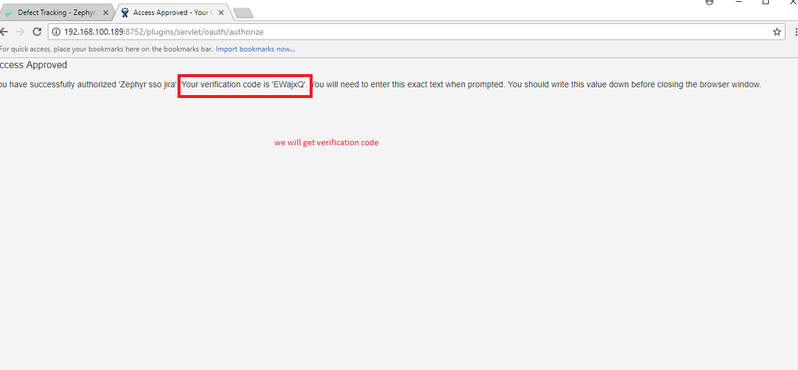
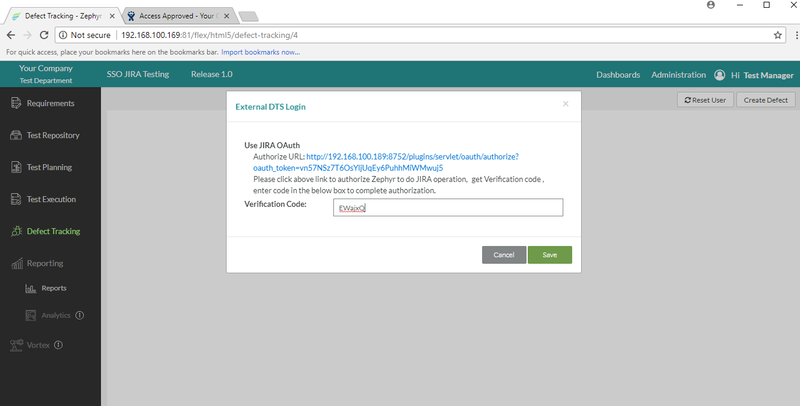
Once the external DTS login is saved, you have officially integrated JIRA SSO with Zephyr.