Exporting Test Cases
- Kevin Pham (Deactivated)
- Marc Ray (Deactivated)
Exporting Test Cases
Prior to Exporting Test Cases
Prior to exporting test cases, there must be an existing project and release that has been created in Zephyr. The project/release must be selected and user must be under the Test Repository section within the release selected. There must be test cases already created in Zephyr which allows us to export to a specific report type.
Scenario: You are a testing manager in Zephyr. As a testing manager, you want to export the test cases for a specific folder.
If this is your first time managing test cases, you might want to work within a test project rather than an actual project in the system, and that way, you can work out any issues you might have with managing test cases before you work with live test cases.

1. Select/check off any of the test cases that you want to export on the left hand side of the table.
- If you want to export an entire folder or release, simply click the
 button next to the folder and then click "Export Tests".
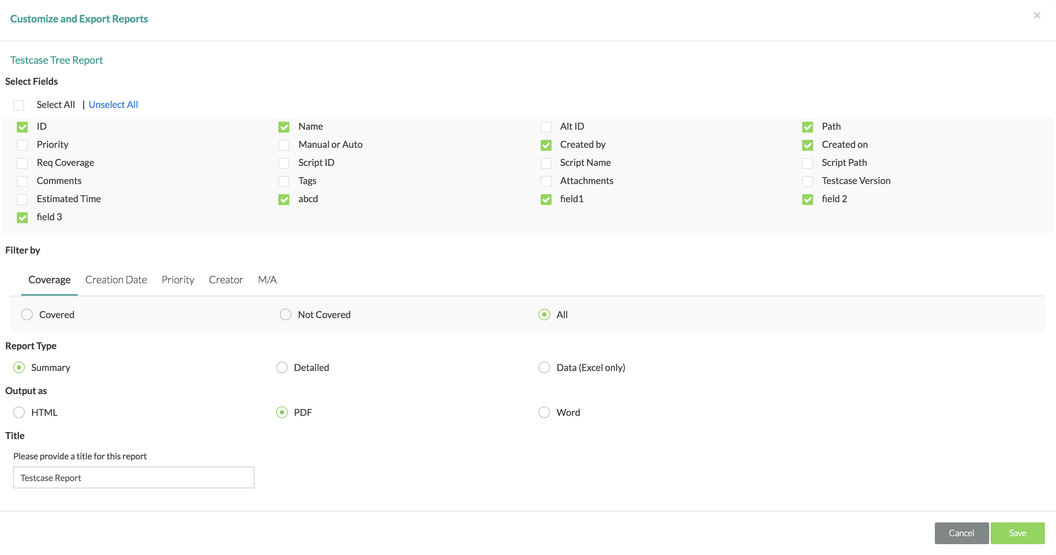
2. After clicking export, there will be a window that pops up where you can choose exactly which fields you want to export for the test cases, what kind of reporting type, what the output file the export should be, and naming the report.
- The default name for an exported report is labeled as "Testcase Report".
3. After selecting your options, simply click the "Save" button and the export will begin.
4. You can then click "OK" and you will get a prompt to download the file.

5. Click on "Download" and the export file of your test cases will be downloaded to your computer.