/
Adding a Group
Adding a Group
- Kevin Pham (Deactivated)
- Dominik Trygar
- Helen Kosova (Deactivated)
Owned by Kevin Pham (Deactivated)
Starting October 11, 2024 (Zephyr Enterprise 8.2), the Zephyr Enterprise documentation moved from its current location on Atlassian to a dedicated, standalone Zephyr Enterprise documentation page. Please see: https://support.smartbear.com/zephyr-enterprise/docs/en/zephyr-enterprise/zephyr-administration-guides/group-setup/add-a-group.html
You can create user groups manually, or import them from Crowd or LDAP.
To create a new group manually:
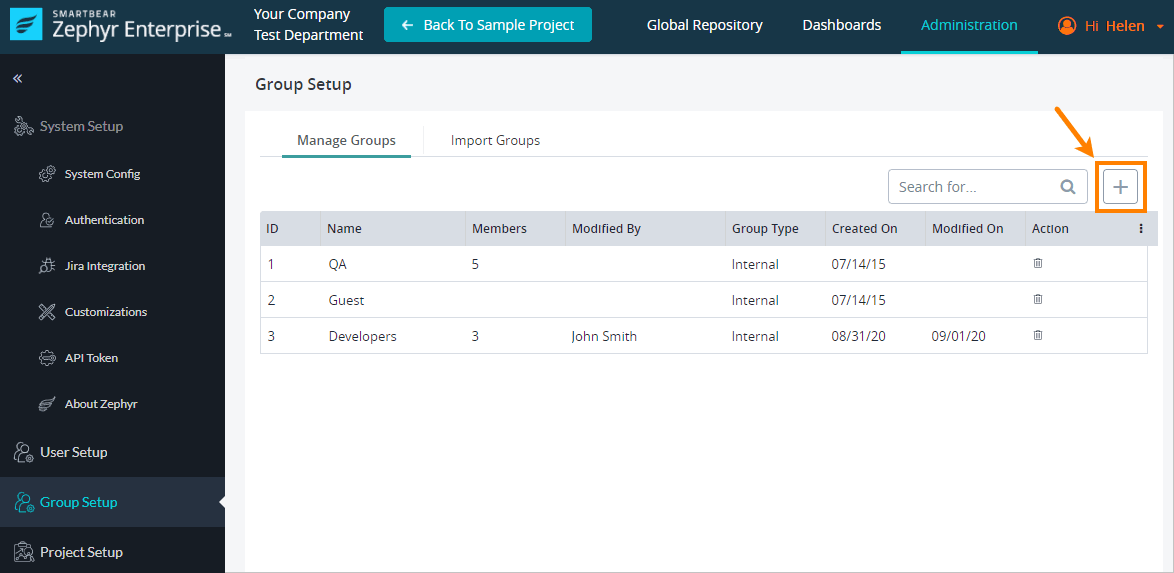
- Go to Administration > Group Setup.
- Click the plus button in the top right corner of the page.
- Give this group a Name. The group name can be up to 50 characters and must be unique.
- (Optional) To make the created group disabled, select the Disabled check box. Displayed groups are not displayed in Project Setup section when assigning groups to a project.
- In the User Allocation section, add users to this group.
To add users, move them from the list on the left to the list on the right.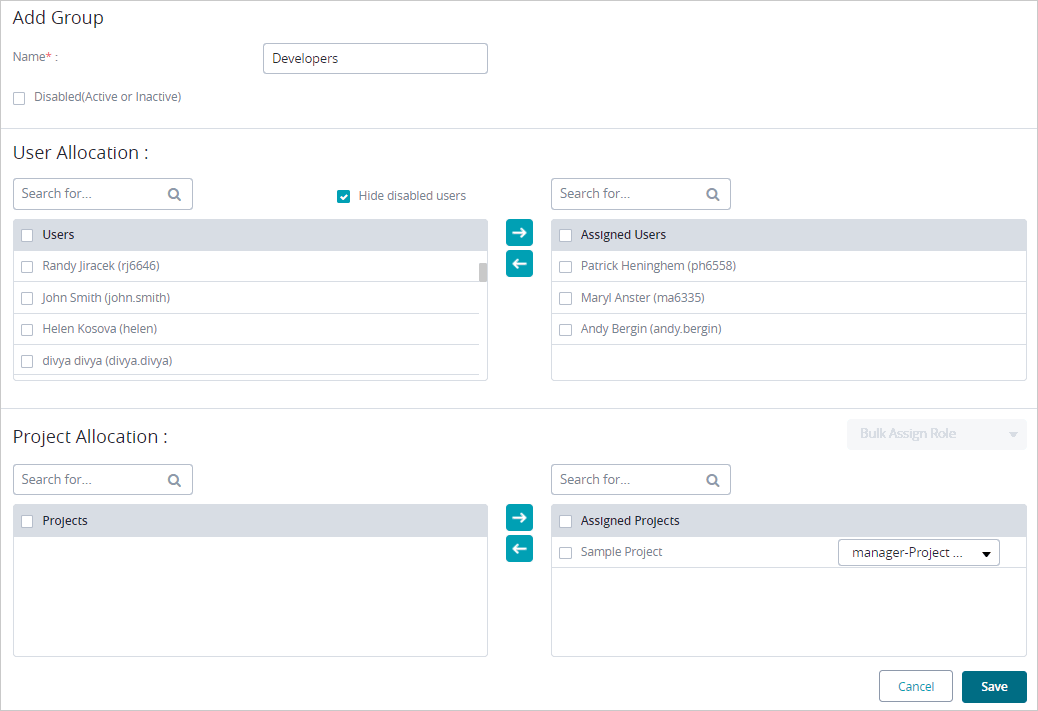
- In the Project Allocation section, select the projects that the group members need access to.
- To assign projects, move them from the list on the left to the list on the right.
- For each assigned project, select the role to give to the group members.
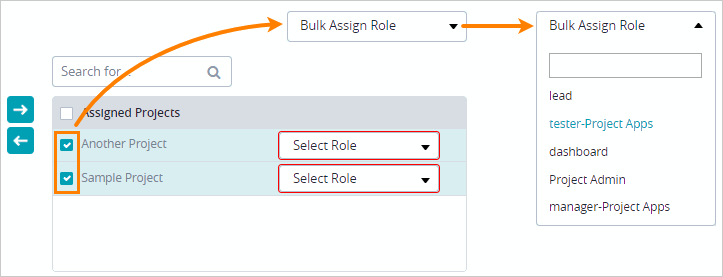
- Tip: To bulk assign the same role in multiple projects, select the check boxes next to the project names, then select the role from the Bulk Assign Role list.
- Click Save.
Related content
Group Setup
Group Setup
More like this
Groups and Permissions
Groups and Permissions
Read with this
Group Setup
Group Setup
More like this
Zephyr Server/Data Center Backups and Restore
Zephyr Server/Data Center Backups and Restore
Read with this
Editing a Group
Editing a Group
More like this
Zephyr Audit Logs
Zephyr Audit Logs
Read with this