Oracle
- Kevin Pham (Deactivated)
- Dominik Trygar
- Edward Stolyar (Deactivated)
- Govind Drolia
Starting October 11, 2024 (Zephyr Enterprise 8.2), the Zephyr Enterprise documentation moved from its current location on Atlassian to a dedicated, standalone Zephyr Enterprise documentation page. Please see: https://support.smartbear.com/zephyr-enterprise/docs/en/zephyr-enterprise/zephyr-installation-and-upgrade-guides/zephyr-on-premise-production-installation/connecting-to-an-external-database/oracle.html
The database for Zephyr will be referenced as part of the installation of Zephyr. It will need to be installed separately and prior to the installation of Zephyr. These instructions will help you connect your Zephyr installation to an Oracle database.
Supported Databases
Oracle
- Oracle Database Versions.
- 12c, 19c
- JDBC Driver Versions. Download JDBC: Here
- 12c - 12.1.0.2 (ojdbc7.jar)
- 19c - 19c (ojdbc7.jar)
- Oracle Database Versions.
Prerequisites
- Download the JDBC and have this available on the application node where Zephyr is being installed
- Have the Zephyr installer ready
- Have a fresh installation of Oracle ready
- Some of the instructions below will use Oracle SQL Developer to illustrate the steps, however, it is not required
Configure the Oracle Database
The following steps will need to be followed:
- Step 1: After installation, Set Collation and DB Parameters
- Step 2: Setup your database charset
- Step 3: Connect in SQL Developer
Step 1: After installation, Set Collation and DB Parameters:
The default collation is Binary for Oracle and the one that is supported. The following query can be used to validate the collation for the user(database)
SELECT COALESCE(value, (SELECT value
						FROM nls_database_parameters
						WHERE parameter = 'NLS_SORT'))
FROM nls_session_parameters
WHERE parameter = 'NLS_SORT'
For this below setup connect through a command console:
Type: sqlplus
Enter USER Name: sys/sysdba
Enter Password: *******
Run the below commands for Oracle database parameters setup:
Oracle must be setup with AL32UTF8 parameter to support UTF-8 characters and before installation is done. To check your charset setting:
SELECT * FROM v$nls_parameters WHERE parameter LIKE '%CHARACTERSET%';
Step 2: Setup your database charset:
- shutdown immediate;
- startup restrict;
- select name from v$database;
view code below:
ALTER DATABASE CHARACTER SET INTERNAL_USE AL32UTF8;
view code below:
SELECT value FROM NLS_DATABASE_PARAMETERS WHERE parameter=’NLS_CHARACTERSET’;
- shutdown immediate;
- startup;
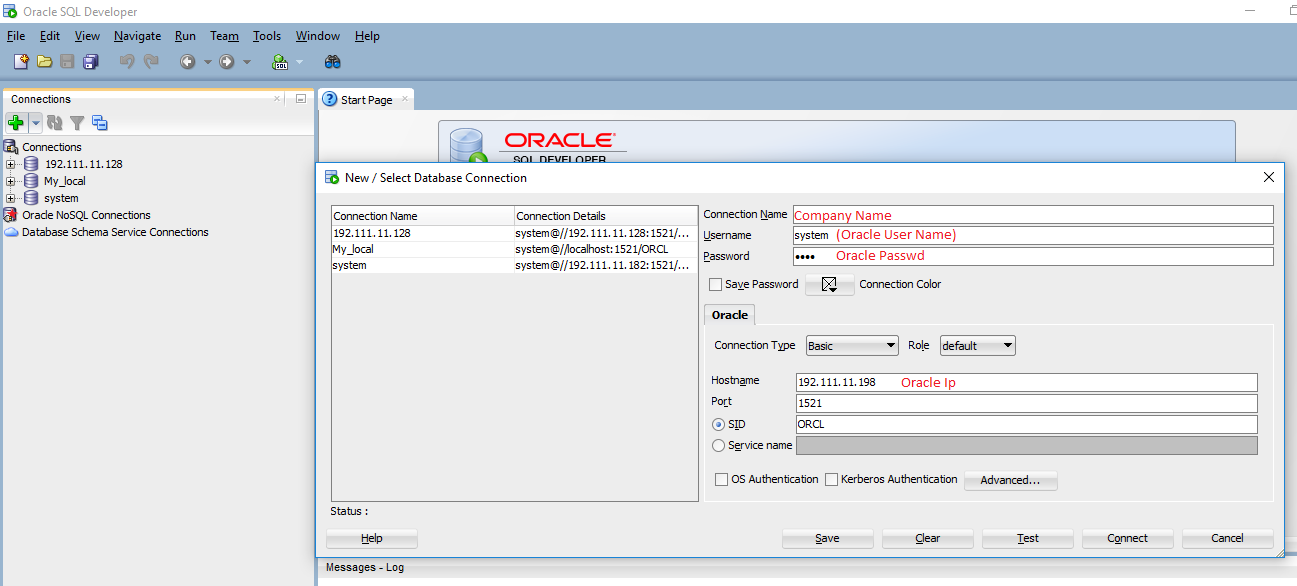
Step 3: Connect in SQL Developer:
Run Below Command for User creation:
Create Table Space:
CREATE tablespace jilo
DATAFILE 'jilo.dbf'
SIZE 2120M
AUTOEXTEND ON;
Oracle User Creation:
create user ITCC identified by zephyr default tablespace <tablespace_name> quota unlimited on <tablespace_name>;
grant connect to ITCC;
grant create table to ITCC;
grant create sequence to ITCC;
grant create trigger to ITCC;
grant create session to ITCC;
grant create view to ITCC;

****** If user was created on a default table space of not know , execute following to give unlimited space on current user table space *********
grant unlimited tablespace to ITCC;
************--------------------------------************
create user DVERSION identified by zephyr default tablespace <tablespace_name> quota unlimited on <tablespace_name>;
grant connect to DVERSION;
grant create table to DVERSION;
grant create sequence to DVERSION;
grant create trigger to DVERSION;
grant create session to DVERSION;


----------------------------------
Internal note: if there are any issues in permissions, use grant all for now.
----------------------------------

CREATE USER itcc IDENTIFIED BY zephyr;
GRANT ALL PRIVILEGES TO itcc;
CREATE USER dversion IDENTIFIED BY zephyr;
GRANT ALL PRIVILEGES TO dversion;
If running into table space issue try: For data files below, find the path of data files and use path value and replace the value "<example>/u01/app/oracle/oradata/XE/system.dbf<example>" below.
SELECT * FROM DBA_DATA_FILES;
ALTER DATABASE DATAFILE '<example>/u01/app/oracle/oradata/XE/system.dbf<example>' AUTOEXTEND ON MAXSIZE UNLIMITED;