Adding a User
Starting October 11, 2024 (Zephyr Enterprise 8.2), the Zephyr Enterprise documentation moved from its current location on Atlassian to a dedicated, standalone Zephyr Enterprise documentation page. Please see: https://support.smartbear.com/zephyr-enterprise/docs/en/zephyr-enterprise/zephyr-administration-guides/user-setup/adding-a-user.html
After importing groups from Crowd or LDAP, the users will be created in the User Setup section and the users created by Crowd or LDAP are read-only. You cannot modify them but you can assign roles to the users created from the imported group.
Add a new user
1. Go to Administration > User Setup.
2. Click the plus button at the top right of the page.
3. Scroll to the bottom to see the Add User panel.
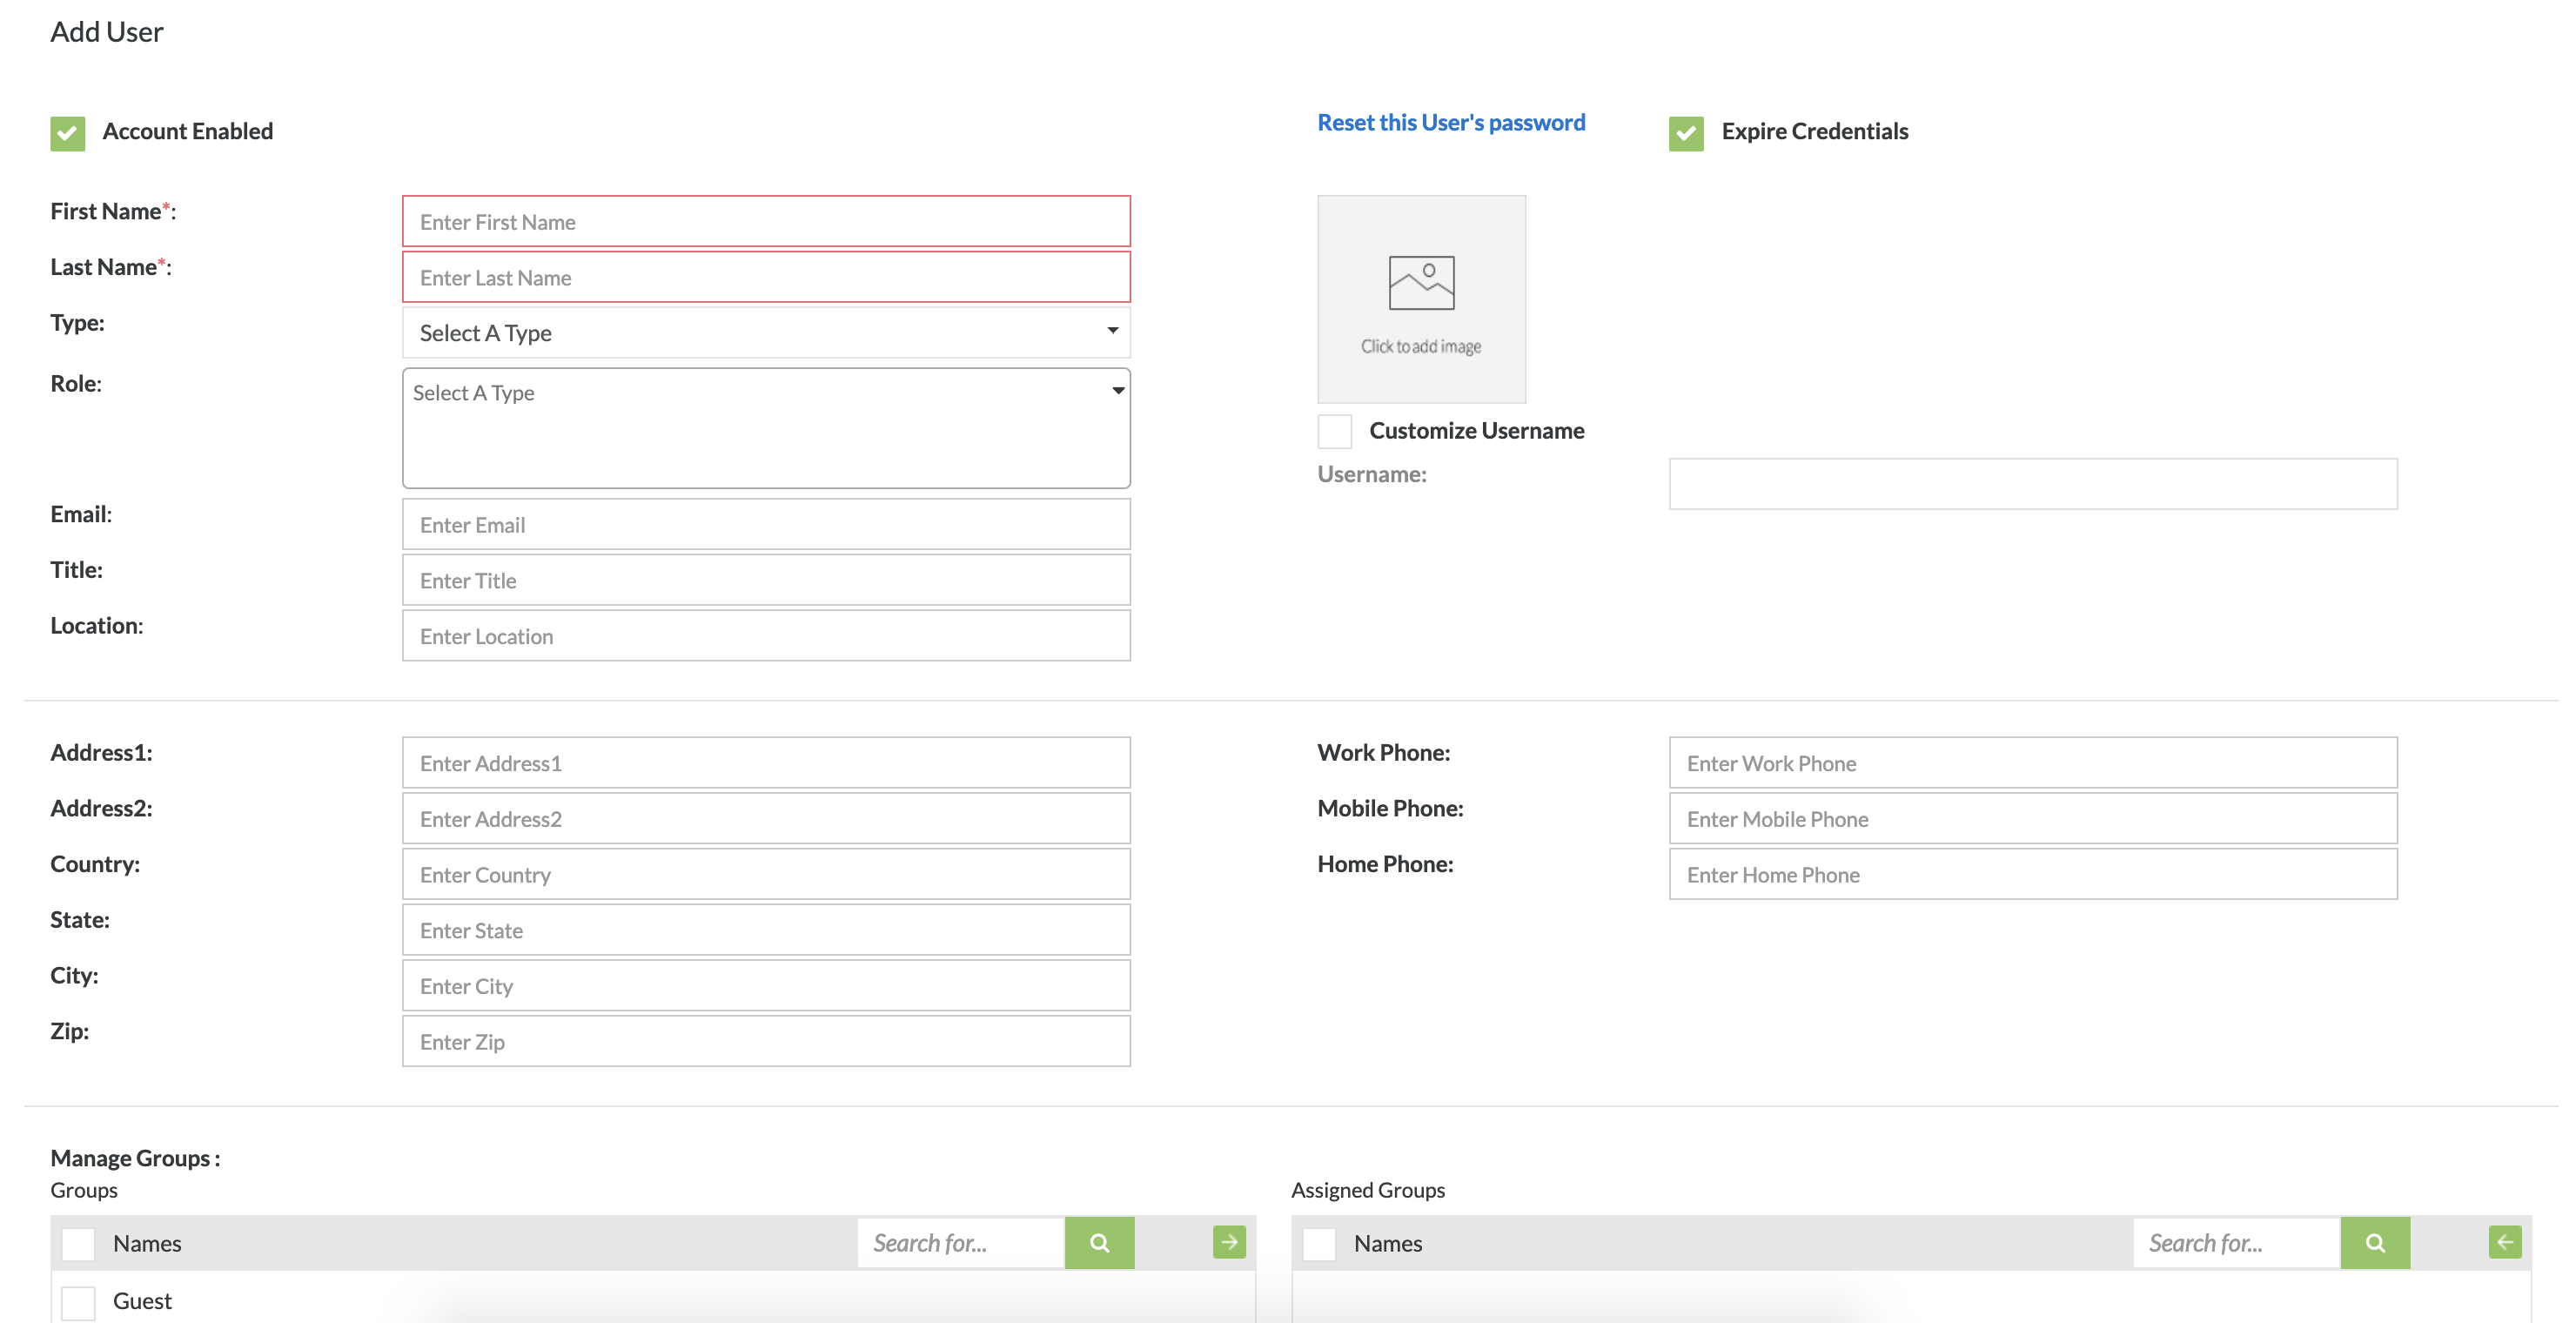
4. Specify the user information. Required fields are shown with a red border in the application.
| Option | Required? | Description |
|---|---|---|
| Account Enabled | Whether the user is enabled or disabled. | |
| First Name | yes | The first name of the user. |
| Last Name | yes | The last name of the user. |
| Role | Roles grant permissions to access specific areas of Zephyr Enterprise and to perform specific tasks. Each user can have one or more roles. Zephyr Enterprise has built-in roles, and you an also create custom roles in the Administration > System Setup > Customizations section. The default roles are:
Users can have multiple roles assigned to them (Administration Apps, Project Apps, Global Repository Apps). If you want to assign multiple roles to bulk users, you can add new roles or you can override any existing roles and replace the new role. | |
| The email address of the user. | ||
| Location | The location of the workplace for the user in the system. | |
| Expire Credentials | The default password for new users is the same as the username. If this check box is selected, the user will be prompted to set a new password upon first login. If this check box is unselected, the user can continue using the default password. | |
| Profile image | Image can be PNG, GIF, or JPG. File size must be less than 2 MB. | |
| Customize username | The default username for a new user is firstname.lastname. For example, if we create a new user with the first name Kevin and the last name Pham, the default username will be kevin.pham. To specify a custom username, select this check box and enter the desired username for this user. | |
| Manage Groups | Optionally select one or more groups to add this user to. | |
| Assign Projects | Optionally select the projects that this user needs access to. Note: Users that are not assigned to any projects can still log into Zephyr Enterprise. |
There are other fields such as the user's address, their work, mobile and home phone numbers, and fields to distinguish their business title and employee type. These fields are not required and are there for convenience.
5. Click Save to finish creating the user.
Default password for new users
The default password for new users is the same as their username. The username itself is in the firstname.lastname format unless the user was created with a custom username.
If the Expire Credentials option was selected when creating the user, this user will be prompted to change the password upon first login. Otherwise the user can change their password at any time later.


Starting Release 8.2, Zephyr Enterprise documentation is moving from its current location on Atlassian to a dedicated, standalone Zephyr Enterprise Documentation page. https://support.smartbear.com/zephyr-enterprise/docs/en/welcome-to-zephyr-enterprise.html