Executing Manual Test Cases
Executing Test Cases and Test Steps
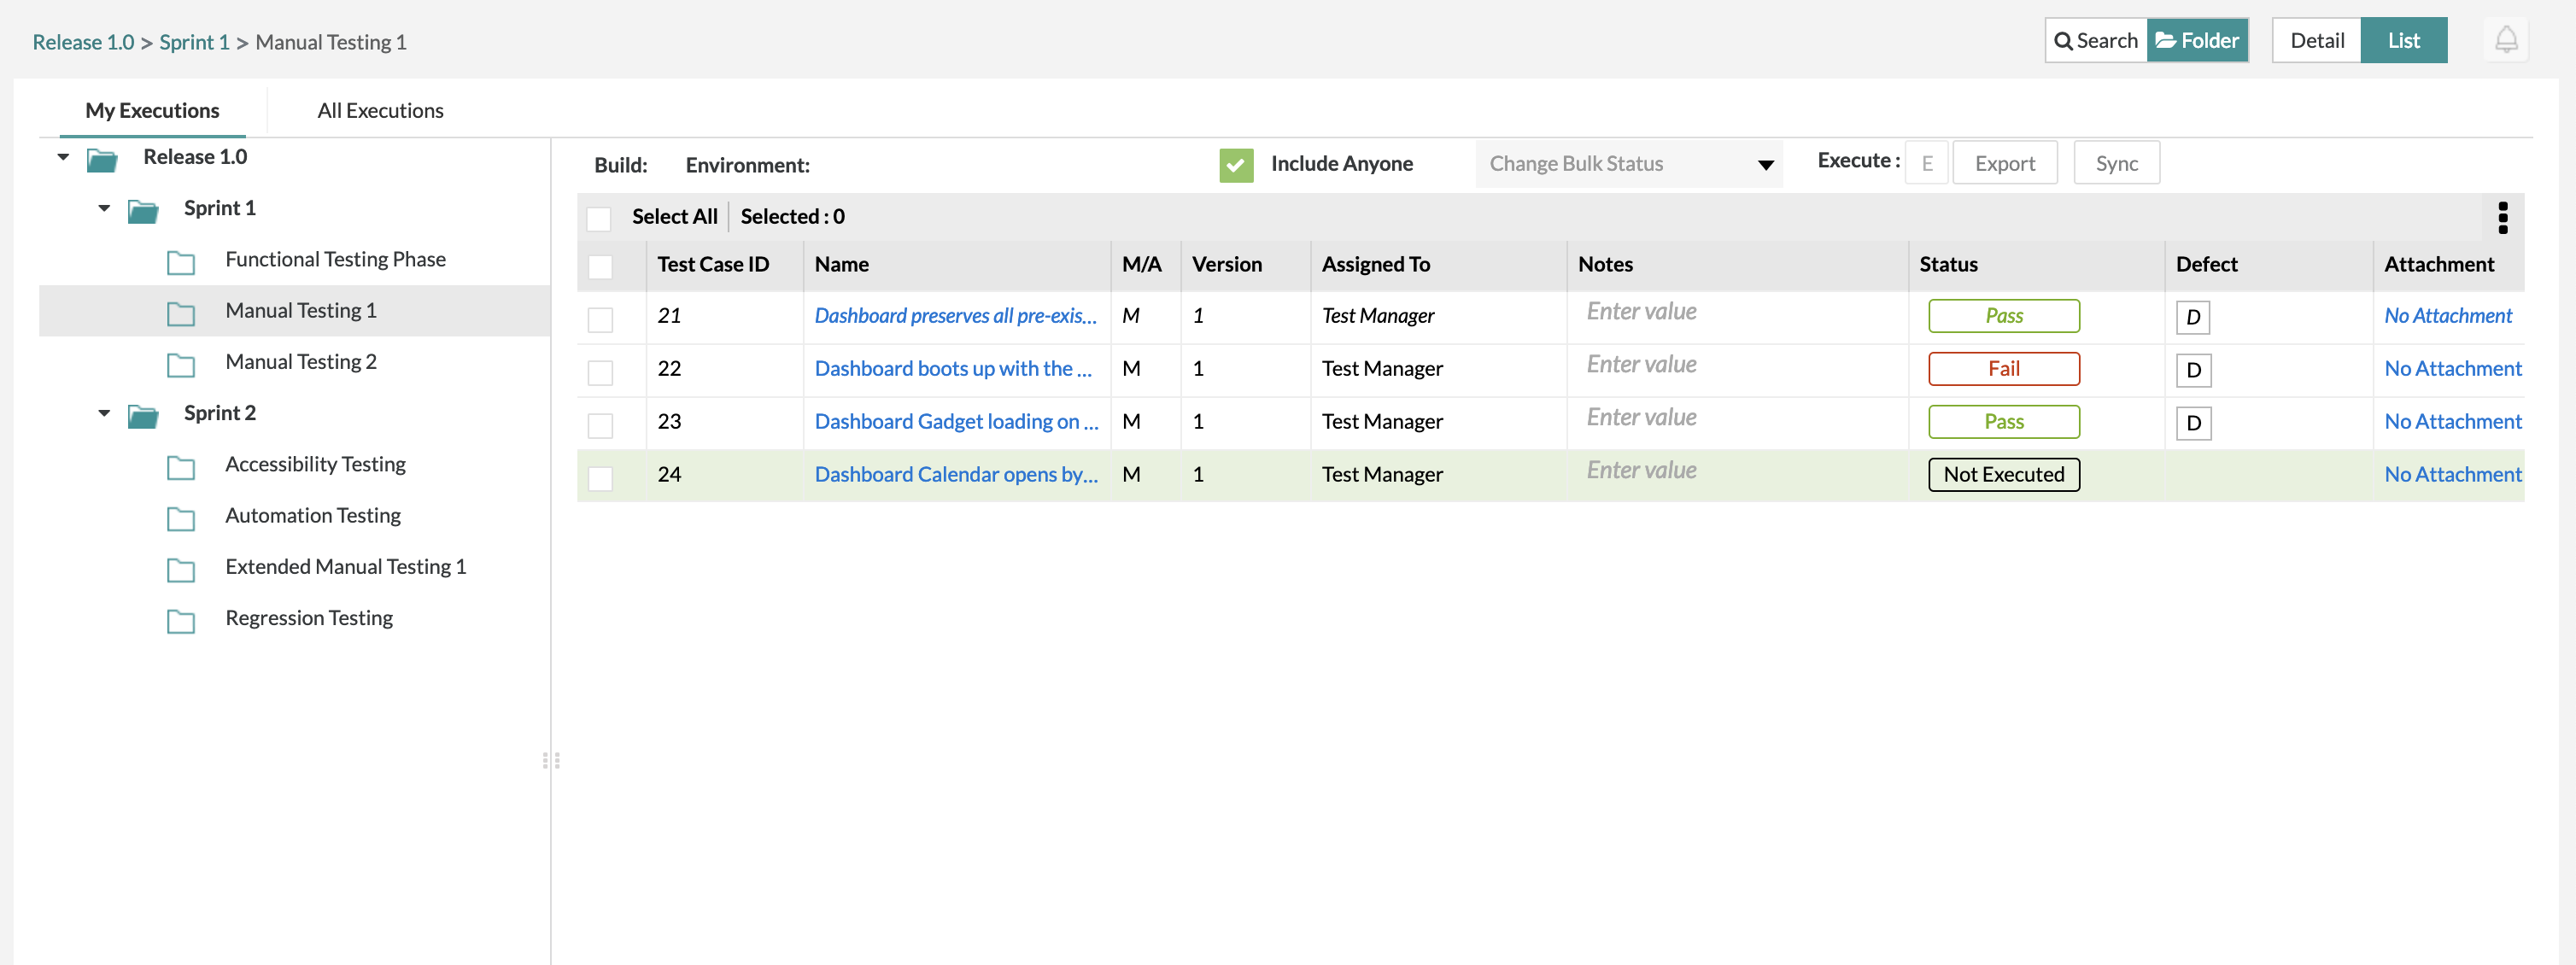
1. Choose which test that you want to execute in the test execution table.
2. In the table, there is a column row labeled as "Name". Navigate to the name of the test case that you want to execute and click on the test case name link.
- This provides the user with a full screen view of the test case to be able to update the status of the both the test case and test steps.
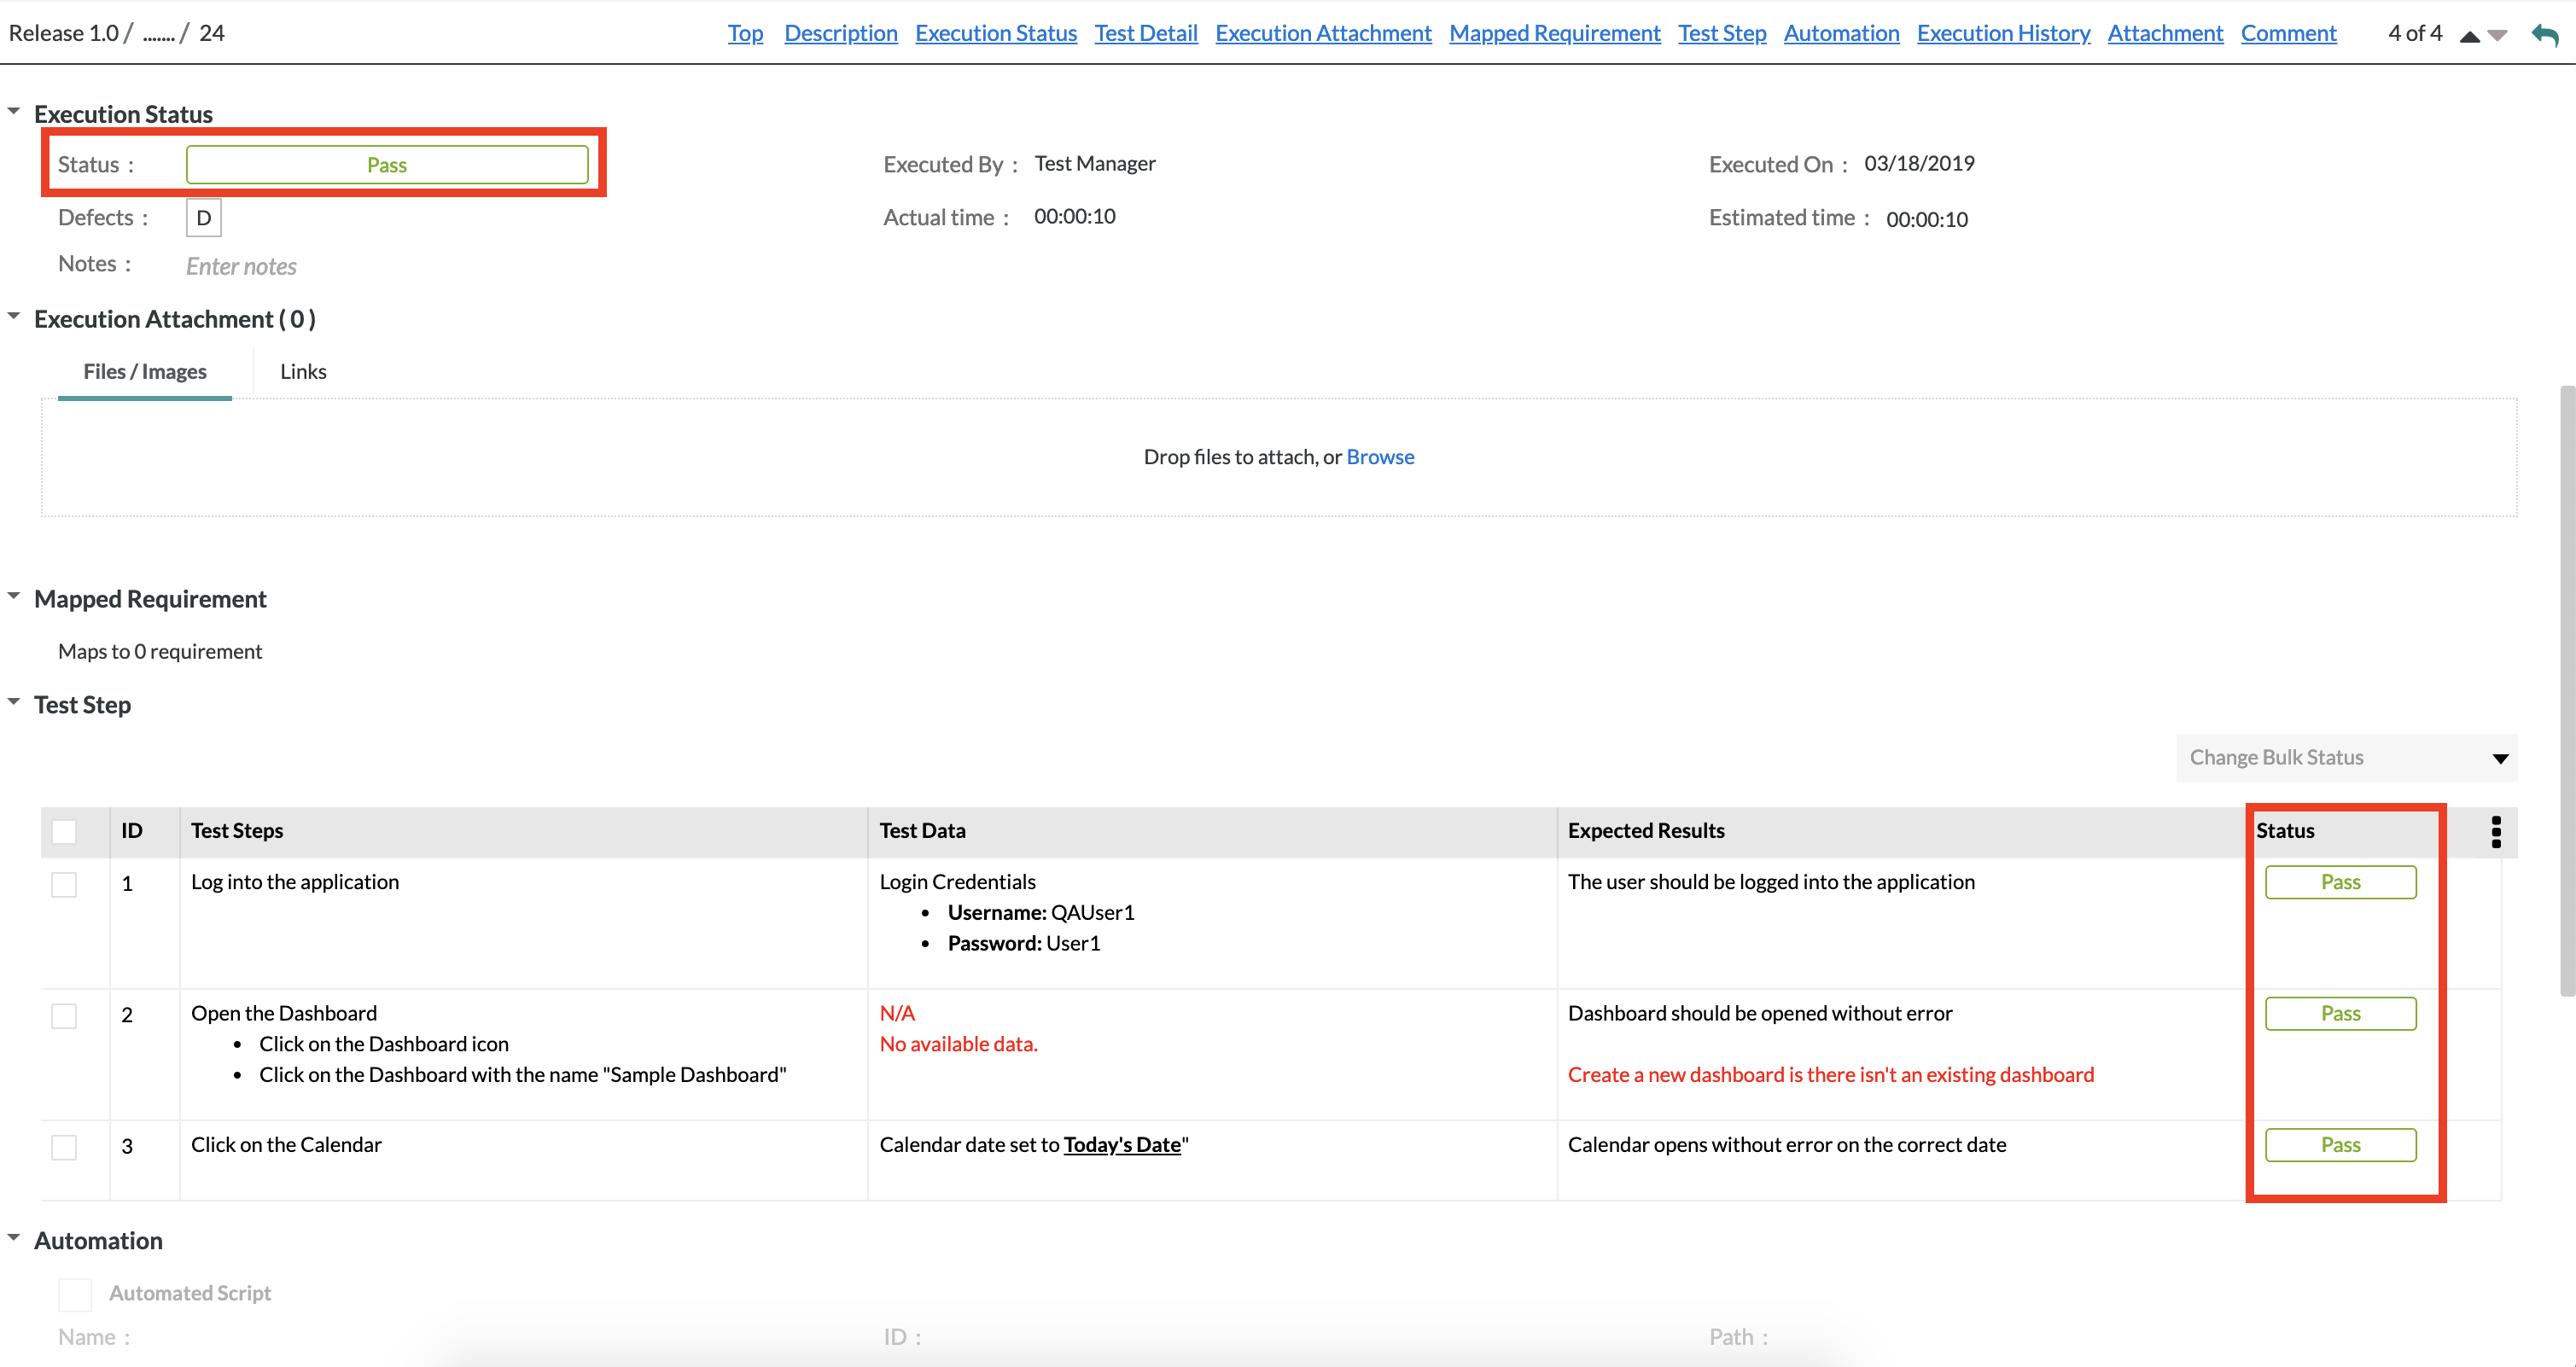
3. You can execute the test steps from in the test steps table using the drop-down list within the "Status" column.
- By default, all non executed test steps will have a status of "Not Executed".
By default, the statuses are: Pass, Fail, WIP (Work in Progress), and Blocked.
- The statuses can be customized and changed within the administration section of Zephyr. Administrators have the ability to change the default statuses.
Auto-Updating Test Case Execution Status Enhancements
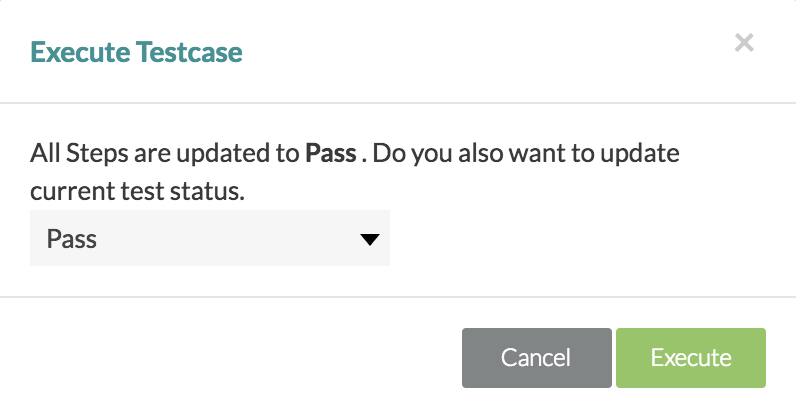
- When updating the test steps, the overall test case execution status will be also get updated automatically or a suggestion pop-up will be displayed that prompts the user if they want to update the current overall test case execution status.
- By default, all projects have the suggestion pop-up for the execution status update.
- To change the configuration to get the status update automatically, the user needs to enable the flag "Auto-update execution status based on test step result" in the project setup for the specific project in which the user wants to have the status update automatically.
Rules for auto-updating the Test Case Execution status based on the Test Step Execution status updates
- If 1 test step is set to Fail then the Execution will be set to Fail
- If 1 test step is set to Blocked but there are no Fails then the Execution will be set to Blocked
- If 1 test step is set to WIP but there are no Fails and nothing Blocked then the Execution will be set to WIP
- If 1 test step is set to Pass but there are no Fails and nothing Blocked then the Execution will be set to WIP
- If 1 test step is set to a Custom Status but there are no Fails and nothing Blocked then the Execution will be set to WIP
- If ALL test steps are set to Pass then the Execution will be set to Pass
- If ALL test step are set to a Custom Status then the Execution will be set to the Custom Status (Only if the test step status name and execution status name are the same)
Auto Updating Test Case Execution Status Limitations
- If the user has enabled the flag "Auto-update execution status based on test step result" in the project setup and the test step status name and execution status name does not match then the user will get the suggestion pop-up to execute the Test.
4. You can execute the overall test case by updating and changing the status within the "Execution Status" section by simply clicking on the status drop-down list and choosing a status from the following:
Pass, Fail, WIP (Work in Progress), and Blocked.
5. After selecting the status, the status of the test case is automatically updated and the test case is now executed.
- You can change the status of the test execution at any time. If a test execution status was marked as "Fail", you can go back and change the status whenever you want.
Bulk Executing Test Steps
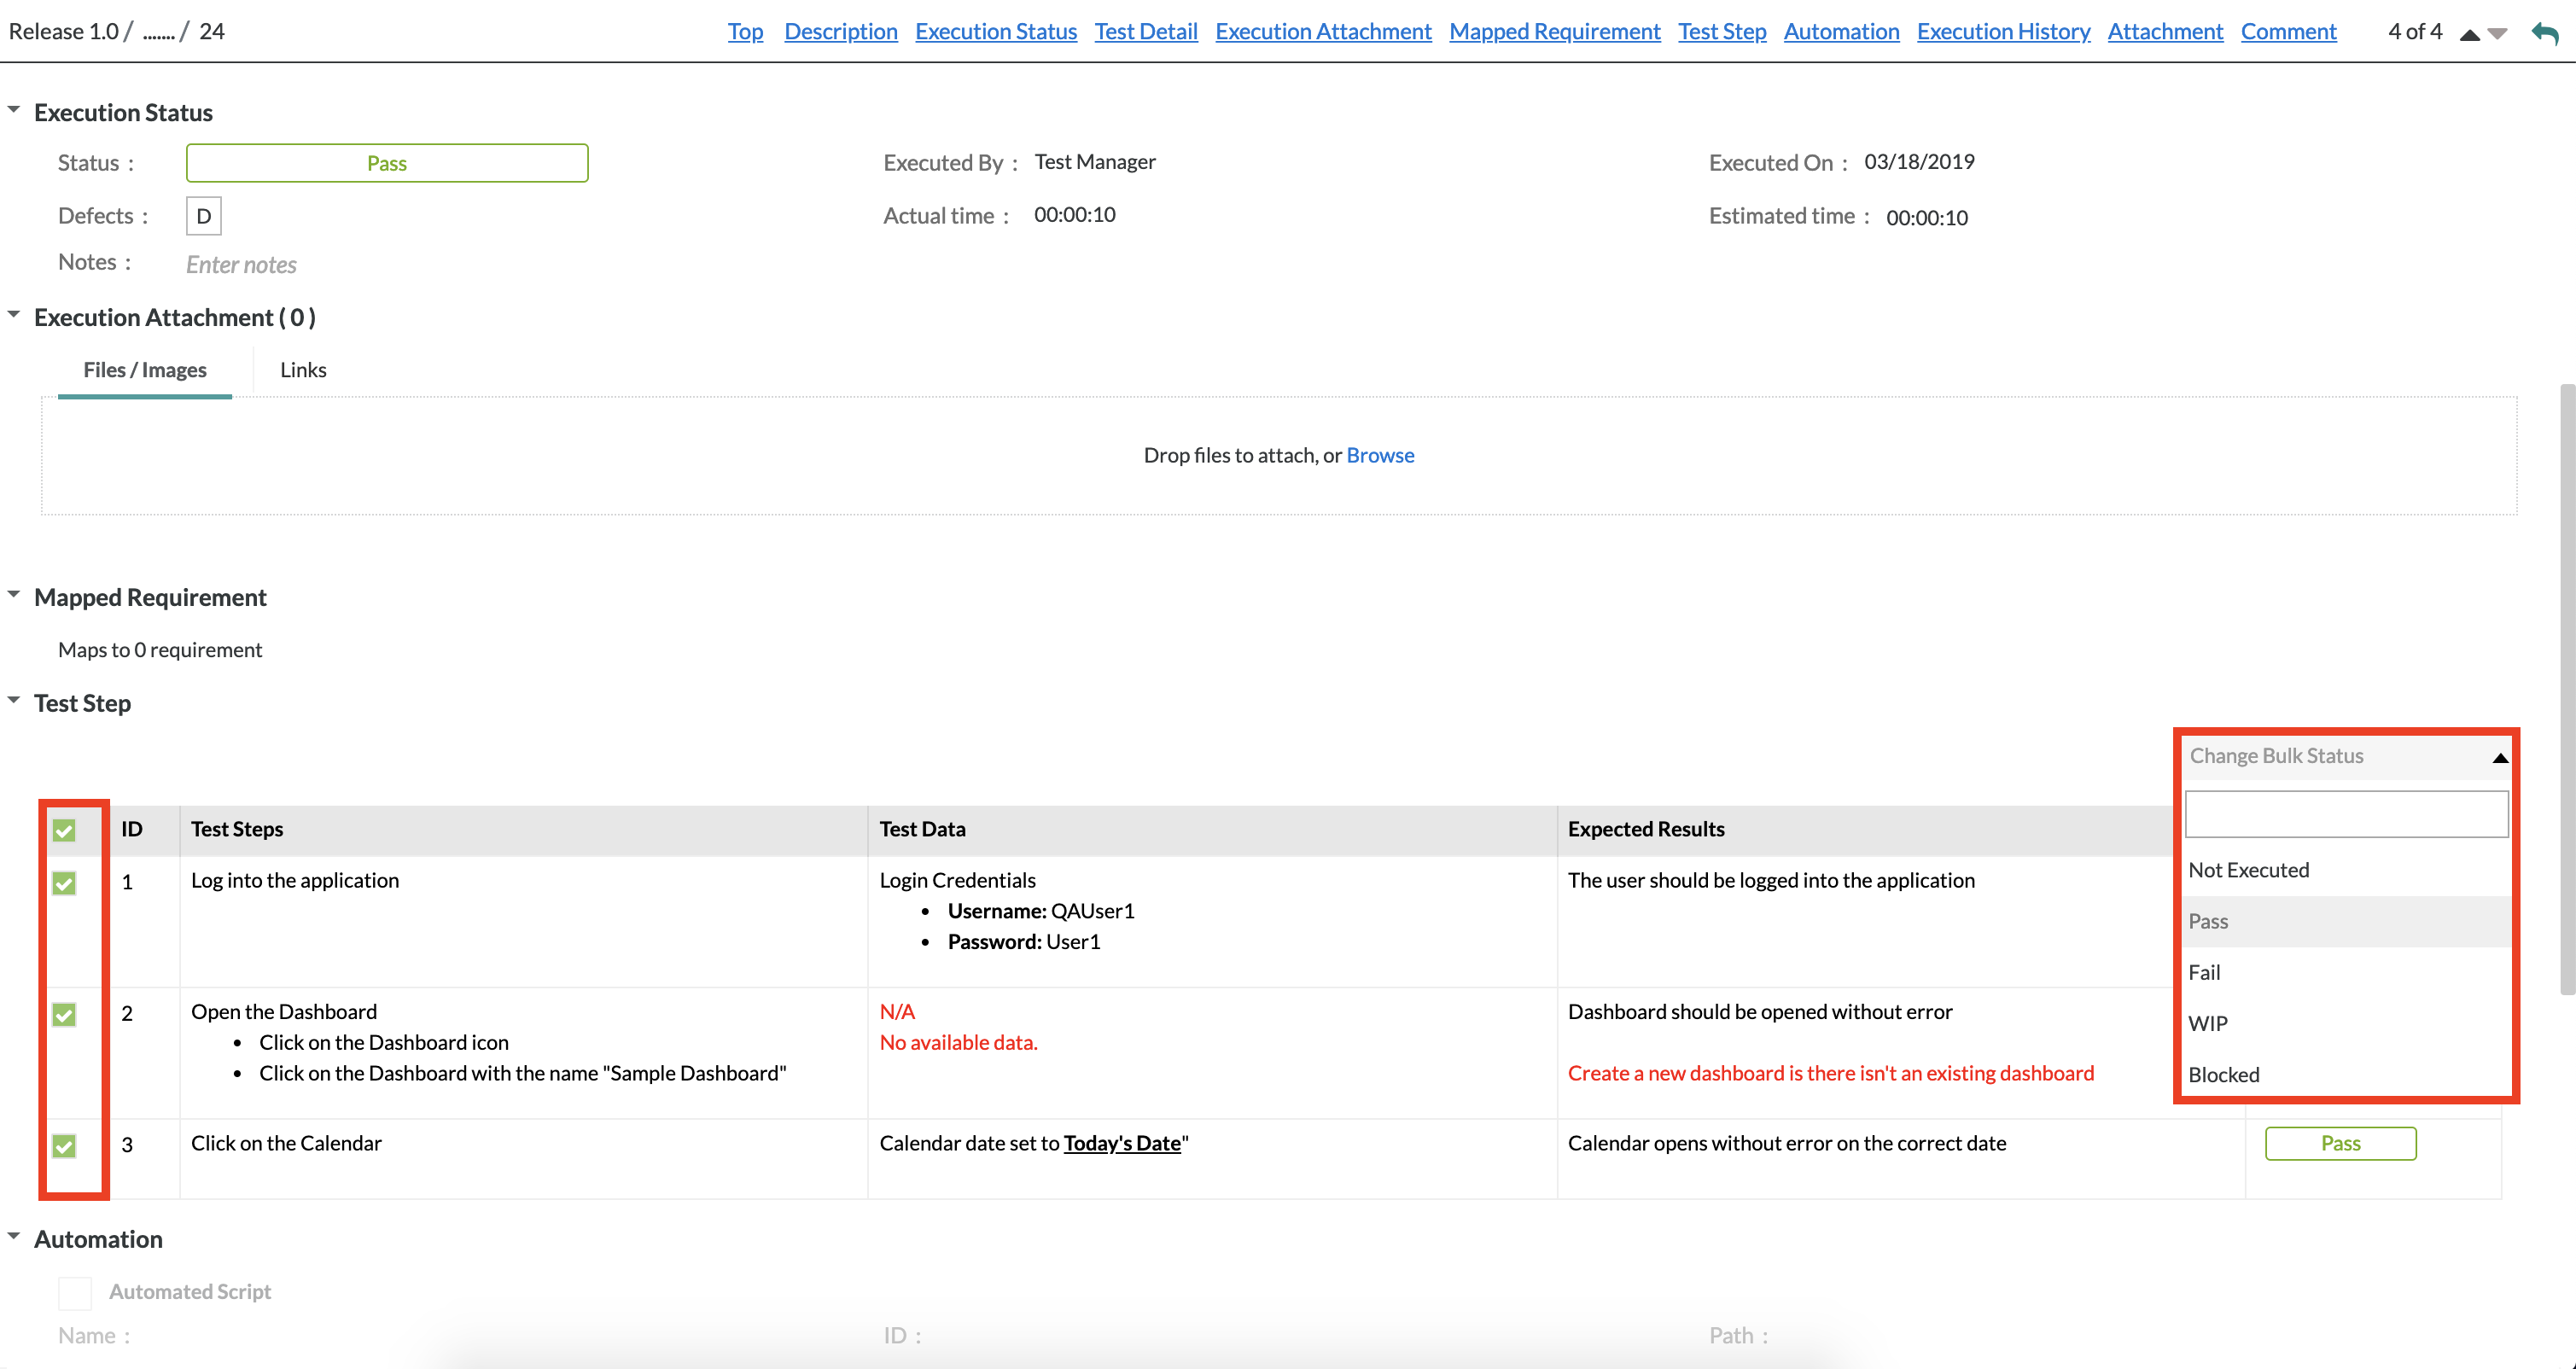
1. To bulk execute the test steps, simply select the test steps that you want to bulk execute by using the checkboxes located on the left-hand side of the table under the "Test Step" section.
2. After selecting the desired test steps, use the "Change Bulk-Status" drop-down list in the top right of the "Test Step" section.
3. Simply select a status to execute the test steps from the following list:
- Pass, Fail, WIP (Work in Progress), and Blocked.
- This will bulk execute the selected test steps.
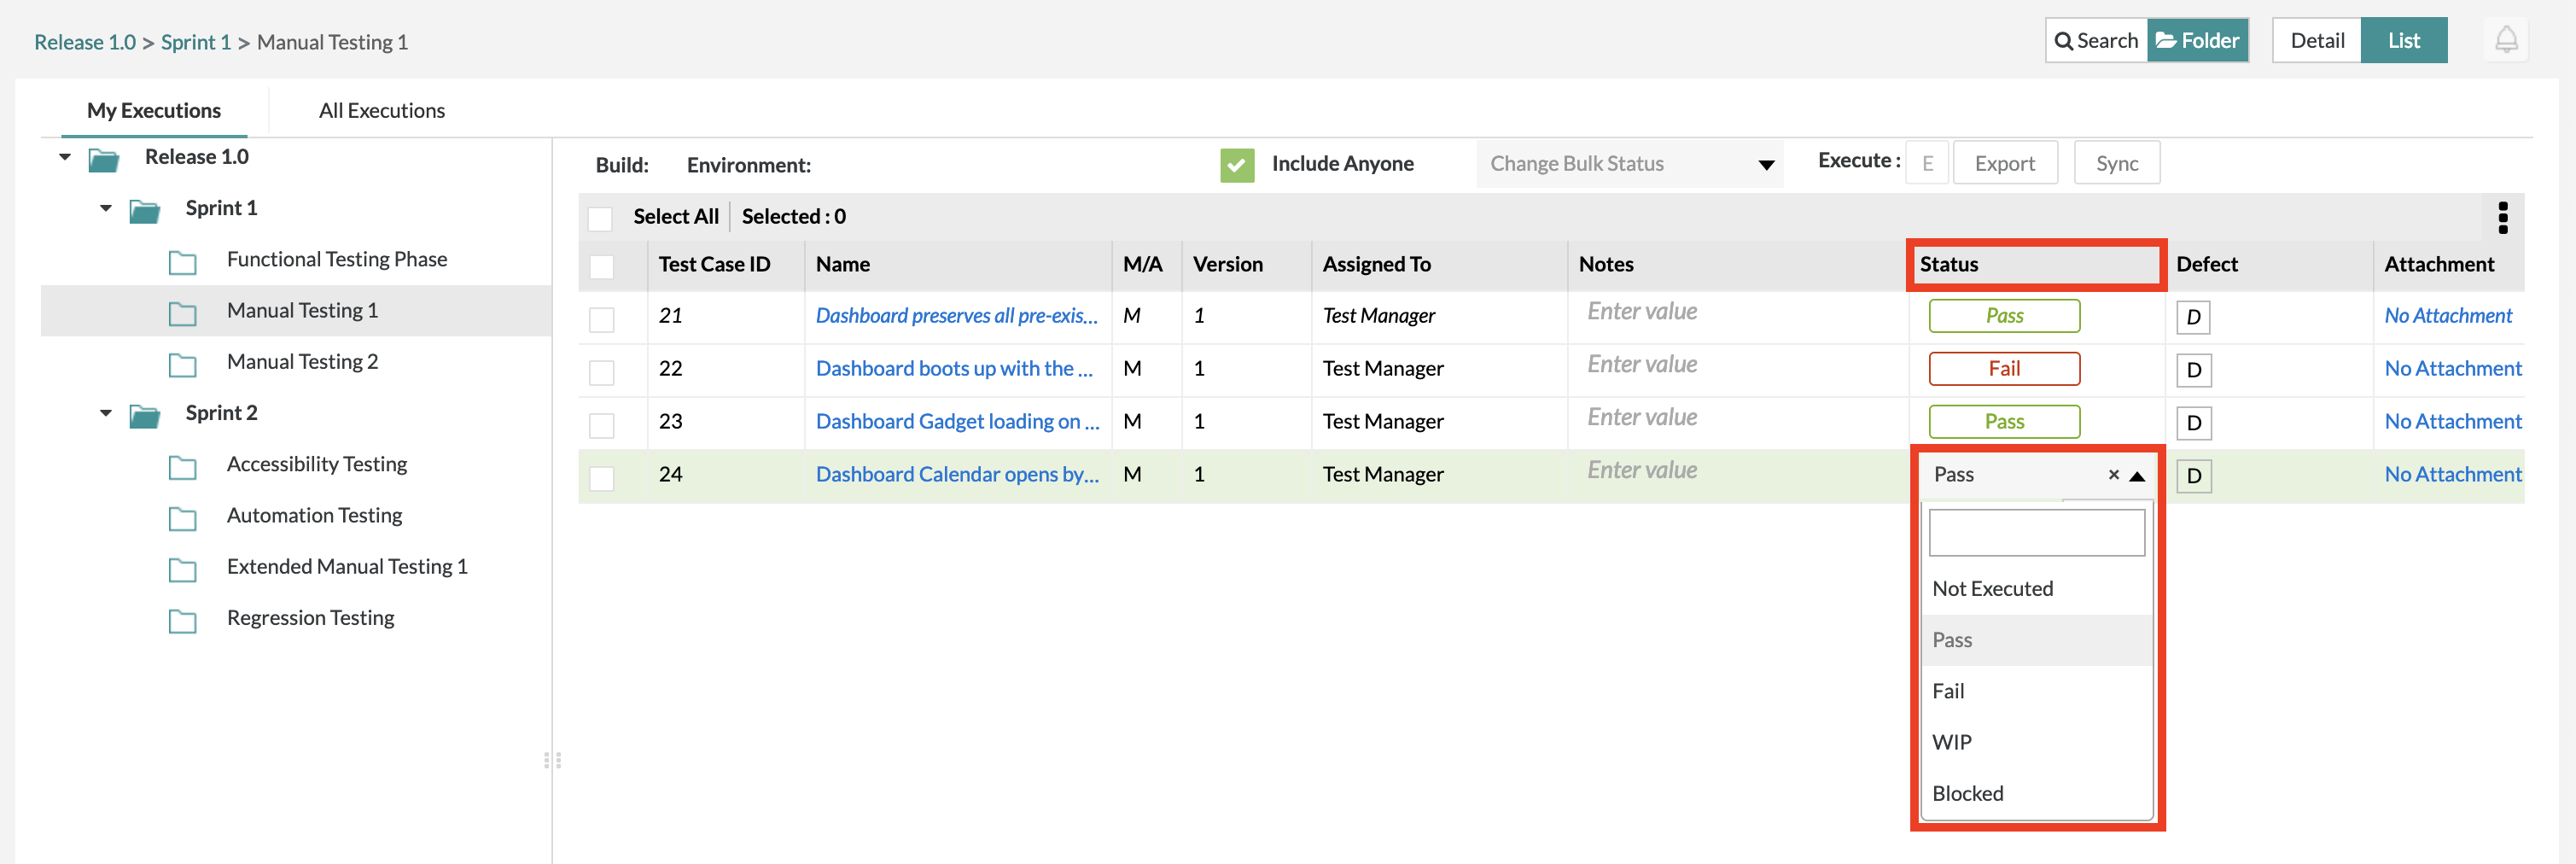
Individually Executing a Test Case Using the Table
1. Choose which test case that you want to individually execute in the test execution table.
2. In the table, there is a column row labeled as "Status". Navigate to the status of the test case that you want to individually want to execute.
- By default, all non executed test cases will have a status of "Not Executed".
3. Click on the status drop-down list in the table and choose from the list of statuses to update and execute the particular test case. By default, the statuses for test executions are: Pass, Fail, WIP (Work in Progress), and Blocked.
Additional Note
The statuses can be customized and changed within the administration section of Zephyr. Administrators have the ability to change the default statuses.
4. After selecting the status inline, the table should automatically update the status of the individual test case. The individual test case is now executed.
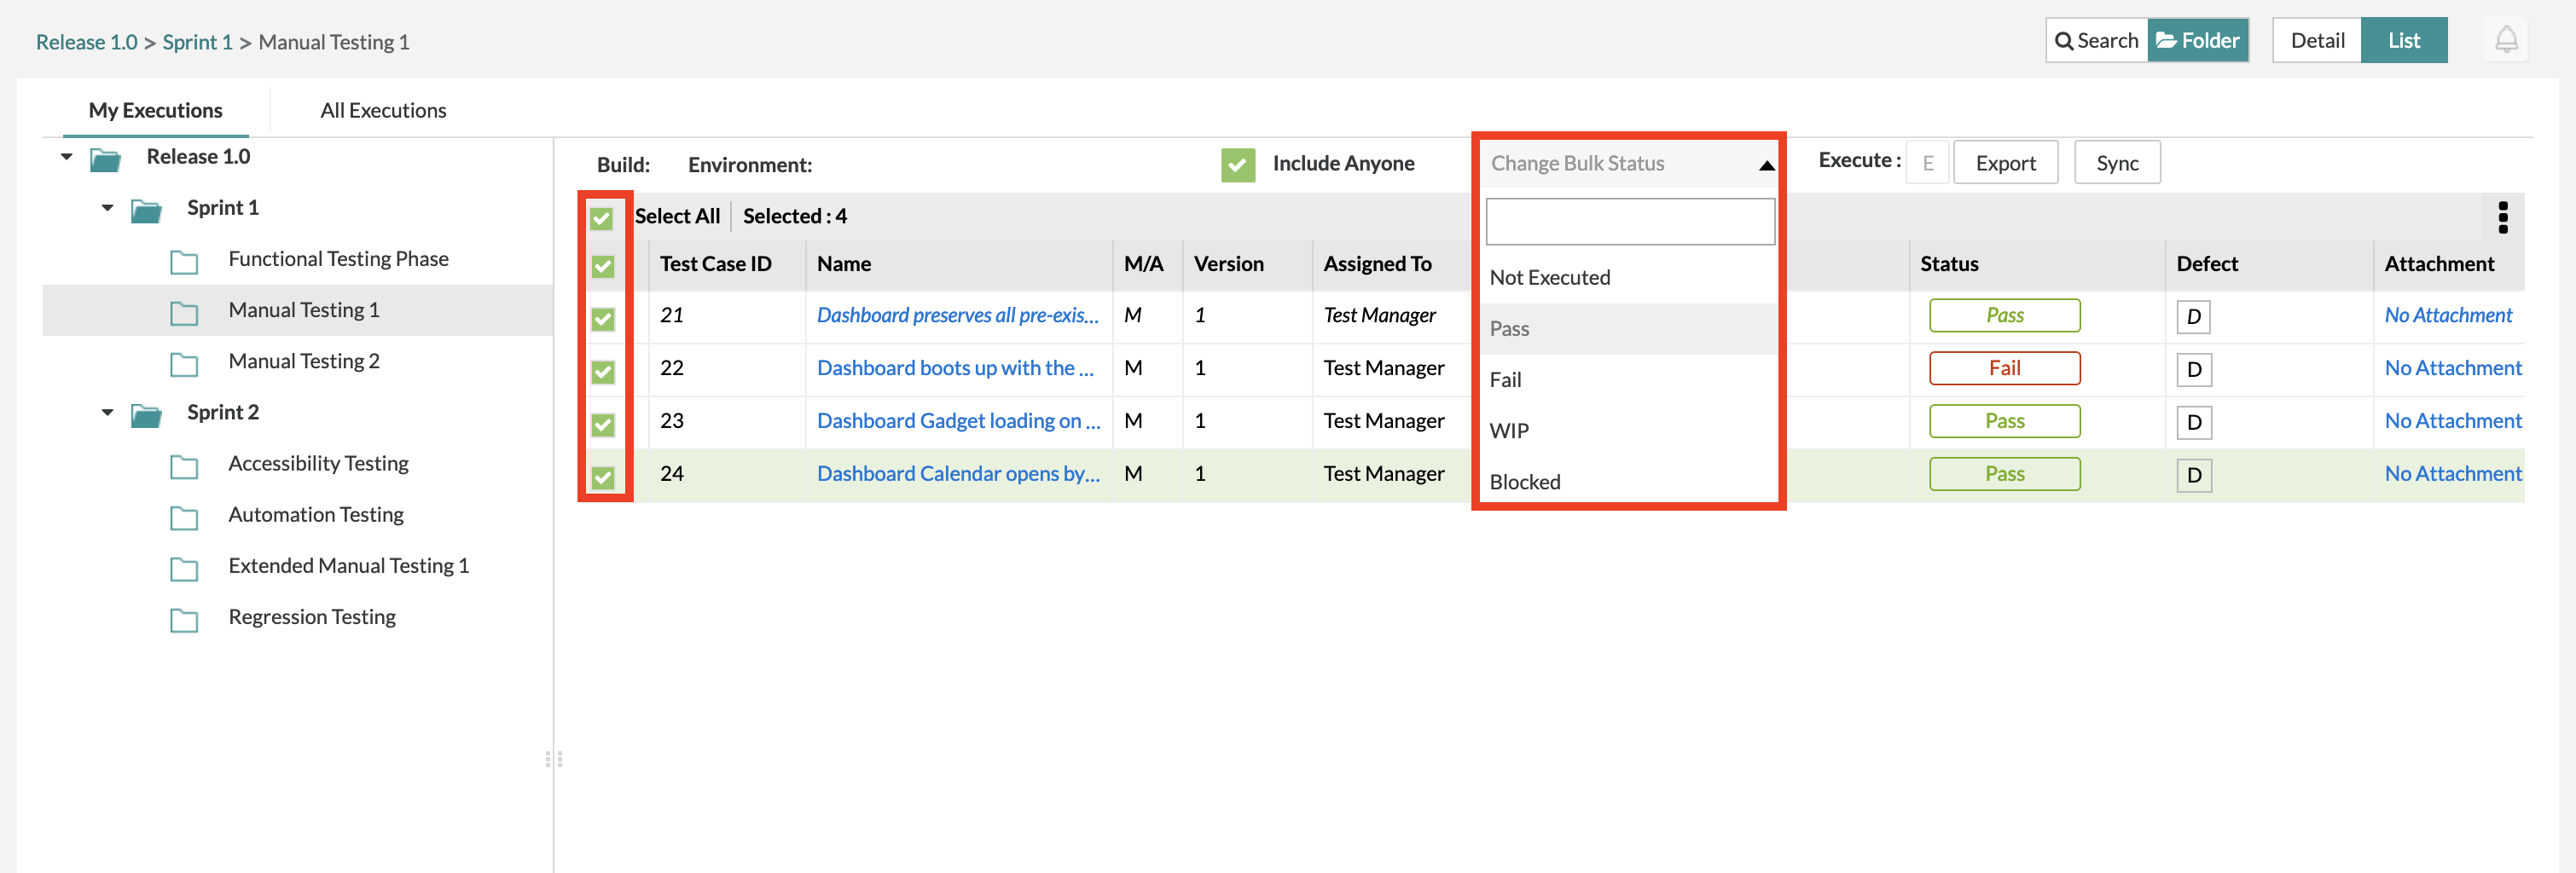
Bulk Executing Test Cases Using the Table
1. Select the test cases that you want you quickly bulk execute by using the check boxes on the left-hand side of the table.
2. Click on the "Change Bulk Status" drop-down list at the top center of the interface (right above the test execution table).
3. Choose from the list of statuses to update and execute the selected test cases. All non executed test cases will have a default status of "Not Executed". By default, the statuses for test executions are: Pass, Fail, WIP (Work in Progress), and Blocked.
Additional Note
The statuses can be customized and changed within the administration section of Zephyr. Administrators have the ability to change the default statuses.
4. After selecting the status, the table should automatically update the statuses of your selected test cases. These test cases are now executed.
