Managing Cycles
- Kevin Pham (Deactivated)
Analytics
Adding a Cycle
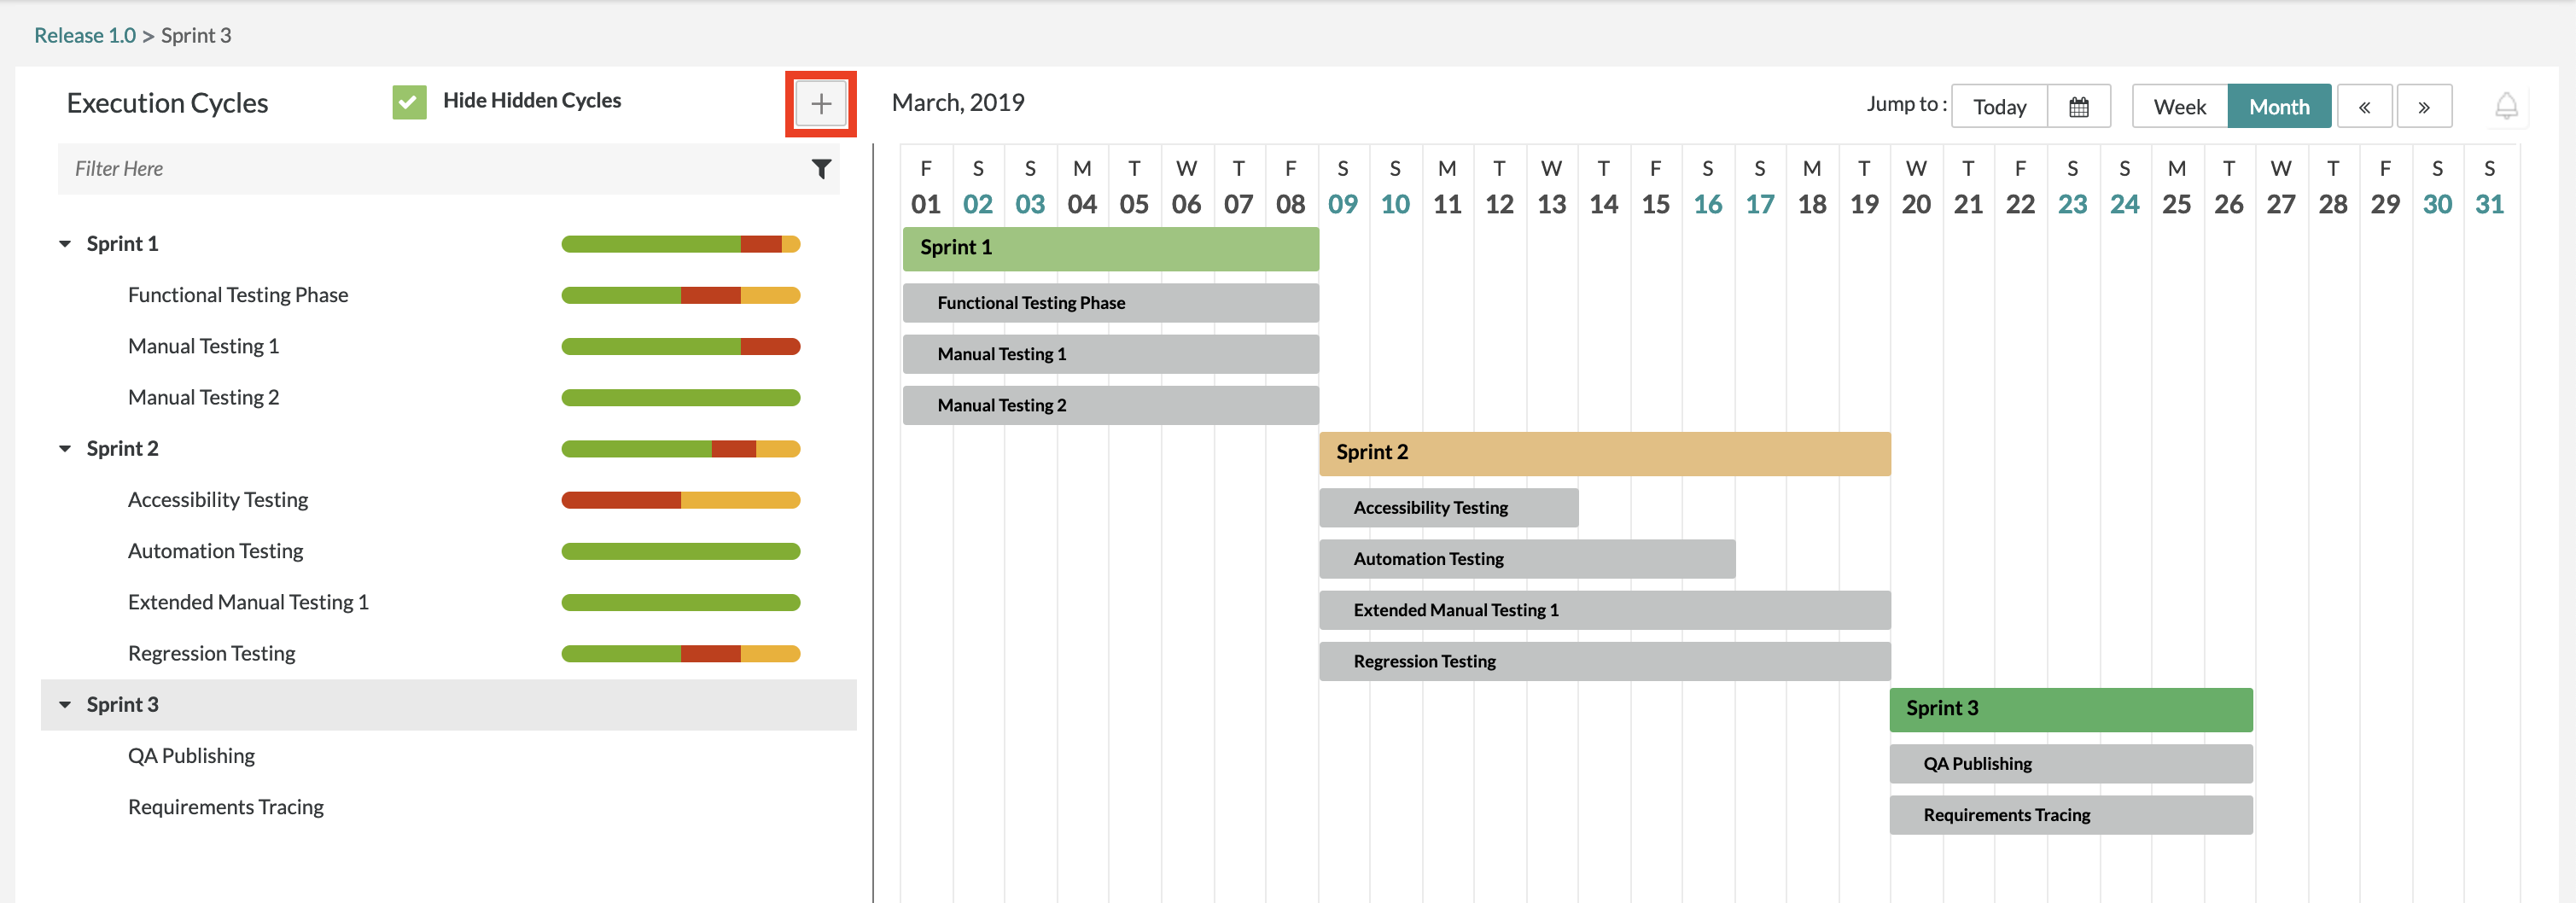
1. Click on the ![]() button towards the top left of the interface.
button towards the top left of the interface.
- A pop-up/modal will appear with additional fields to fill out to add a testing cycle.
2. Fill in the mandatory fields for adding a cycle:
- Name, Start Date, and End Date are mandatory fields.
- Name - The name of the testing cycle that is displayed in the schedule for test planning.
- Start Date - The start date for the test execution cycle.
- End Date - The end date for the test execution cycle.
- Build, Environment, and Hide are optional fields.
- Build - The field used to define the build/version/patch of the software that is being tested.
- Environment - The field used to define which environment that the tests are being executed/run on.
- Hide - The ability to hide this test cycle from being viewed (Test Planning and Test Execution view hidden).
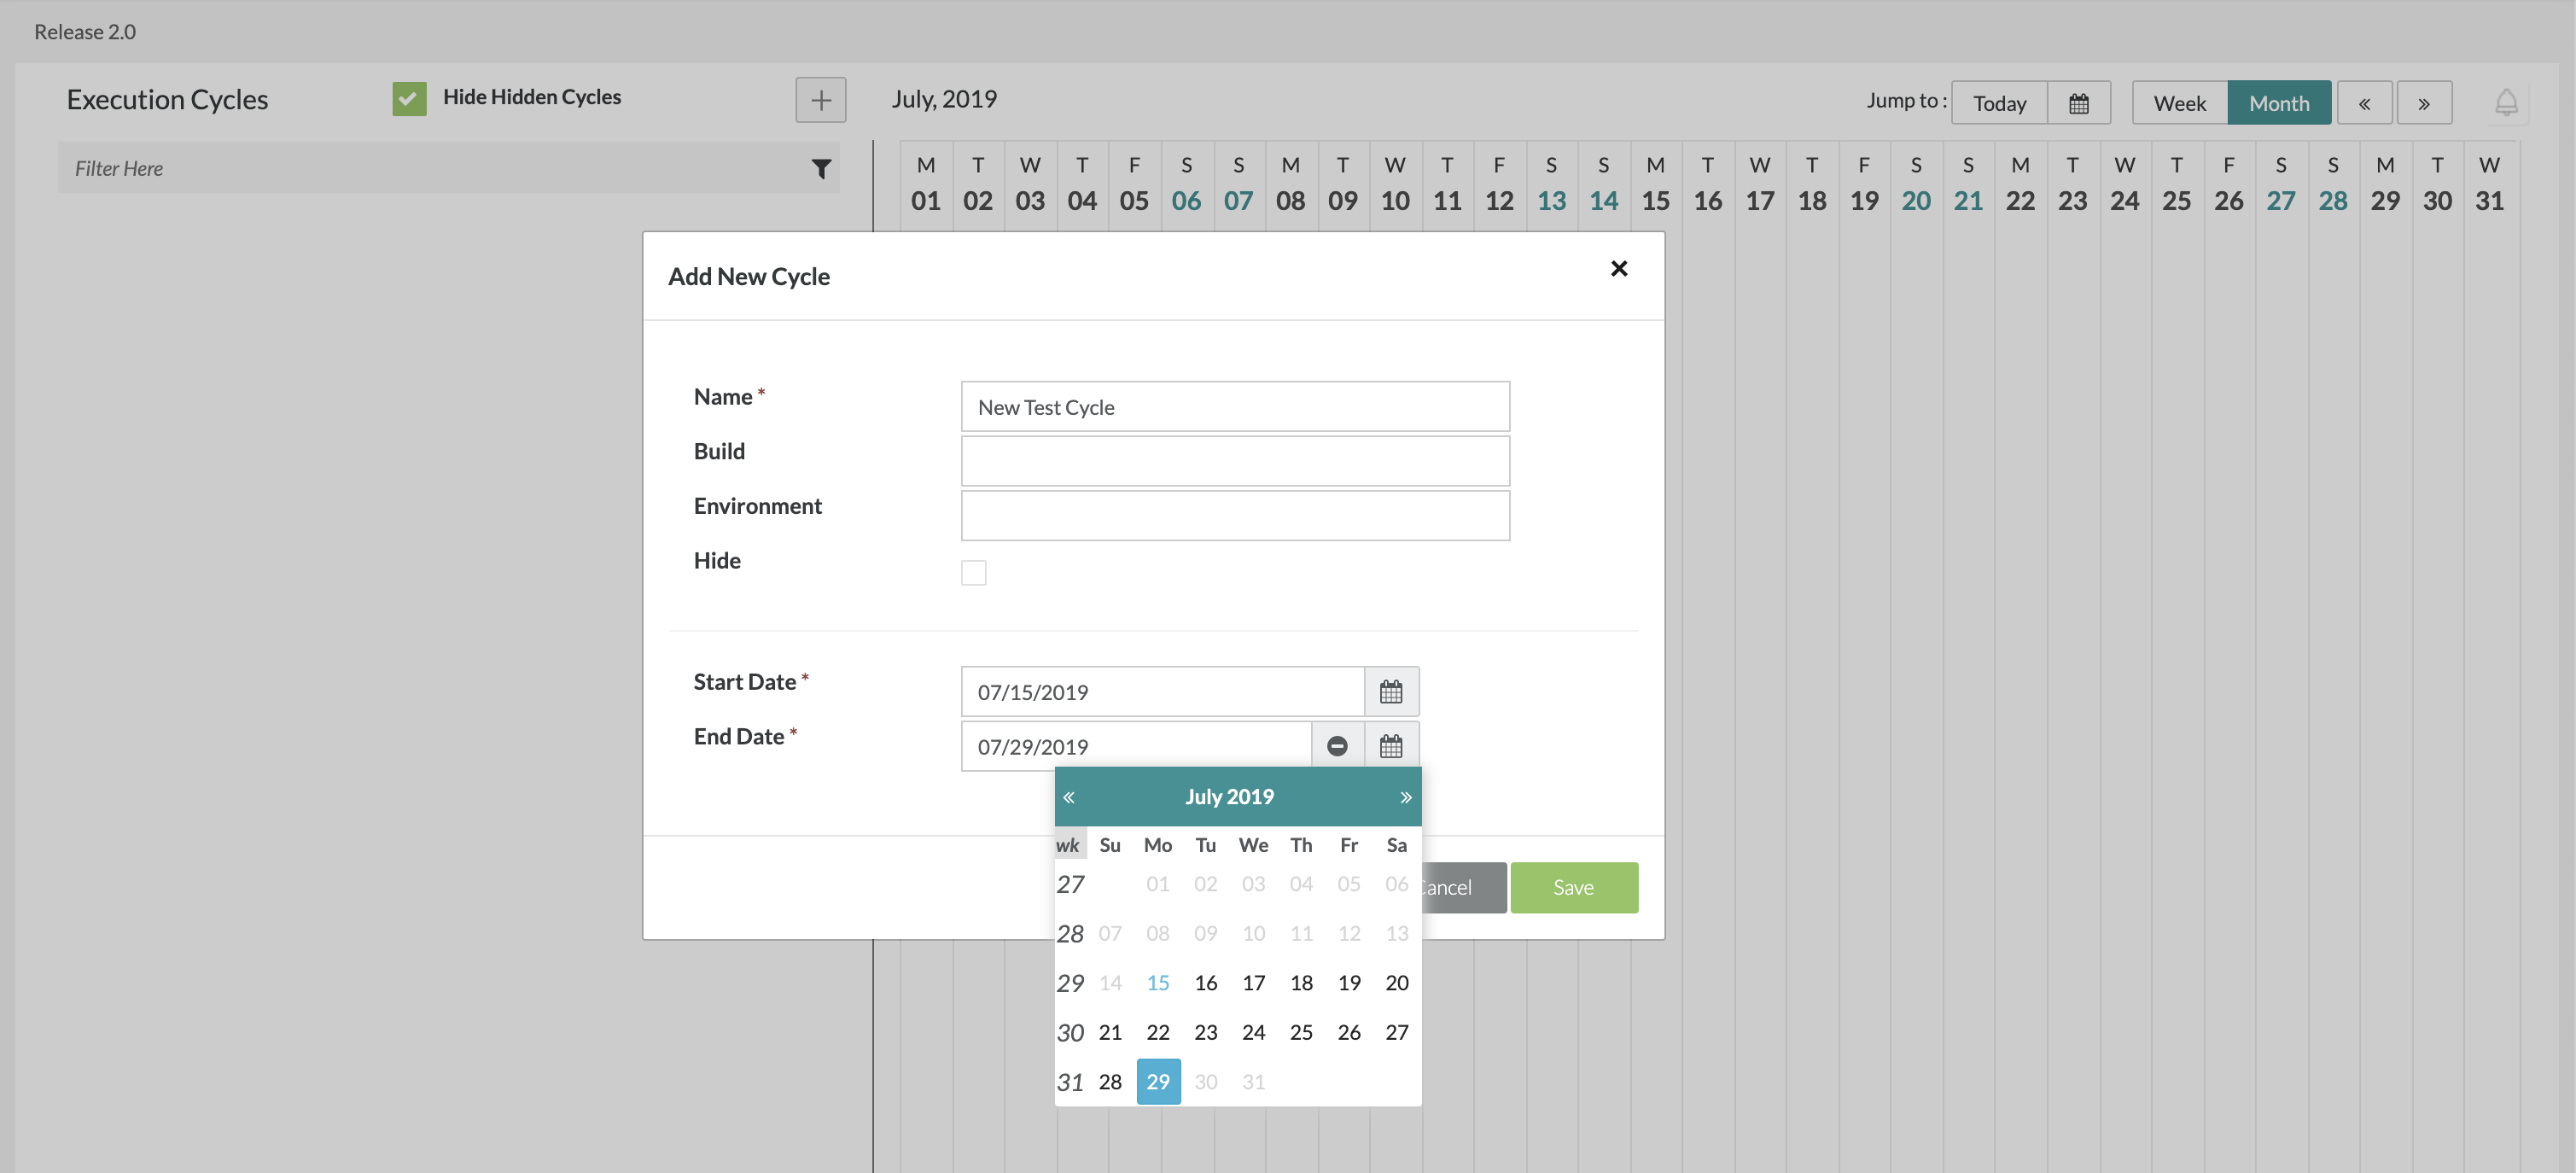
When creating a cycle, the start and end dates will be auto-populated with the start and end dates to match the current release. Users are prevented from creating cycles that go beyond the release dates. For example, if we look at the release date below, we can see the release start date is 07/15/2019 and the end date is 07/29/2019.
When we create a new cycle in that specific release, the start date will automatically be set to the start date of the release which is 07/15/2019 and the end date will match the release end date which is 07/29/2019. Users can change the start and end dates for the test cycle but the dates selected cannot go beyond the original release dates.
3. After filling in the fields, click on the "Save" Button to finalize any changes and create the cycle.
Editing a Cycle
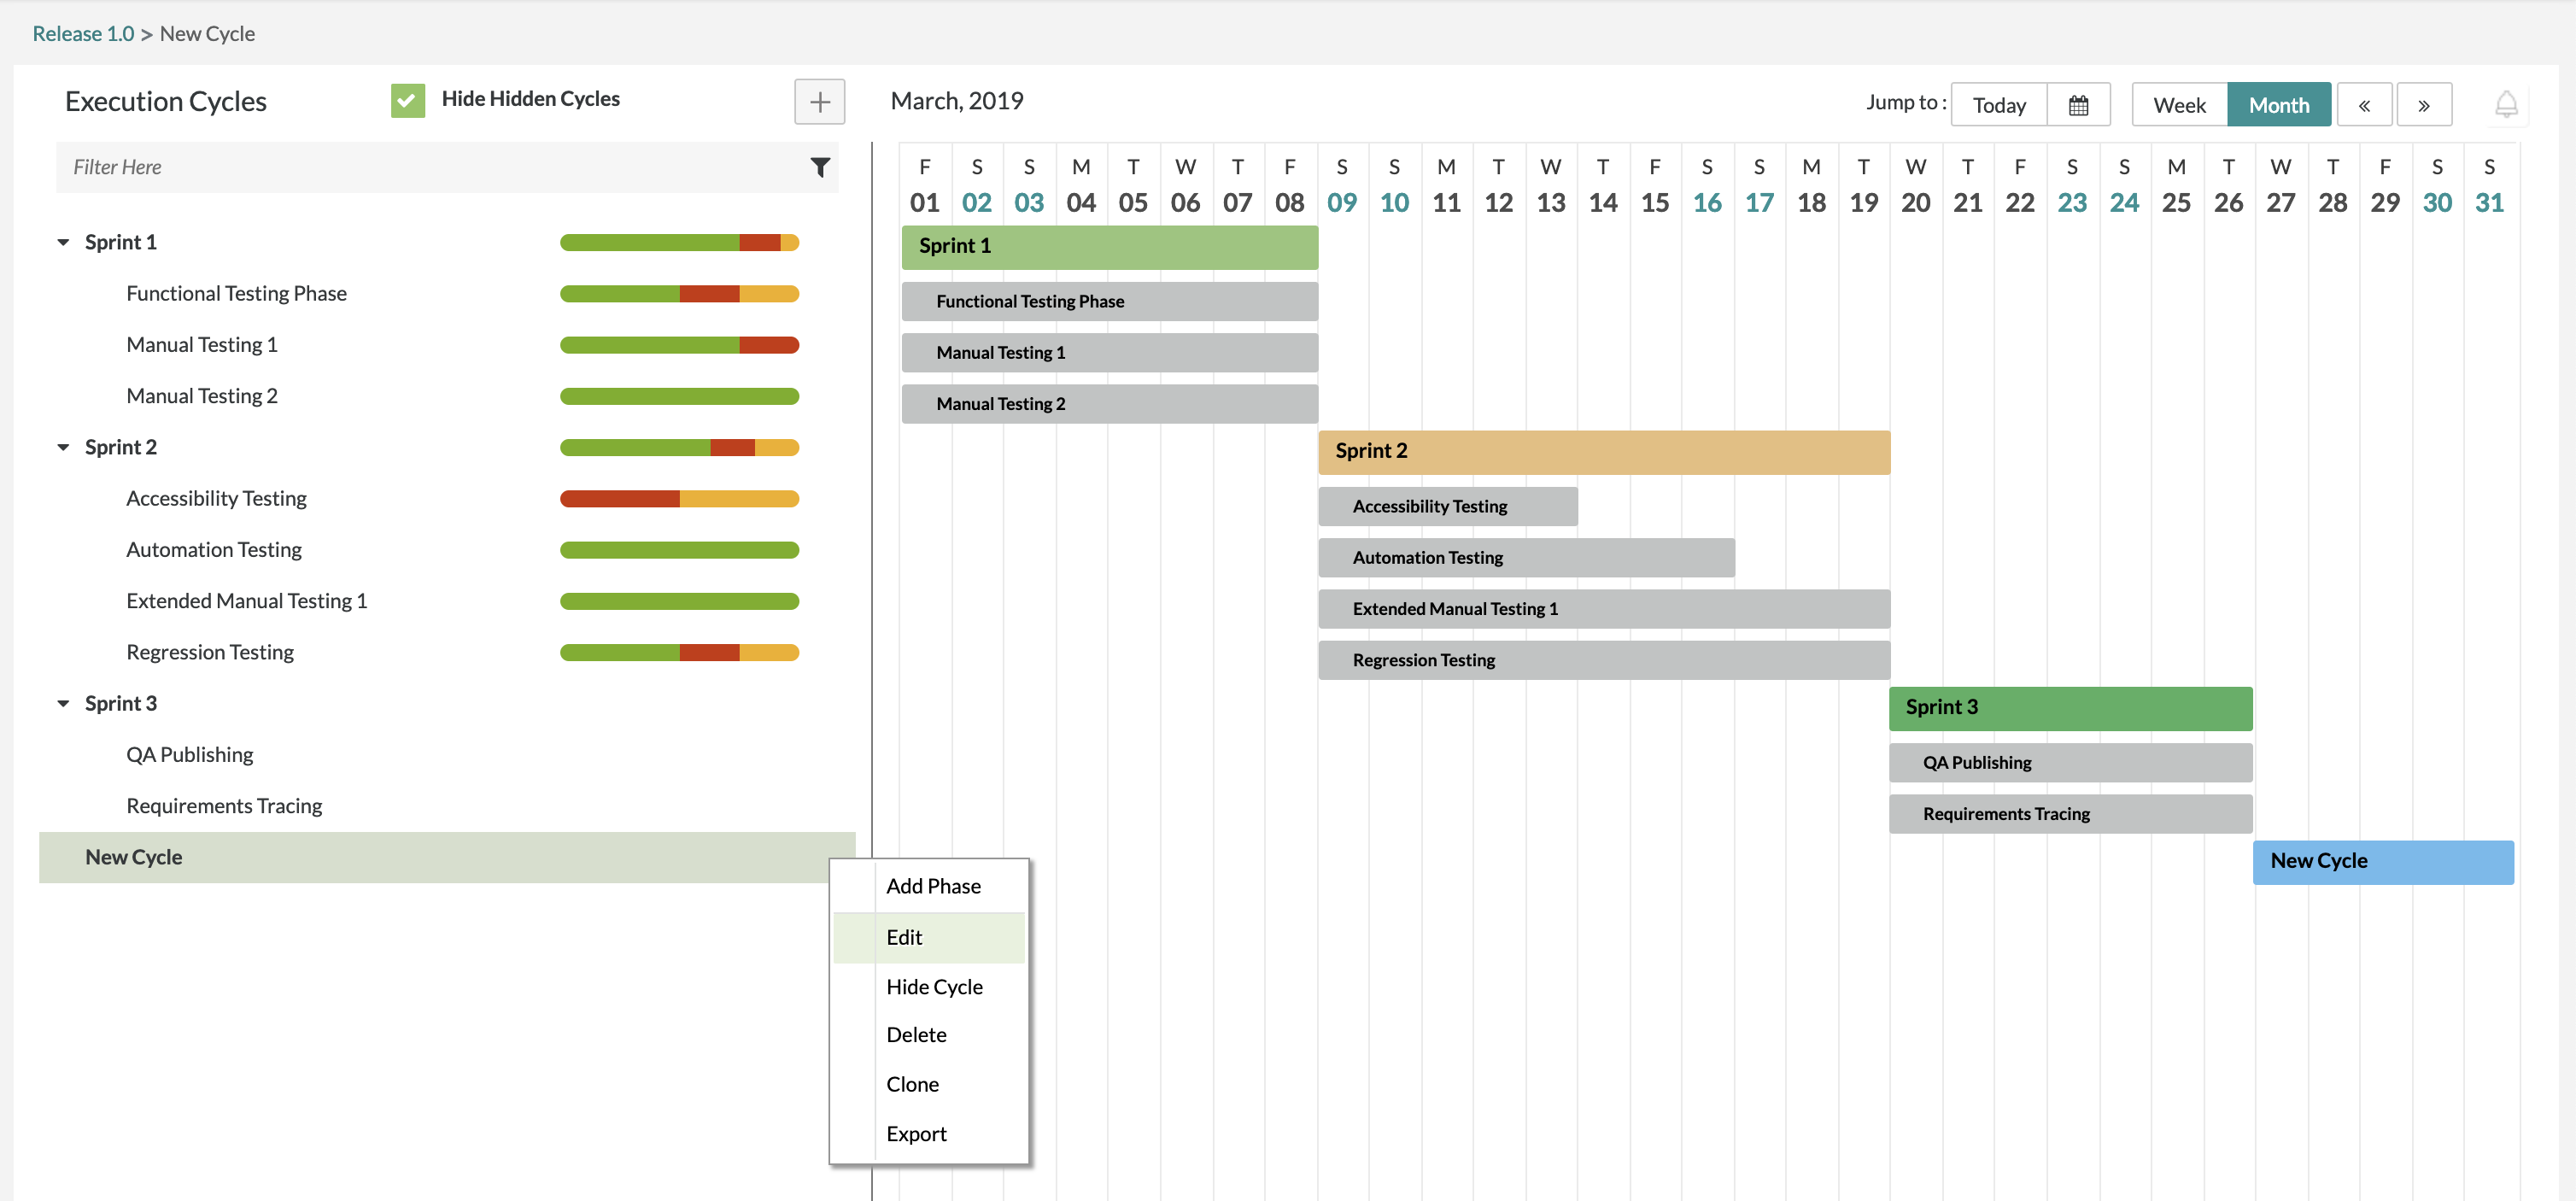
1. Click on the ![]() button on the test cycle that you want to edit and click on "Edit".
button on the test cycle that you want to edit and click on "Edit".
- A pop-up/modal will appear with ability to edit the fields for the testing cycle and the ability to edit the start/end date for each individual test phase within that specific testing cycle.
2. Change/Edit any of the fields for the testing cycle:
- Name, Start Date, and End Date are mandatory fields.
- Name - The name of the testing cycle that is displayed in the schedule for test planning.
- Start Date - The start date for the test execution cycle.
- End Date - The end date for the test execution cycle.
- Build, Environment, and Hide are optional fields.
- Build - The field used to define the build/version/patch of the software that is being tested.
- Environment - The field used to define which environment that the tests are being executed/run on.
- Hide - The ability to hide this test cycle from being viewed (Test Planning and Test Execution view hidden).
When we editing a cycle in that specific release, the users can change the start and end dates for the test cycle but the dates selected cannot go beyond the original release dates.
3. After filling in the fields, click on the "Save" Button to finalize any changes to the testing cycle.
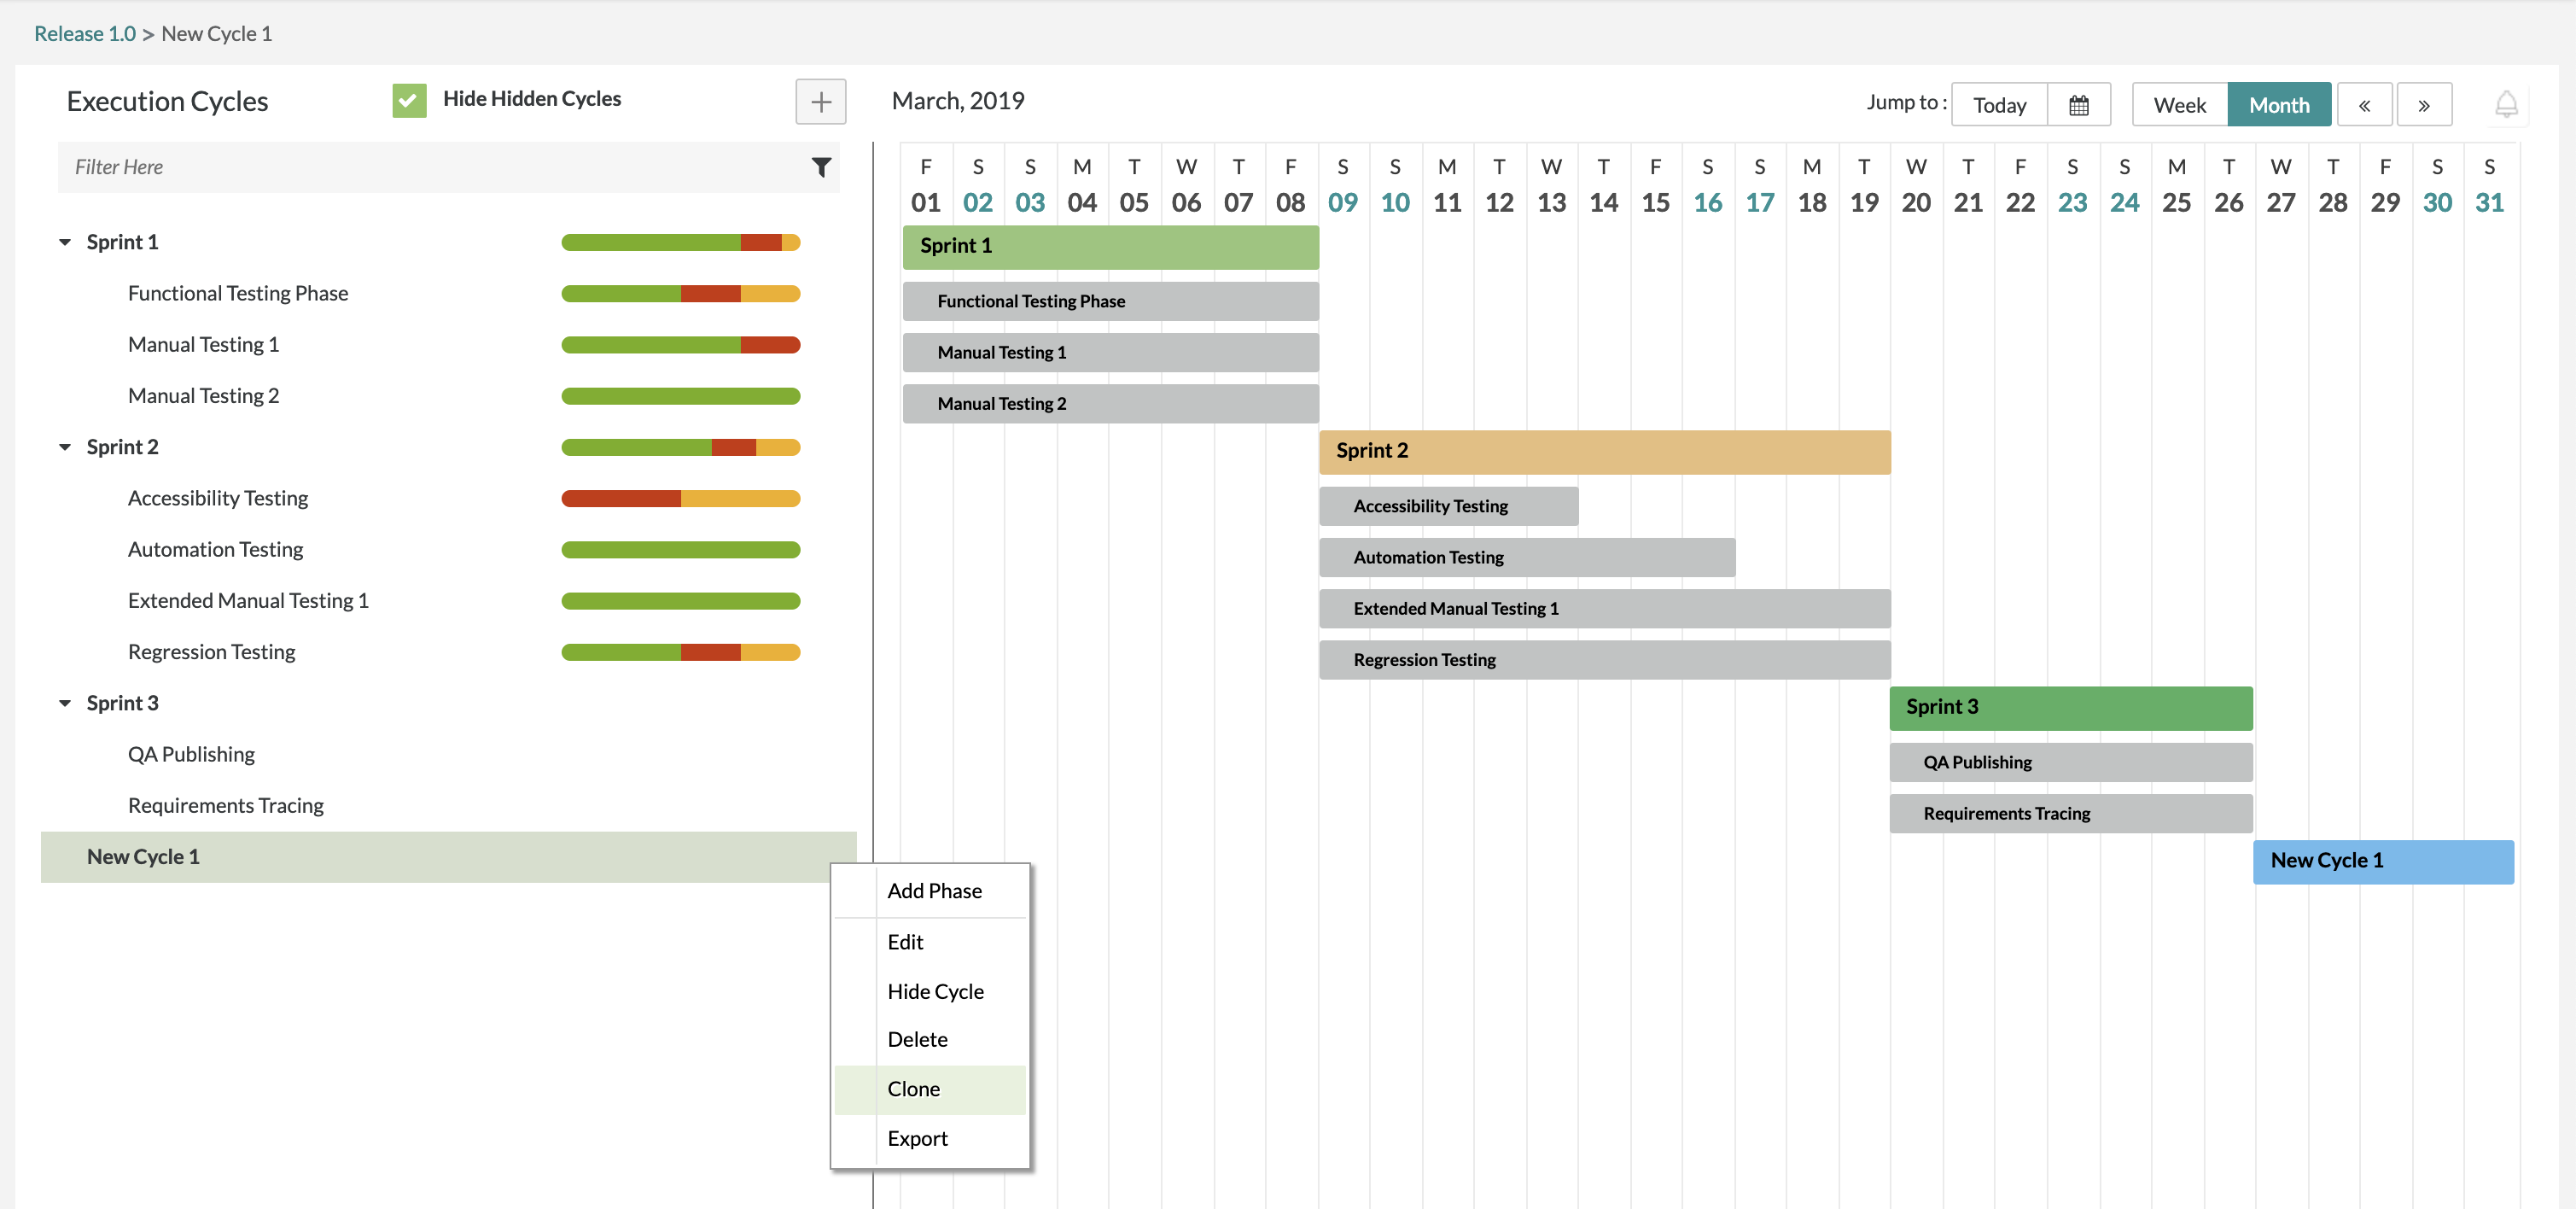
Cloning a Cycle
1. Click on the ![]() button on the test cycle that you want to clone and click on "Clone".
button on the test cycle that you want to clone and click on "Clone".
- A pop-up/modal will appear where you can change/edit the fields for a testing cycle.
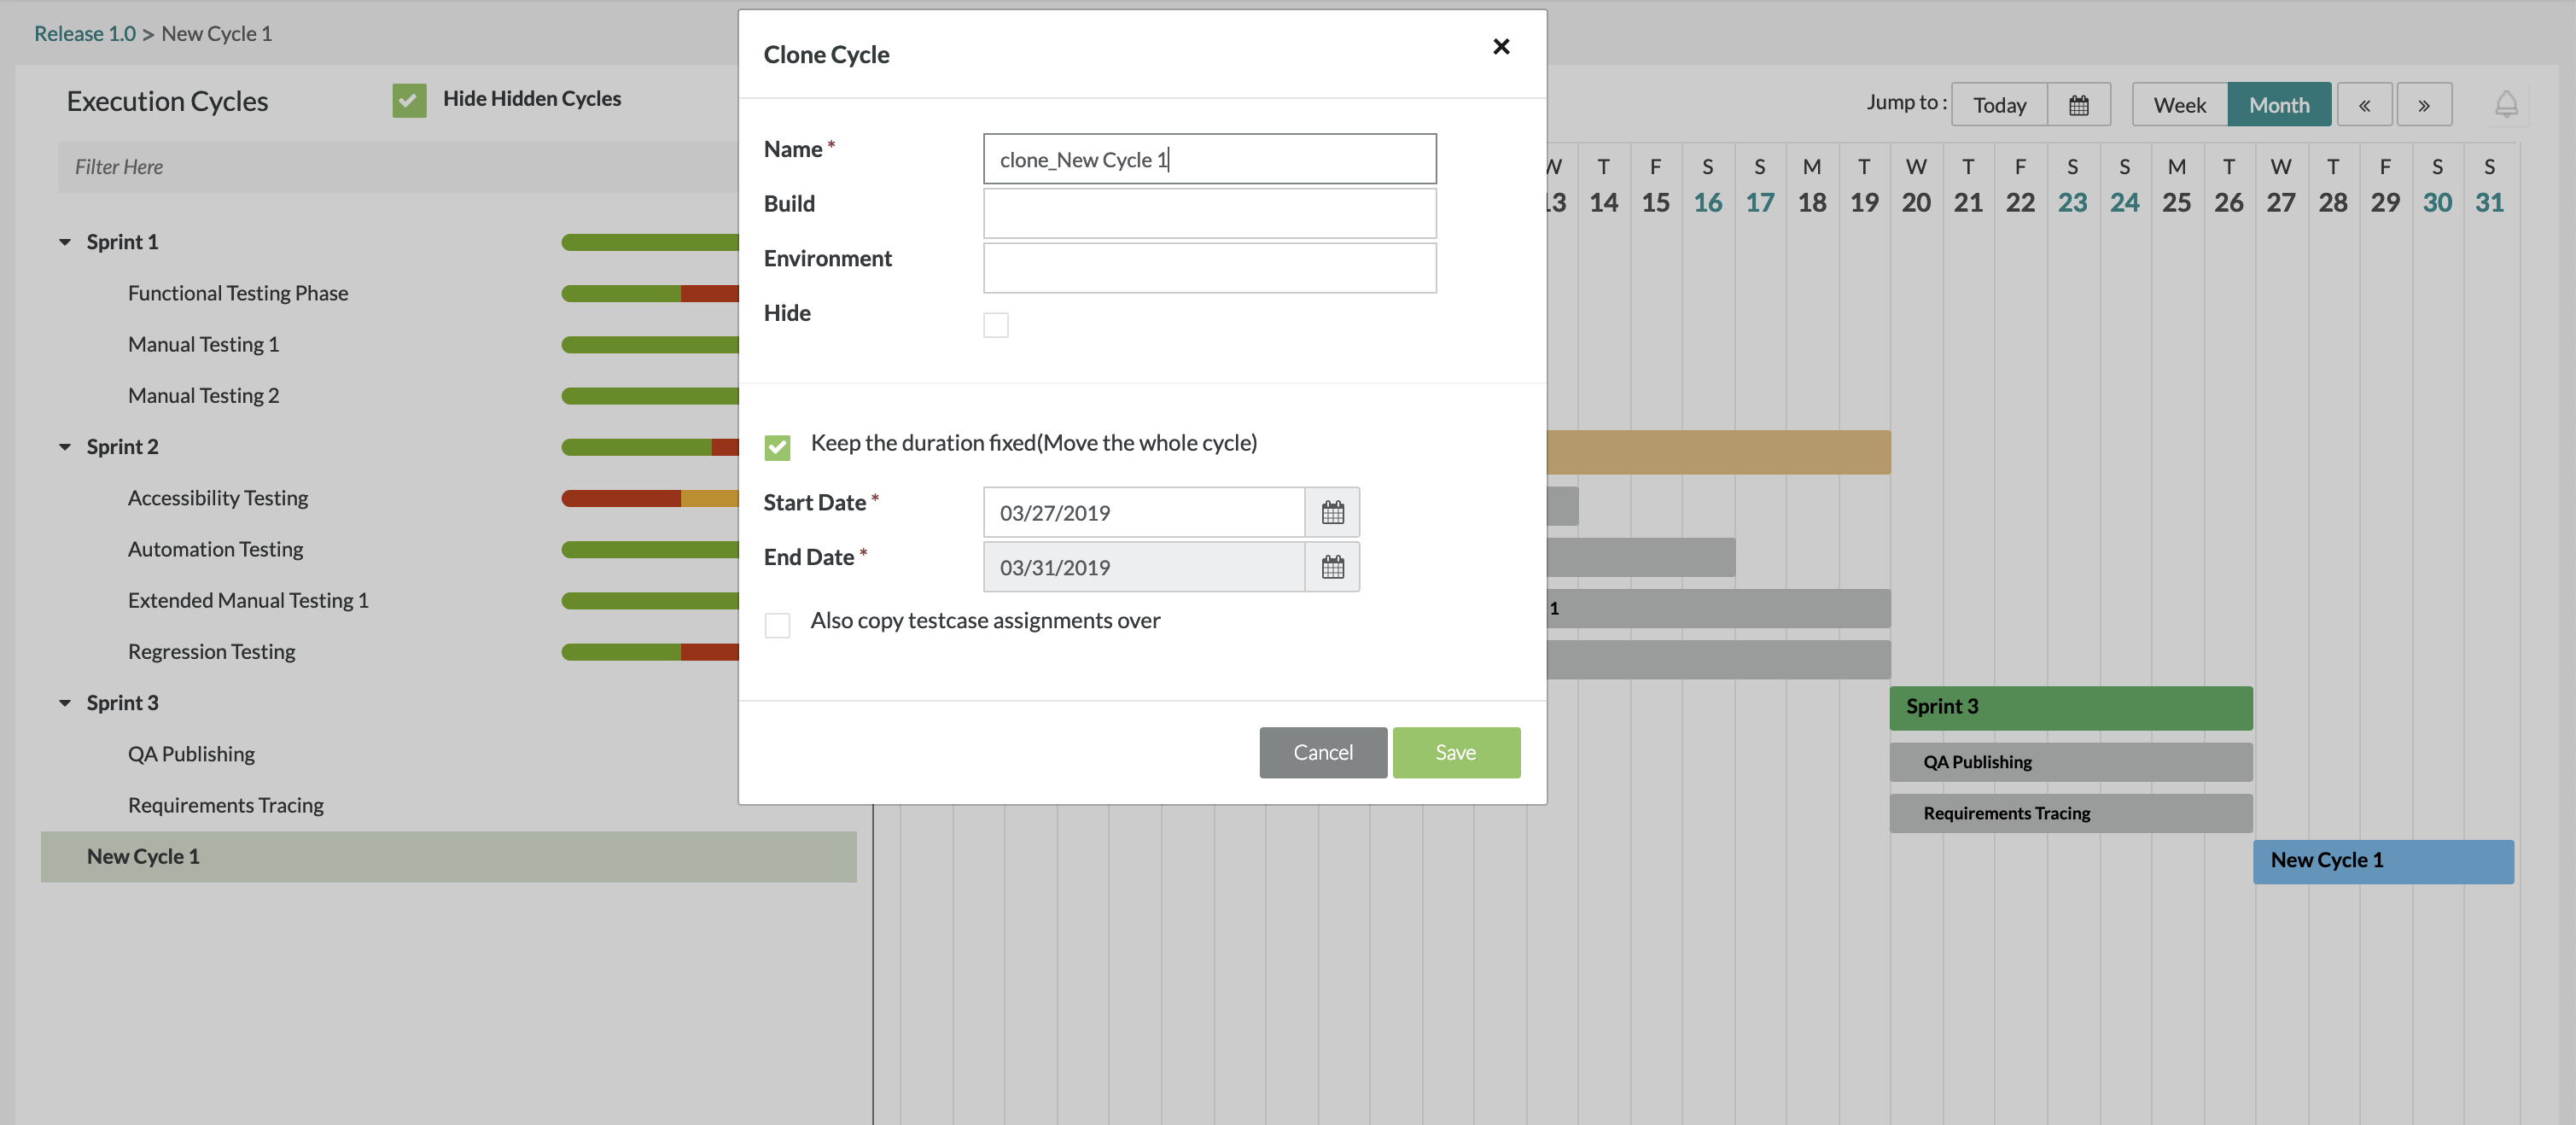
2. Change/Edit any of the fields for the testing cycle:
- Name, Start Date, and End Date are mandatory fields.
- Name - The name of the testing cycle that is displayed in the schedule for test planning.
- Start Date - The start date for the test execution cycle.
- End Date - The end date for the test execution cycle.
- Build, Environment, and Hide are optional fields.
- Build - The field used to define the build/version/patch of the software that is being tested.
- Environment - The field used to define which environment that the tests are being executed/run on.
- Hide - The ability to hide this test cycle from being viewed (Test Planning and Test Execution view hidden).
- Start Date and End Date for individual test phases can be changed from this view as well.
- Start Date - The start date for the test execution phase.
- End Date - The end date for the test execution phase.
Additional Notes
You are also able to keep the duration of the cycle fixed and then you would move the entire test cycle. No matter what date you move the cloned test cycle to, the duration of the test cycle will remain the same.
- For example, if the original duration of the test cycle is 7 days and you check off "Keep the duration fixed", the duration of the cloned cycle will be 7 days as well. You just have the ability to shift the start date and the end day will change to match the 7 days.
You are also able to copy the test case assignments over from the original test cycle which keeps all assignments for the test cases in the cycle.
- This can be done by checking off "Also copy testcase assignments over".
3. After filling in the fields, click on the "Save" Button to finalize any changes and to clone the testing cycle.
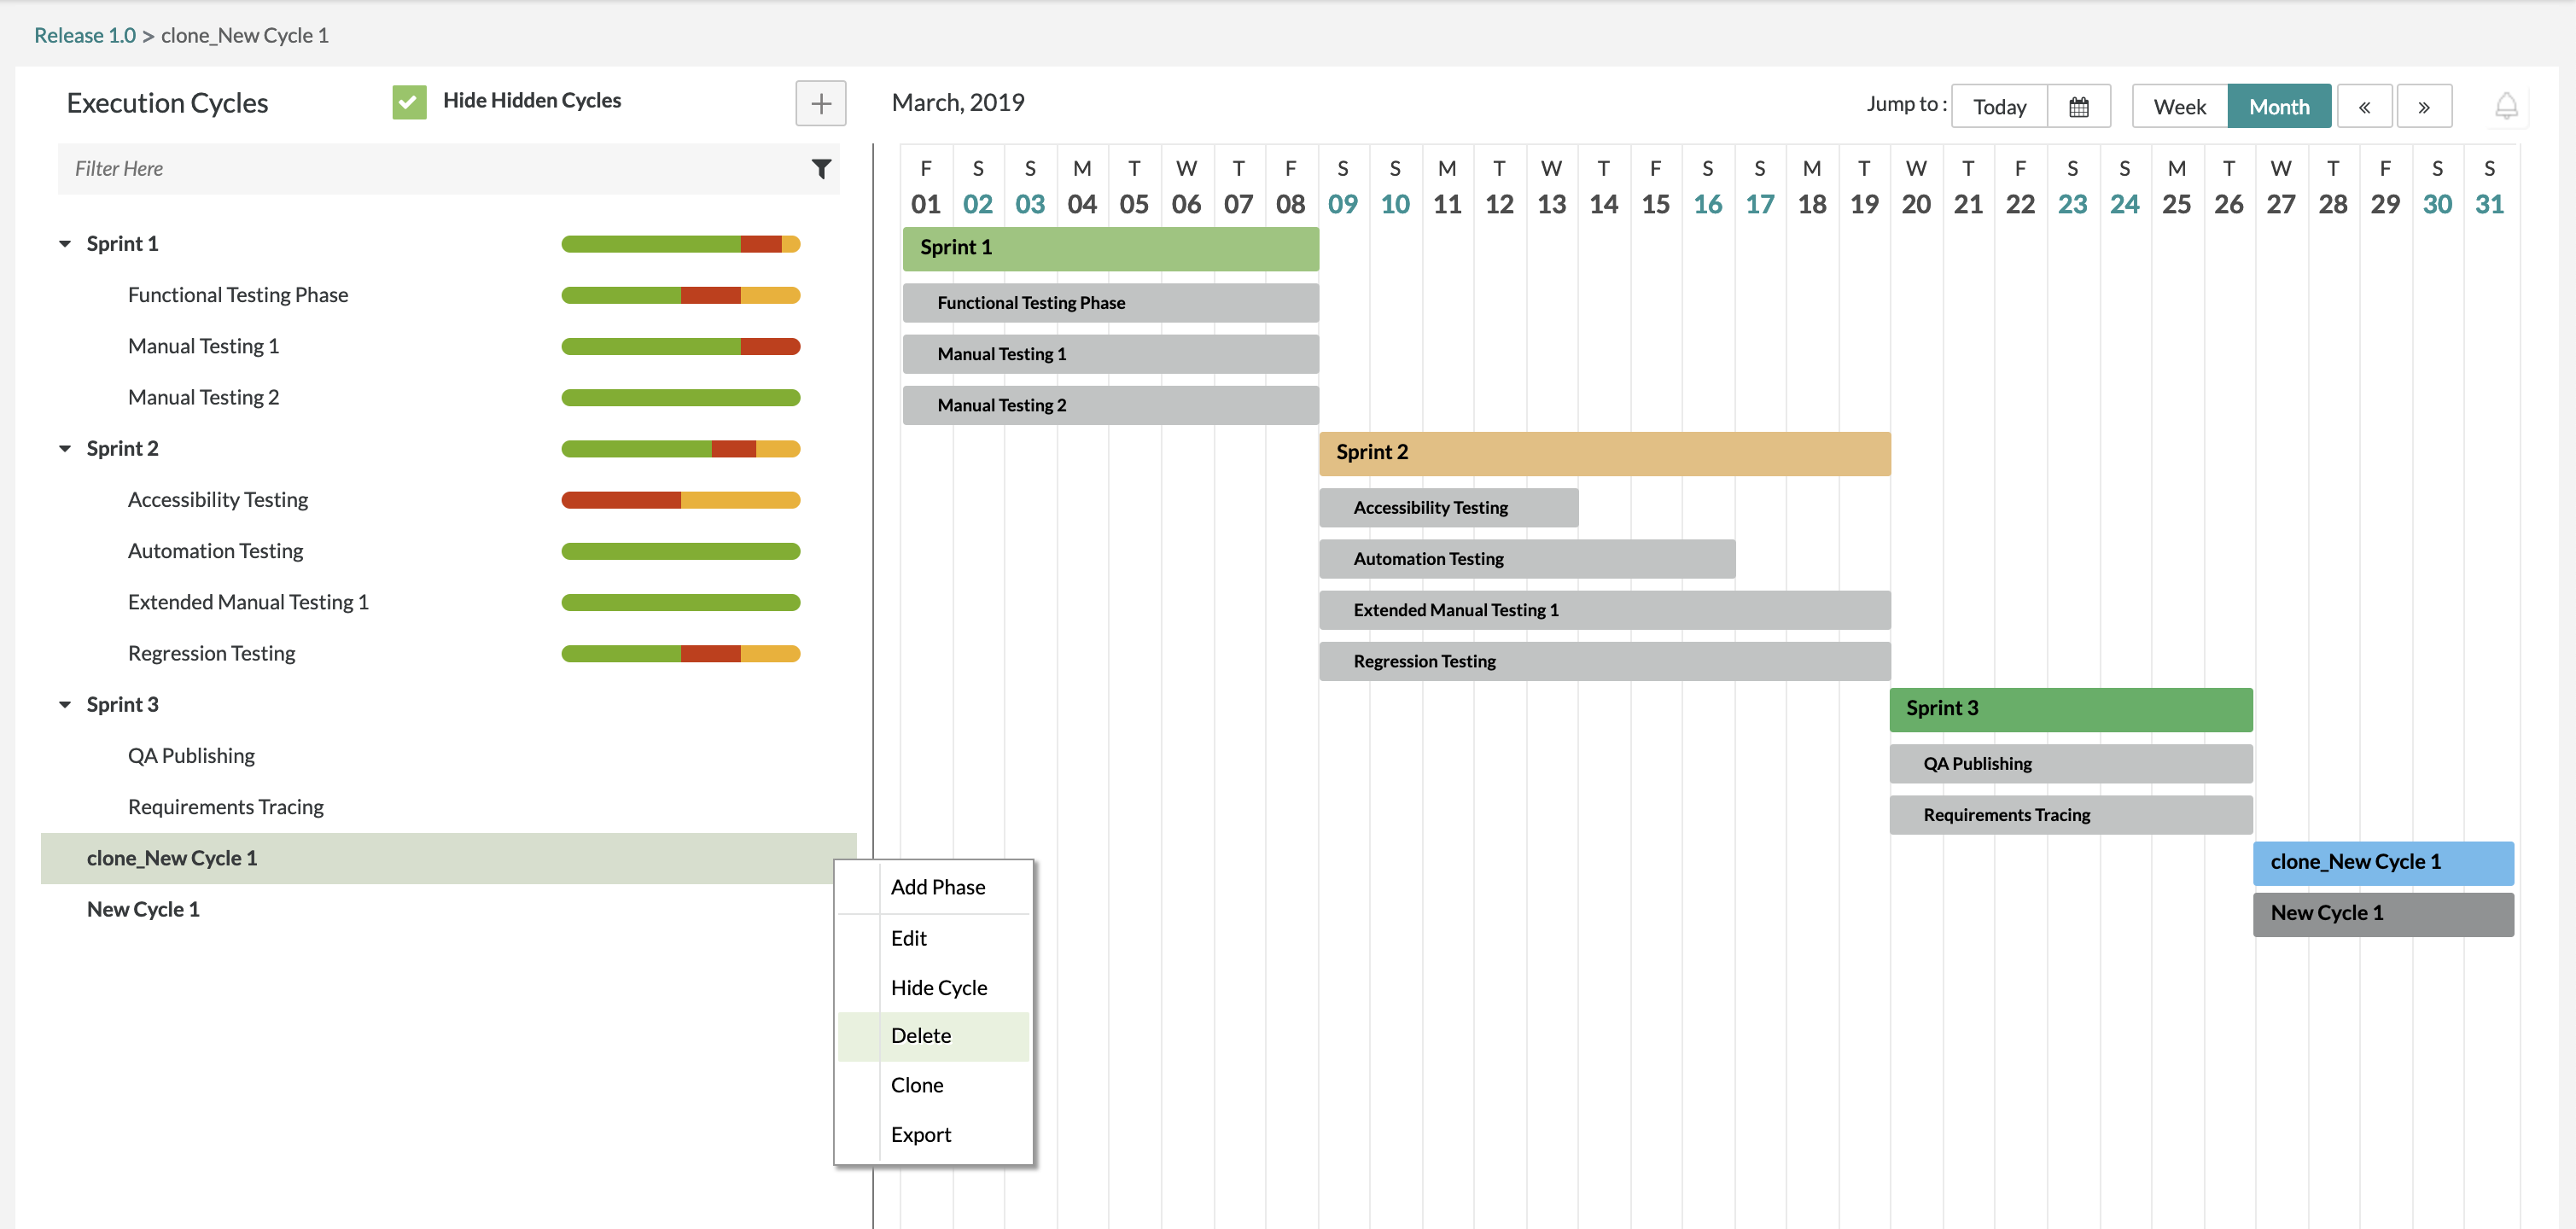
Deleting a Cycle
1. Click on the ![]() button on the test cycle that you want to delete and click on "Delete".
button on the test cycle that you want to delete and click on "Delete".
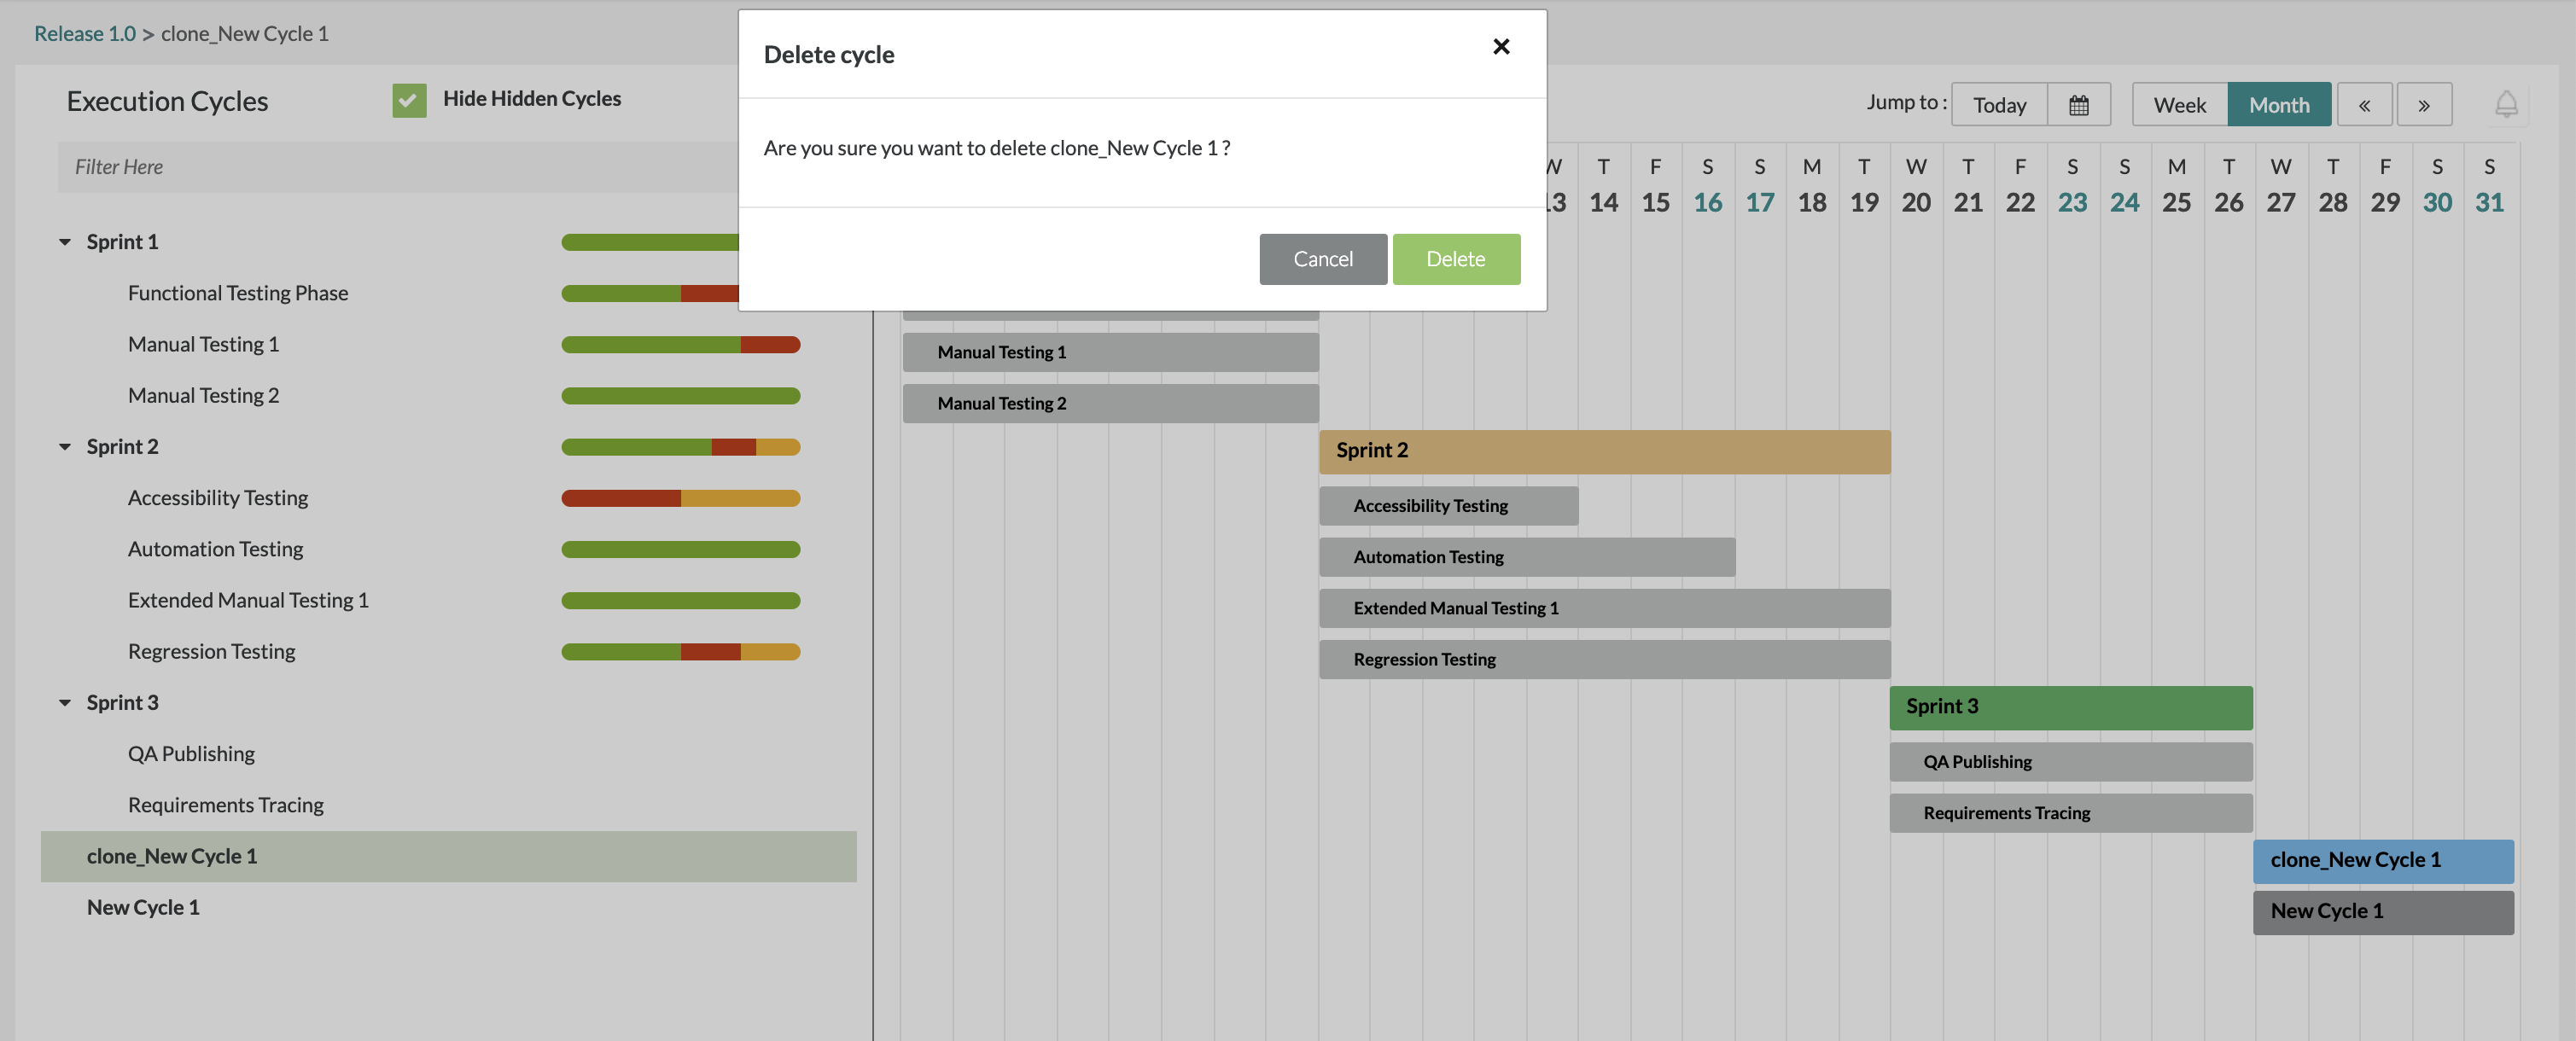
- A pop-up/modal will appear asking "Are you sure you want to delete"?
2. Simply click on the "Delete" Button to remove the testing cycle from the release.
Exporting a Cycle
1. Click on the ![]() button on the test cycle that you want to export and click on "Export".
button on the test cycle that you want to export and click on "Export".
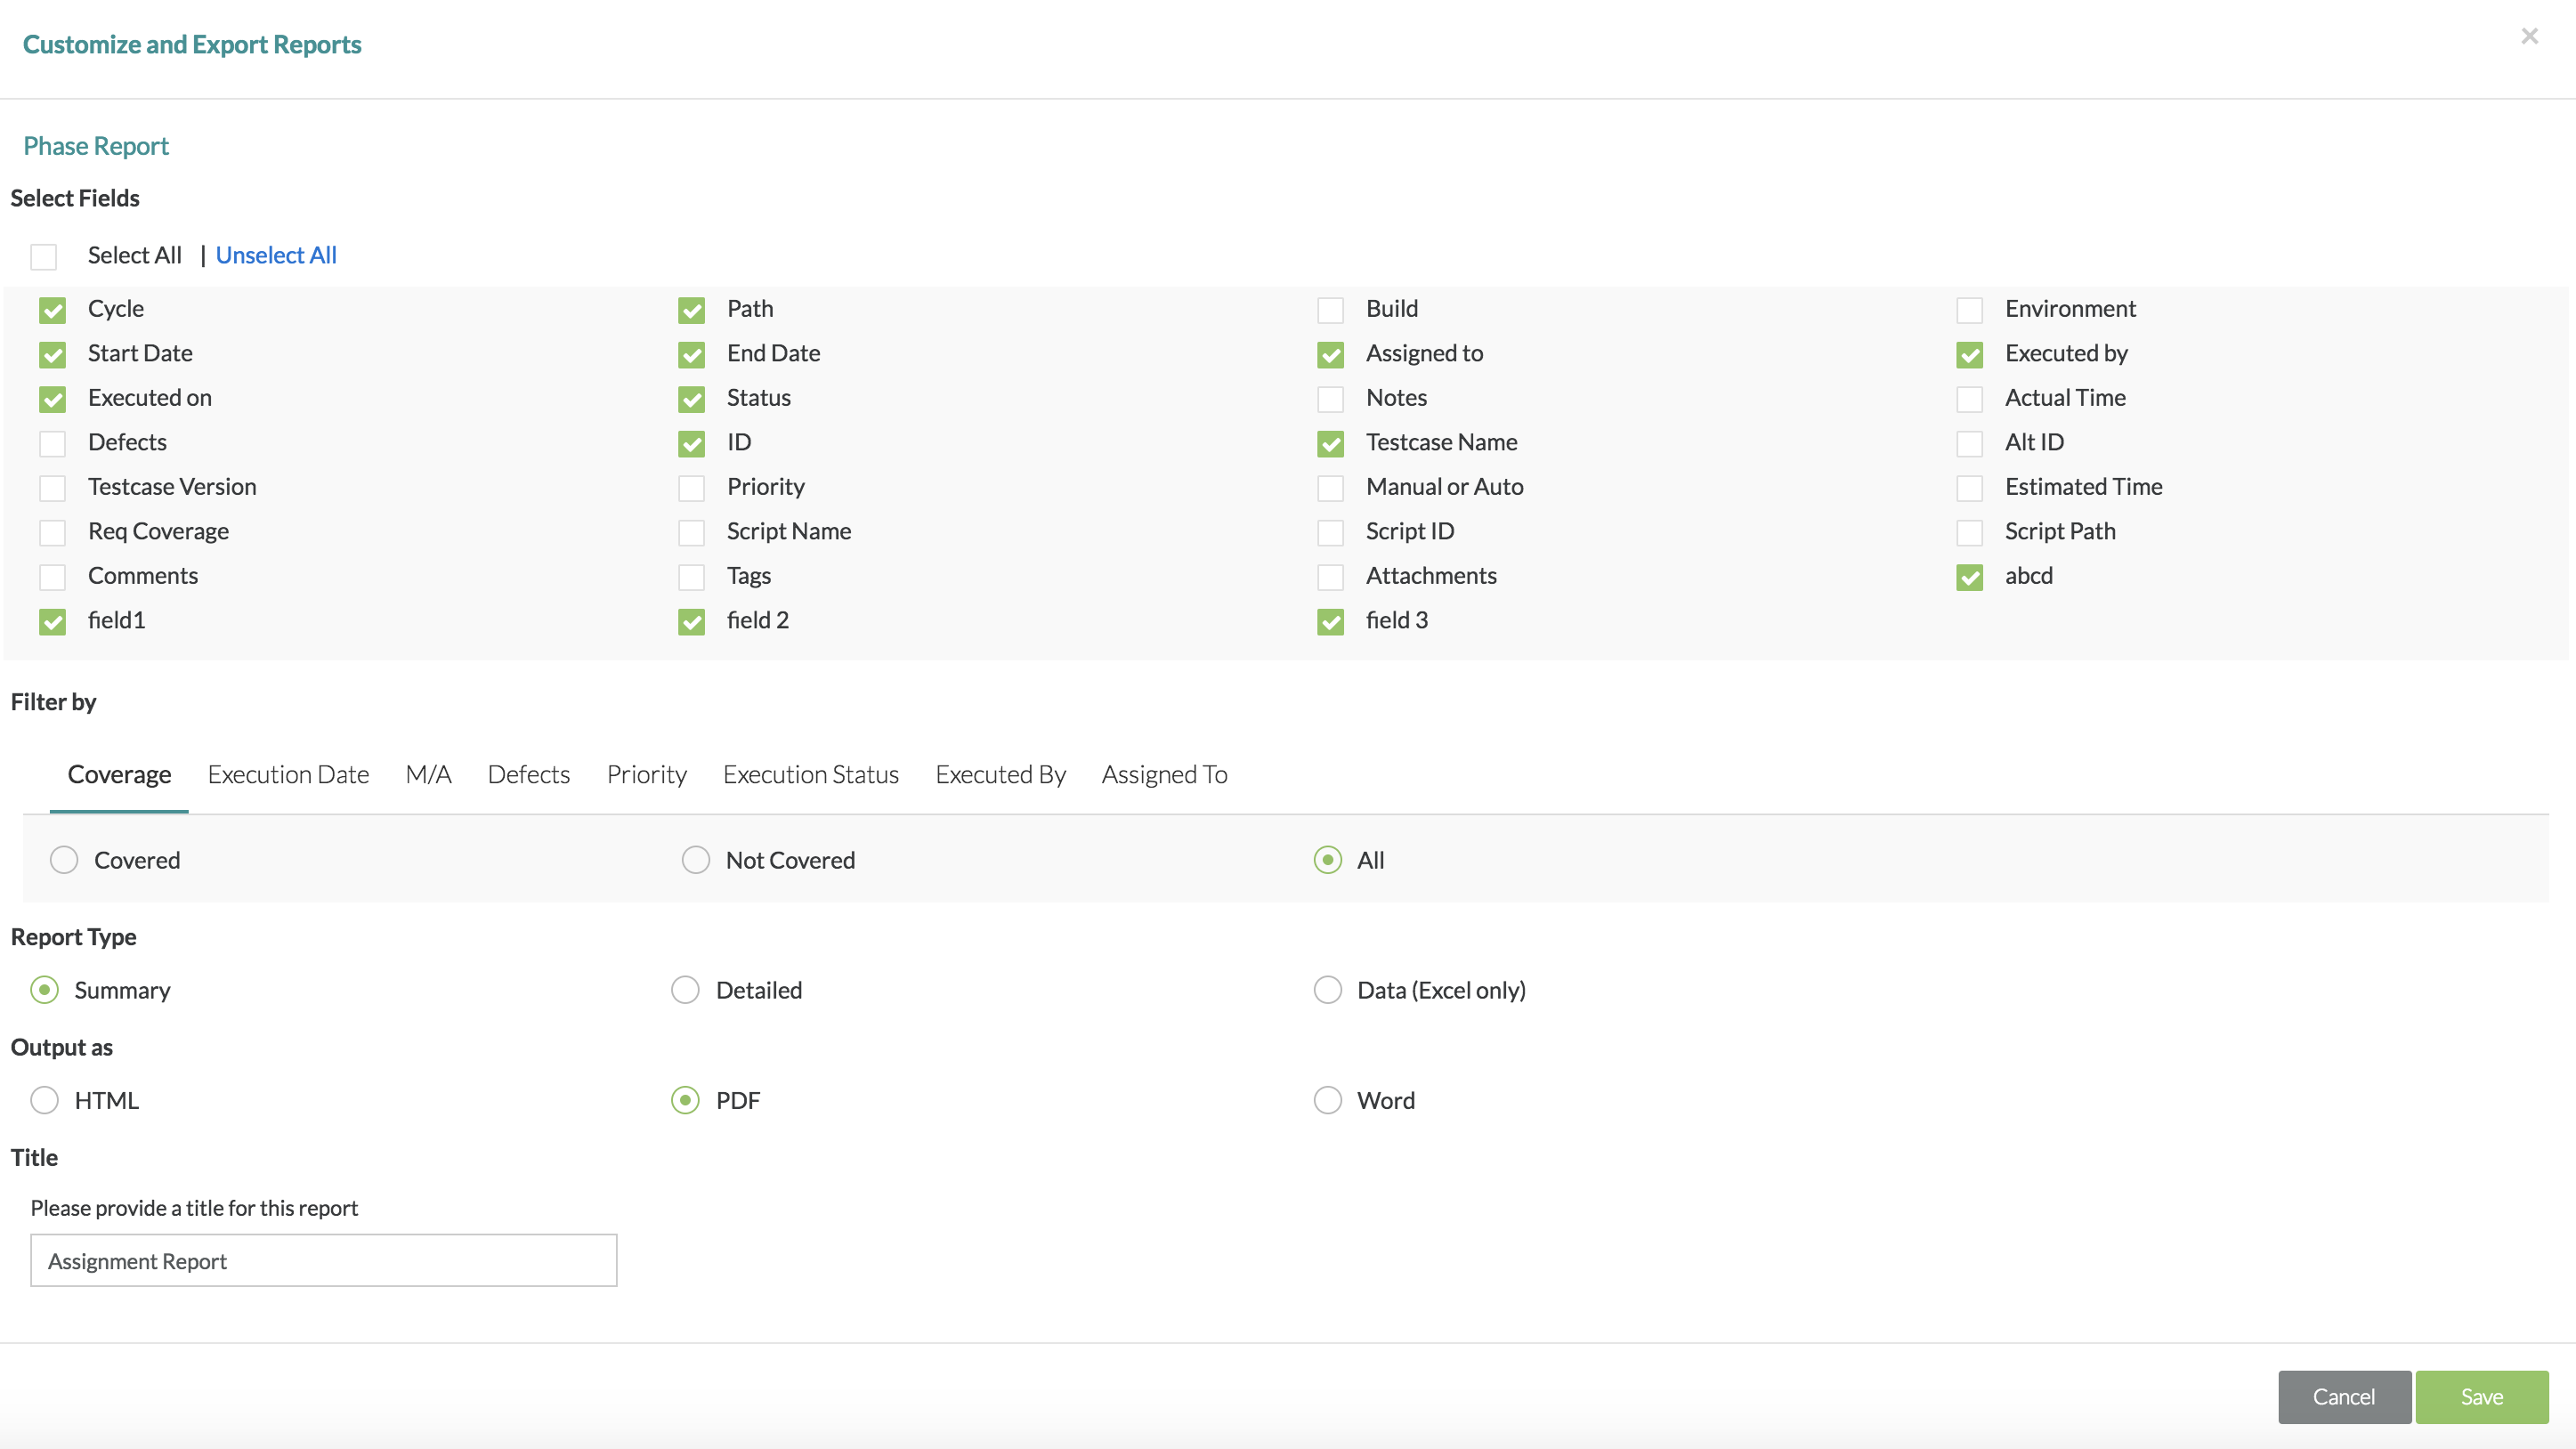
2. After clicking export, there will be a window that pops up where you can choose exactly which fields you want to export for the test cycle, what kind of reporting type, what the output file the export should be, and naming the report.
- When users are selecting the report type, they have the ability to still use the Select Fields section to filter/select which fields they want to export. Users are able to select which fields they want for summary reports, detailed reports, and even data (Excel) reports.
- Previously, when users wanted to export to Excel, the Excel report would use all fields regardless of whether or not it was selected.
- Now, when users want to export to Excel, they have the option to select which fields are included or not in the Excel report by filtering and selecting the fields.
- The default name for an exported report is labeled as "Assignment Report".
3. After selecting your options, simply click the "Save" button and the export will begin.
4. You can then click "OK" and you will get a prompt to download the file.

5. Click on "Download" and the export file of your test planning will be downloaded to your computer.