Adding a Project
- Kevin Pham (Deactivated)
Analytics
Adding Projects
1. Click on the ![]() button at the top right of the interface.
button at the top right of the interface.

2. Fill in the following mandatory fields. The mandatory fields are shown with a red star next to the text and the text box border is red.
- Name - The unique name given to a project to distinguish a project.
- Start Date - The initial date that the project is started. This date is important as all subsequent activities and dates are set past this point.
There are optional field to fill out such as description for the project, selecting an end date, mapping the project to an external defect project from JIRA, selecting a lead to be on the project as well as an option to change the project type.
There are a total of 3 different project types.
 Normal (N) Projects - Default project type. Users assigned to a normal project are able to view the testing assets of all other normal projects including the Global Trees of the test repository and test execution. Users that are only assigned to a normal project cannot view the testing assets of restricted and isolated projects.
 Restricted (R) Projects - Users assigned to a restricted project are not able to view the testing assets of isolated projects but can see those assets in a normal project. Restricted projects are typically useful for restricting access to sensitive data that only members of the project can see.
 Isolated (I) Projects - Users assigned to an isolated project are not able to view the testing assets of any projects nor can anybody see the testing assets of their project. Isolated projects are typically useful to completely isolate a project and its testing assets. For example, it might be ideal to whenever you want to host multiple customer projects on the same instance of Zephyr.
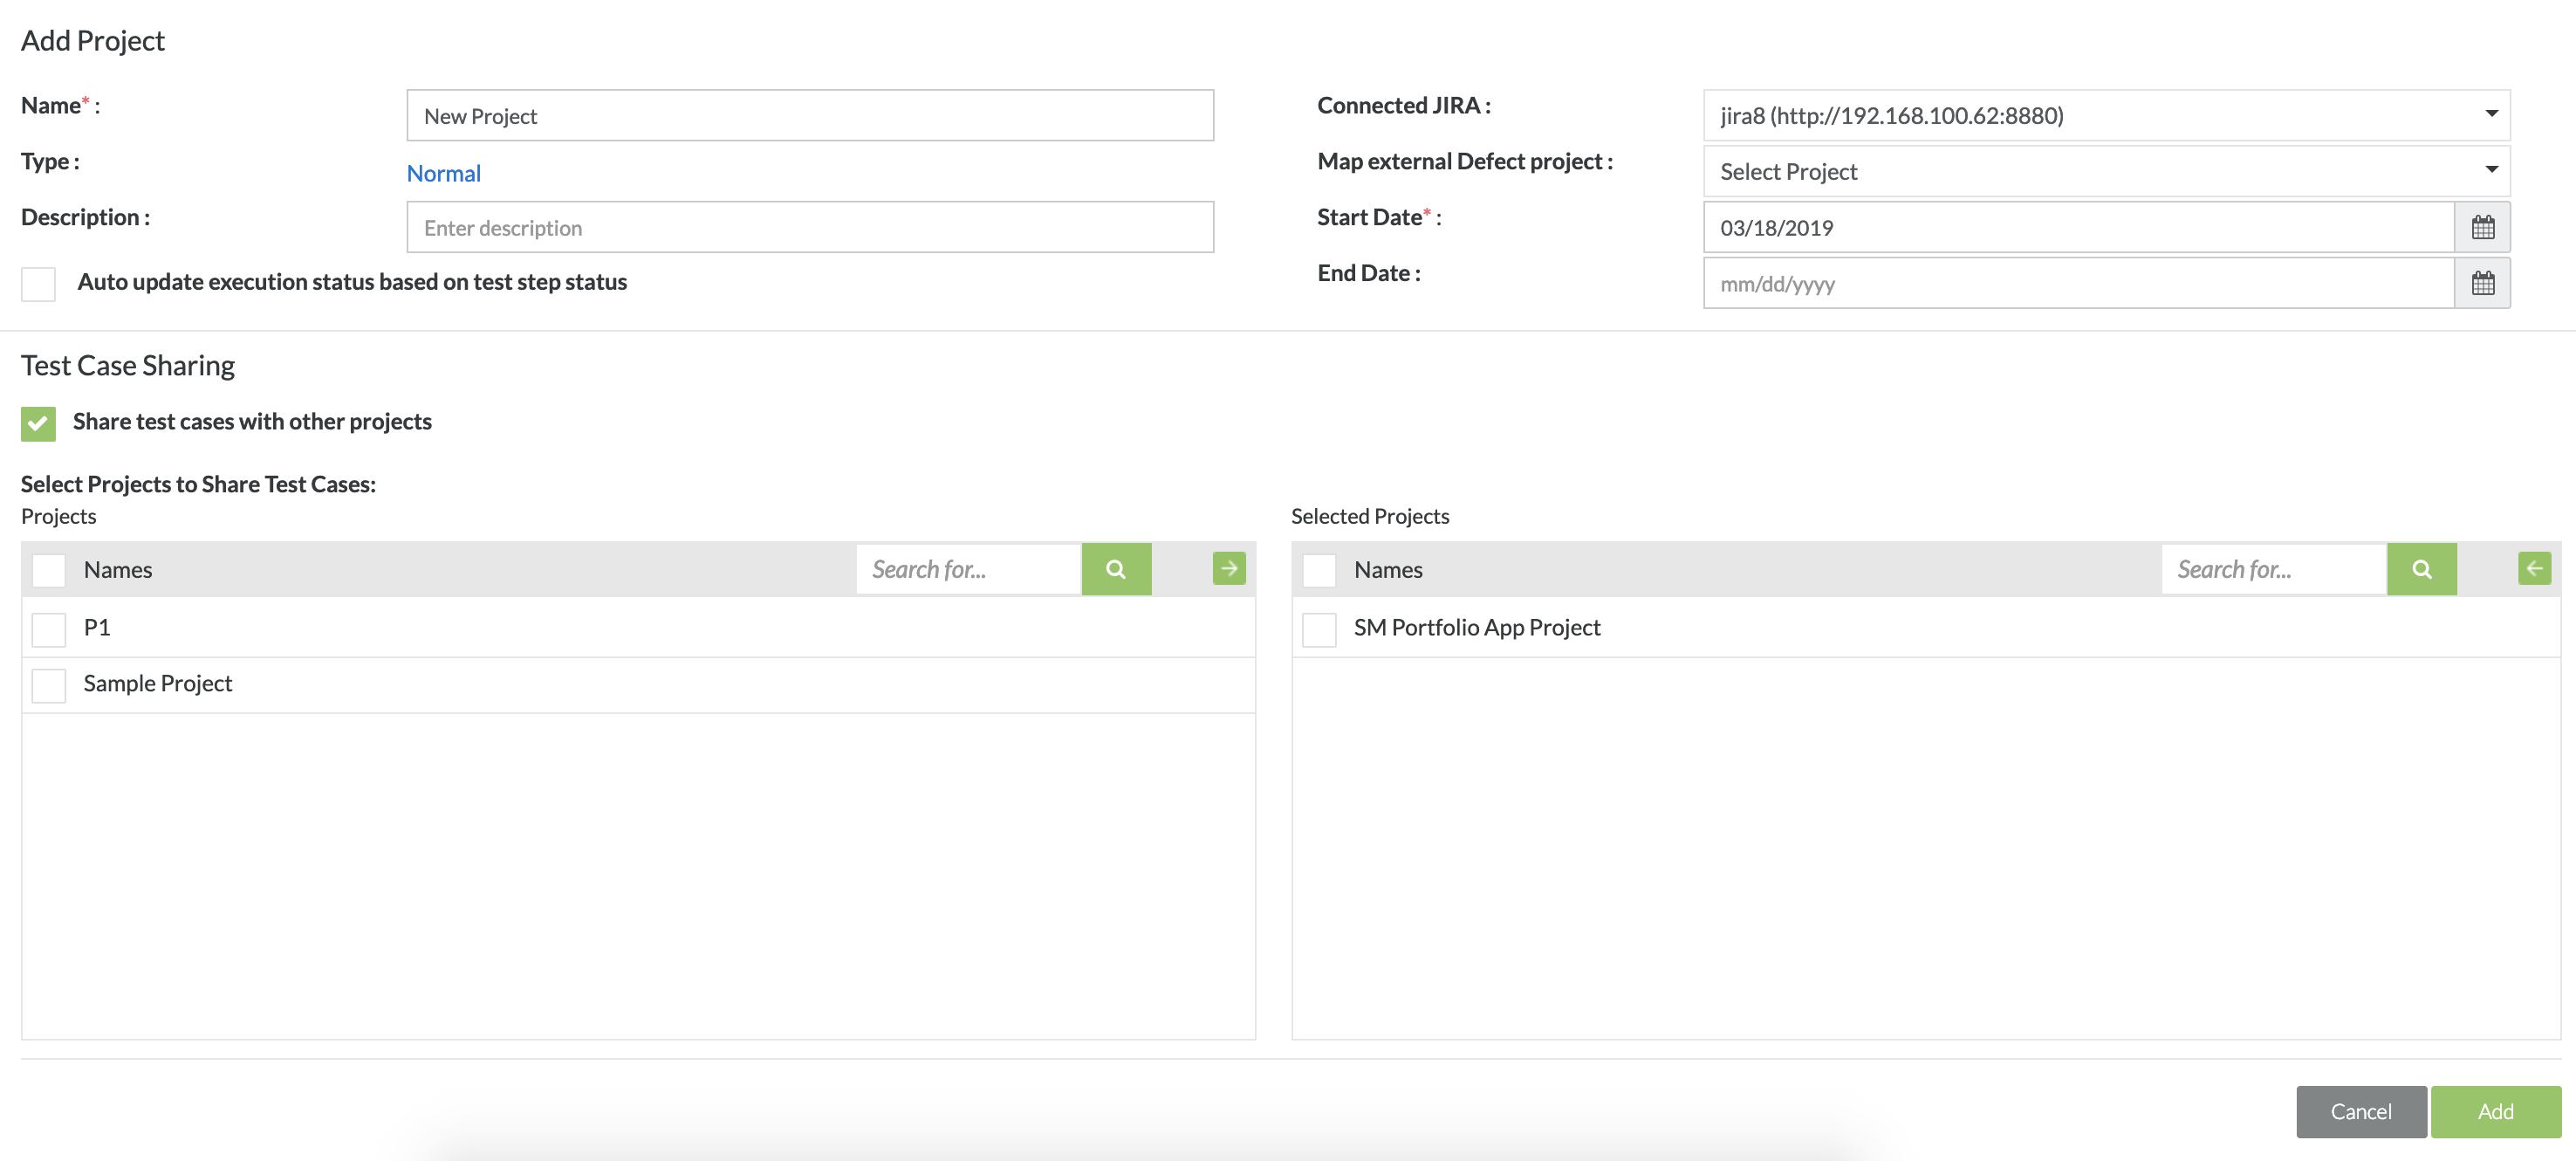
Share test cases with other projects: A project can be marked as shared which will give its' test resources the ability to be copied to other projects marked as shared. Project sharing is restricted to projects with type "Normal".
3. Select the projects that you want to share test cases with.
- Check off the project(s) that you want to share test cases with.
- Click on the green arrow to move the checked off project(s) to the selected shared projects
4. After filling in all the mandatory fields, click on the "Add" Button to create the project in the system.