Microsoft SQL
- Kevin Pham (Deactivated)
Analytics
The database for Zephyr will be referenced as part of the installation of Zephyr. It will need to be installed separately and prior to the installation of Zephyr. These instructions will help you connect your Zephyr installation to a Microsoft SQL Server Database.
Supported Databases
Microsoft SQL Server
- Versions: 2012/2014/2016
- JDBC Driver Version: 4.2
- Versions: 2012/2014/2016
Prerequisites
- Check whether your version of Microsoft SQL Server is supported
- Download the JDBC and have this available on the Application node where Zephyr will be installed
- If you are upgrading from Zephyr 4.8, a MySQL Database will already be present. For migrating from MySQL to Microsoft SQL Server, please review the database migration process
- Have the Zephyr installer ready
- Although use of SQL Server Management Studio is not mandatory, it is recommended in order to complete the below setup tasks.
- Microsoft SQL Server 2016 Express has been used to illustrate the setup process
- Have a fresh installation of Microsoft SQL Server ready
Configure the Microsoft SQL Server Database
The following steps will need to be followed:
- Step 1: Create a user account with the relevant permissions
- Step 2: Set permissions for remote access
- Step 3: Turn on the SQL Server Browser Service
- Step 4: Configure Firewall to allow network traffic
- Step 5: Setting up Authentication
- Step 6: Install Zephyr and Connect to the Database
- Step 7: Setting up Memory
- Step 8: Knowing where the Logs reside
- Step 9: Configuring additional nodes
Step 1: Create a user account with the relevant permissions
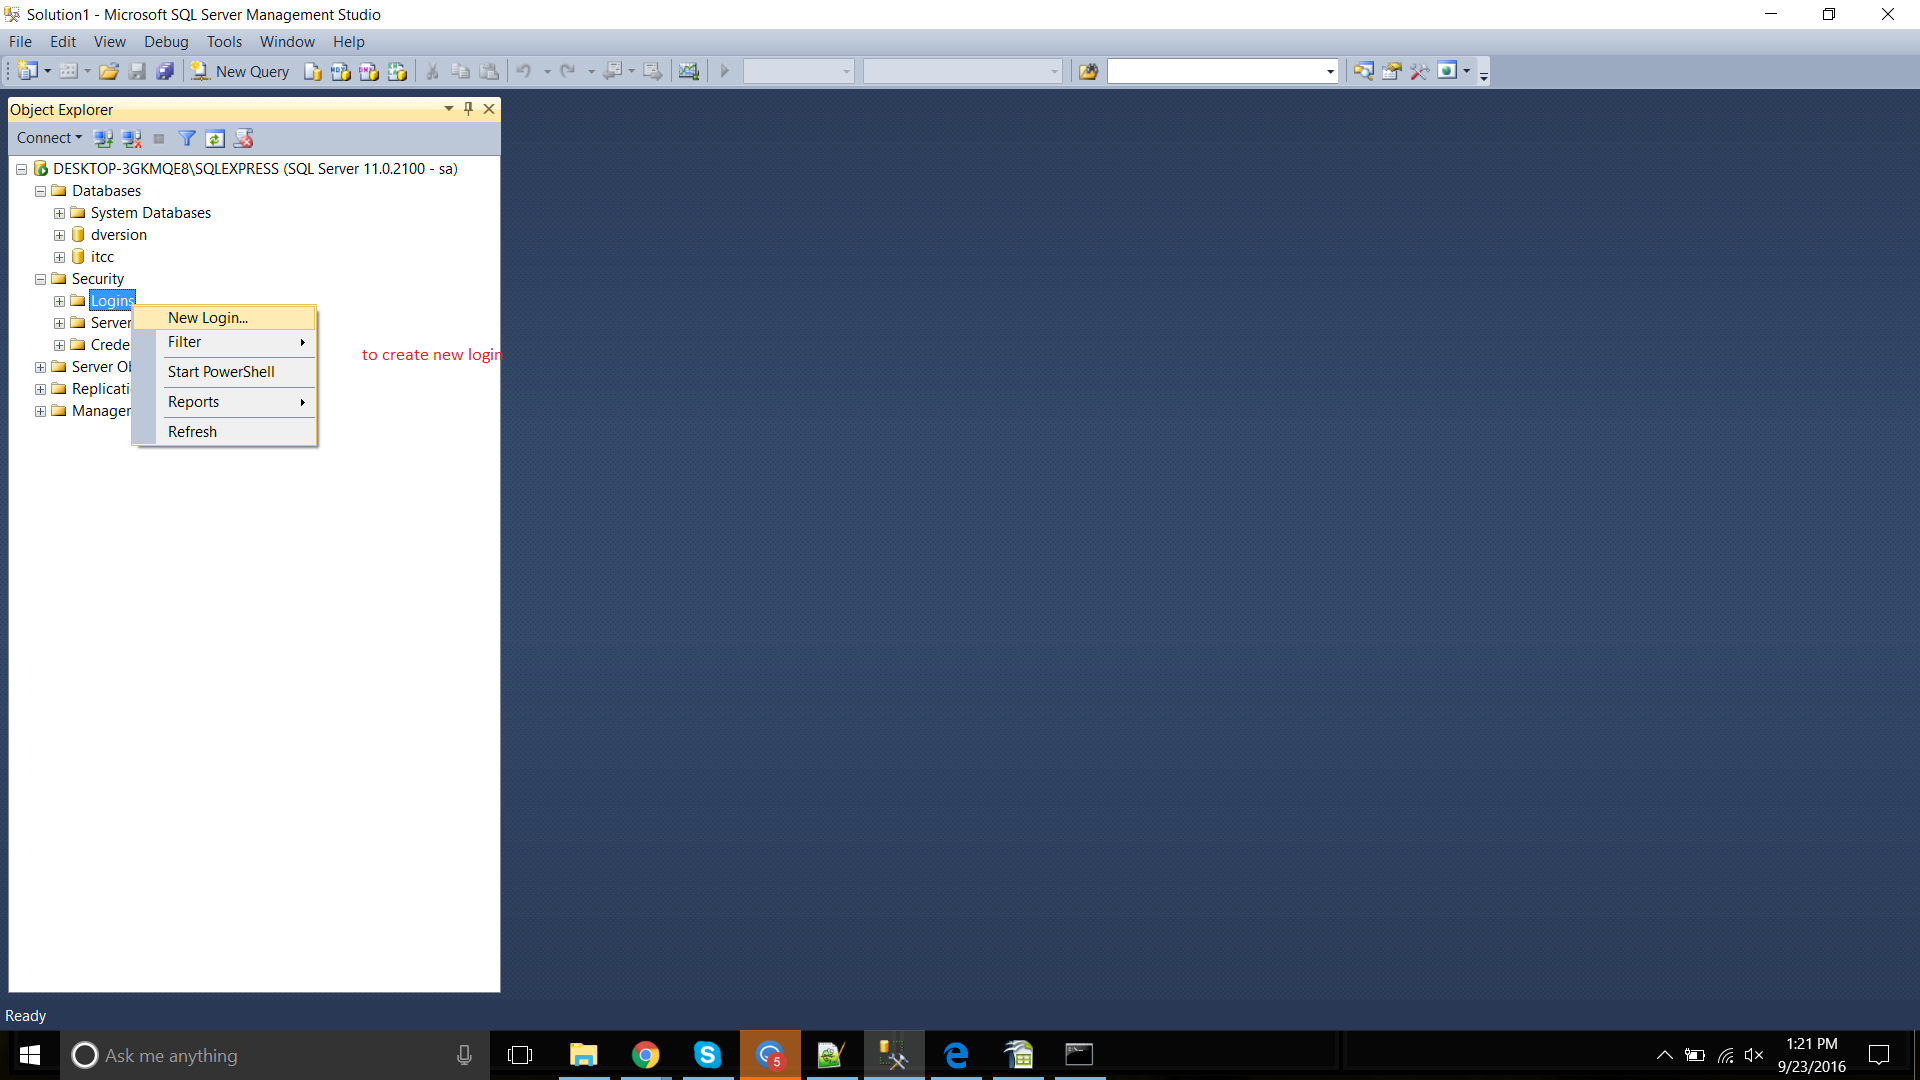
In Object Explorer, expand the folder of the server instance in which you want to create the new login.
Right-click the Logins folder under Security. Click on New Login….
In the Login – New dialog box, on the General page, enter the name of a user in the Login name box.
To create a login that is saved on a SQL Server database, select SQL Server authentication. In the Password box, enter a password for the new user. Enter that password again into the Confirm password box.
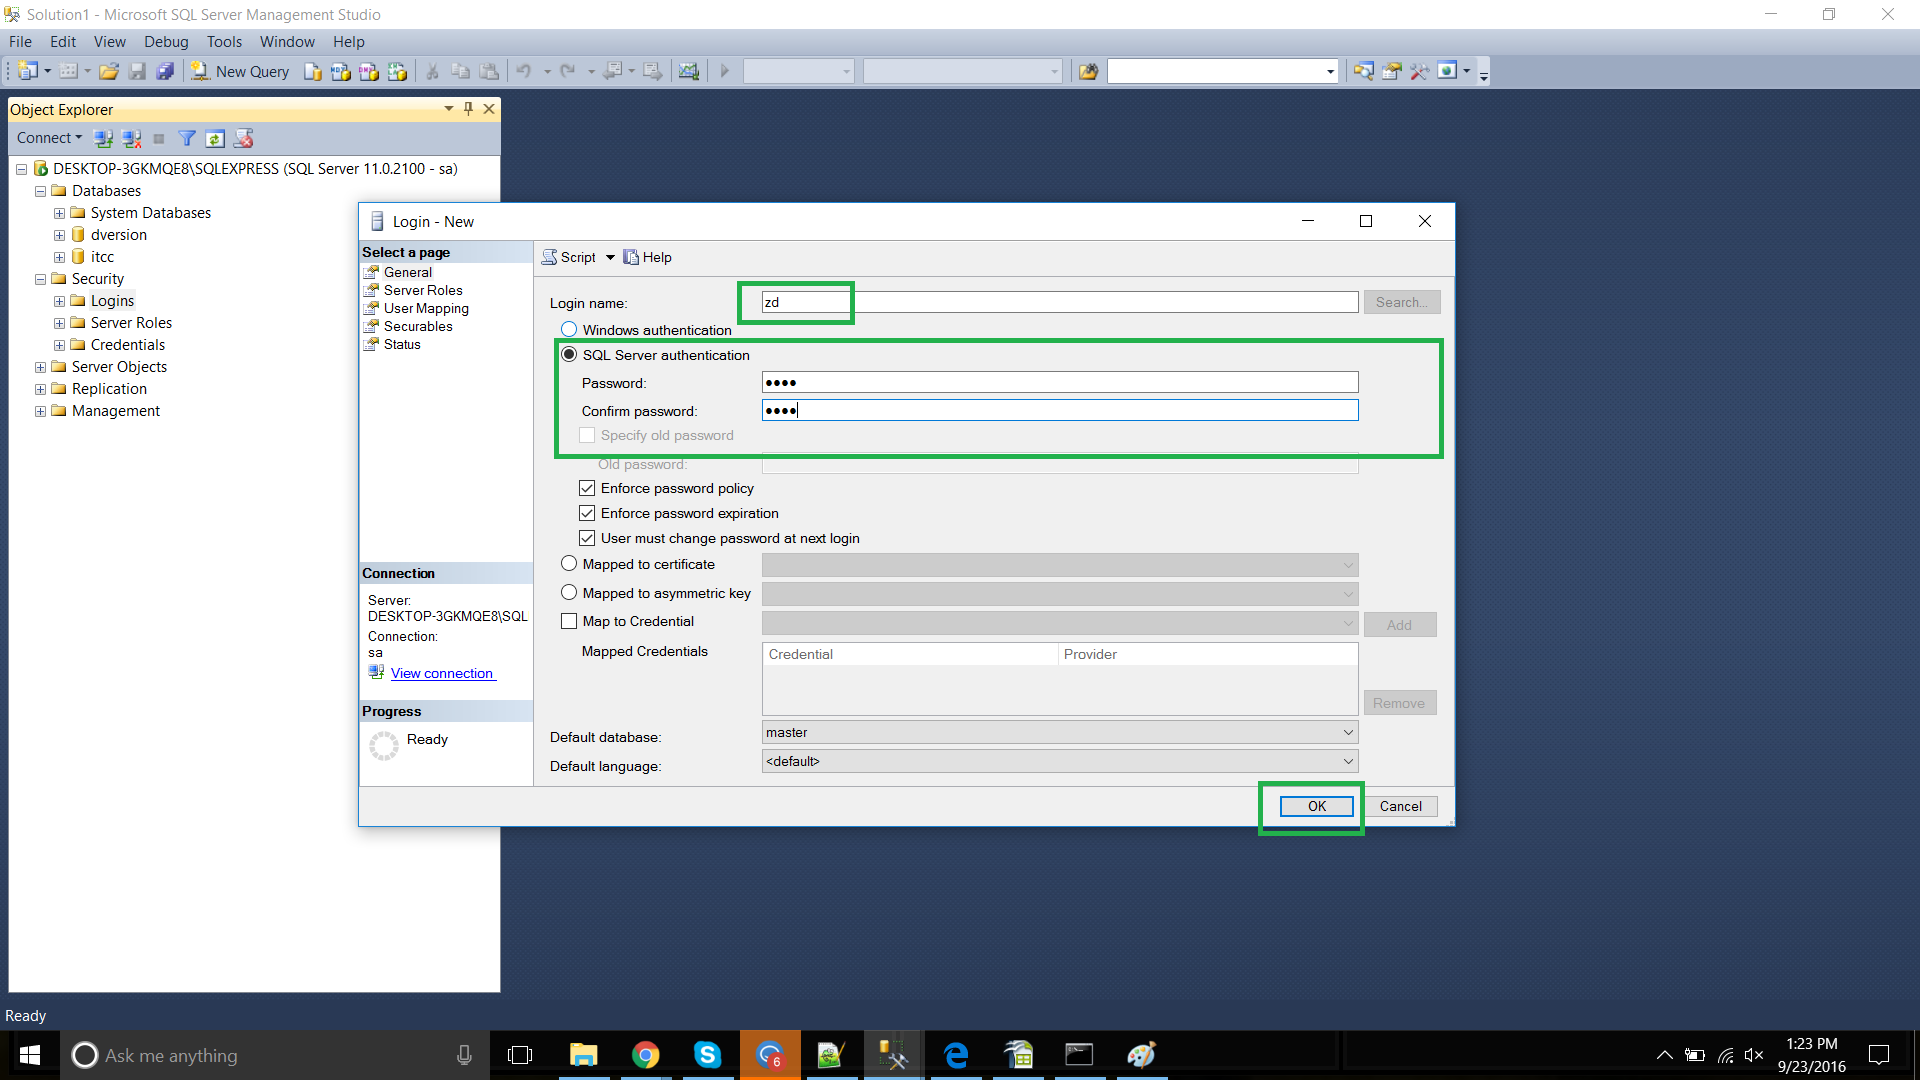
From the Default database list, select a default database for the login. Master is the default for this option.
From the Default language list, select a default language for the login.
Click OK.
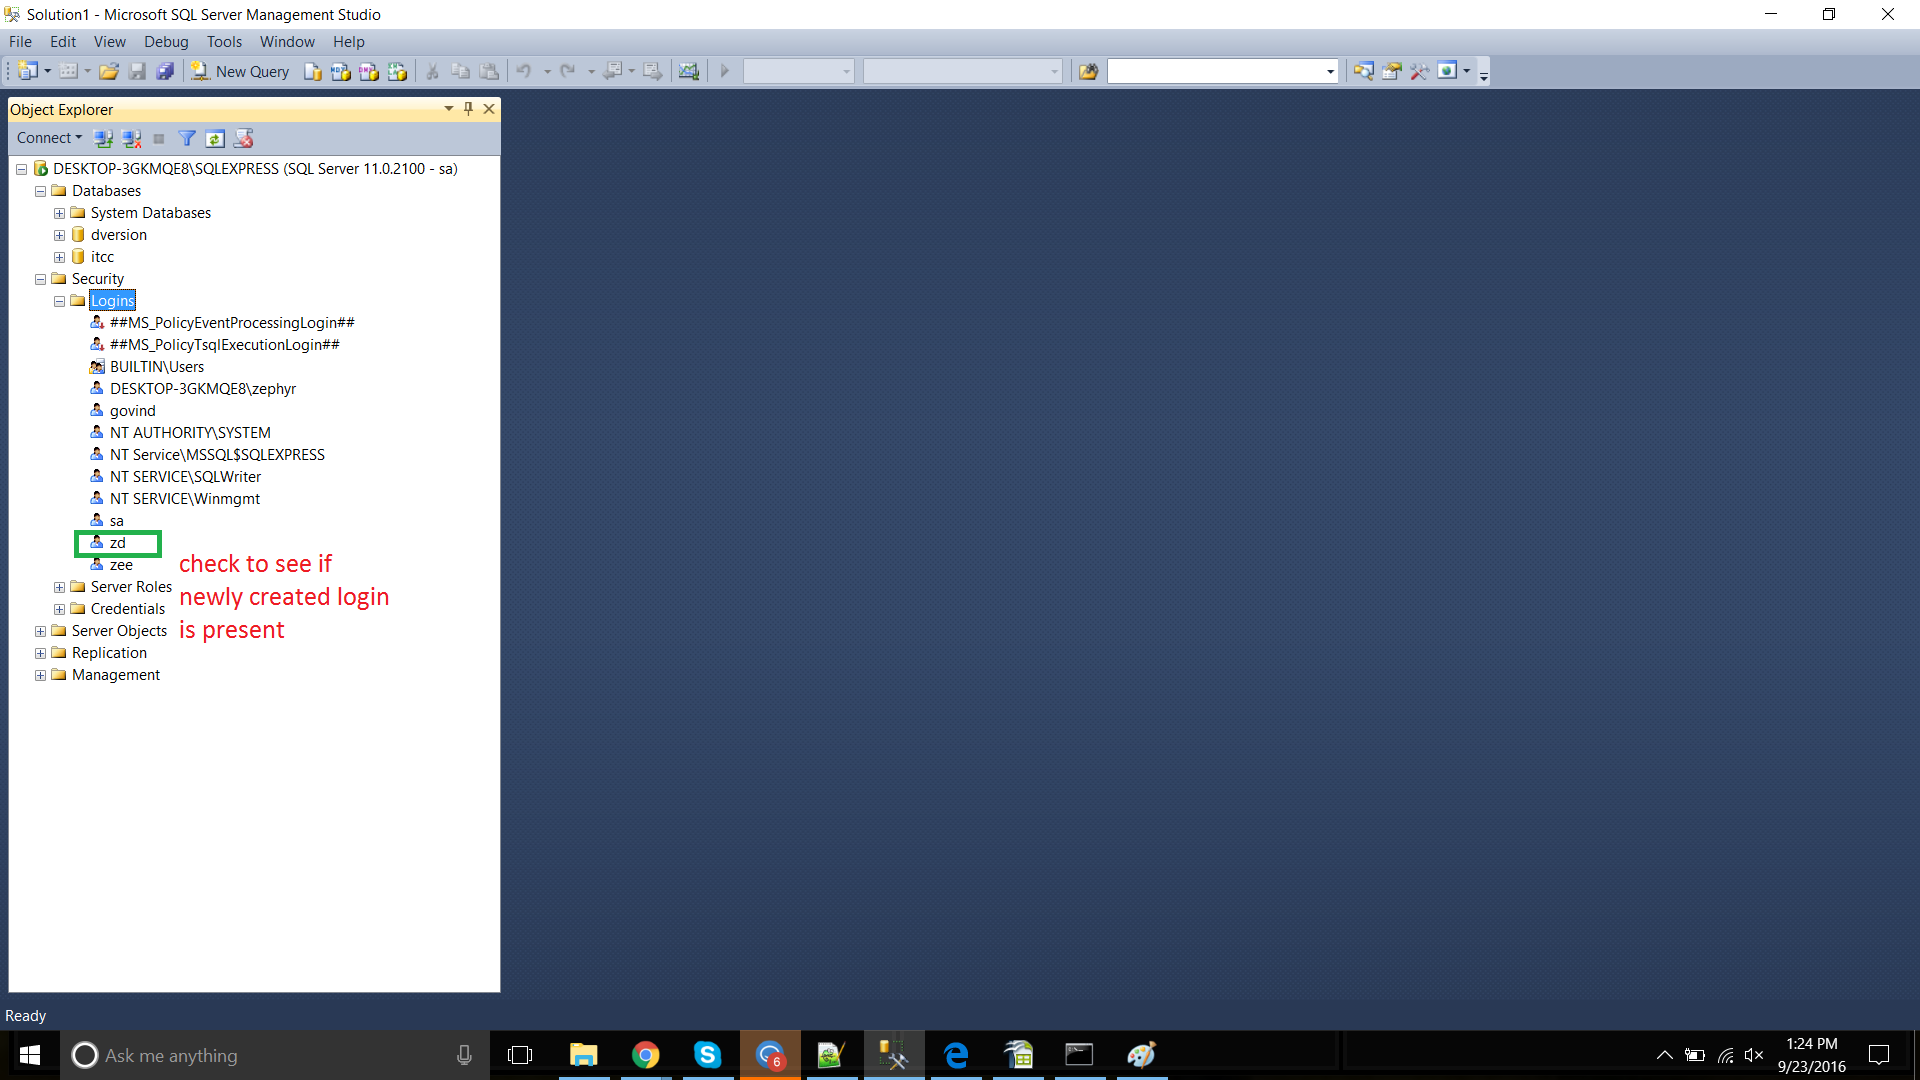
View the newly created Login by expanding Logins under the Security folder.
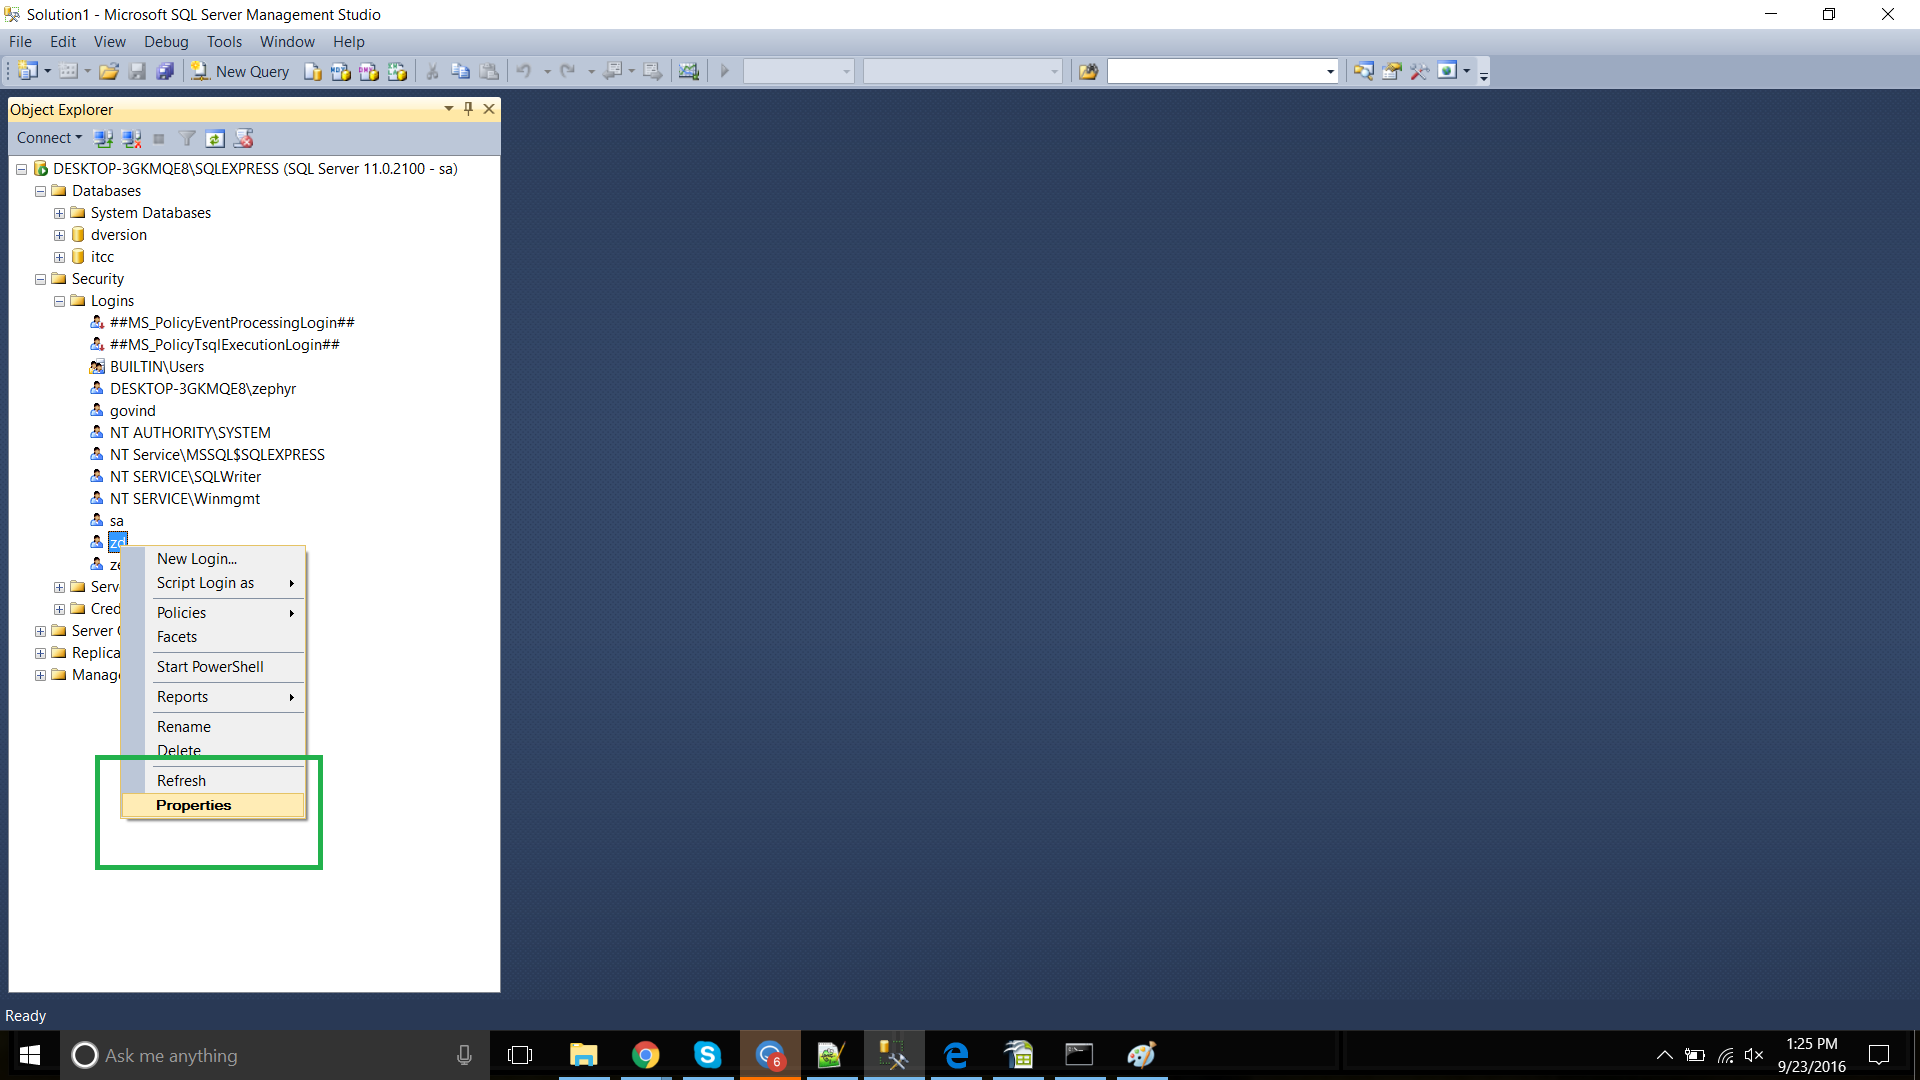
Next, we need to set the permissions for this Login. Right click on the user and select Properties.
In Properties window, grant the permissions for the user to Alter any database.
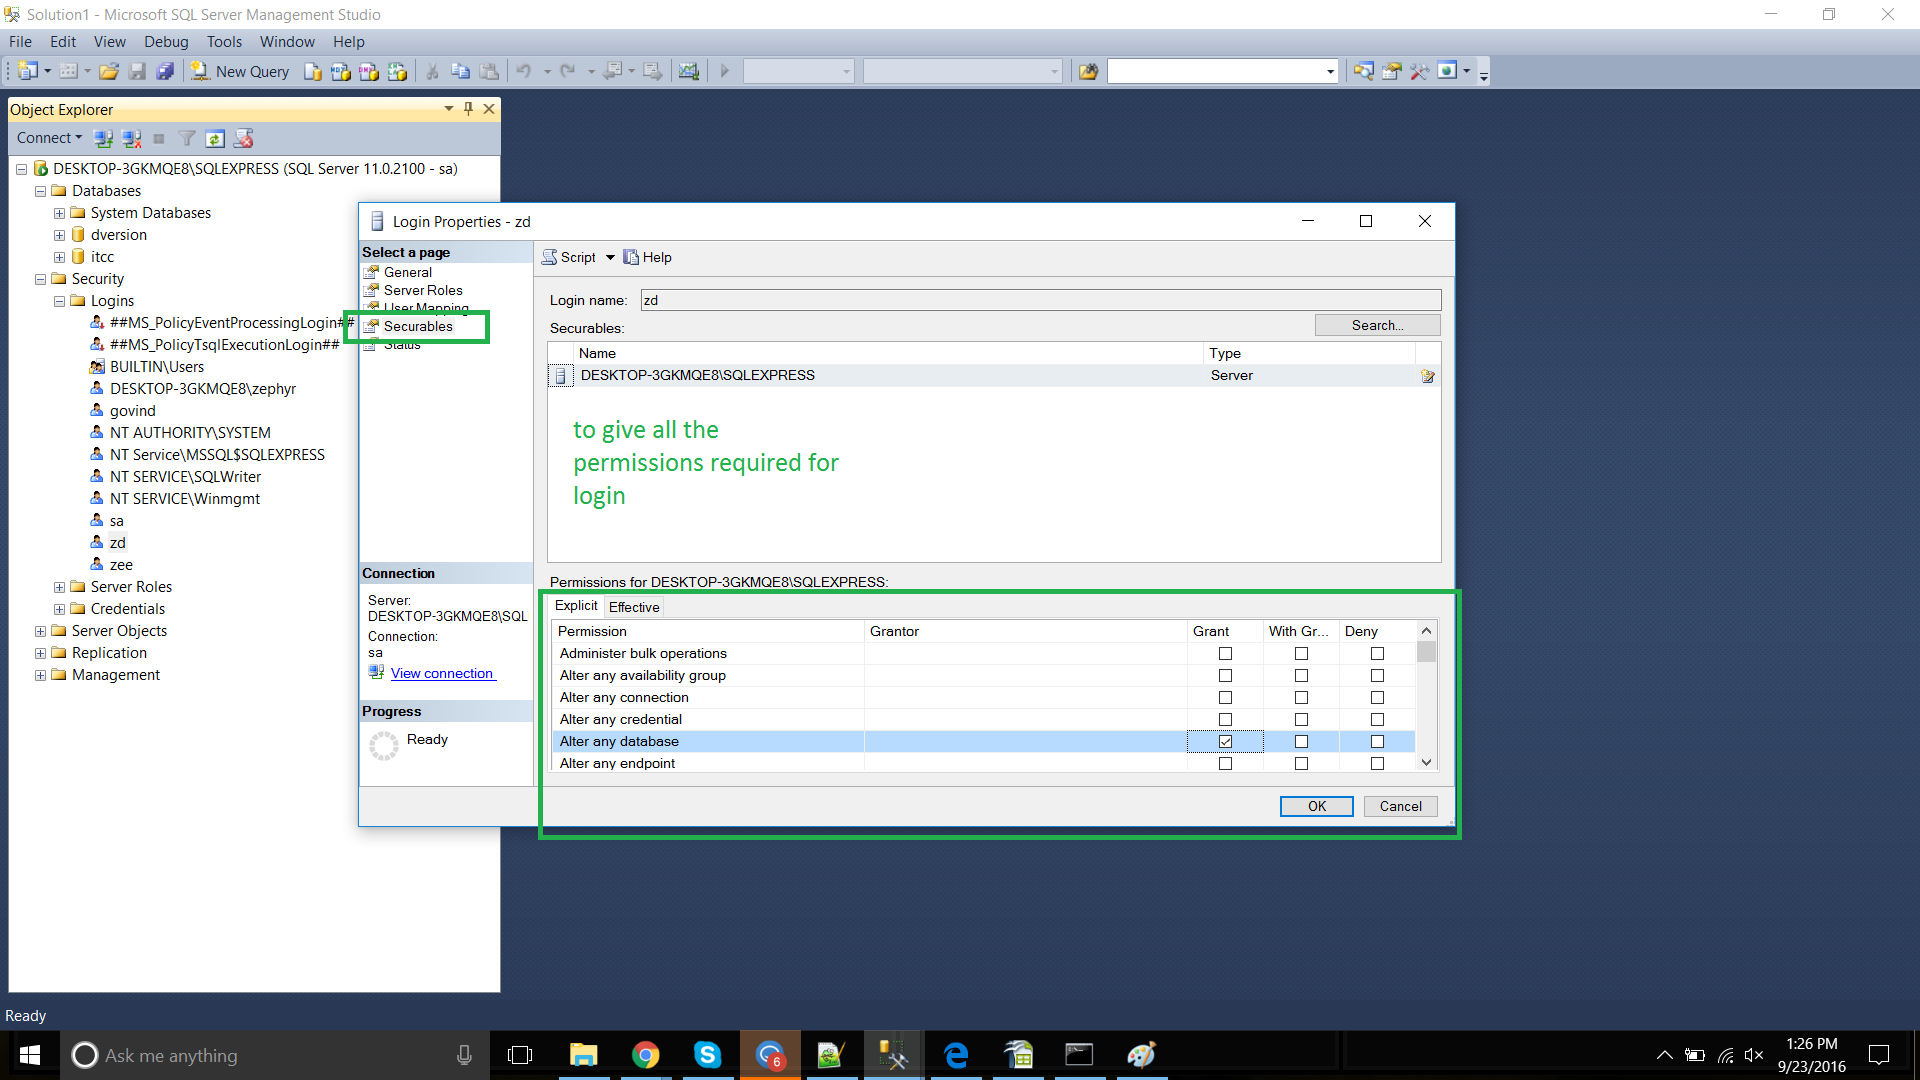
The Effective tab will show the minimum permissions that must be provided.

This process has created a new Login user with the correct permissions.
Step 2: Set permissions for remote access
In this step we will enable remote connections on the instance of SQL Server that you want to connect to from a remote computer.
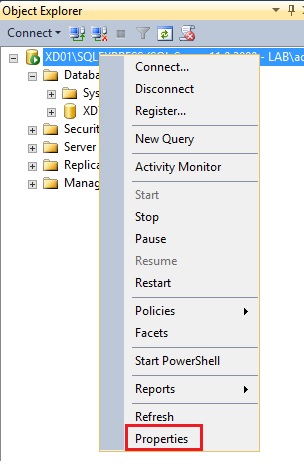
Staying within SQL Server Management Studio, right-click on the server name in the left pane and select Properties.
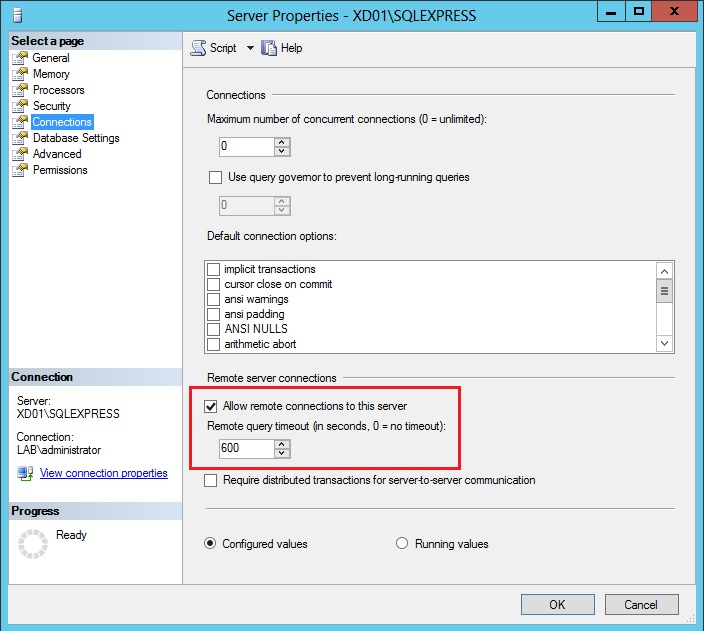
Select Connections in the left pane and make sure that checkbox Allow remote connections to this server is selected.
Next, we will need to Enable the TCP/IP Protocol. For this, Open SQL Server Configuration Manager, Expand SQL Server Network Configuration and click on Protocols for SQLEXPRESS. Check the Status to ensure that the TCP/IP protocol is enabled. if it is disabled right-click on TCP/IP and select the Enable option.
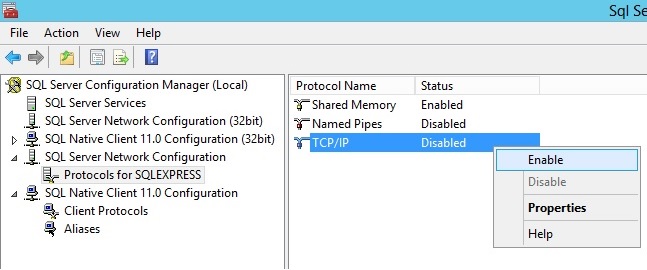
From the same pop-up options, click on Properties.
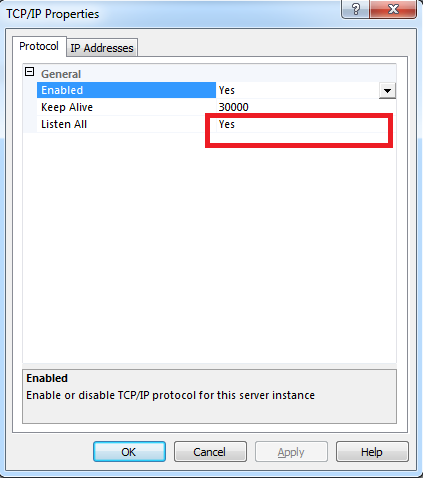
In the Protocol tab, make sure that Listen All has a value of Yes.
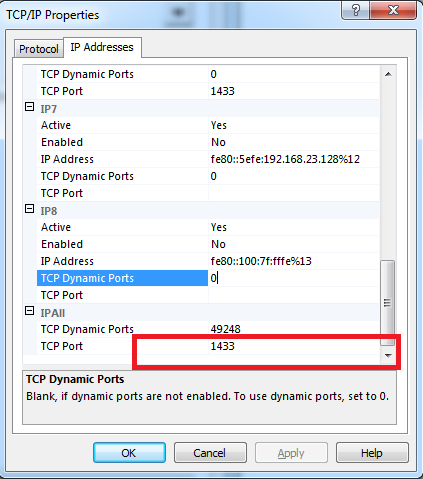
Now, navigate to the IP Addresses tab and scroll-down to the APAll section, and enter the port 1433 for TCP Port.
Finally, SQL Server service can be restarted.
Start, Stop, Pause, Resume, Restart the Database Engine, SQL Server Agent, or SQL Server Browser Service
Step 3: Turn on the SQL Server Browser Service
Open SQL Server Configuration Manager and click on “SQL Server Services” in the left pane, right-click SQL Server Browser service and select Properties.
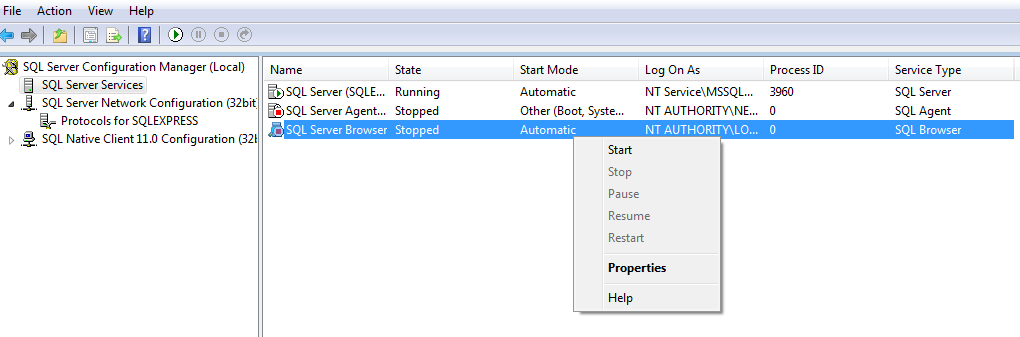
Go to the Service tab and for the Start Mode option change start the type to Automatic.
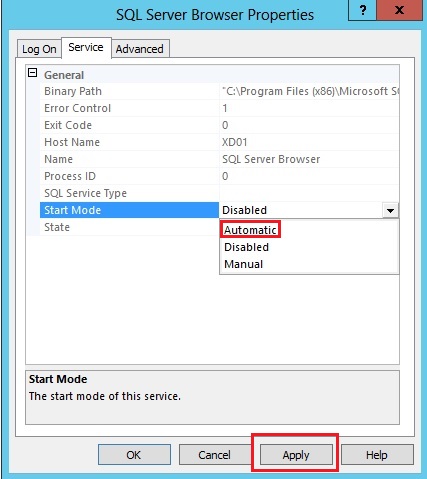
Click the Start button to start the SQL Browser service.

Confirm that the SQL Server Browser service is in the Running state.

Step 4: Configure Firewall to allow network traffic
In this step we will configure the firewall to allow network traffic that is related to the SQL Server and to the SQL Server Browser service.
The following two ports will need to be set:
- A port exception for TCP Port 1433. In the New Inbound Rule Wizard dialog, use the following information to create a port exception:
- Select Port
- Select TCP and specify port 1433
- Allow the connection
- Choose all three profiles (Domain, Private & Public)
- Name the rule “SQL – TCP 1433″
- A port exception for UDP Port 1434. Click New Inbound Rule again and use the following information to create another port exception:
- Select Port
- Select UDP and specify port 1434
- Allow the connection
- Choose all three profiles (Domain, Private & Public)
- Name the rule “SQL – UDP 1434
To access SQL Server on other computer
- Open SQL Server Management Studio
- In Object Explorer, click on Connect -> Database Engine
- In Server name, give the IP address of the computer where SQL Server is installed, click on Connect.
.png?version=1&modificationDate=1589824694472&cacheVersion=1&api=v2&width=423&height=321)
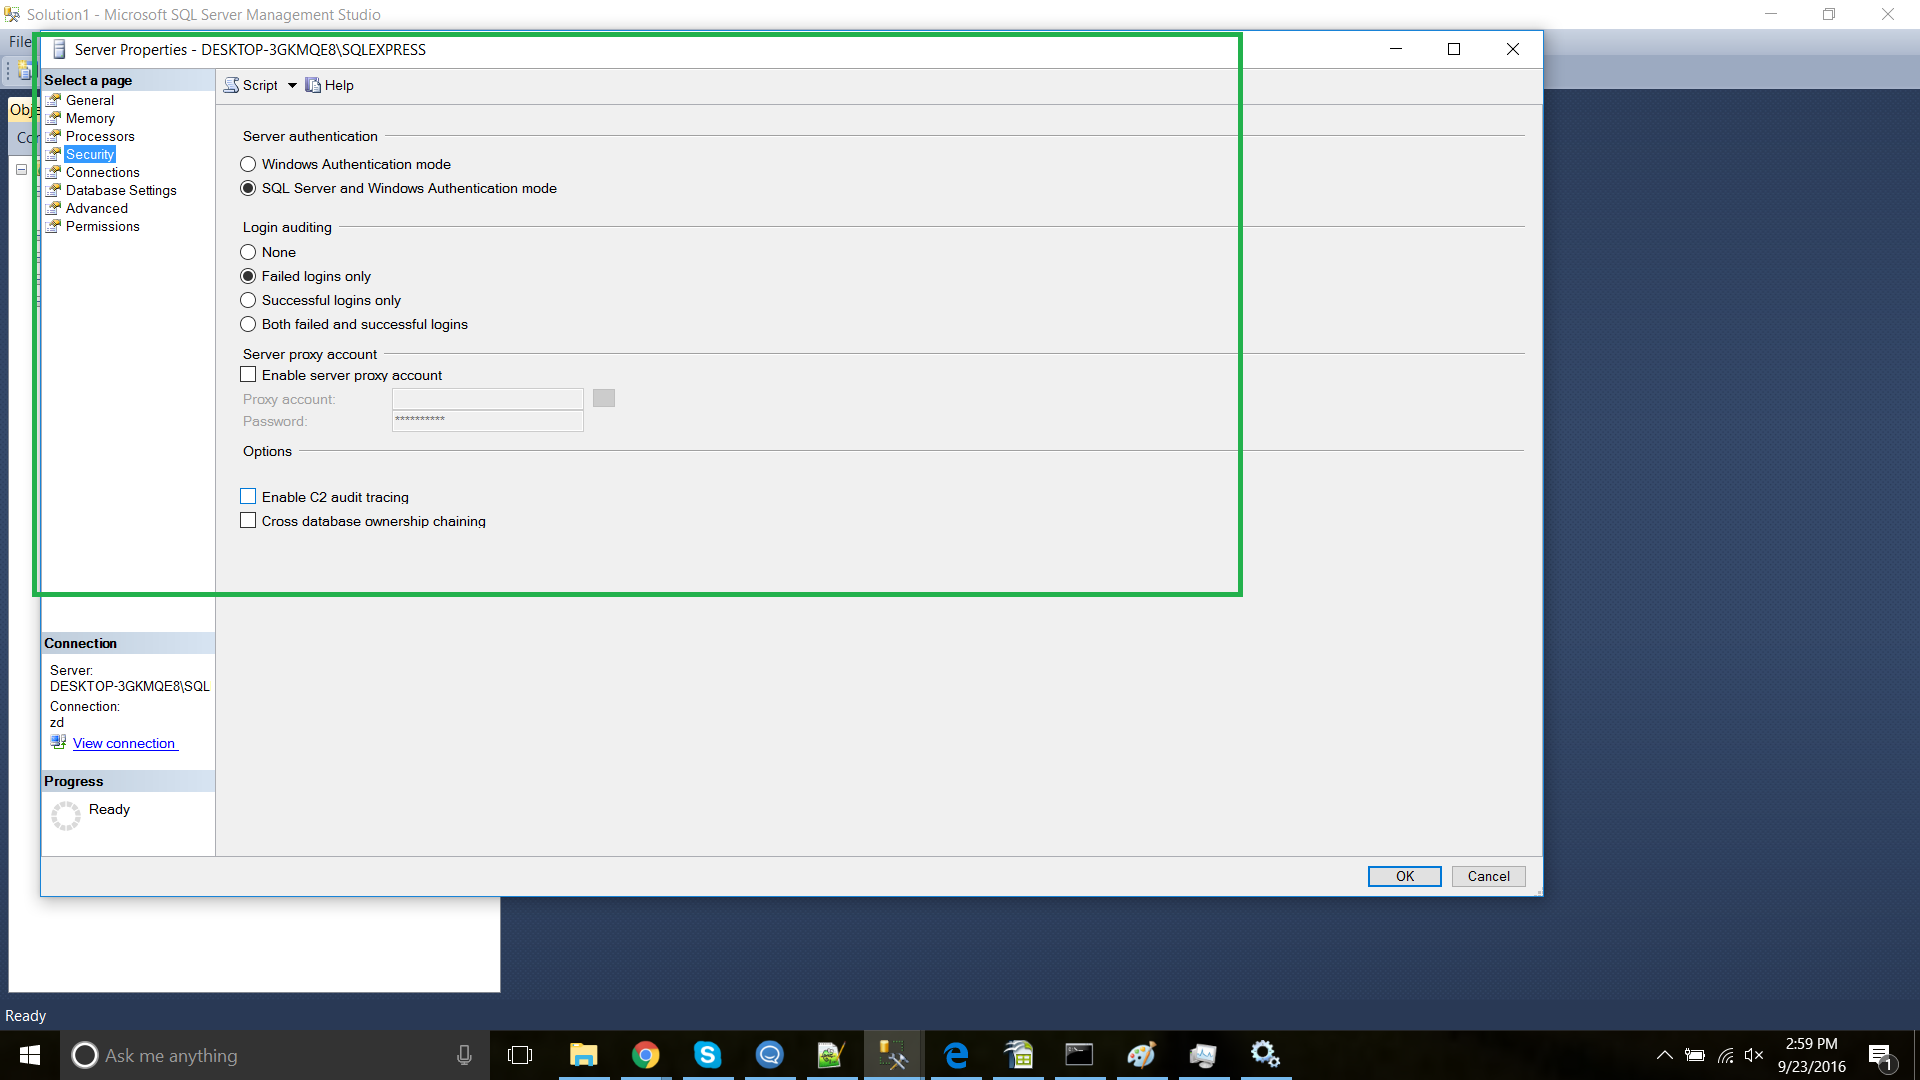
Step 5: Setting up Authentication
In SQL Server Management Studio, right-click on the server name in the left pane and select Properties.
From here, select Security and under Server authentication, select SQL Server and Windows Authentication mode.
Step 6: Install Zephyr and Connect to the Database
Now the Database is ready, open the Zephyr installer. The wizard will take you through the setup steps.
When prompted to "Choose deployment type", select between the Server or Data Center deployment type.

Provide the license file for Zephyr.
Complete the fields for connecting to the Database.

Pressing "Test Connection" button should now provide the message "Database Connection test successful!".
The Installation wizard will then provide Shortcut options, and install Zephyr.
After the install, follow these steps:
- For Windows : go to your Zephyr installation directory (the default is C:\Program files\Zephyr\):
(i) Navigate to ..\tomcat\webapps\flex\WEB-INF\template
(ii) Copy the cluster.properties.tmpl file to ..\tomcat\webapps\flex\WEB-INF\classes and rename the file to cluster.properties. Restart the Server .
- For Linux : go to your Zephyr installation directory (the default is usr\local\Zephyr\):
(i) Navigate to ..\tomcat\webapps\flex\WEB-INF\template
(ii) Copy the cluster.properties.tmpl file to ..\usr\local:\Zephyr\tomcat\webapps\flex\WEB-INF\classes and rename the file to cluster.properties. Restart the Server.
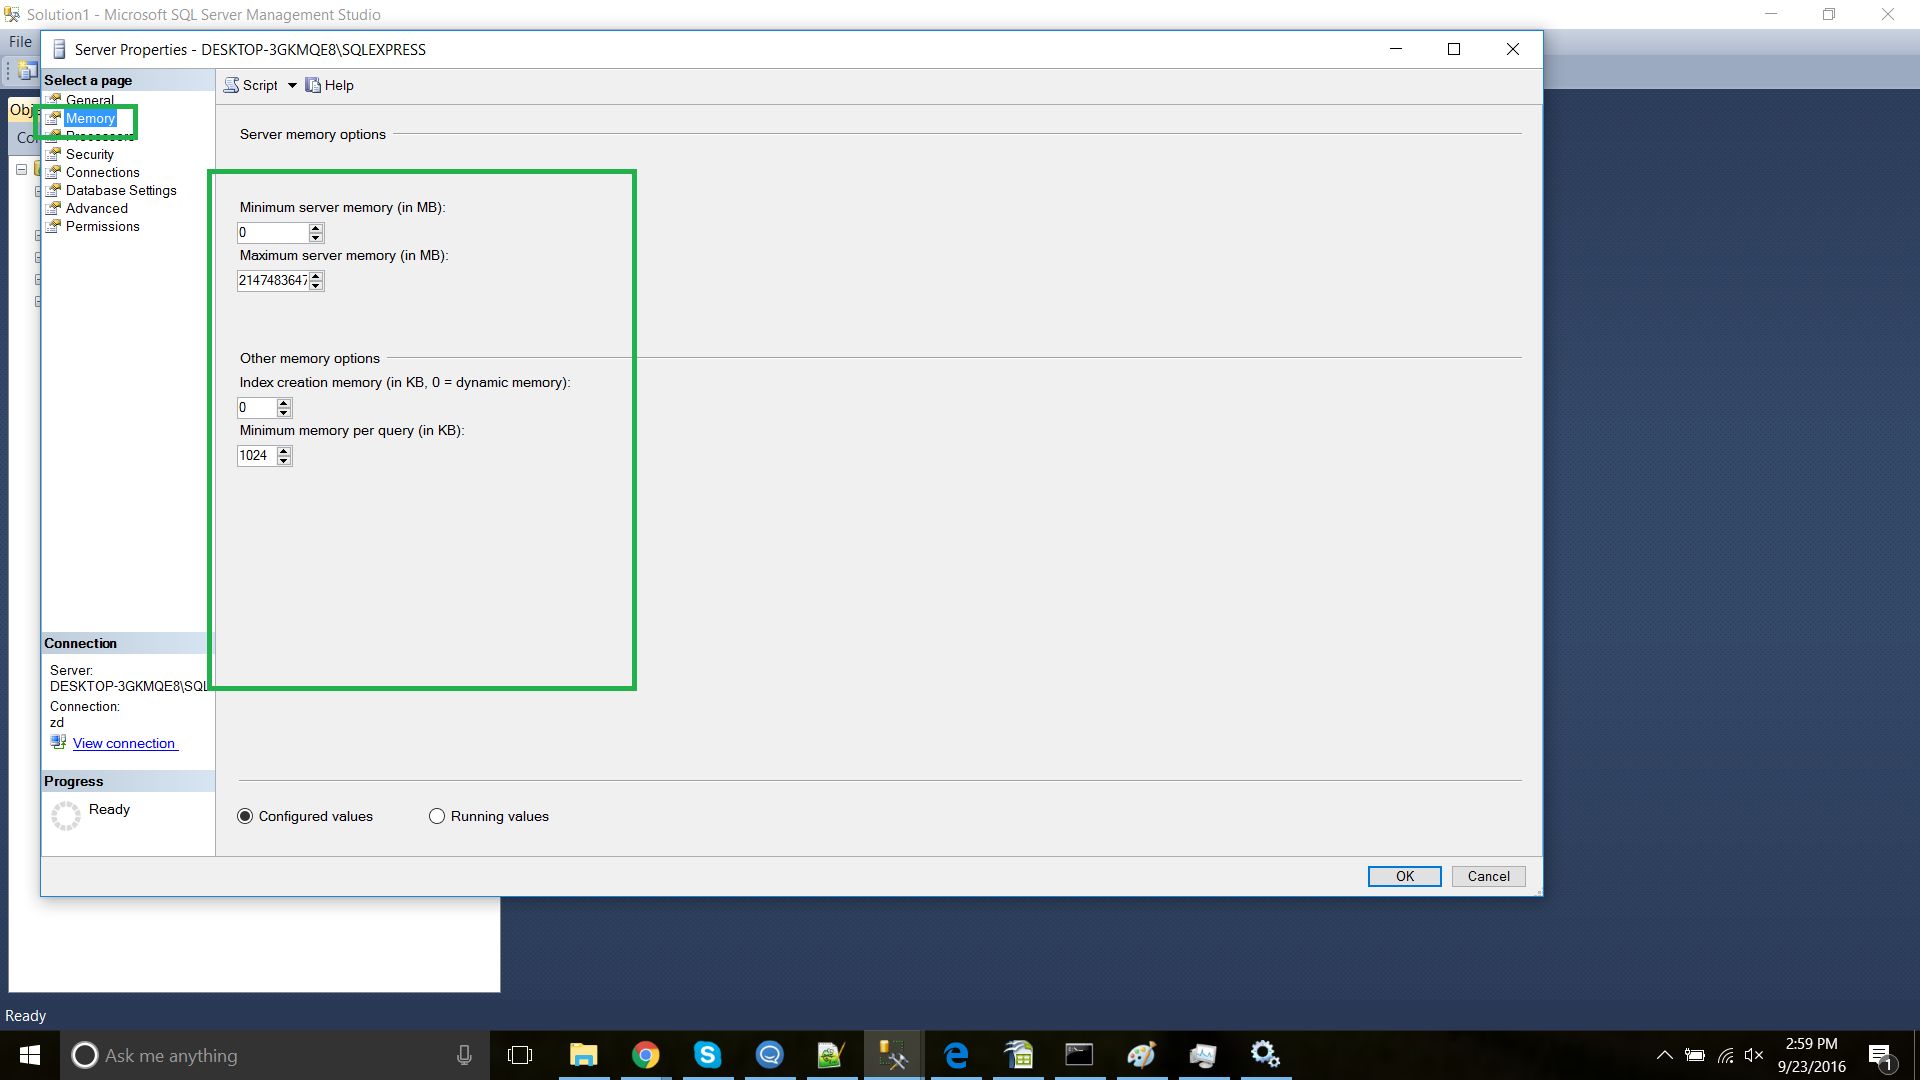
Step 7: Setting up Memory
In SQL Server Management Studio, right-click on the server name in the left pane and select Properties.
Now select Memory, and set the Minimum and Maximum server memory to the desired level. 8GB is our recommended minimum.
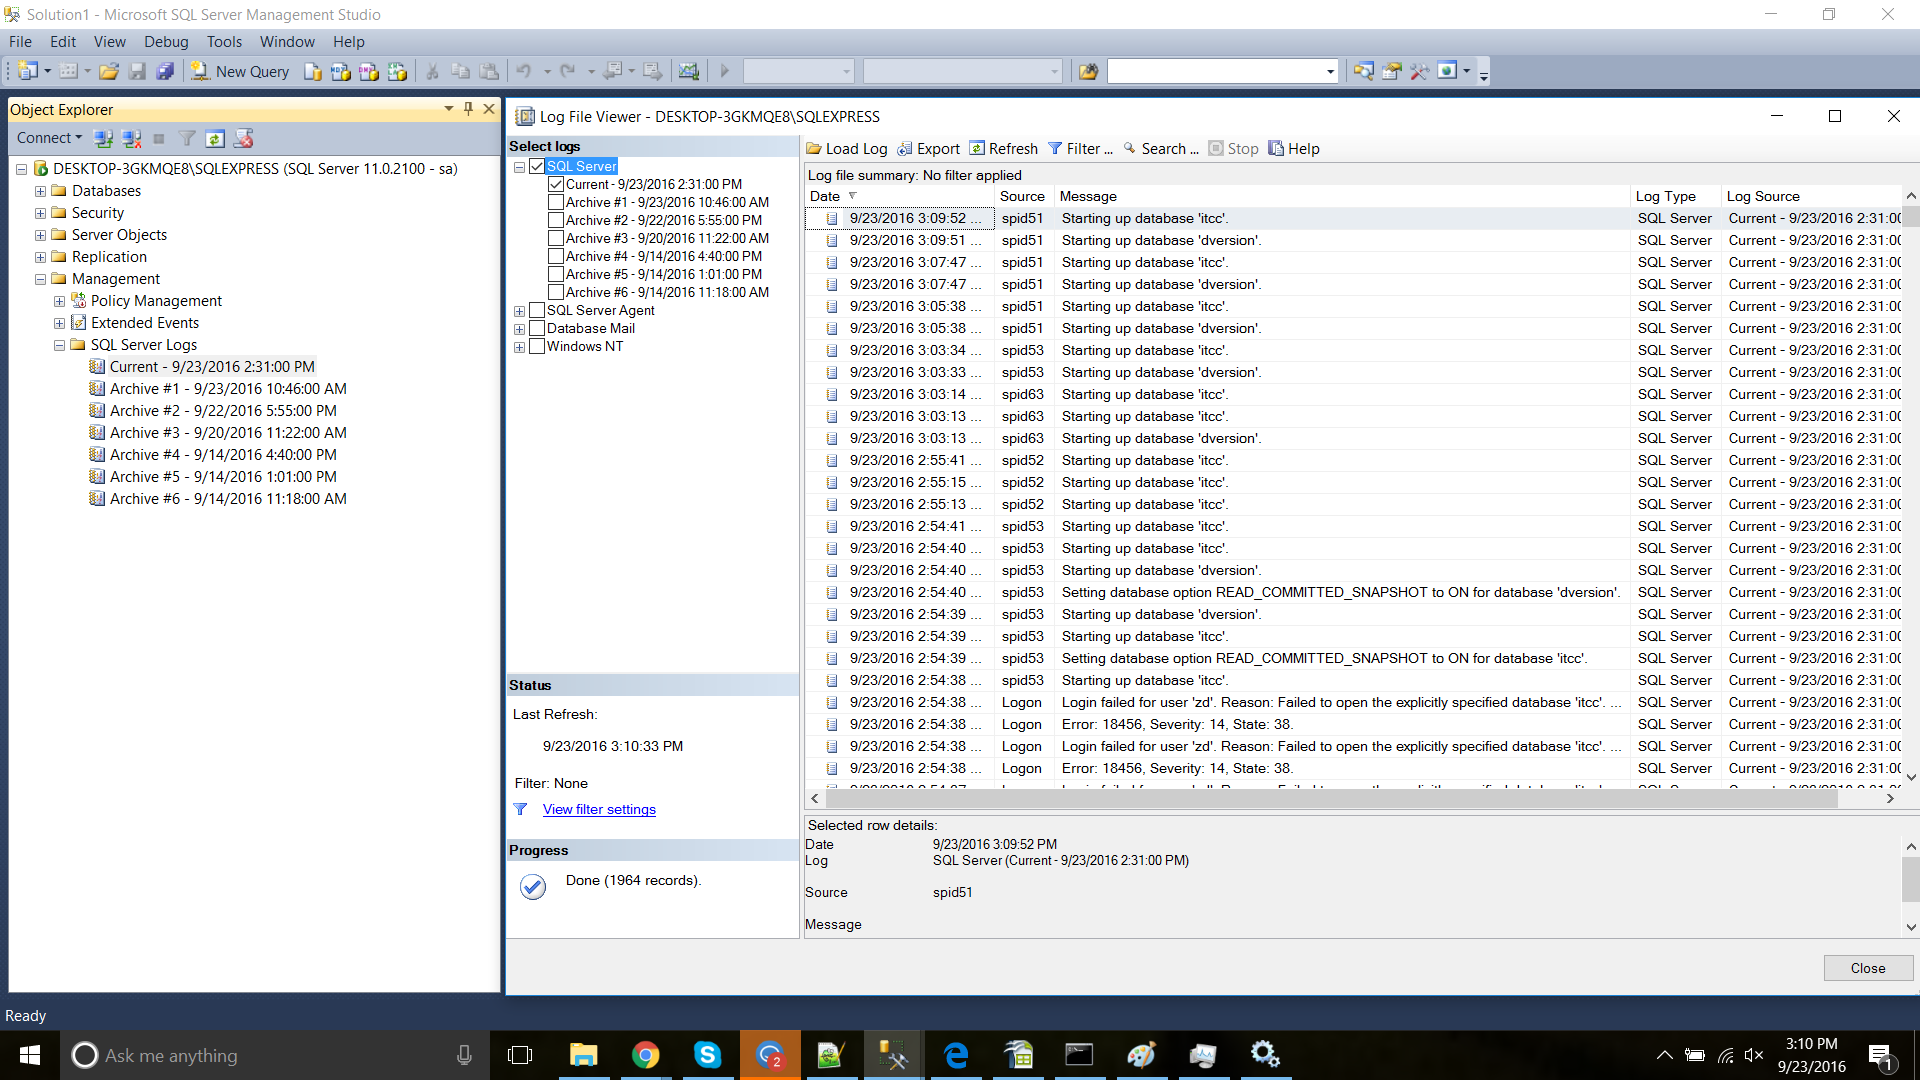
Step 8: Knowing where the Logs reside
Knowing where the Log files reside is useful when troubleshooting. To view the Logs in SQL Server, expand the Management tab, select SQL Server Logs. Click on View SQL Server Log.

Step 9: Configuring additional nodes
Now that a Microsoft SQL Server Database is connected to one installation of Zephyr, Step 4 needs to be followed again for every additional application node of Zephyr.
Once this is complete, follow these steps:
- Log into one of the Application nodes where Zephyr is installed. Then log into Zephyr.
- In the Testcase Creation application, create a Subfolder, and then create a Testcase with some teststeps.
- Use the Object Explorer to log into the SQL Server Database.
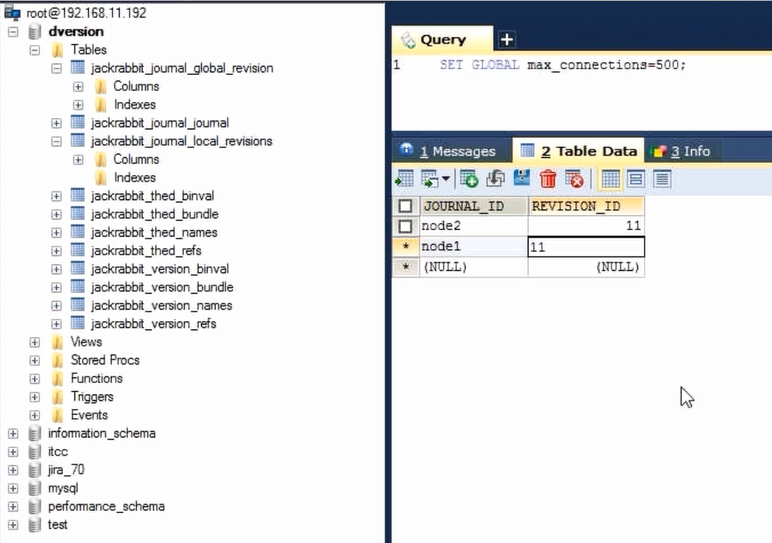
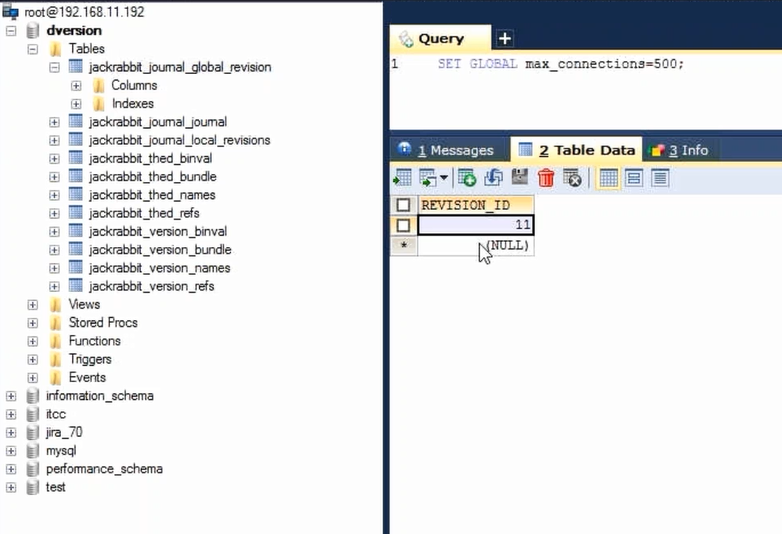
- In Dversion database we will see the JACKRABBIT_JOURNAL_GLOBAL_REVISION table and also a JACKRABBIT_JOURNAL_LOCAL_REVISIONS table.
- Get the current value of the REVISION_ID from the JACKRABBIT_JOURNAL_GLOBAL_REVISION table.
- The JACKRABBIT_JOURNAL_LOCAL_REVISIONS table will contain one entry for a node (i.e. "node2"). Add a new entry for the second node with its name and the value obtained from Step 5.