Description
In Zephyr Enterprise, selected defects can be exported to an excel sheet from defect tracking section. The ability to export a set of defects helps to provide users with reports to help track progress the defects and the status/progress of those defects. To learn how to export defects, please view the steps below.
Terminology
Table of Contents
The steps below describe in detail the general process of creating new defects, searching and viewing defects for a particular project, editing defects, creating sub-tasks for defects, and exporting a list of defects for reporting. To view further instructions for each individual function, please click the links provided below. By clicking on a link, you will be redirected to the page with the steps corresponding to the function selected.
Exporting Defects
Prior to Creating a Sub-task
Prior to creating a new sub-task for a defect, there must be an existing project with defects in Zephyr Enterprise. The project must be selected and the user must be under the Defect Tracking section. Also, the user project should be connected to an instance of JIRA. This can be configured in the Project Setup page under the administration section of Zephyr.
Scenario: You are a testing manager in Zephyr Enterprise. As a testing manager, you want to create a sub-task within the system in the defect tracking section of Zephyr.
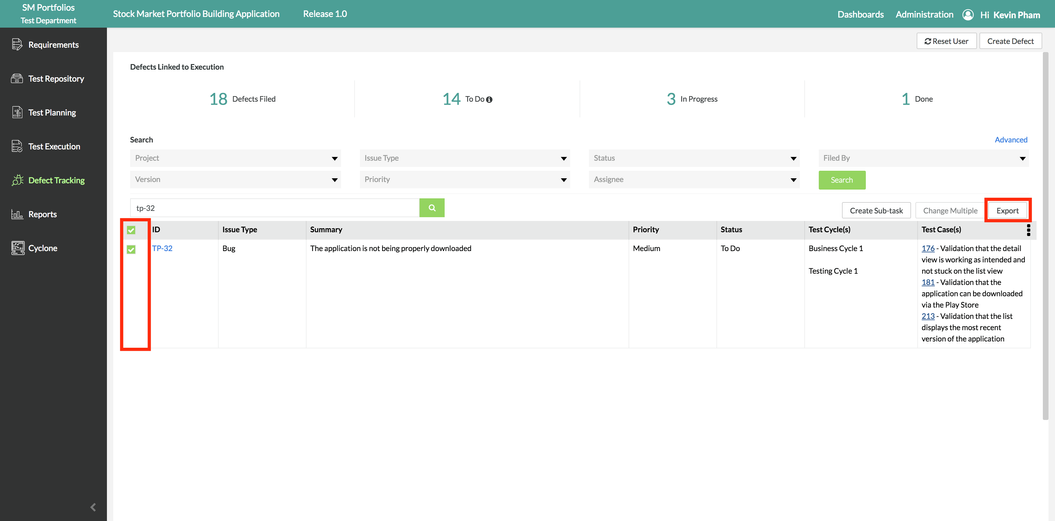
1. Select the defect(s) that you want to export to an excel sheet by using the check boxes on the left-hand side of the defect table.
2. Simply click on the button at the top right of the table.
- A pop-up/modal will appear as shown below:
3. Click on the "Download" button.
- The default name for the downloaded defect report/file is labeled as "Defect".
- The exported file of defects is downloaded to an excel file (.xlsx).


