Import
- Kevin Pham (Deactivated)
- Edward Stolyar (Deactivated)
|
Prerequisite for Using the Zephyr Importing Tool
This prerequisite is applicable for both the internal and external importer tool.
Zephyr supports the majority of the Jira fields and this includes any custom fields added as well.
Even though we support these Jira fields (mandatory or optional), they must be added to the Create Issue Screen in Jira. It is required for all mandatory fields for a given project to be added to the Create Issue Screen.
This is required because it allows the field to be mapped to a data column as part of the import process. Zephyr is then able to list the respective fields on the mapping section when using the Importer tool. Once the mapping is done, the user is able to map the required mandatory or optional Jira fields to the importer file fields.
Internal Importer
- Zephyr for JIRA now provides an in-house importer tool that allows users to import data straight from Excel and XML to JIRA.
- The importer tool utilizes a simple drag-and-drop feature to perform mapping of the issue fields with the Excel and XML fields to a JIRA story.
- Users are able to maintain persistent mapping for future reuse if there needs to be future imports.
- The Zephyr for Jira importer tool allows users the linking of test cases from Excel and XML to a JIRA story.
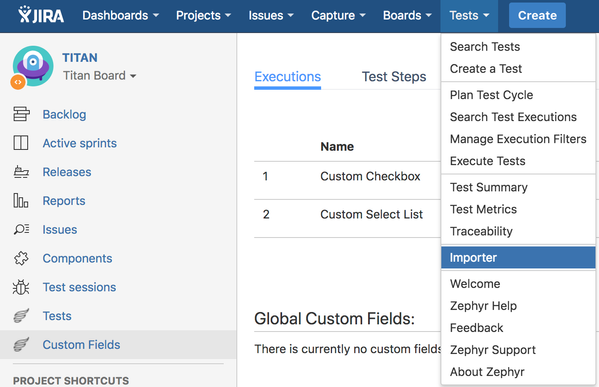
Click on the “Tests” menu at the top of the navigation bar and then click on the “Importer” tool to bring up the in-house importer tool.
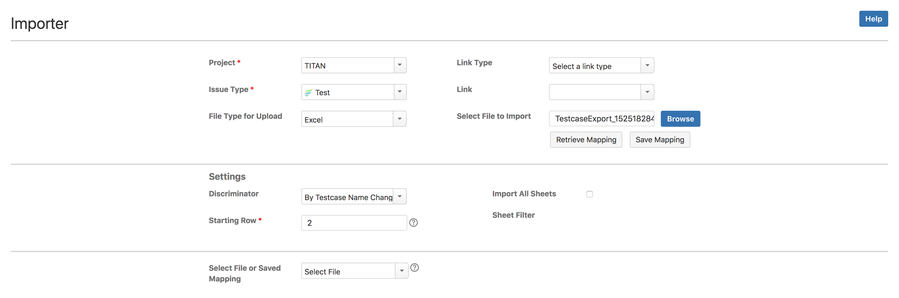
1. Select the project that you want to import the issues to.
2. Select the issue type that you want to import.
- The importer tools allow users to import tests, requirements, tasks, stories, bugs, and epics.
3. Select the file type that you want to import from (either an Excel or XML file).
4. Browse for the Excel or XML file that you want to import
- You can select “Retrieve Mapping” to retrieve the columns so that you can map the fields in your file to the Zephyr fields.
- You can select “Save Mapping” to save any mapping you have below for future reuse.
5. Choose how to discriminate between the issues in your Excel/XML file and then determine the starting row.
- The starting row should be greater than 1 because the first row is usually the row with the header for each column.
6. If you have any previously saved mappings, you can use this select to use a saved mapping.
7. If you don’t have any saved mappings, you can map your import file to the fields that Zephyr for JIRA uses. Mapping is an extremely easy process that allows users to simply drag-and-drop the Excel/XML fields to the mapped fields.
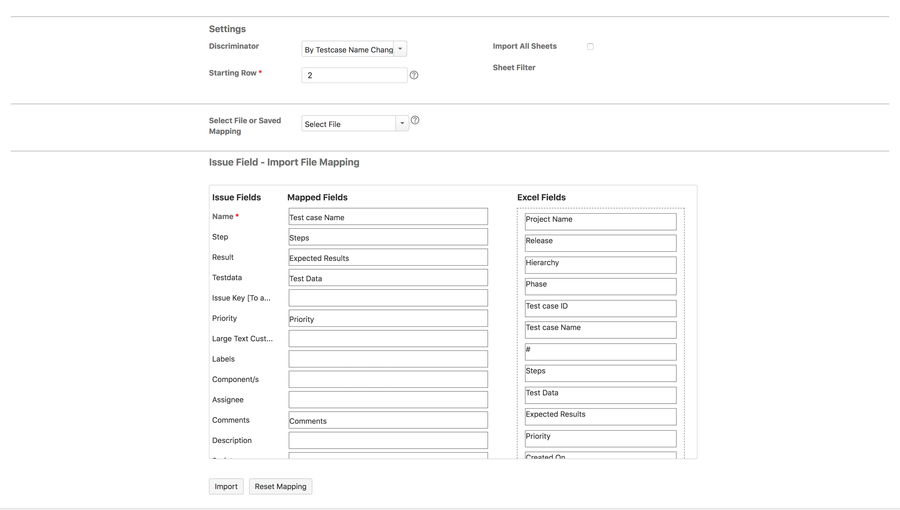
8. After mapping your fields, click on the “Import” button to start importing the issues from the import file to Zephyr for JIRA.
External Importer
If your tests are in Excel:
You have a couple of different options to import them into JIRA:
- Using the JIRA Importers Plugin
You will have to convert your files to a CSV format and use this plugin to import your tests into JIRA. See http://confluence.atlassian.com/display/JIRA/Importing+Data+from+CSV for detailed instructions. Note that if you have detailed test steps in your tests, they CANNOT be imported using this mechanism. Use the next option for that. - Using the Zephyr for JIRA Tests Importer Utility
This utility allows the importing of tests directly from Excel spreadsheets, including detailed test steps.
If your tests are in XML format:
The Zephyr for JIRA Tests Importer Utility supports importing tests that are in the Testlink xml format, not the JIRA xml format yet.