/
Create Tests
Create Tests
You need to have the "Create Issue" permission in the relevant project to be able to create a test. If you do not have this permission, please contact your JIRA administrator.
To create a new test:
- Do one of the following to open the Create Issue dialog.
- Keyboard shortcut: 'c'.
- At the top right corner of the screen, click the Create Issue link.
- While browsing a project, you can click on the test icon .
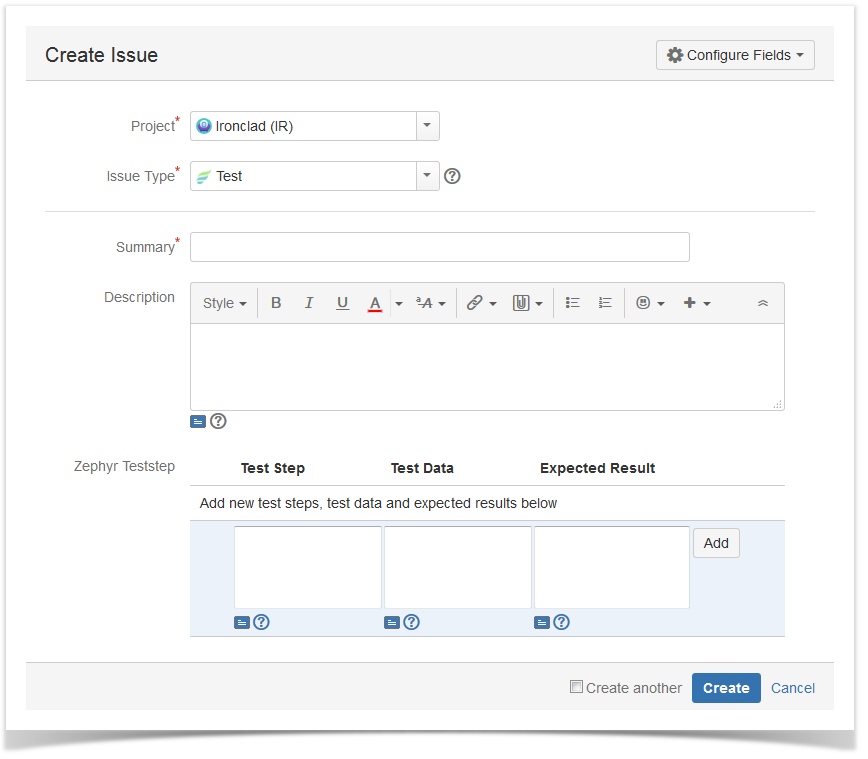
- In the displayed Create Issue dialog, enter the details for the test.
- Optional: If you want to create a series of test with similar details, you can select the Create another check box.
When you select this option, a new issue dialog will appear after your test is created, automatically pre-populated with your previous test details, while leaving the 'Summary' field blank. - Click the Create button to create the test.
- Users can directly input test step, test data, and expected results field values at this screen.
![]() Note that only the Fix Version/s field is used for tests. All tests that have a Fix Version populated will be organized accordingly. If that field is left blank, then they will belong to an "Unscheduled" version. See Organize Tests for more details.
Note that only the Fix Version/s field is used for tests. All tests that have a Fix Version populated will be organized accordingly. If that field is left blank, then they will belong to an "Unscheduled" version. See Organize Tests for more details.
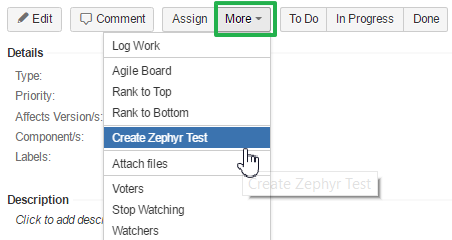
Creating a new test issue from another issue type:
For a supported issue type, select the More drop-down and then select Create Zephyr Test.
Tests created this way will automatically be linked back to the issue they were created from.
, multiple selections available,
Related content
Executing Tests
Executing Tests
Read with this
Adding a Test Case
Adding a Test Case
More like this
View and Modify Tests
View and Modify Tests
Read with this
Test Repository
Test Repository
More like this
Executing Manual Test Cases
Executing Manual Test Cases
More like this
Adding and Deleting Test Cases in a Test Phase
Adding and Deleting Test Cases in a Test Phase
More like this


