Adding JIRA Cloud Servers
- Daniel (Deactivated)
- Edward Stolyar (Deactivated)
Owned by Daniel (Deactivated)
Last updated: Feb 04, 2021 by Edward Stolyar (Deactivated)
Configuring JIRA instances in Bamboo
After installation, configure Bamboo global settings to establish connection with JIRA Server(s). Follow the below steps
- Launch Bamboo and access it via a web browser
- Click on "Overview" from the Bamboo administration menu

- Click Zephyr for JIRA Configuration from the left side panel under Add-ons

- Click Add New JIRA Cloud button.

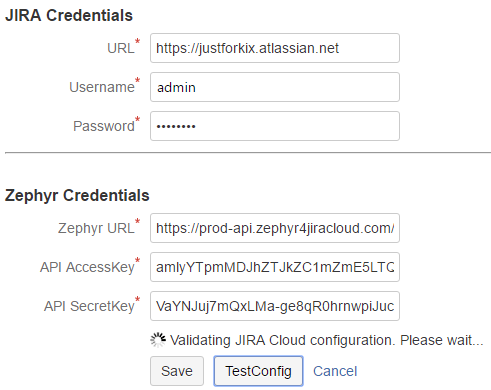
- Enter JIRA Cloud URL and user credentials. Note that the User Name and Password must be that of a user with appropriate permissions to project(s). Next, add the Zephyr URL, access key and secret key from your Cloud instance. You can get the access key and secret key from your JIRA Cloud instance ZAPI section of the Manage Add-on section. Click Test Configuration to validate connection to JIRA Cloud.

- Please wait while bamboo is validating JIRA Cloud and Zephyr credentials
- If the URLs and credentials given are good, Bamboo will display the validation successful message. Click Save to commit the configuration after testing.

- Once saved, the Zephyr for JIRA Cloud configuration will show in the top list as "Verified"

, multiple selections available,