| Table of Contents |
|---|
Overview
The integration of TestComplete into of TestComplete into Zephyr allows Zephyr to directly trigger the execution of TestComplete Projectsof TestComplete Projects. Zephyr will also be able to retrieve test case execution results for visualization within Zephyr.
There are two supported approaches for integration with TestCompletewith TestComplete, both leveraging Vortex:
Approach 1 allows
triggering TestComplete projectstriggering TestComplete projects directly from Zephyr Enterprise, which then parses the generated JUnit XML file to update the test case execution results.
Approach 2 involves using
the TestComplete Jenkinsthe TestComplete Jenkins plugin, which needs to be setup and triggered separately. Then a Vortex Folder Watcher job is created in Zephyr Enterprise to watch for and parse the generated JUnit XML file.
The table below outlines the pros and cons of each approach:
Approach | Pros | Cons |
|---|---|---|
1 - Triggering TestComplete Directly |
|
|
2 - Leveraging TestComplete Jenkins Plugin |
|
|
Triggering TestComplete directly from Zephyr Enterprise
...
The diagram below gives an overview of this setup: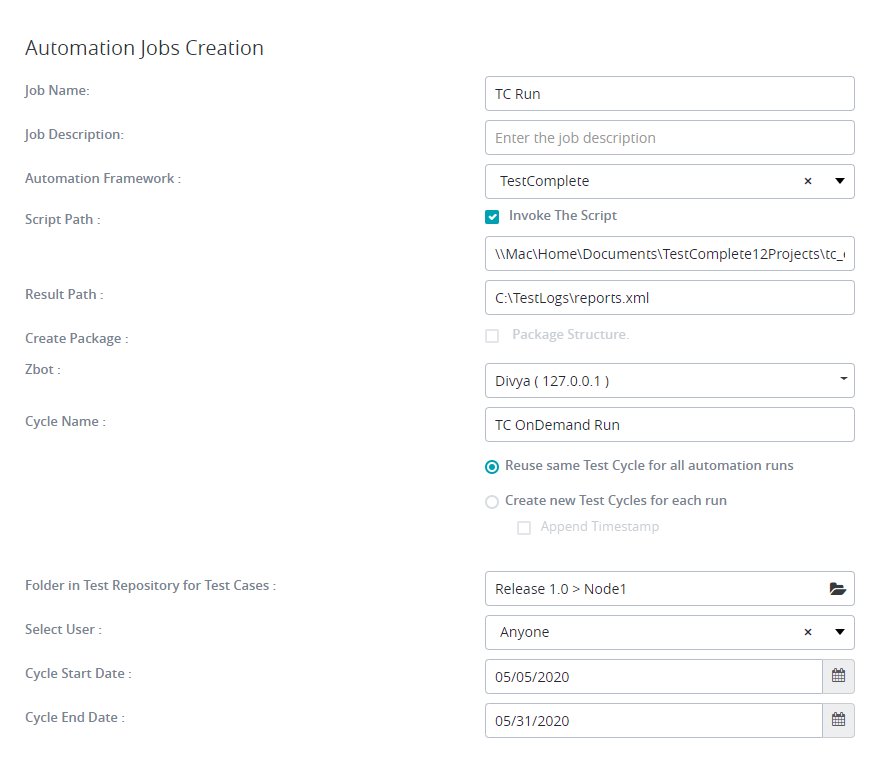
...
Setup Process Overview
...
Install TestComplete and create a BAT file to trigger the desired
...
project
Install and
...
configure zBot on the same machine
...
as TestComplete
Setup an Automation job in Zephyr
...
Enterprise
Step 1 - Install and Configure TestComplete
Step 1a - If needed, install TestComplete
The Trial is available here: https://smartbear.com/product/testcomplete/free-trial/
Product Documentation: https://support.smartbear.com/testcomplete/docs/
Step 1b - Ensure that it can be executed for the desired project
Please make sure that you're able to run TestComplete and execute the desired project properly.
Step 1c - Generate the BAT file
For this integration to work, Zephyr needs to be able to trigger TestCompletetrigger TestComplete. It’s possible to trigger TestComplete directlytrigger TestComplete directly, but it’s advisable to trigger a BAT file instead for instead for the sake of convenience and future editing.
Please create a BAT file located in the same machine as TestComplete with as TestComplete with the content below:
TestComplete.exe "<fullPathToProject><fullPathToProject>” /run /p:<projectName><projectName> /ExportSummary:"<fullPathForResults>" <fullPathForResults>"
where:
<fullPathToProject> is <fullPathToProject> is the full path and file name for the TestComplete .pjs project
<projectName> is the TestComplete project name
<fullPathForResults> is the TestComplete .pjs project
<projectName> is the TestComplete project name
<fullPathForResults> is the desired full path and file name for the jUnit XML the JUnit XML report (.xml file)
For example:
TestComplete.exe exe "\\Mac\Home\Documents\TC_examples\Zephyr_TestComplete_Integration.pjs" /run /p:Zephyr_TestComplete_Integration /ExportSummary:"C:\TestLogs\report.xml"
After creating the BAT file, please trigger it locally to ensure the TestComplete project the TestComplete project is executed automatically, and that the jUnit XML the JUnit XML results are saved to the expected .xml file.
| Note |
|---|
The approach of using a BAT file is particularly useful if we want to perform some cleanup operationssome cleanup operations, like deleting temporary files from the automation run, closing the Browser, or closing down TestComplete down TestComplete (even if Silent mode is if Silent mode is used). If you have a TestExecute licencea TestExecute licence, you’ll be able to reference TestExecute.exe in the BAT file instead. |
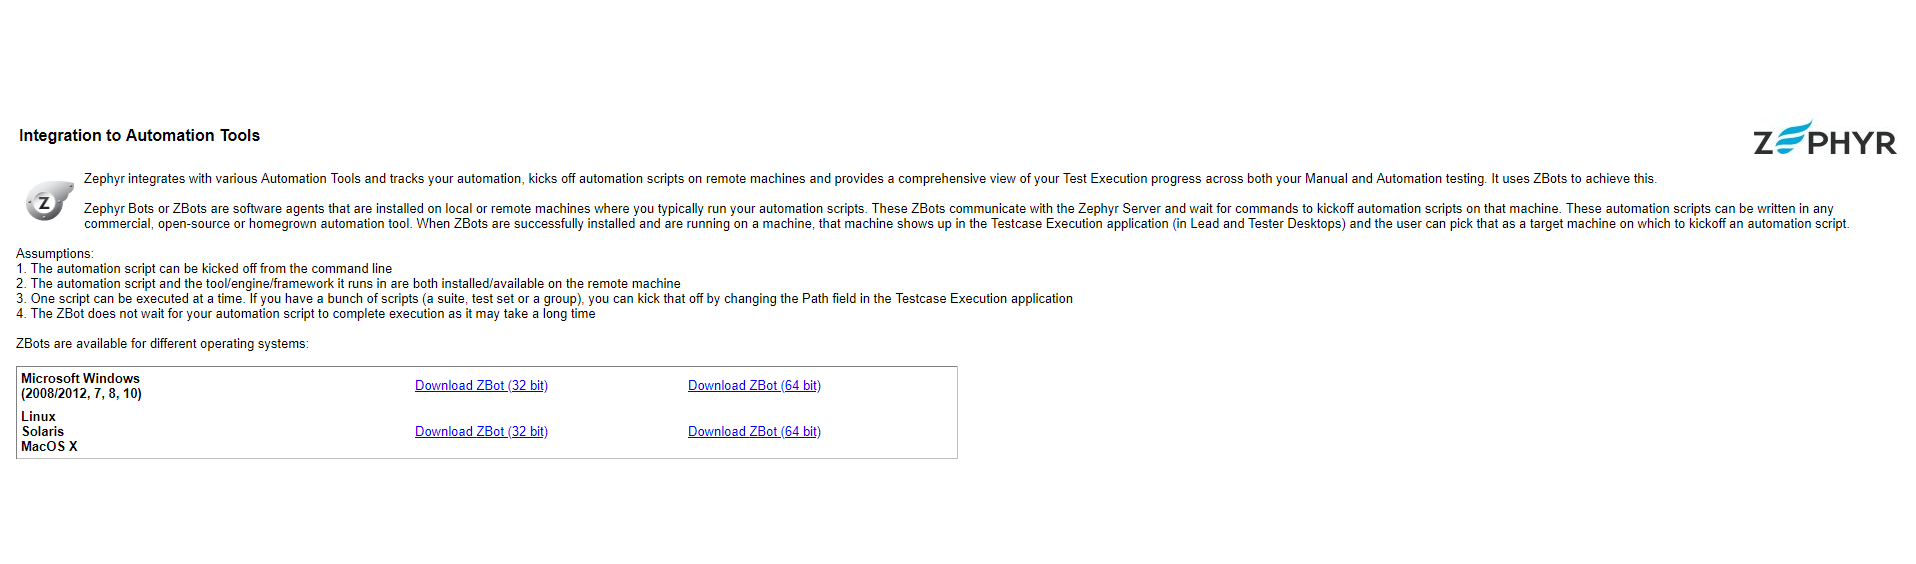
Step 2 - Install and Configure ZBot
ZBot is an agent for Zephyr Enterprise that runs on the same machine as the target test automation tool , and communicates with Zephyr Enterprise to receive jobs and post results. You may read more about it here: ZBot Overview
Please follow the instructions here to install the ZBot below to install the ZBot on the local machine.
After installing, you must configure the ZBot to communicate with your Zephyr
Steps Below
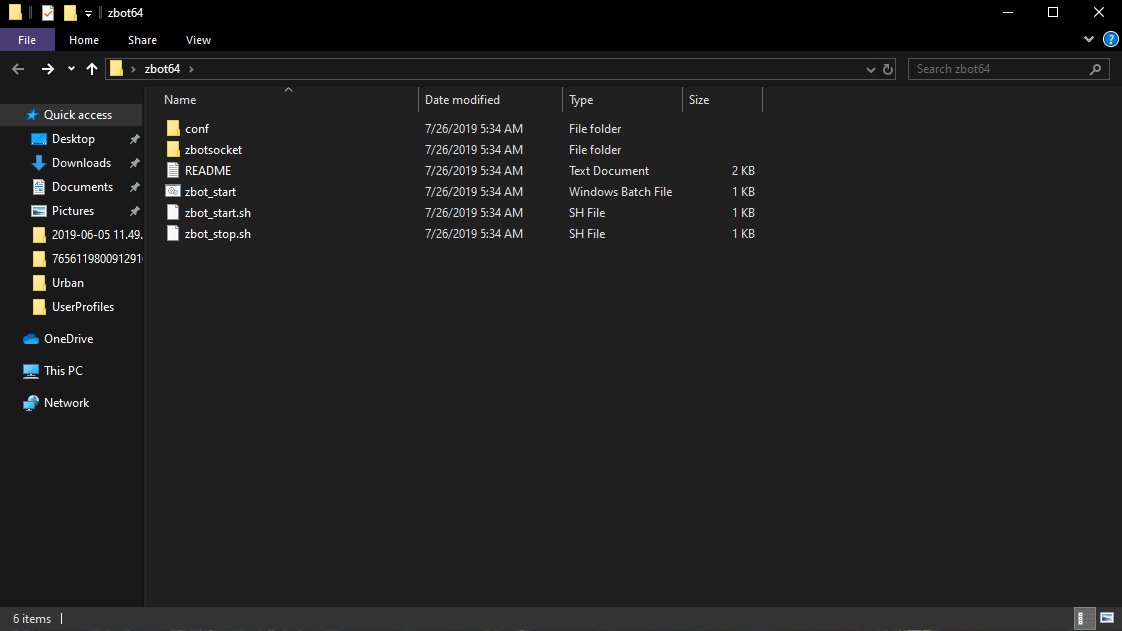
1. Download and install the ZBot.
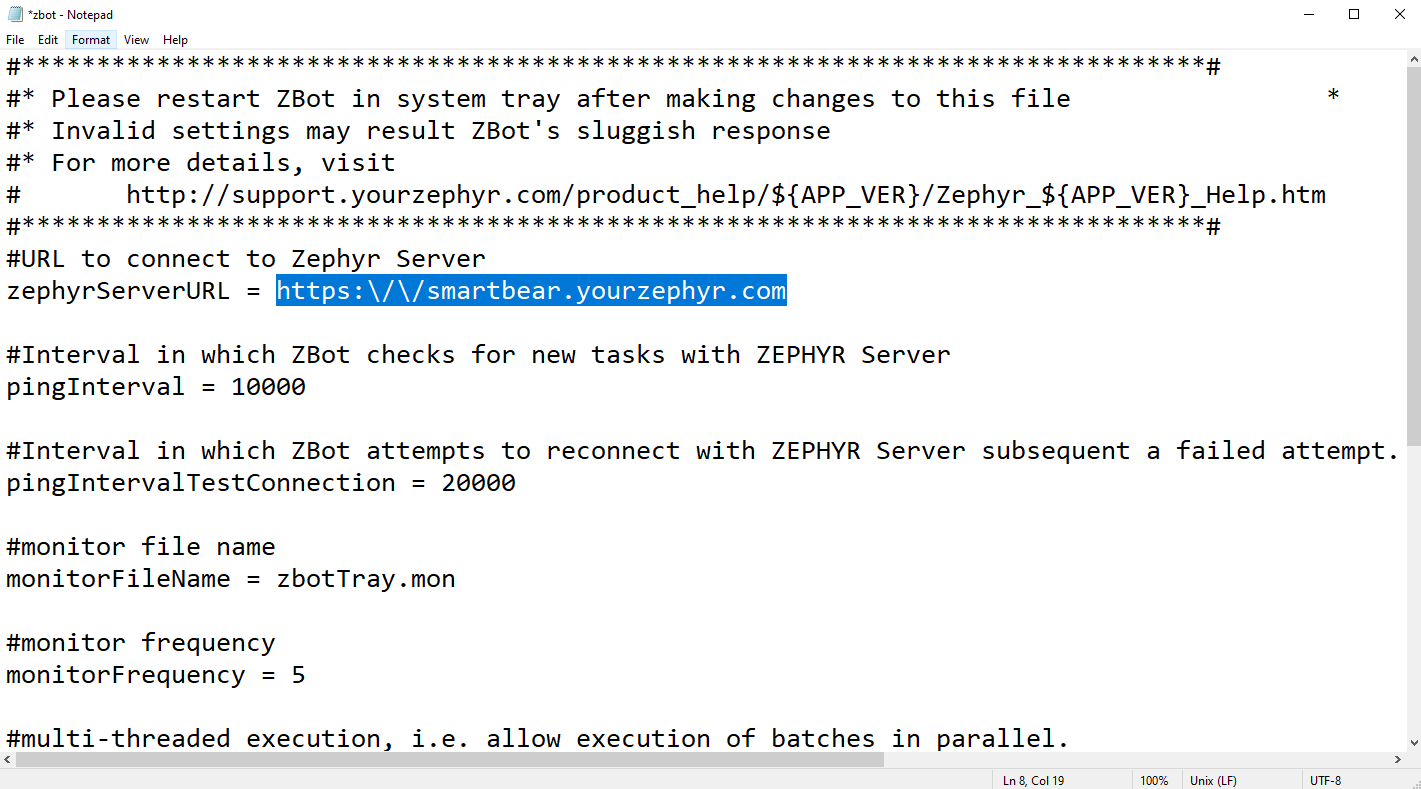
2. Navigate to and open the ZBot properties file located in the conf folder.
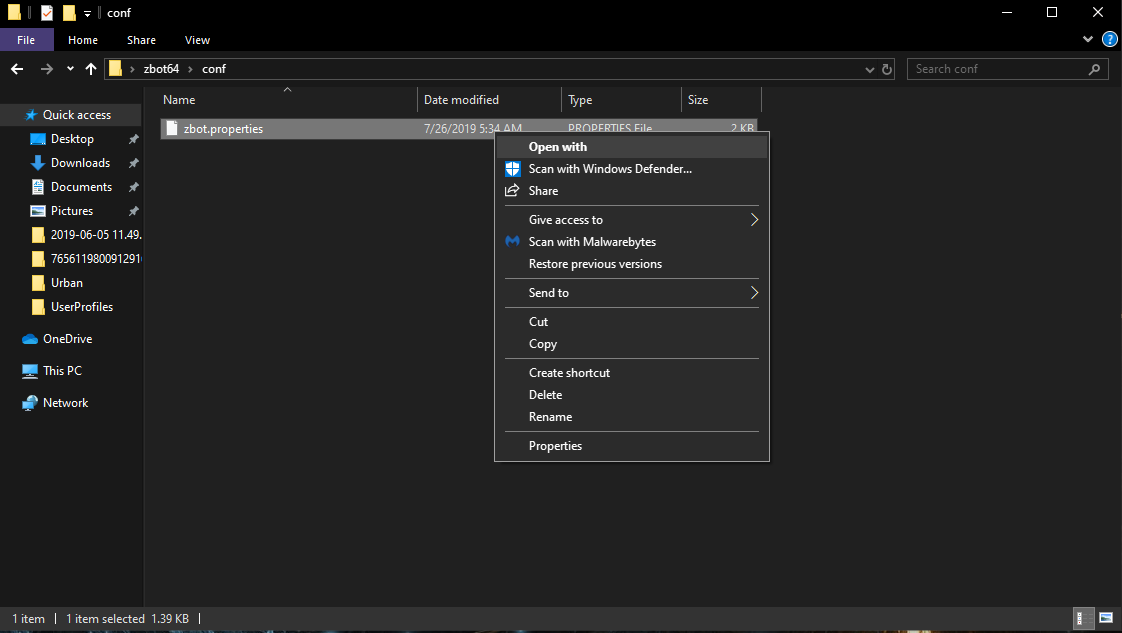
3. Enter the parameters for the zephyrServerURL.
- If you're instance has SSL setup, be sure to include "https:"
- Make sure that your forward slashes for your instance is entered correctly. View the image below as a reference.
4. Enter the parameters for the Zephyr server credentials. This will include username and password for the zephyr instance.
- Note about user permissions: user must have full access to Test Planning, Test Execution, etc.
- The password will be entered as clear text but once the ZBot is started, the ZBot will pick up on the properties file and encrypt your password.
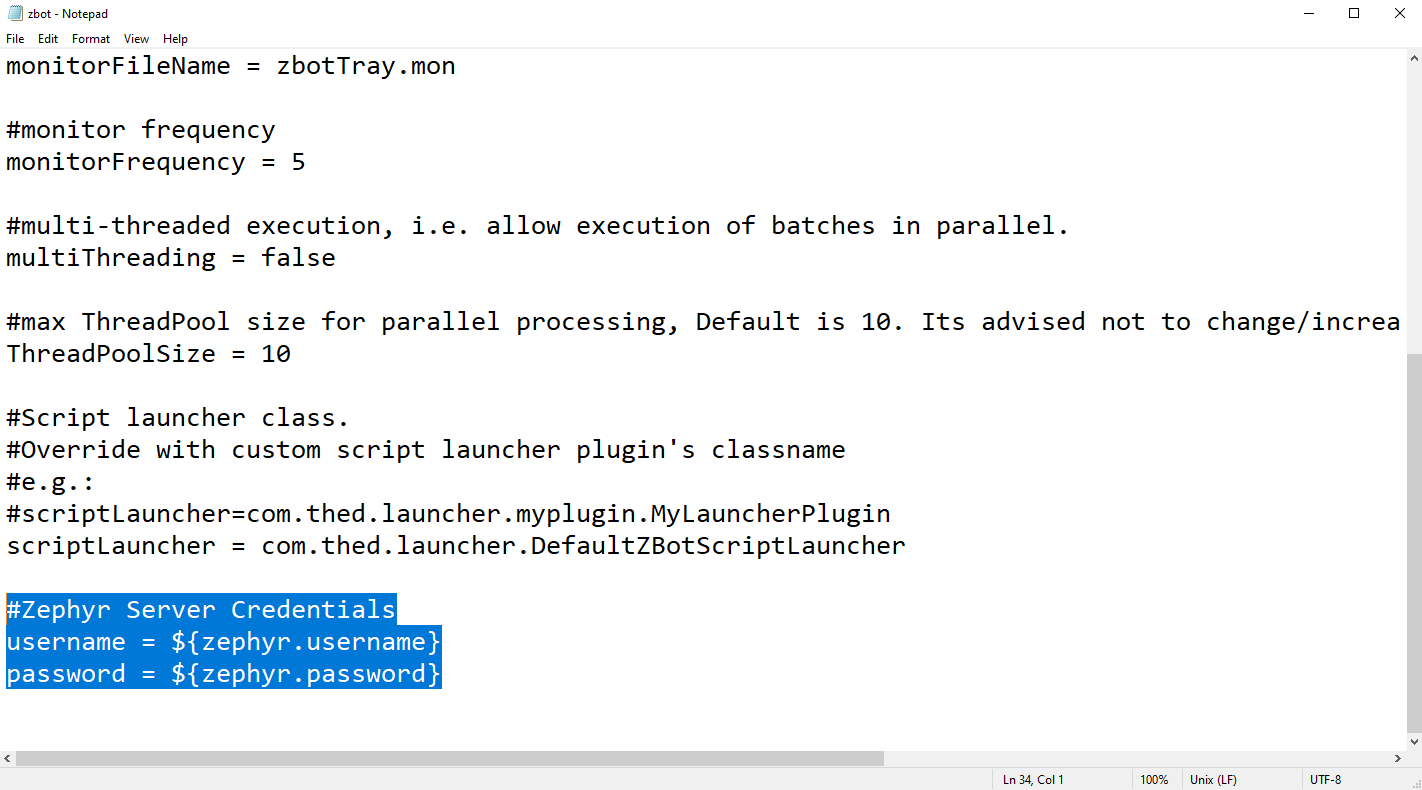
5. Save the ZBot properties file once the changes have been made.
6. Now simply start the ZBot to get it going.
Make sure the Zbot is working properly by opening Zephyr Enterprise and checking that the ZBot is available under the drop down menu.
Step 3 - Setup Vortex Automation
Setup Vortex (including ZBotincluding ZBot) using the steps mentioned here for “How “How to Add and Execute Automation Job” Job” : https://zephyrdocs.atlassian.net/wiki/spaces/ZE/pages/1558444869/Zephyr+Vortex
Please see below for the final Vortex configuration: 
...
Leveraging TestComplete Jenkins Plugin
Steps for setting up the Vortex Automation
Setup Vortex (including ZBotincluding ZBot) using the steps mentioned here for “How “How to Add and Execute Folder Watcher Job” : https://zephyrdocs.atlassian.net/wiki/spaces/ZE/pages/1558444869/Zephyr+Vortex
Here is how the setup should look: 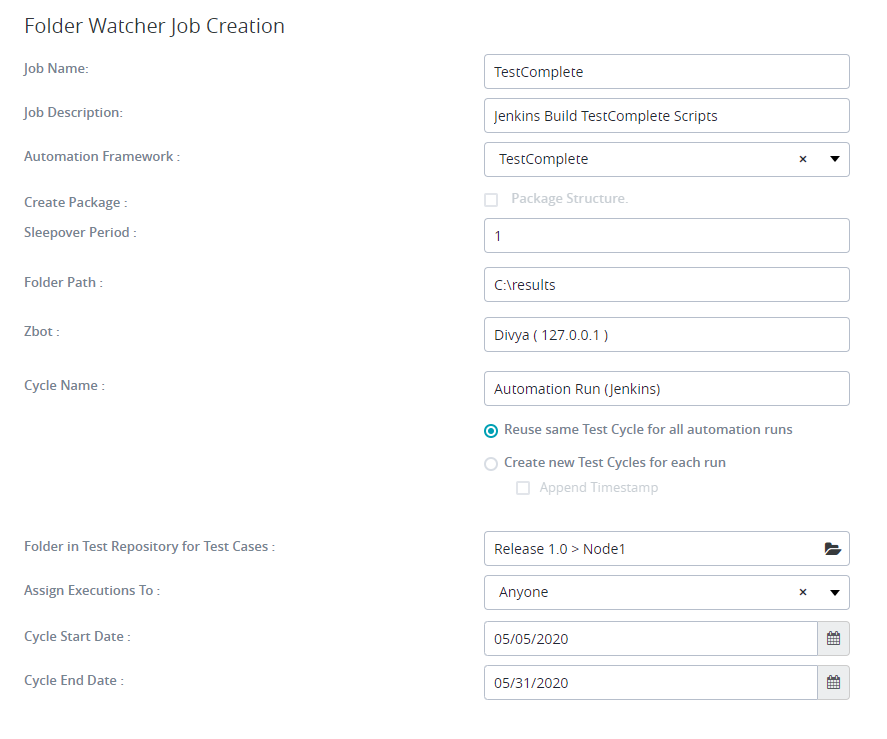
...
Steps for setting up the TestComplete Jenkins Plugin
Please follow follow these steps for the setup. First, start the ZBot from where the start the ZBot from where the results file will be placed. Then, setup the Jenkins job as shown here: 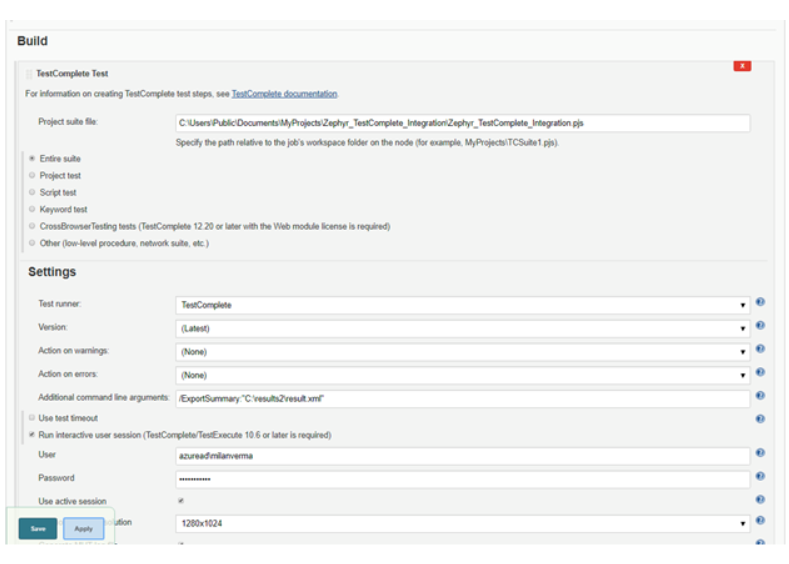
...
Notice, with the above setup,TestComplete TestComplete (rather than TestExecutethan TestExecute) is being used, so we see the UI of TestComplete when of TestComplete when the build is triggered/run.
Now, once the Jenkins build is triggered/run, the Vortex Folder Watcher job will check the specified results folder containing the JUnit XML file. Upon finding a new file, the results are parsed and consumed by Zephyr Enterprise.
| Tip |
|---|
Don’t forget to specify the XML path as an additional command line argument. This will help to produce the JUnit report file, which the Vortex Folder Watcher will use. You might want to setup some post build actions for cleanupfor cleanup, such as deleting temporary files generated by the automation run. If doing this, clean out the Folder Watcher location too so when a new run happens, the folder will have a new file to parse. |