Steps to Install Elasticsearch
- Helen Kosova (Deactivated)
This topic describes how to install Elasticsearch 6.8.1 on a single node and how to configure an Elasticsearch cluster (three nodes).
Install and configure Elasticsearch on a single node
- Download Elasticsearch version 6.8.1.
- Unzip the downloaded file.
Open the file elasticsearch-6.8.1\config\elasticsearch.yml and make the following changes.
If you a going to connect to Elasticsearch using the IP address:cluster.name: zephyr transport.tcp.port: 9300 node.name: "ESNode1" network.host: 192.168.0.1 network.bind_host: 192.168.0.1 network.publish_host: 192.168.0.1 http.port: 9200 bootstrap.memory_lock: true xpack.security.enabled: false discovery.zen.ping.unicast.hosts: ["192.168.0.1"] indices.query.bool.max_clause_count: 4096
If you are going to connect to Elasticsearch using the hostname:
cluster.name: zephyr
transport.tcp.port: 9300
node.name: "ESNode1"
network.host: 127.0.0.1
network.bind_host: 127.0.0.1
network.publish_host: 127.0.0.1
http.port: 9200
bootstrap.memory_lock: true
xpack.security.enabled: false
discovery.zen.ping.unicast.hosts: ["127.0.0.1"]
indices.query.bool.max_clause_count: 4096
Start Elasticsearch by running the elasticsearch-6.8.1\bin\elasticsearch.bat file.
For more information on system configuration, see Configuring System Settings.
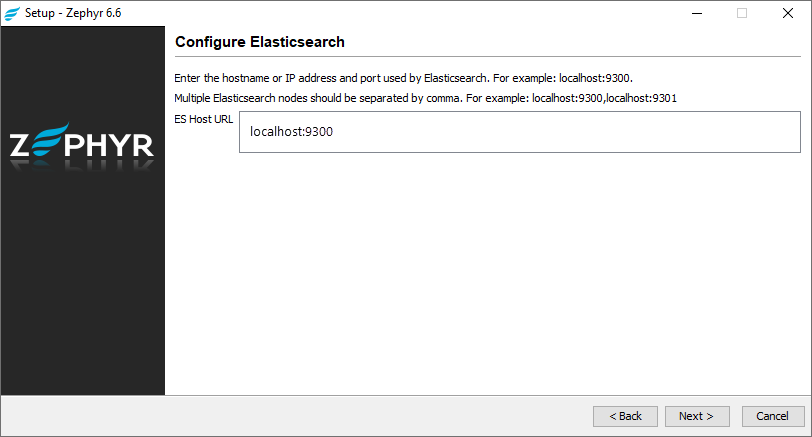
Elasticsearch must be running before you start installing Zephyr Enterprise. You connect Zephyr to Elasticsearch during product installation. To do that, specify either 192.168.0.1:9300, or localhost:9300 on the Configure Elasticsearch page, depending on which configurations you have made in the elasticsearch.yml file:
Configure an Elasticsearch cluster (3 nodes)
The number of Elasticsearch nodes you use in a cluster should be odd. That is, the minimum number of nodes you can use in a cluster is 3.
To avoid split-brain, you need to specify an appropriate value for the discovery.zen.minimum_master_nodes parameter. To determine it, follow the rule N/2+1, where N is the number of nodes in the cluster. In a three-node cluster, the parameter should be set to 2 (3/2+1=2 - rounded down to the nearest integer).
See Also
Zephyr On-Premise Production Installation
Set Up Zephyr Data Center Cluster
Connecting to an External Database