Starting Release 8.2, Zephyr Enterprise documentation has moved from its current location on Atlassian to a dedicated, standalone Zephyr Enterprise Documentation page. Please see: https://support.smartbear.com/zephyr-enterprise/docs/en/zephyr-enterprise/zephyr-administration-guides/project-setup/add-a-project.html
Adding Projects
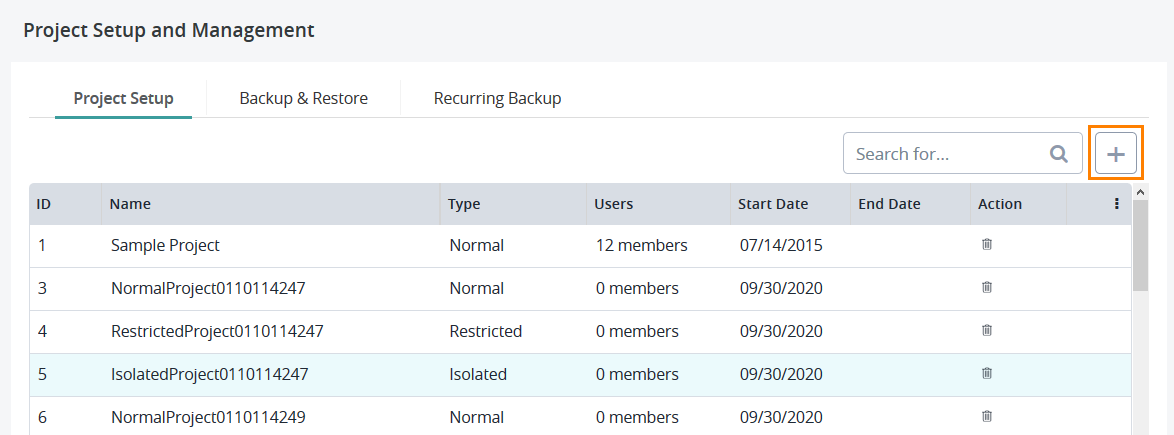
1. Click on the button in the top-right corner of the window.
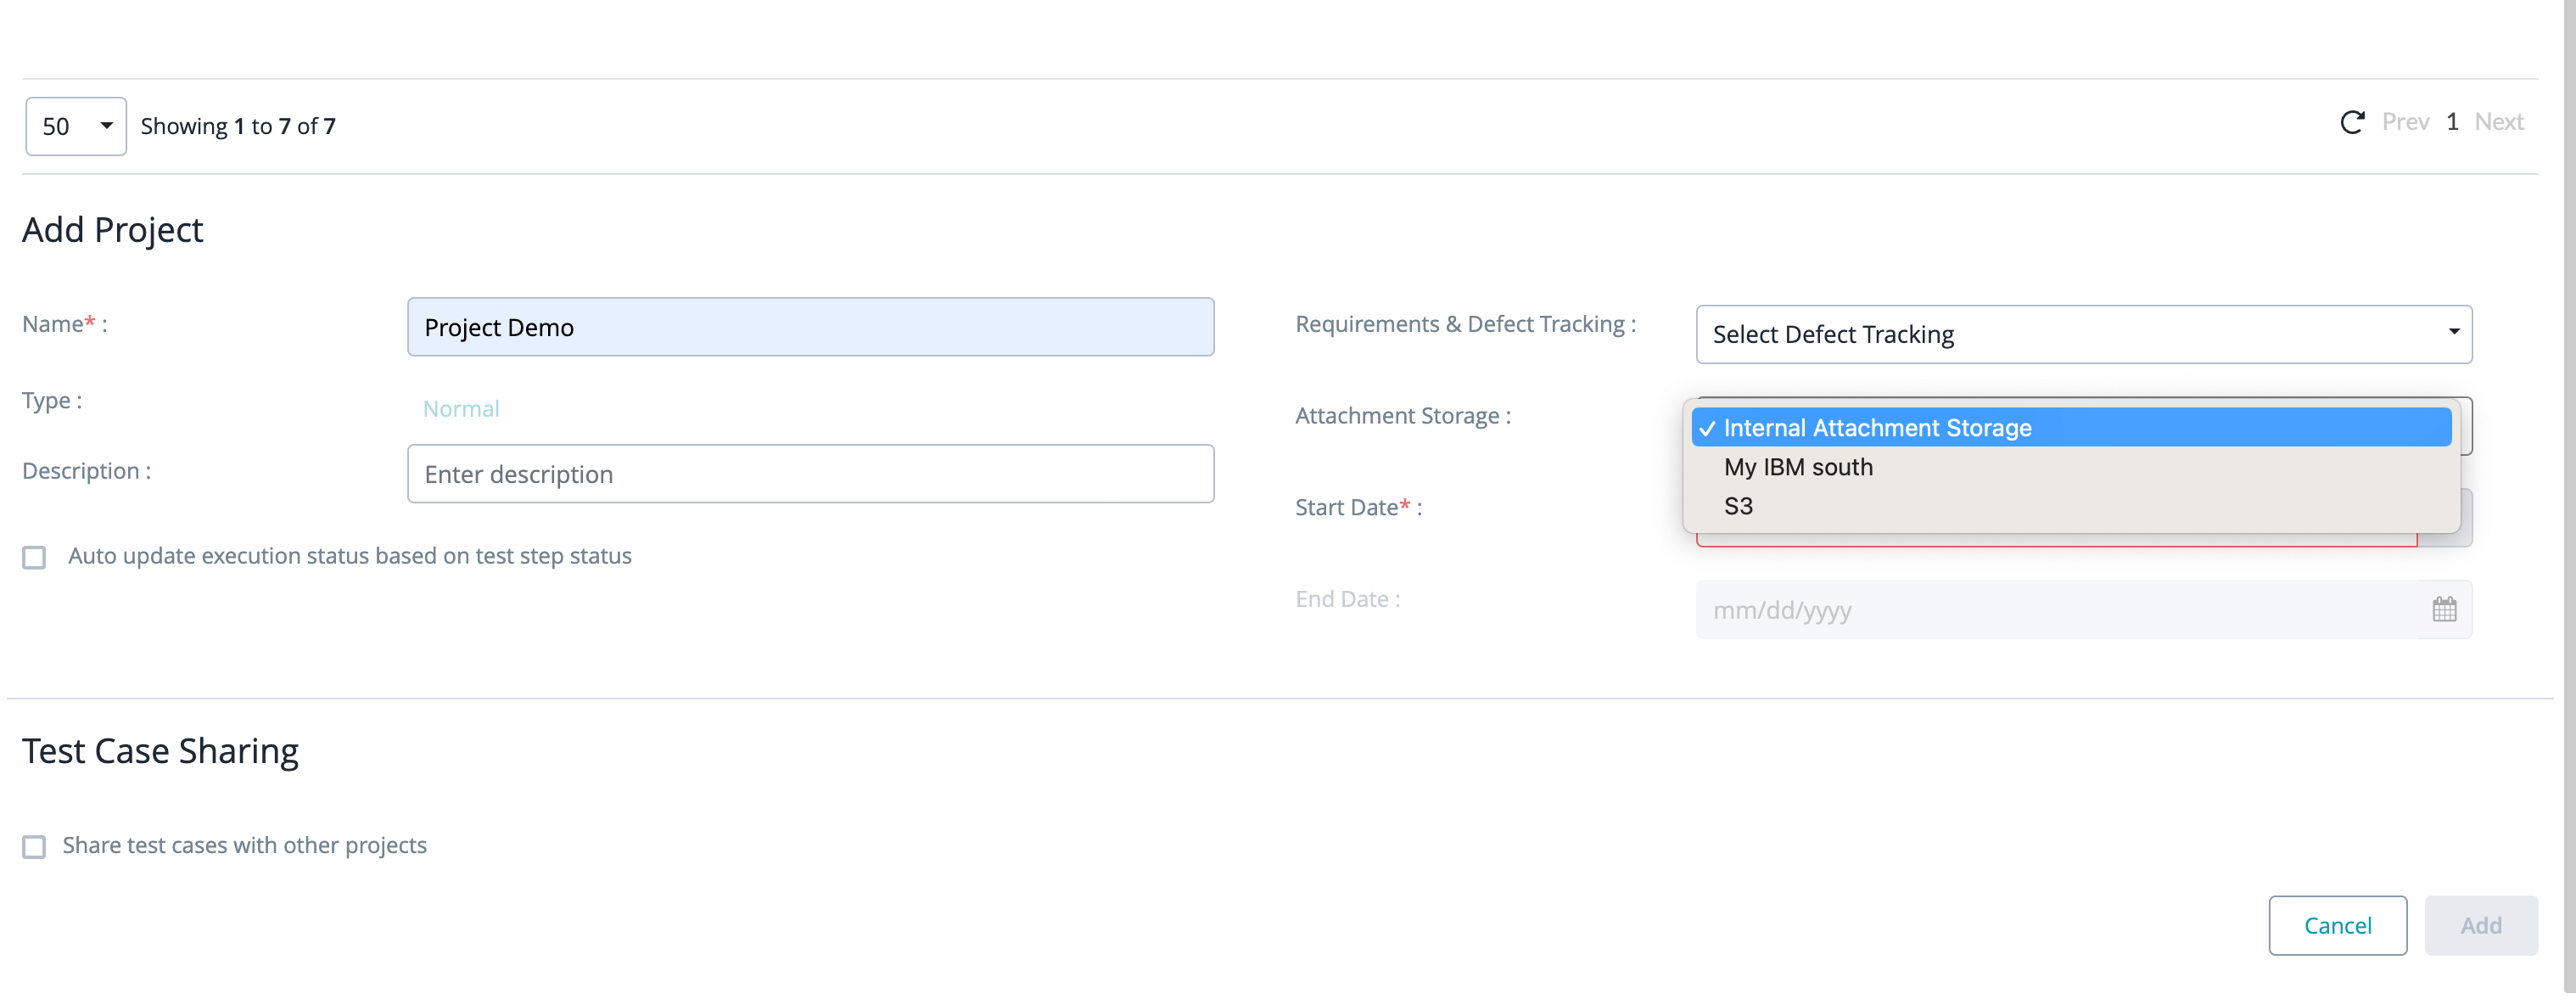
2. Fill in all the required fields. The required fields have a red asterisk next to their name:
The Add Project dialog has the following fields:
| Field | Description |
|---|---|
| Name (required) | The name of the project. |
| Type | The project type. There are three project types:
|
| Description | The description of the project. |
| Requirements & Defect Tracking | Select the defect tracking system you will use for your project. You can choose either Zephyr Internal, or Jira: |
| Allow creating internal requirements (check box) | If you select this check box, you will be able to create requirements in Zephyr even if you use Jira as a source of truth. When the check box is not selected, you cannot add requirements or import them in the Excel format. The check box appears when you select Jira as the defect tracking system. |
| Map external Defect project | Select a Jira project to map to your project. The field appears when you select Jira as the defect tracking system. |
| Attachment Storage | Select the desired storage from the drop-down list. |
| Start Date (required) | The start date of the project. |
| End Date | The end date of the project. |
| Auto update execution status based on test step status (check box) | If this check box is selected, Zephyr automatically updates the execution status of the test case based on the test step status. |
| Share test cases with other projects (check box) | A project can be marked as shared, which allows test resources to be copied to other projects marked as shared. Project sharing is restricted to projects with the type "Normal". |
3. After populating the fields, click Add to create the project.

