...
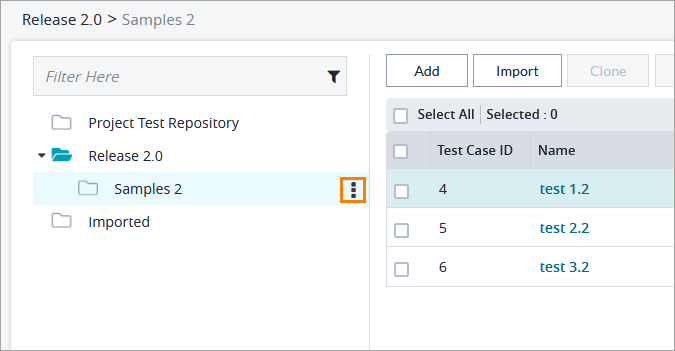
Click the
 button on the folder you want to share a test case to:
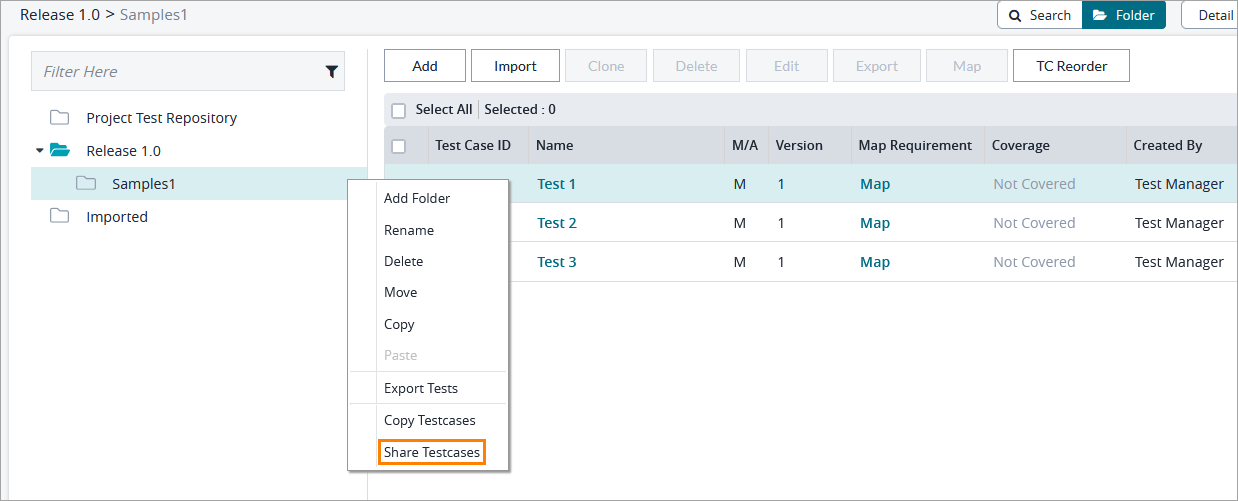
Click Share Testcases:

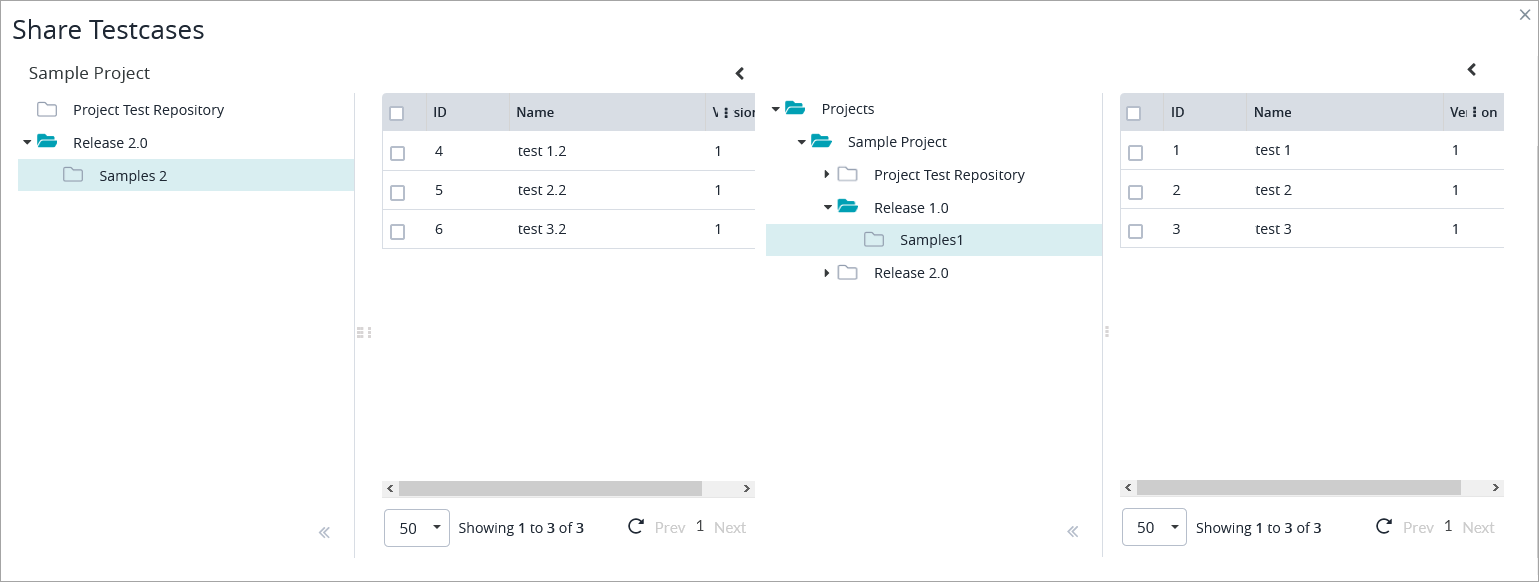
A dialog will open with your local test repository on the left and other available test repositories on the right:

Navigate through the available test repositories on the right, select the needed test case, and drag it to the destination folder in your local test repository:

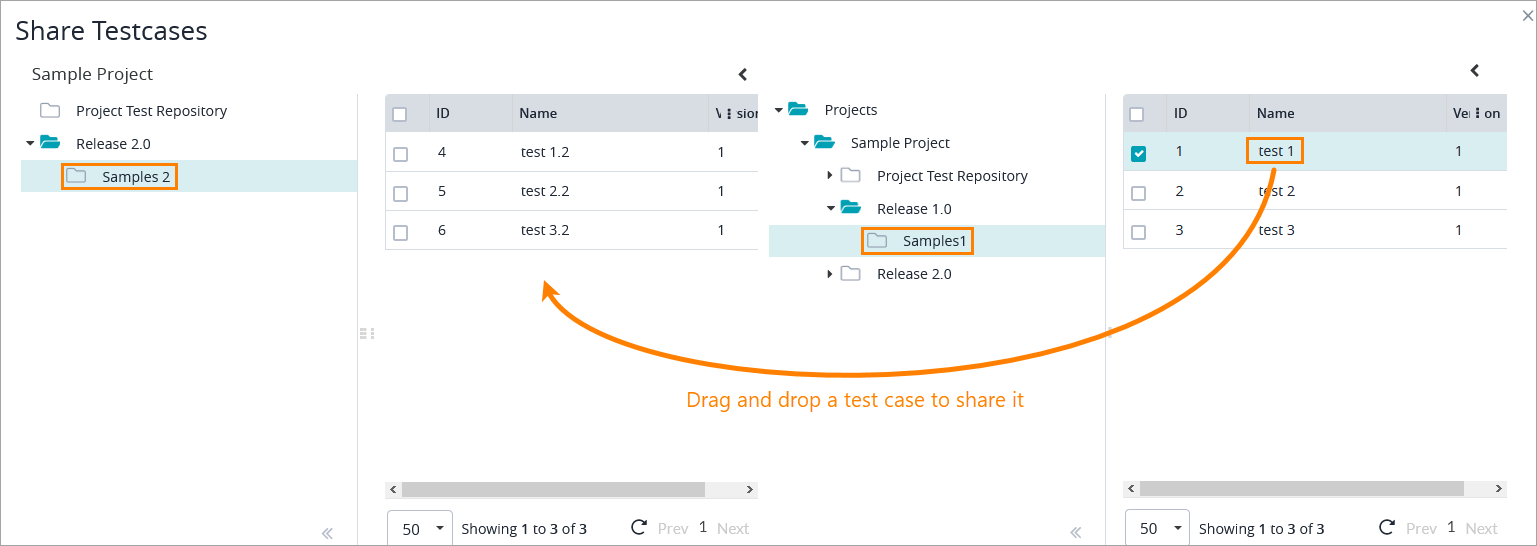
The shared test case will appear in your current test repository on the left: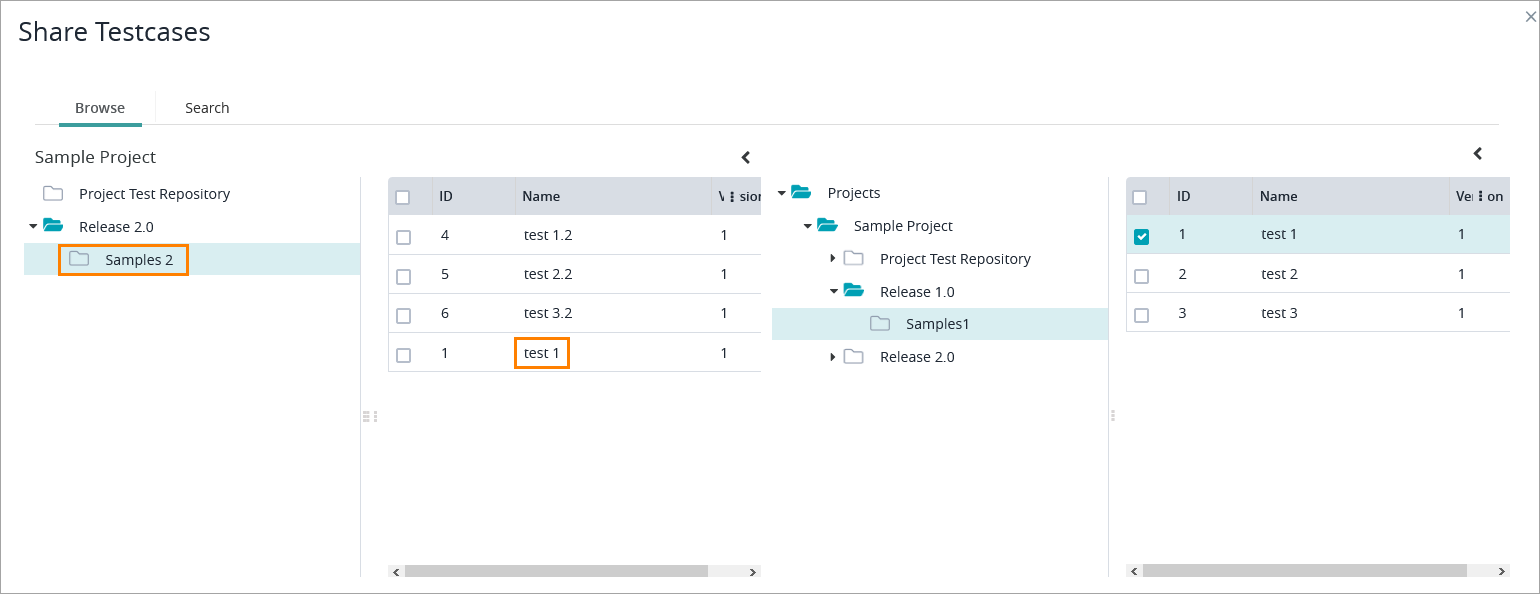

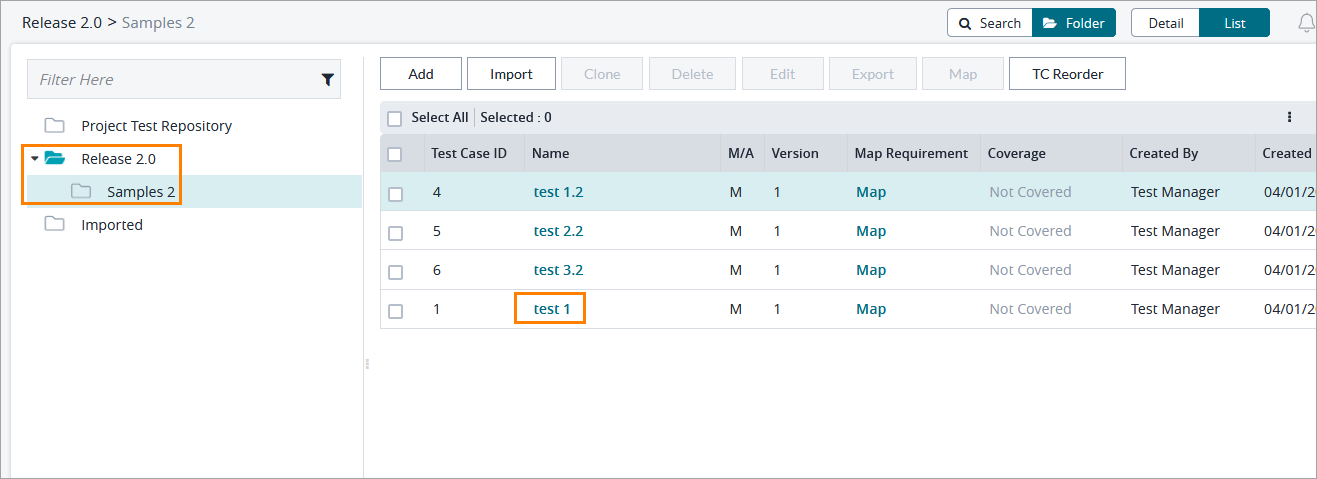
Now, when you close the Share Testcases dialog, you will see the shared test case in the list of test cases of your current release:
 |
|---|
...
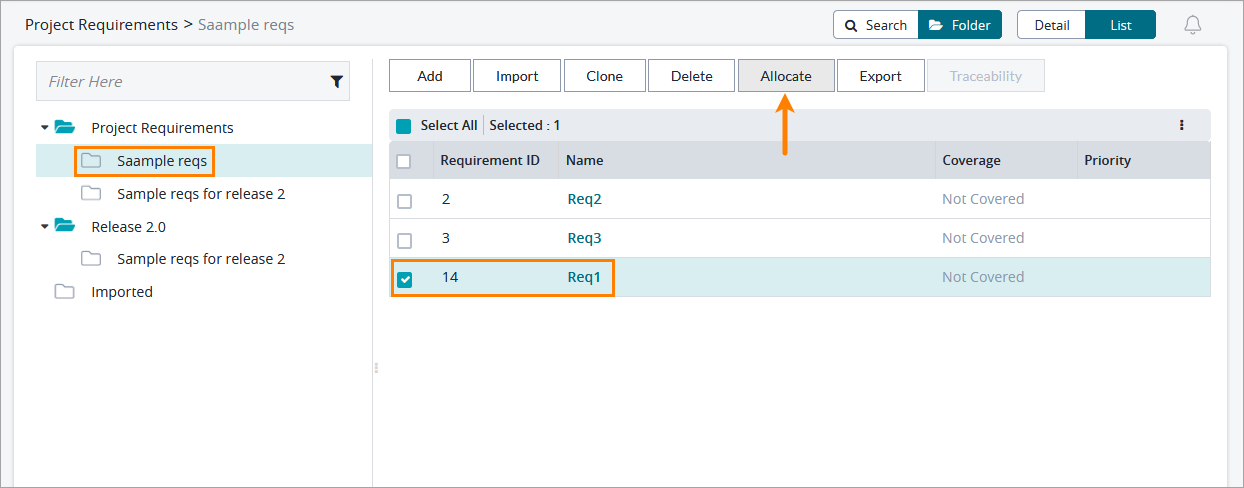
Navigate to Requirements and in the Project Requirements repository, select the folder containing the requirements of the needed release (in our case, these are the requirements of Release 1.0):

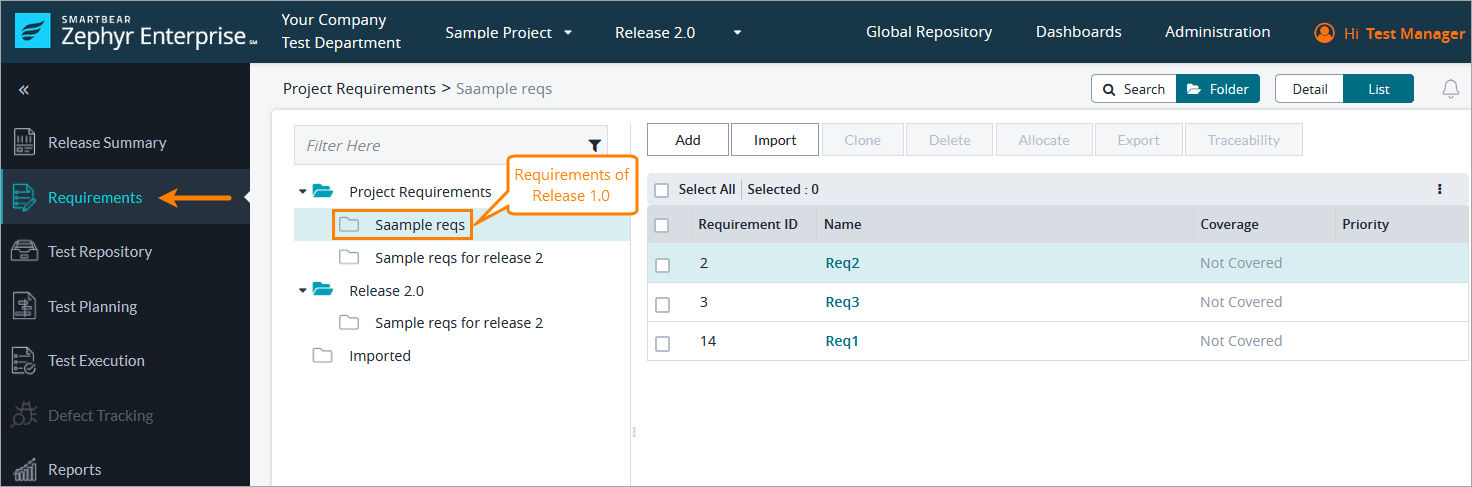
Select the requirement to which the shared test case is mapped in Release 1.0 and click Allocate to add the requirement to your current release (Release 2.0 in our example):

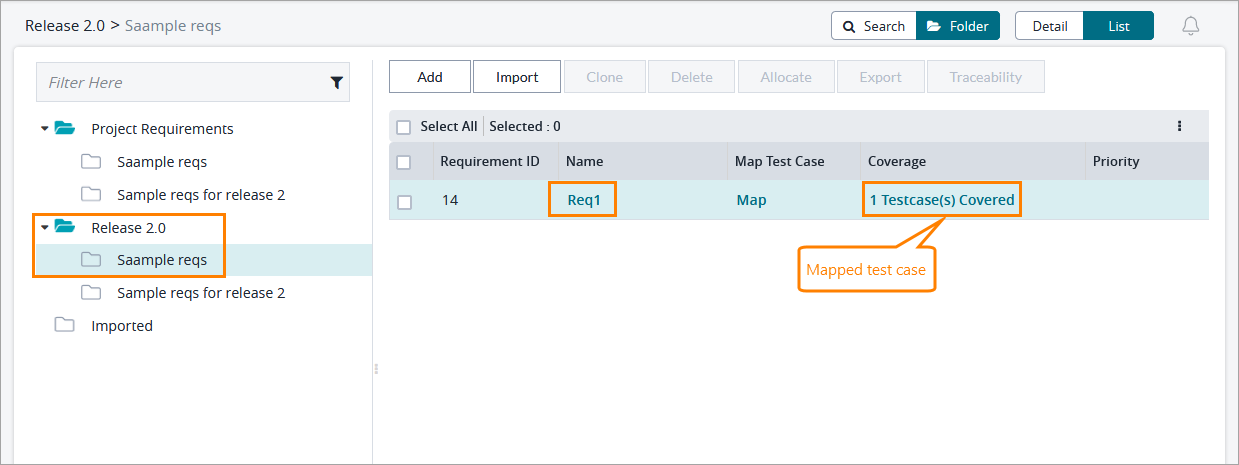
The requirement will appear among the requirements of your current release and will be automatically mapped to the shared test case:

Now if you switch to Test Repository, you will see that the shared test case is mapped to the requirement: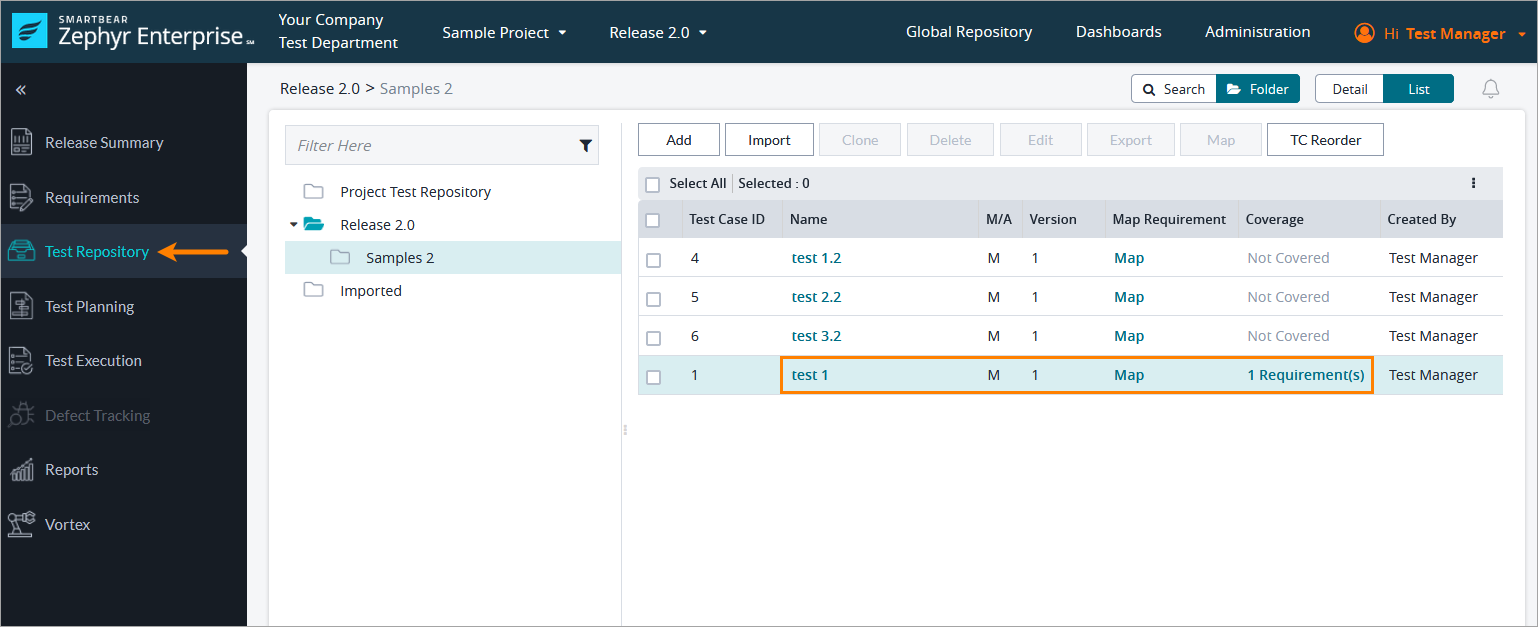

| Info |
|---|
Deleting a requirement or test case removes the mapping as well. |
...