...
Editing a Group
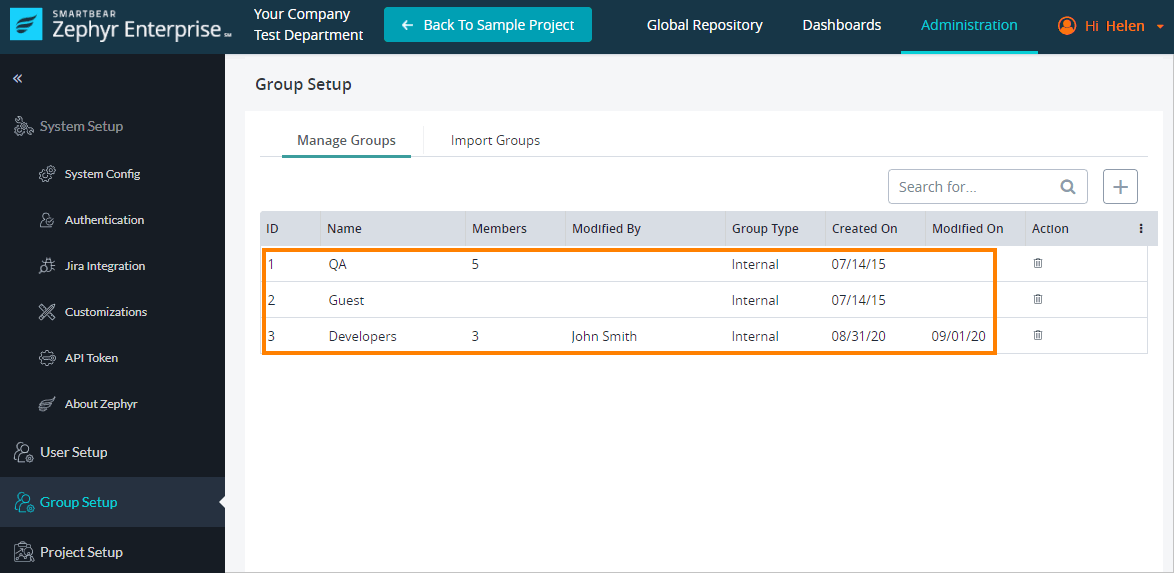
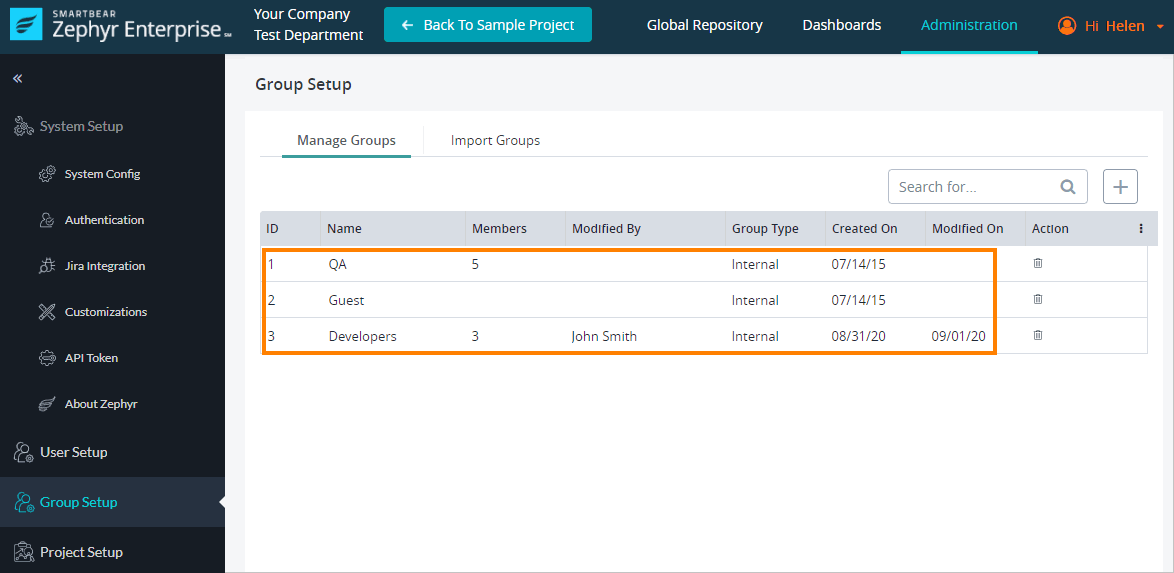
1. Click on the individual group that you want to edit.
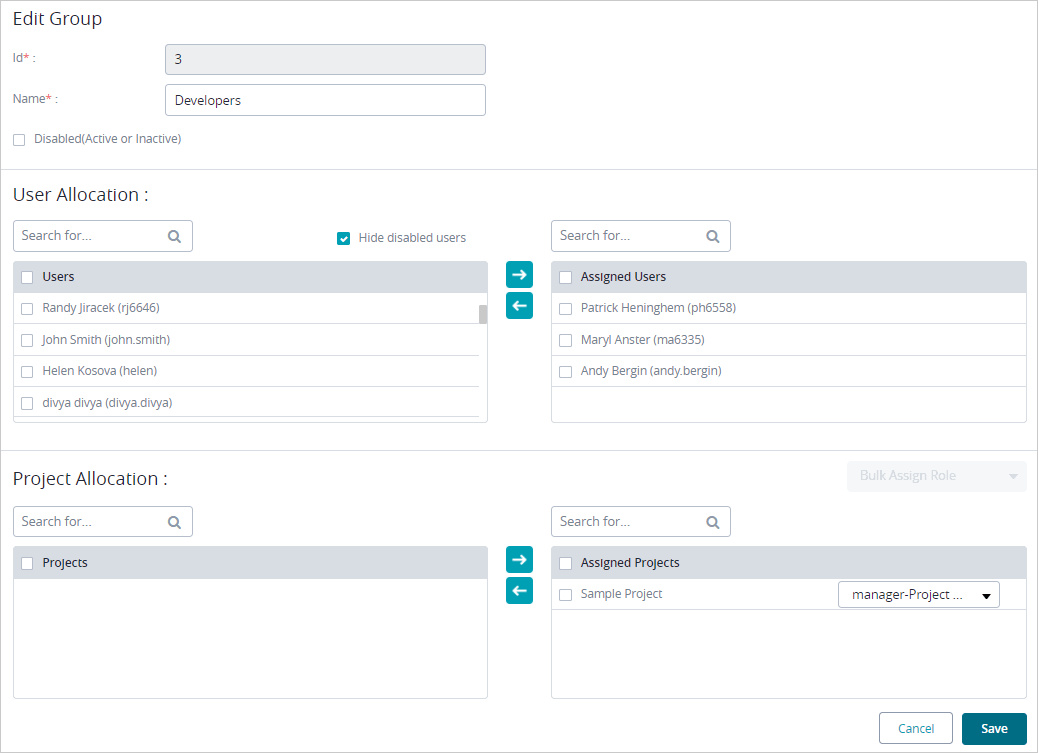
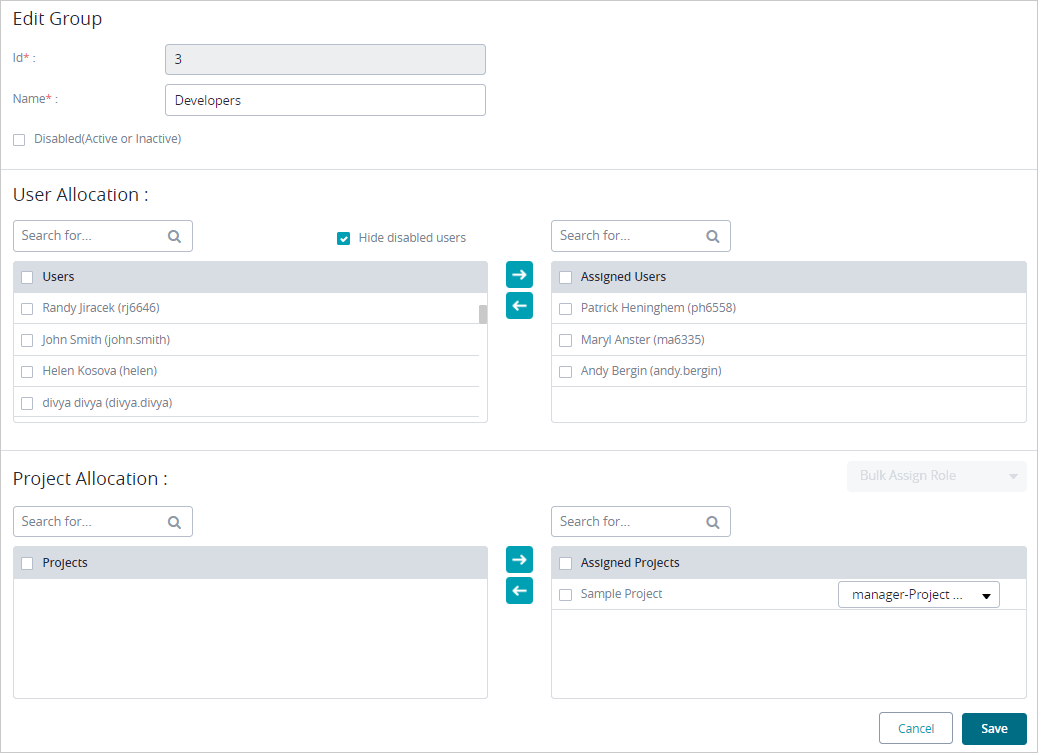
2. Change/Edit the name of the group and you can disable a group if needed using the check box provided.
3. When editing a group, you can assign users to the group by using the user allocation section
- Check off the user(s) that you want to include in the group.
- Click on the green arrow to move the checked off user(s) to the group.
4. Click “Save” to save any changes to the group.
...
| Info |
|---|
Starting October 11, 2024 (Zephyr Enterprise 8.2), the Zephyr Enterprise documentation moved from its current location on Atlassian to a dedicated, standalone Zephyr Enterprise documentation page. Please see: https://support.smartbear.com/zephyr-enterprise/docs/en/zephyr-enterprise/zephyr-administration-guides/group-setup/edit-a-group.html |
1. Go to Administration > Group Setup.
2. Click the group that you want to edit.
3. Scroll down to the bottom of the page to see the group edit interface.
4. Change the group name, user list, or projects assignments as required.
5. Click Save.


