...
...
...
...
...
...
...
...
...
...
...
...
...
...
...
...
...
...
...
...
...
...
...
...
...
...
...
...
...
...
...
...
...
...
...
About
You use OAuth authentication when connecting to Jira Cloud or Jira Server / Data Center(DC). For Jira Cloud, this is the only supported authentication type.
...
This topic enlists the steps to configure OAuth Connection:
Configure an application link in Jira Cloud and Jira Server/DC (below version 9.x)
Configure an application link in Jira Server/DC (above version 9.x)
...
Open the command line prompt and run the following commands. They will generate the keys in the needed format:
openssl genrsa -out jira_privatekey.pem 1024
openssl req -newkey rsa:1024 -x509 -key jira_privatekey.pem -out jira_publickey.cer -days 365
openssl pkcs8 -topk8 -nocrypt -in jira_privatekey.pem -out jira_privatekey.pcks8
openssl x509 -pubkey -noout -in jira_publickey.cer > jira_publickey.pem
To configure the connection, we will need the private key in the PCKS8 format and the public key in the PEM format.
...
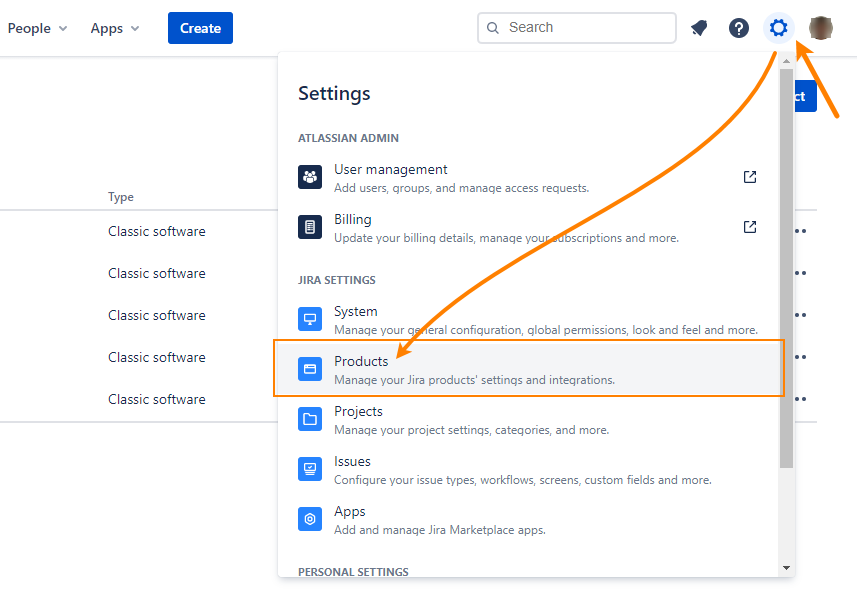
In Jira, go to ⚙ > Products > Application links (under Integrations):
On the subsequent page, enter the URL of your Zephyr Enterprise instance followed by /flex:
- If you use Zephyr Enterprise Cloud –
https://{your-subdomain}.yourzephyr.com/flex
- If you use Zephyr Enterprise Server –
http(s)://{your-host-URL-or-IP}:{port}/flex
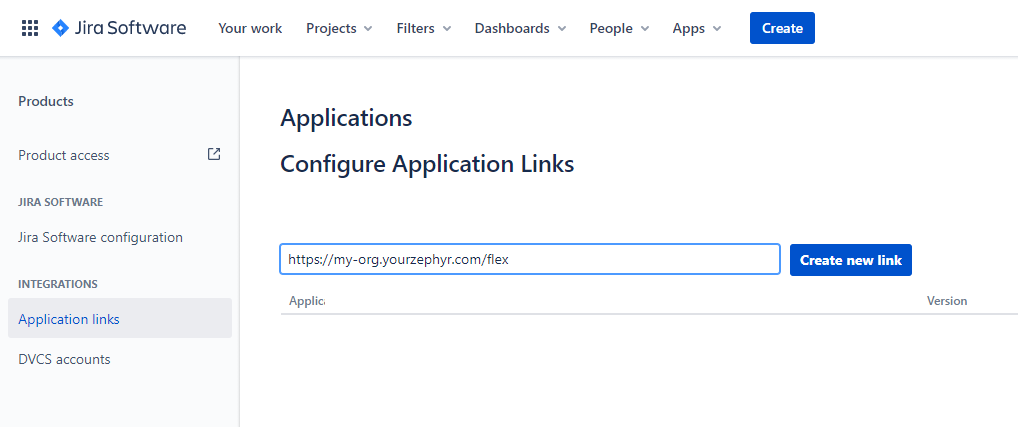
Click Create new link.
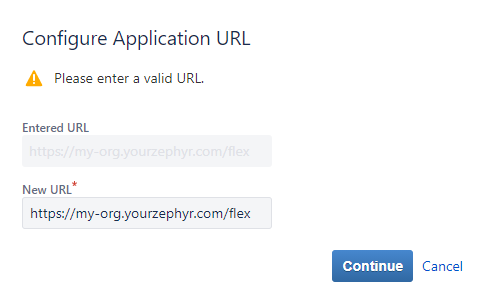
Click Continue in the subsequent confirmation dialog:

Now you need to configure the link properties:
- Enter some name into the Application Name box, for example, Zephyr Ent.
- Enter the same value into other text boxes in the dialog.
- Scroll the dialog box down and select the Create incoming link check box. It’s important to select this check box.
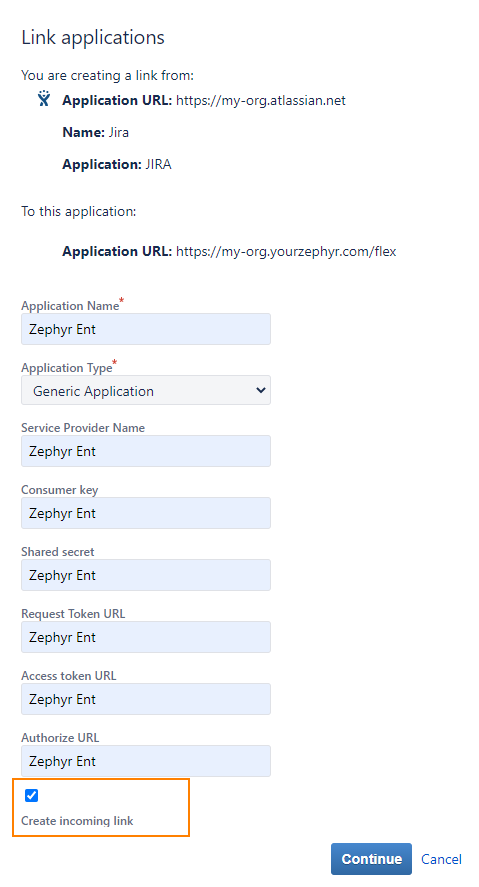
In the next dialog, you need to specify the key.
- In the Consumer Key text box, enter the key name, for instance, Zephyr Ent. You will need the Consumer Key value later. Write it down or remember.
- Enter some value into the Consumer Name box.
- Enter the contents of the public key .pem file (jira_publickey.pem) you generated earlier into the Public Key text box.
To do this, open the key file in any text editor, copy the file contents and paste it in the Public Key box. When copying, skip the first and last lines of the file (they have the BEGIN PUBLIC KEY and END PUBLIC KEY phrases).
Also, make sure you don’t enter leading or trailing characters like spaces or line breaks by accident. A good practice is to clear the text box before pasting the key contents to it.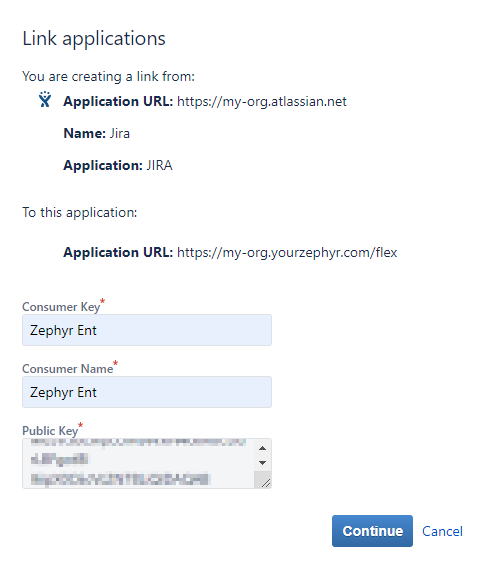
Click Continue.
The new application link will appear in the list of links in Jira:
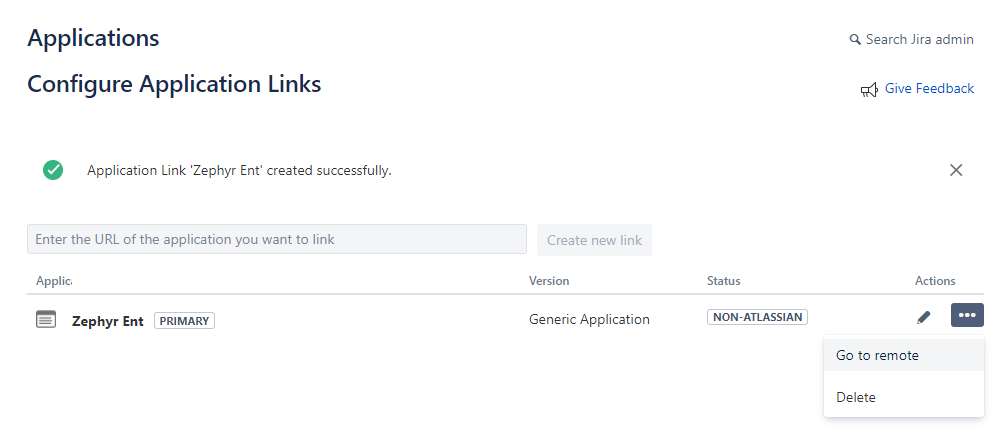
Tip: To check if you specified the app URL correctly, click “Go to remote” for the created link. This should open the Zephyr Login form.
...