About
You use OAuth authentication when connecting to Jira Cloud or Jira Server / Data Center(DC). For Jira Cloud, this is the only supported authentication type.
In Jira, external OAuth consumers are represented by application links. These links use OAuth with RSA-SHA1 keys for authentication. You will need a private RSA key rather than OAuth token (or secret) for connection.
This topic enlists the steps to configure OAuth Connection:
Configure an application link in Jira Cloud and Jira Server/DC (below version 9.x)
Configure an application link in Jira Server/DC (above version 9.x)
Watch video tutorial
...
Below is the textual description.
...
Browse Project permission for all projects
Issue Permissions: Assignable User, Assign Issues, Close Issues, Delete Issues, Edit Issues, Link Issues, Move Issues, Set Issue Security, Transition Issues
Comments Permissions
Attachment Permissions
Jira Web-hook Enabled
Issues Related Events: Updated, Deleted
Project Version Related Events: Released, Unreleased, Created, Moved, Updated, Deleted
Project Related Events: Updated, Deleted
...
The easiest way is to use the Jira administrator account for setting up the integration parameters. You may also want to create a user account in your Jira instance that will specifically be used for integration with Zephyr. This account should have all the needed permissions.
1.
| Anchor | ||||
|---|---|---|---|---|
|
To generate the key pair, you can use the OpenSSL command-line utility. You might already have it on your computer, as it is included in many software products like source control systems and their clients, web servers, and others. You can also download it any time from the https://www.openssl.org/ website.
Open the command line prompt and run the following commands. They will generate the keys in the needed format:
openssl genrsa -out jira_privatekey.pem 1024
openssl req -newkey rsa:1024 -x509 -key jira_privatekey.pem -out jira_publickey.cer -days 365
openssl pkcs8 -topk8 -nocrypt -in jira_privatekey.pem -out jira_privatekey.pcks8
openssl x509 -pubkey -noout -in jira_publickey.cer > jira_publickey.pem
To configure the connection, we will need the private key in the PCKS8 format and the public key in the PEM format.
The 2048-bit key is also supported.
2. Configure an application link in Jira Cloud and Server Data Center
You configure an application link to other Atlassian products, using OAuth1.0 . Zephyr Enterprise does not support OAUTH2.0 which is in an external application. Based on the version of Jira Server DC and Jira Cloud that you want to connect with, the following are ways you can configure an application link:
a. Jira Cloud and Jira Server/DC (below version 9.x)
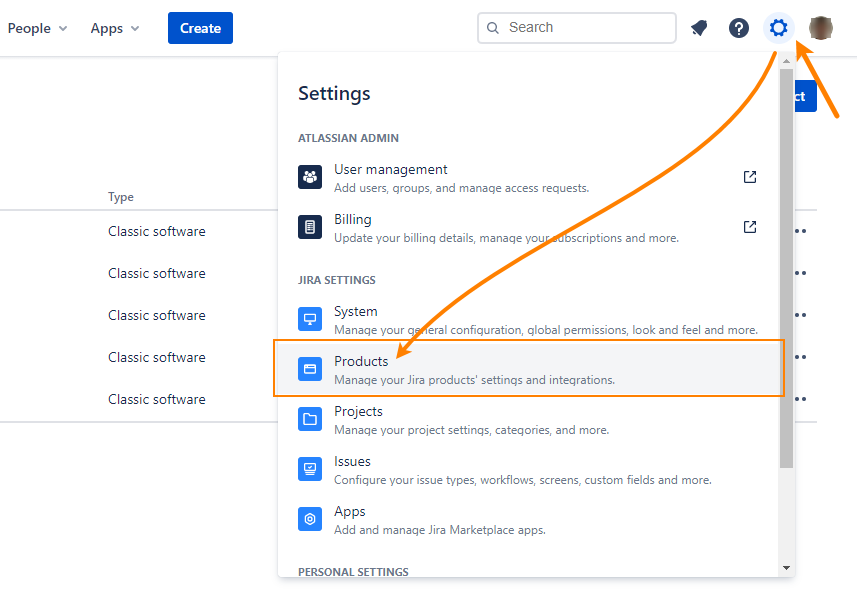
In Jira, go to ⚙ > Products > Application links (under Integrations):
...
On the subsequent page, enter the URL of your Zephyr Enterprise instance followed by /flex:
- If you use Zephyr Enterprise Cloud –
https://{your-subdomain}.yourzephyr.com/flex
- If you use Zephyr Enterprise Server –
http(s)://{your-host-URL-or-IP}:{port}/flex
...
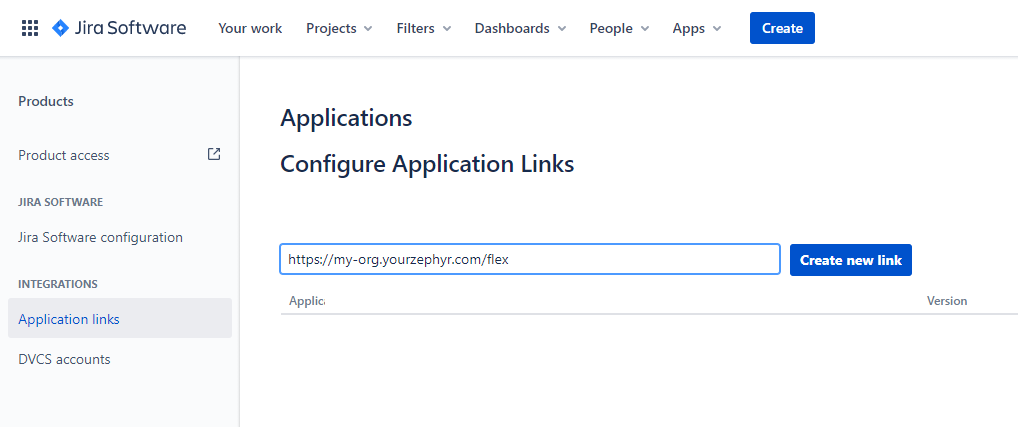
Click Create new link.
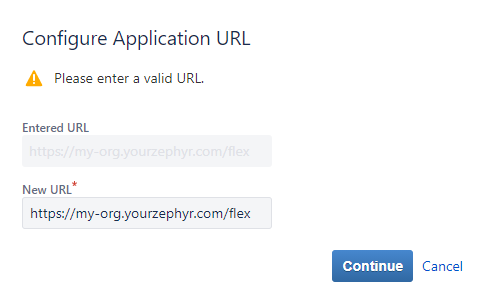
Click Continue in the subsequent confirmation dialog:
Now you need to configure the link properties:
- Enter some name into the Application Name box, for example, Zephyr Ent.
- Enter the same value into other text boxes in the dialog.
- Scroll the dialog box down and select the Create incoming link check box. It’s important to select this check box.
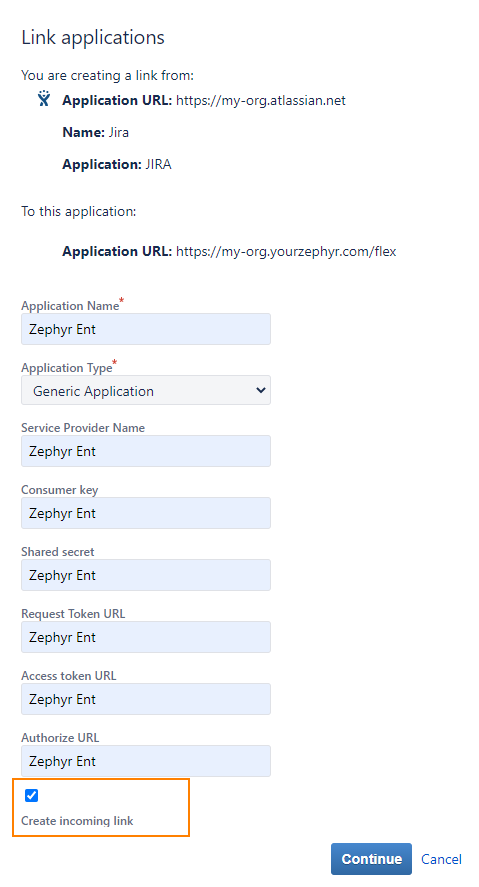
In the next dialog, you need to specify the key.
- In the Consumer Key text box, enter the key name, for instance, Zephyr Ent. You will need the Consumer Key value later. Write it down or remember.
- Enter some value into the Consumer Name box.
- Enter the contents of the public key .pem file (jira_publickey.pem) you generated earlier into the Public Key text box.
To do this, open the key file in any text editor, copy the file contents and paste it in the Public Key box. When copying, skip the first and last lines of the file (they have the BEGIN PUBLIC KEY and END PUBLIC KEY phrases).
Also, make sure you don’t enter leading or trailing characters like spaces or line breaks by accident. A good practice is to clear the text box before pasting the key contents to it.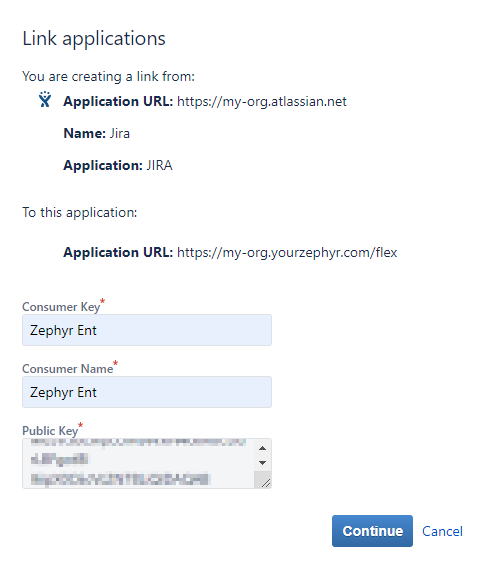
Click Continue.
The new application link will appear in the list of links in Jira:
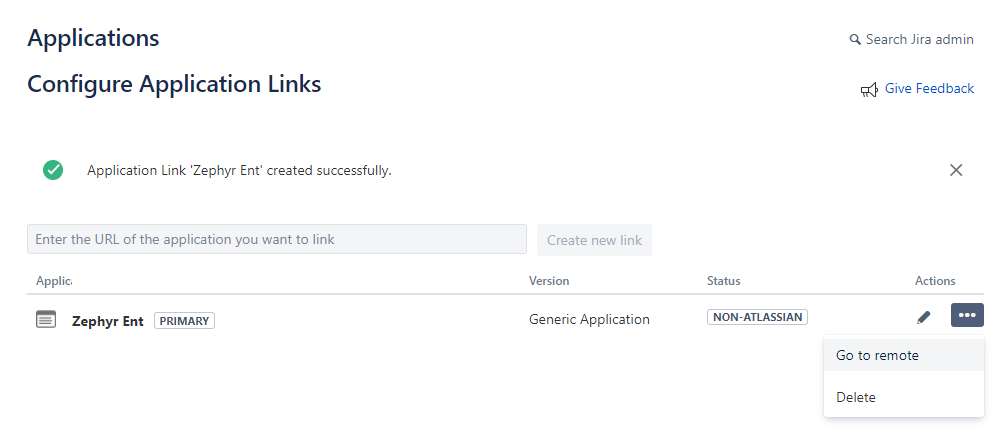
Tip: To check if you specified the app URL correctly, click “Go to remote” for the created link. This should open the Zephyr Login form.
b.
| Anchor | ||||
|---|---|---|---|---|
|
In Jira, go to ⚙ > Products > Application links (under Integrations):
On the subsequent page, enter the URL of your Zephyr Enterprise instance followed by /flex:
- If you use Zephyr Enterprise Cloud –
https://{your-subdomain}.yourzephyr.com/flex
- If you use Zephyr Enterprise Server –http(s)://{your-host-URL-or-IP}:
...
{port}/flex
...
3. Click Create new link.
4. Select Atlassian product.
...
5. Click Continue in the subsequent confirmation dialog.
6. Now you need to configure the link properties:
- Enter some name into the Application Name box, for example, Zephyr Ent.
- Enter the same value into other text boxes in the dialog.
- Scroll the dialog box down and select the Create incoming link check box.![]() It’s important to select this check box.
It’s important to select this check box.
...
7. Click Continue.
8. In the next dialog, you need to specify the key.
- In the Consumer Key text box, enter the key name, for instance, Zephyr Ent.![]() You will need the Consumer Key value later. Write it down or remember.
You will need the Consumer Key value later. Write it down or remember.
- Enter some value into the Consumer Name box.
- Enter the contents of the public key .pem file (jira_publickey.pem) you generated earlier into the Public Key text box.
To do this, open the key file in any text editor, copy the file contents and paste it in the Public Key box.![]() When copying, skip the first and last lines of the file (they have the BEGIN PUBLIC KEY and END PUBLIC KEY phrases).
When copying, skip the first and last lines of the file (they have the BEGIN PUBLIC KEY and END PUBLIC KEY phrases).
Also, make sure you don’t enter leading or trailing characters like spaces or line breaks by accident. A good practice is to clear the text box before pasting the key contents to it.
...
9. Click Continue.
10. The new application link will appear in the list of links in Jira:
...
Tip: To check if you specified the app URL correctly, click “Go to remote” for the created link. This should open the Zephyr Login form.
3.
| Anchor | ||||
|---|---|---|---|---|
|
Log in to your Zephyr Enterprise instance as a user with administrator permissions.
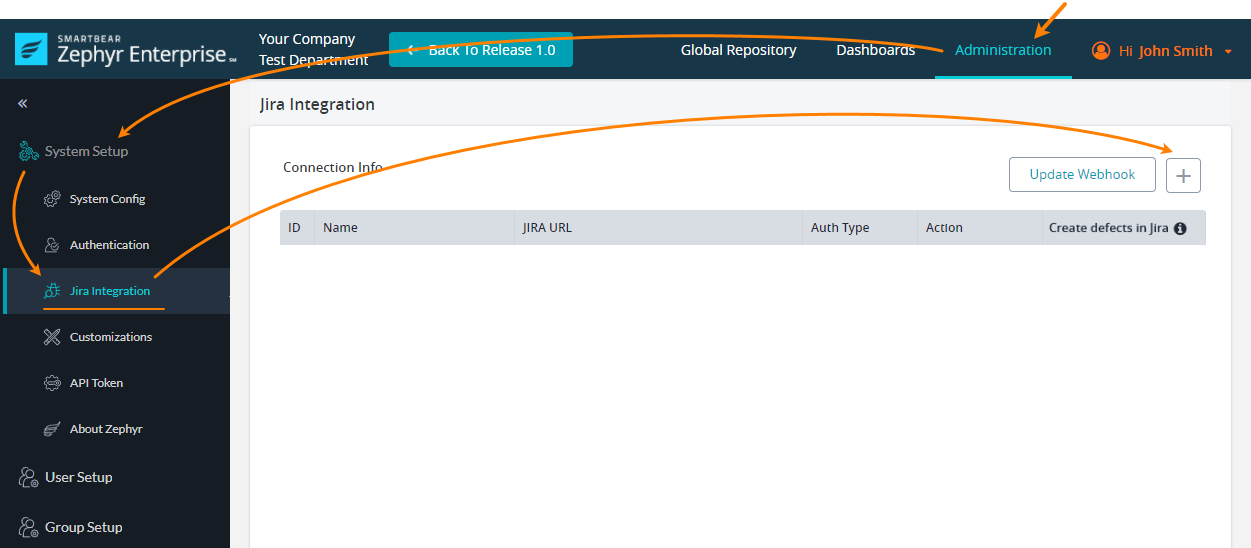
Go to Administration > Jira Integration (under System Setup).
Click + above the Jira instance list:
...
In the subsequent dialog, specify the following values:
- Auth Mode -Select OAuth (1.0a). To connect to Jira Cloud, you should use this mode.
- Name – Any descriptive name for the connection. It will be used in the Zephyr UI.
- Jira URL – The URL of your Jira instance likehttps://{my-org}.atlassian.nеt.
- Consumer Key Name – The key name. It should be the same as the Consumer Key value you entered in Jira.
- Consumer Private Key – Specify the contents of the private key you generated earlier. Use the .pcks8 file (jira_privatekey.pcks8): open it in any text editor, copy the key contents and paste them to the Consumer Private Key box. When copying, skip the first and last lines of the file (they have the BEGIN PUBLIC KEY and END PUBLIC KEY phrases). Also, make sure you don’t enter leading or trailing characters like spaces or line breaks by accident. A good practice is to clear the text box before pasting the key contents to it.
...

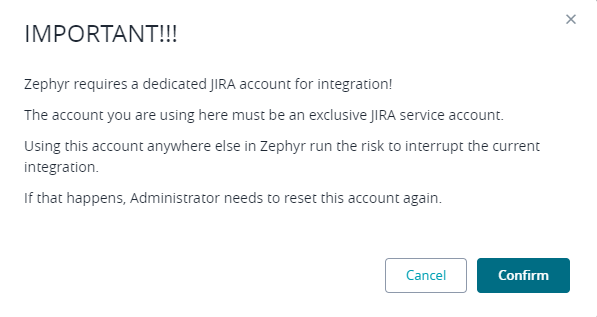
Click Confirm to continue.
Zephyr will display the following message box. Click Confirm to continue:
Zephyr will show the following dialog box:
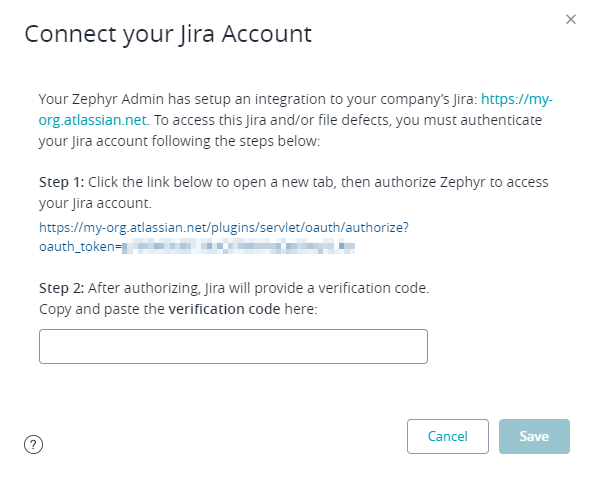
If you specified the public and private keys correctly, you will see some valid authorization URL. Otherwise, this value will contain the error message.
In the dialog:
a. Click the URL specified in Step 1: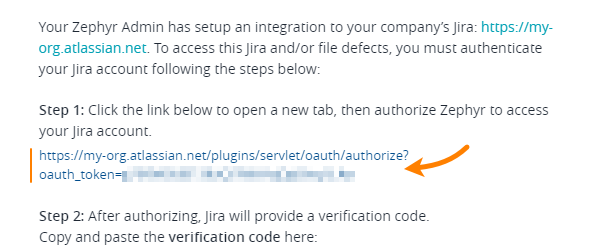
b. This will send a request for the authentication code to Jira. The latter will ask for your approval to allow Zephyr access to your Jira project. Click Allow to continue: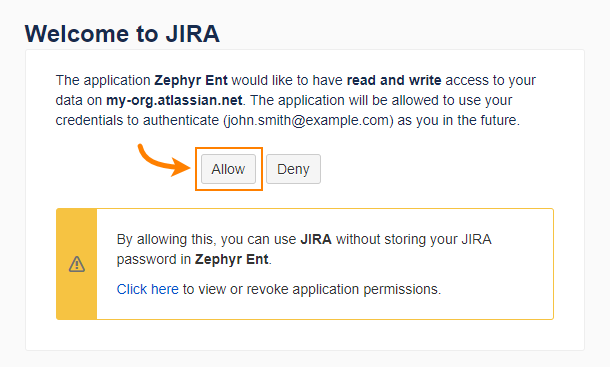
c. Jira will show another page with the verification code (the value in quotes):
Copy this code to the clipboard and then switch to Zephyr and paste it into the Step 2 box: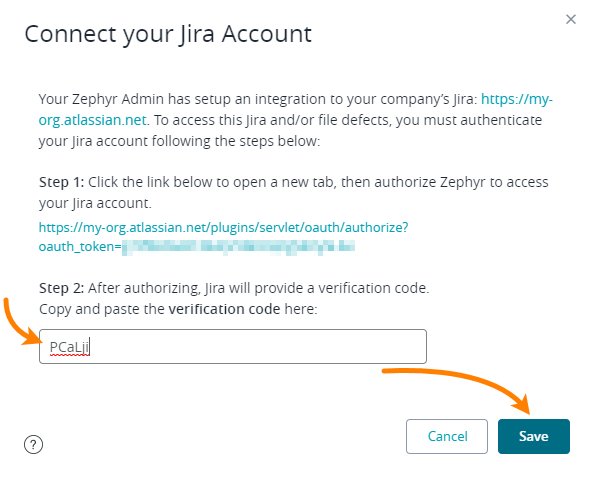
Click Save.
Zephyr will run some diagnostics and will report the results:
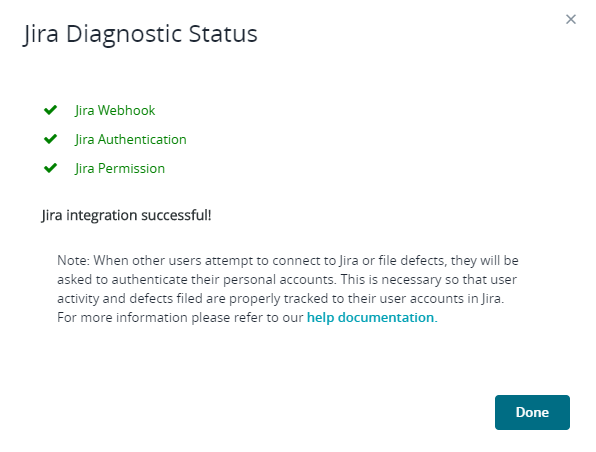
Click Done. You will see the newly created connection in the list of connections:
...
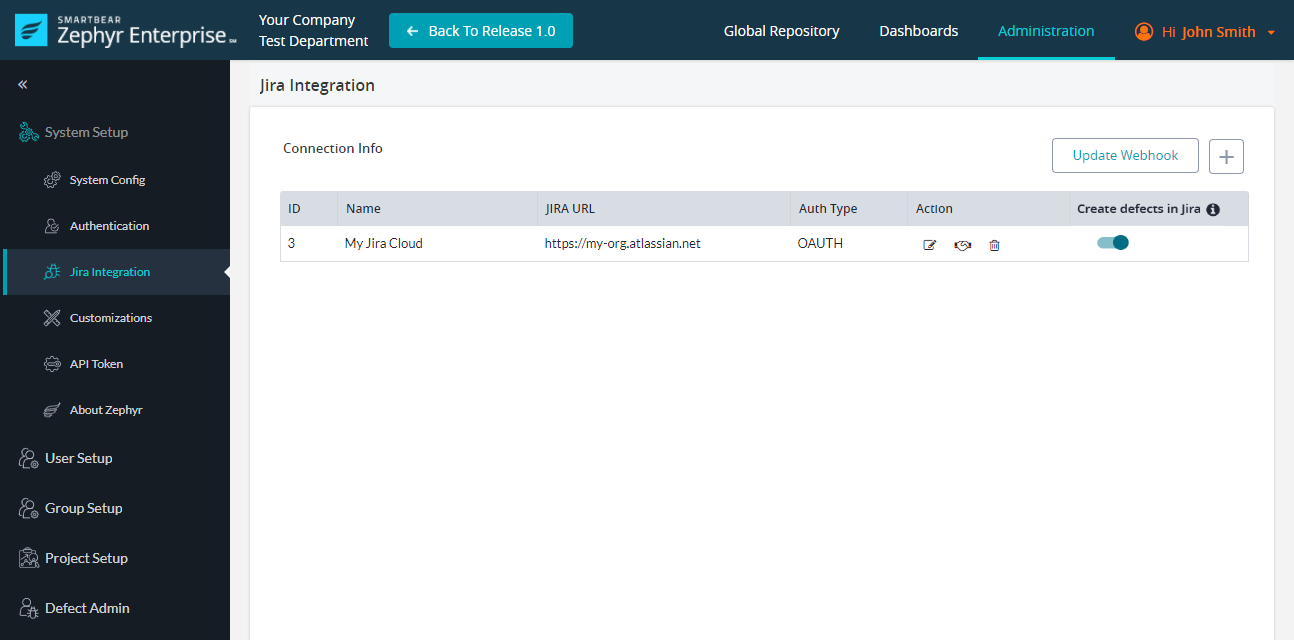
| Info |
|---|
Switch the Create defects in Jira toggle on to allow creating issues directly in Jira. If the toggle is on, clicking Next in Zephyr’s File New Defect dialog opens Jira’s Create issue dialog in a new tab. |
...