...
After you configured Jira connection, you need to map your Zephyr project to a Jira project:
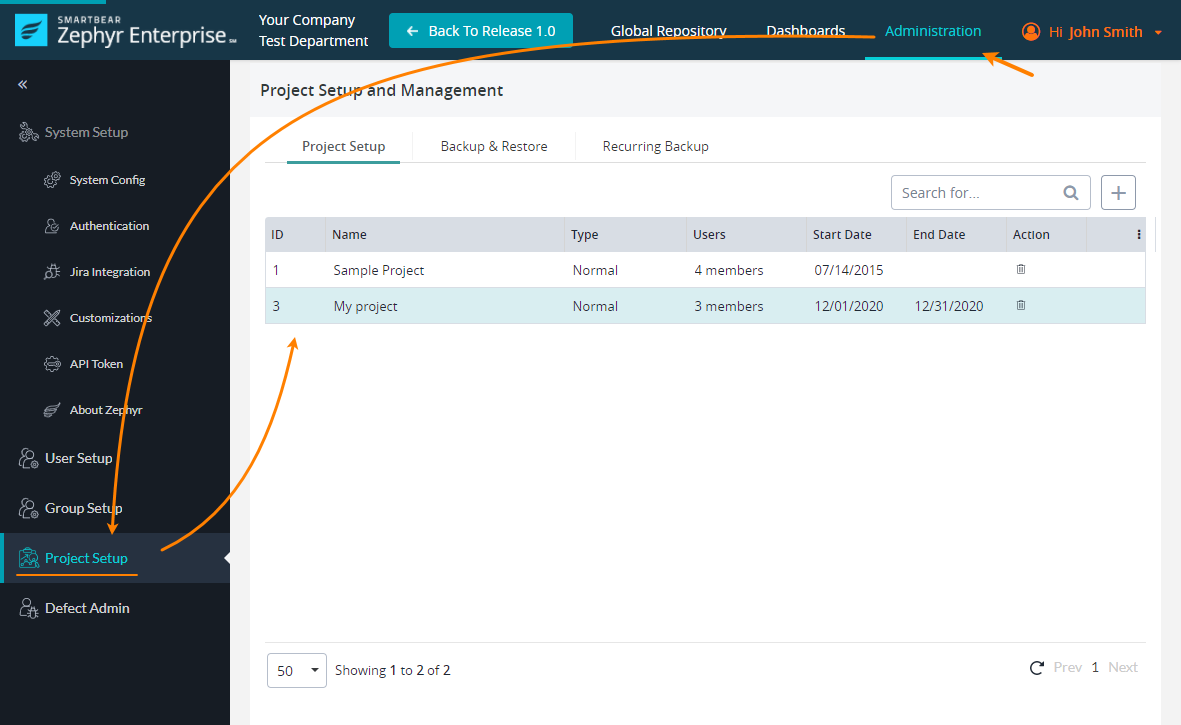
Log in to Zephyr Enterprise as a user with administrator permissions. Then, go to Administration > Project setup settings:
...
On the Project setup tab, select your project and scroll the page down to the Edit Project section.
In the Requirements & Defect Tracking box, select the Jira connection you created on the previous step:
...
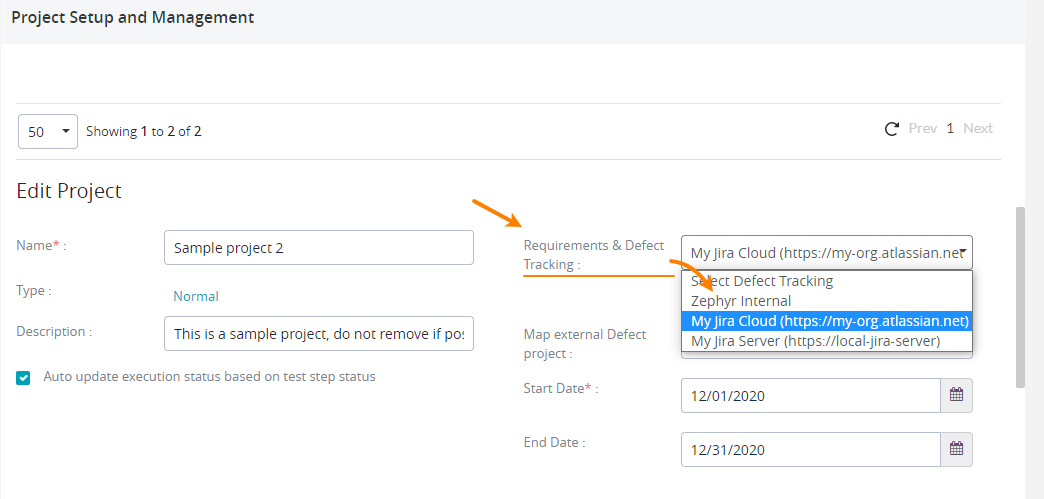
 Choose carefully. Selecting another defect tracker later, after you map Zephyr items to Jira tickets, might be problematic.
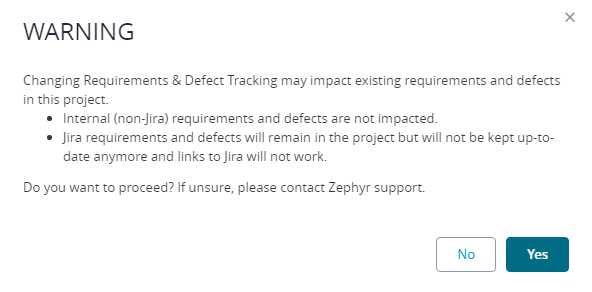
Confirm the connection in the subsequent message box:
...
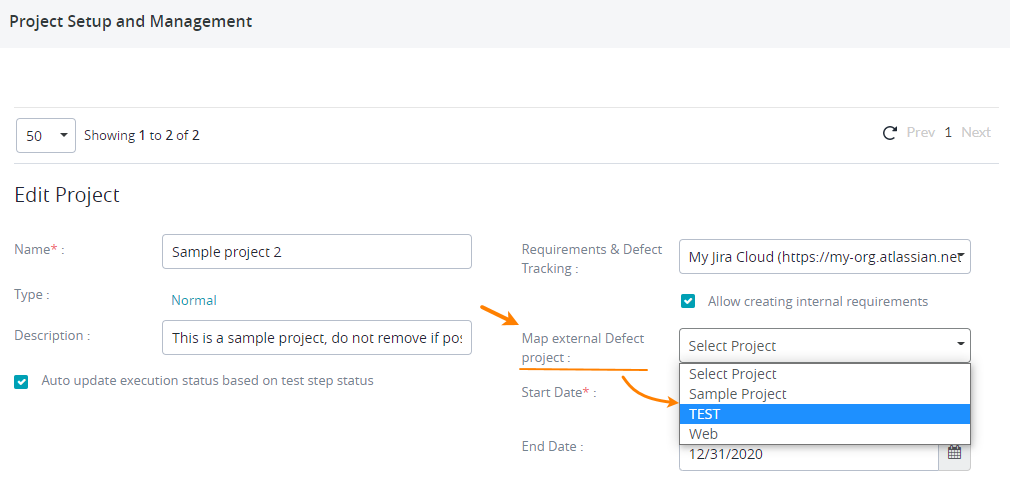
Zephyr will load a list of projects from your Jira instance and will show it in the Map external Defect project drop-down list (this list is invisible until you select a Jira instance for your project).
Select the Jira project in that list to link it to your Zephyr project:
...
 If later you rename your Jira project, the Jira project will get unmapped in Zephyr and you have to map it again.
Scroll the page down and click Save to save the changes you’ve made.
Congratulations! You’ve mapped your Zephyr project to a Jira project.
| Info |
|---|
When using Jira for defect tracking, the Jira fields on the Create and Edit screens MUST be the same, otherwise users won't be able to properly file/modify defects. Refer to this Jira resource for more information: Associating a screen with an issue operation | Administering Jira applications Data Center and Server 9.12 | Atlassian Documentation |
Note about webhooks
Webhooks are an essential part of Zephyr integration with Jira. They are used to synchronize Zephyr and Jira requirements and information about defects.
...