...
Log in to your Zephyr Enterprise instance as a user with administrator permissions.
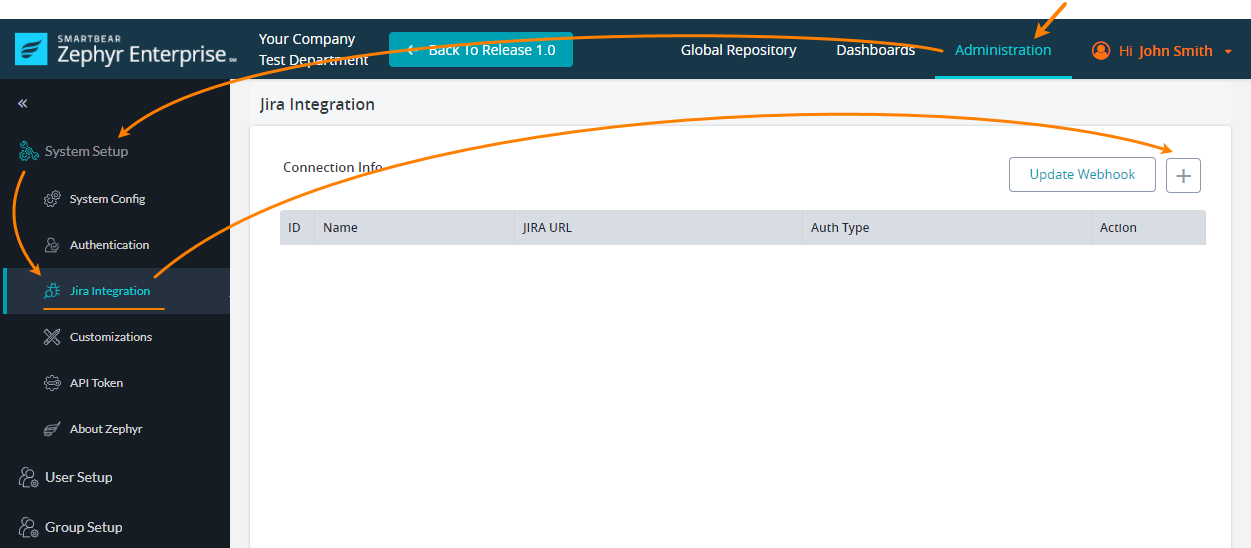
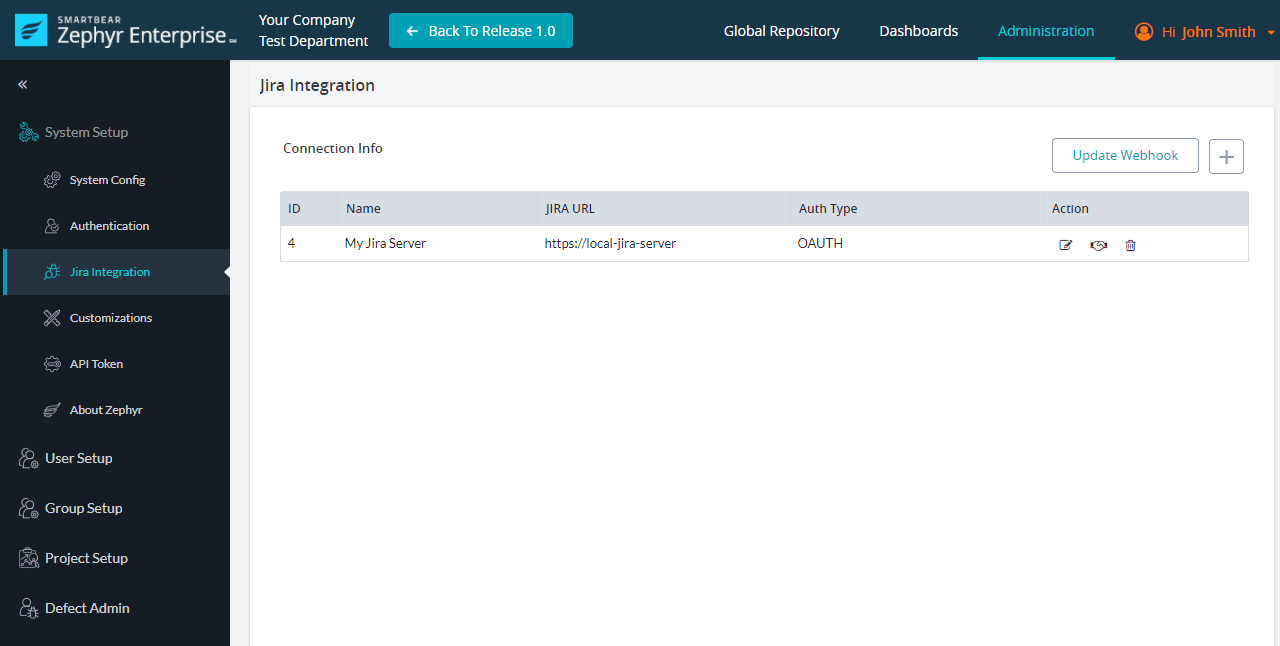
Go to Administration > (System Setup) Jira Integration.
Click + above the Jira instance list:

In the subsequent dialog, specify the following values:

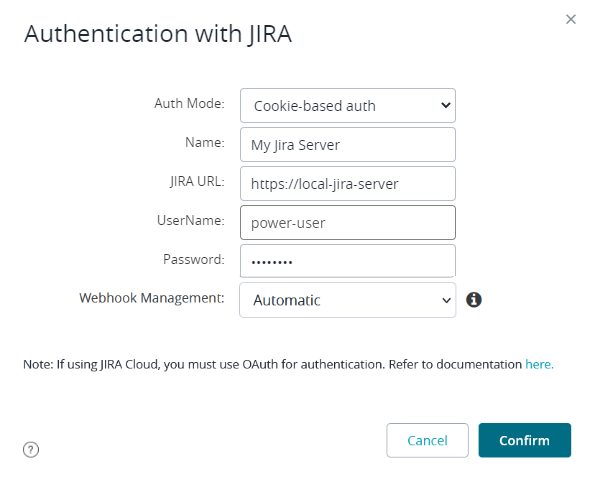
- Auth mode -Select Basic (cookie-based).
- Name – Any descriptive name for the connection. It will be used in the Zephyr UI.
- Jira URL – The URL and port number of your Jira server.
- Username and Password – The name and password of the account that Zephyr will use to communicate with Jira.
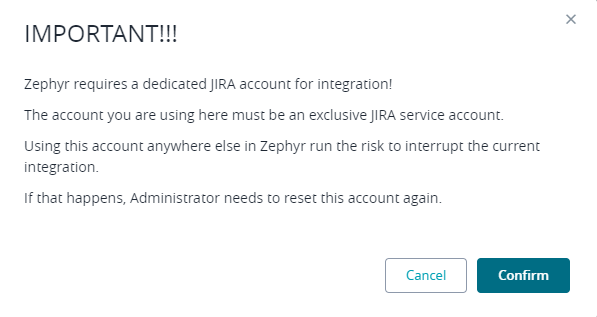
Click Confirm to continue.Click Continue in the subsequent confirmation dialog:

Zephyr will run some diagnostics and will report the results:

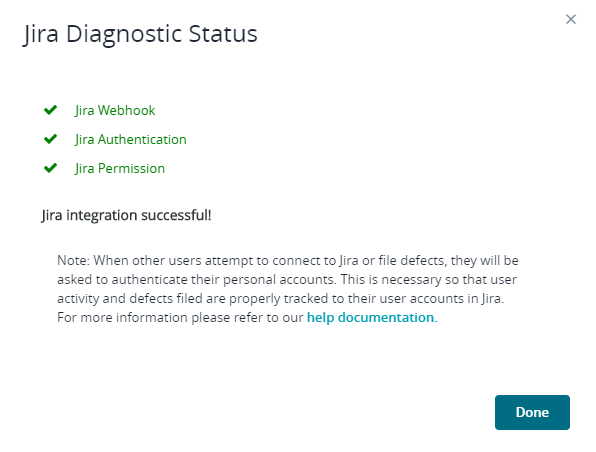
Click Done. You will see the newly created connection in the list of connections:
Further steps
![]() You have not yet completed integration setup. To complete it, you need to map your Zephyr project to a Jira project. Follow this link for details:
You have not yet completed integration setup. To complete it, you need to map your Zephyr project to a Jira project. Follow this link for details:
➡ Next step: Configure your Zephyr project
Note about webhooks
Webhooks are an essential part of Zephyr integration with Jira. They are used to synchronize Zephyr and Jira requirements and information about defects.
Webhooks can be created in two ways:
Zephyr creates a pre-configured webhook automatically when you are mapping a project in Zephyr. In this case, there is no need to perform any additional actions, but you need to have a Jira account with special permissions (for example, Browse Projects). You can view the created webhook in Jira settings: go to ⚙ > System (under Jira Settings) > Webhooks (under Advanced).
 Don’t delete this webhook, and don’t change its properties. It has all the needed settings enabled. Later, you can update the webhook, if needed.
You, as an administrator, can create and manage webhooks manually. This can be useful if you do not have (or do not want to create) a Jira service account with permissions required for automatic webhook management.