...
| Table of Contents | ||||
|---|---|---|---|---|
|
Editing Defects Individually
1. After searching defects, click on the individual defect that you want to edit by using the defect table.
2. Scroll down to the bottom of the page.
- The fields for the selected defect are located below the defect table.
3. From here, you can change and edit any of the fields for the defect.
...
The way you edit defects in Zephyr depends on which issue tracking system your Zephyr administrator set up in the project settings. To learn how to edit a defect in Zephyr, select the issue tracking system you are using:
Jira integrated with Zephyr
The built-in issue tracking system
...
Jira integrated with Zephyr
To edit a single defect -
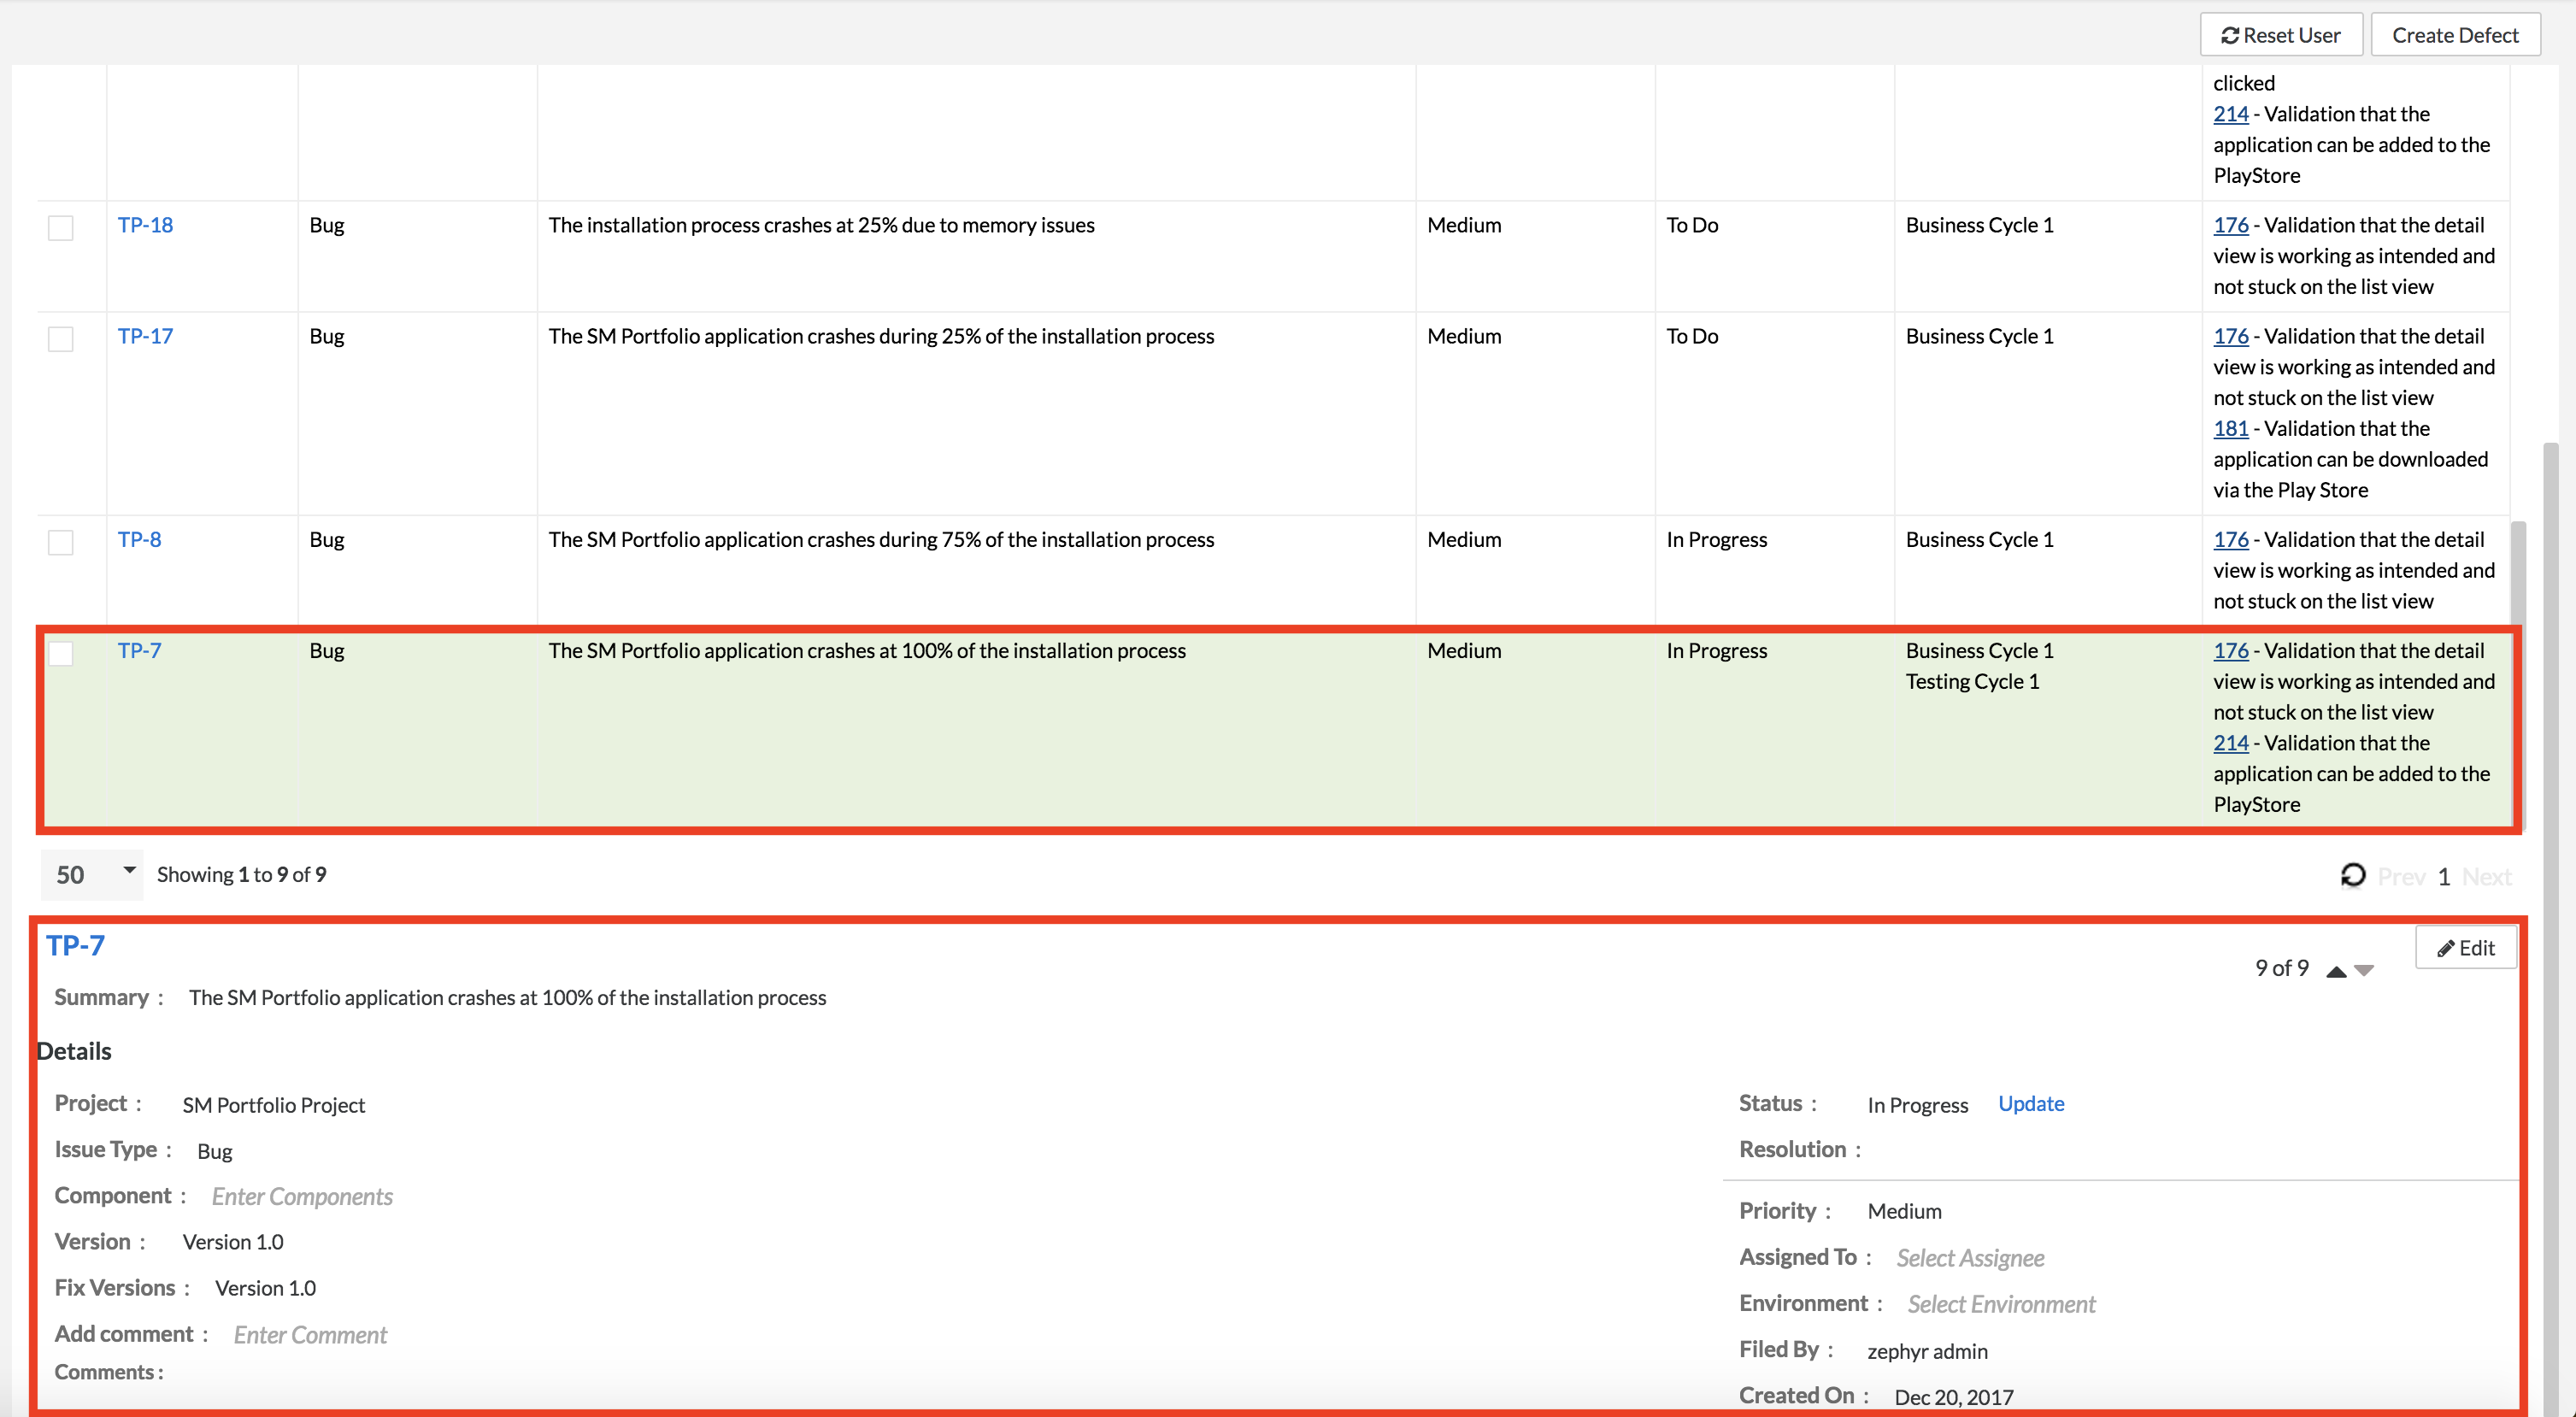
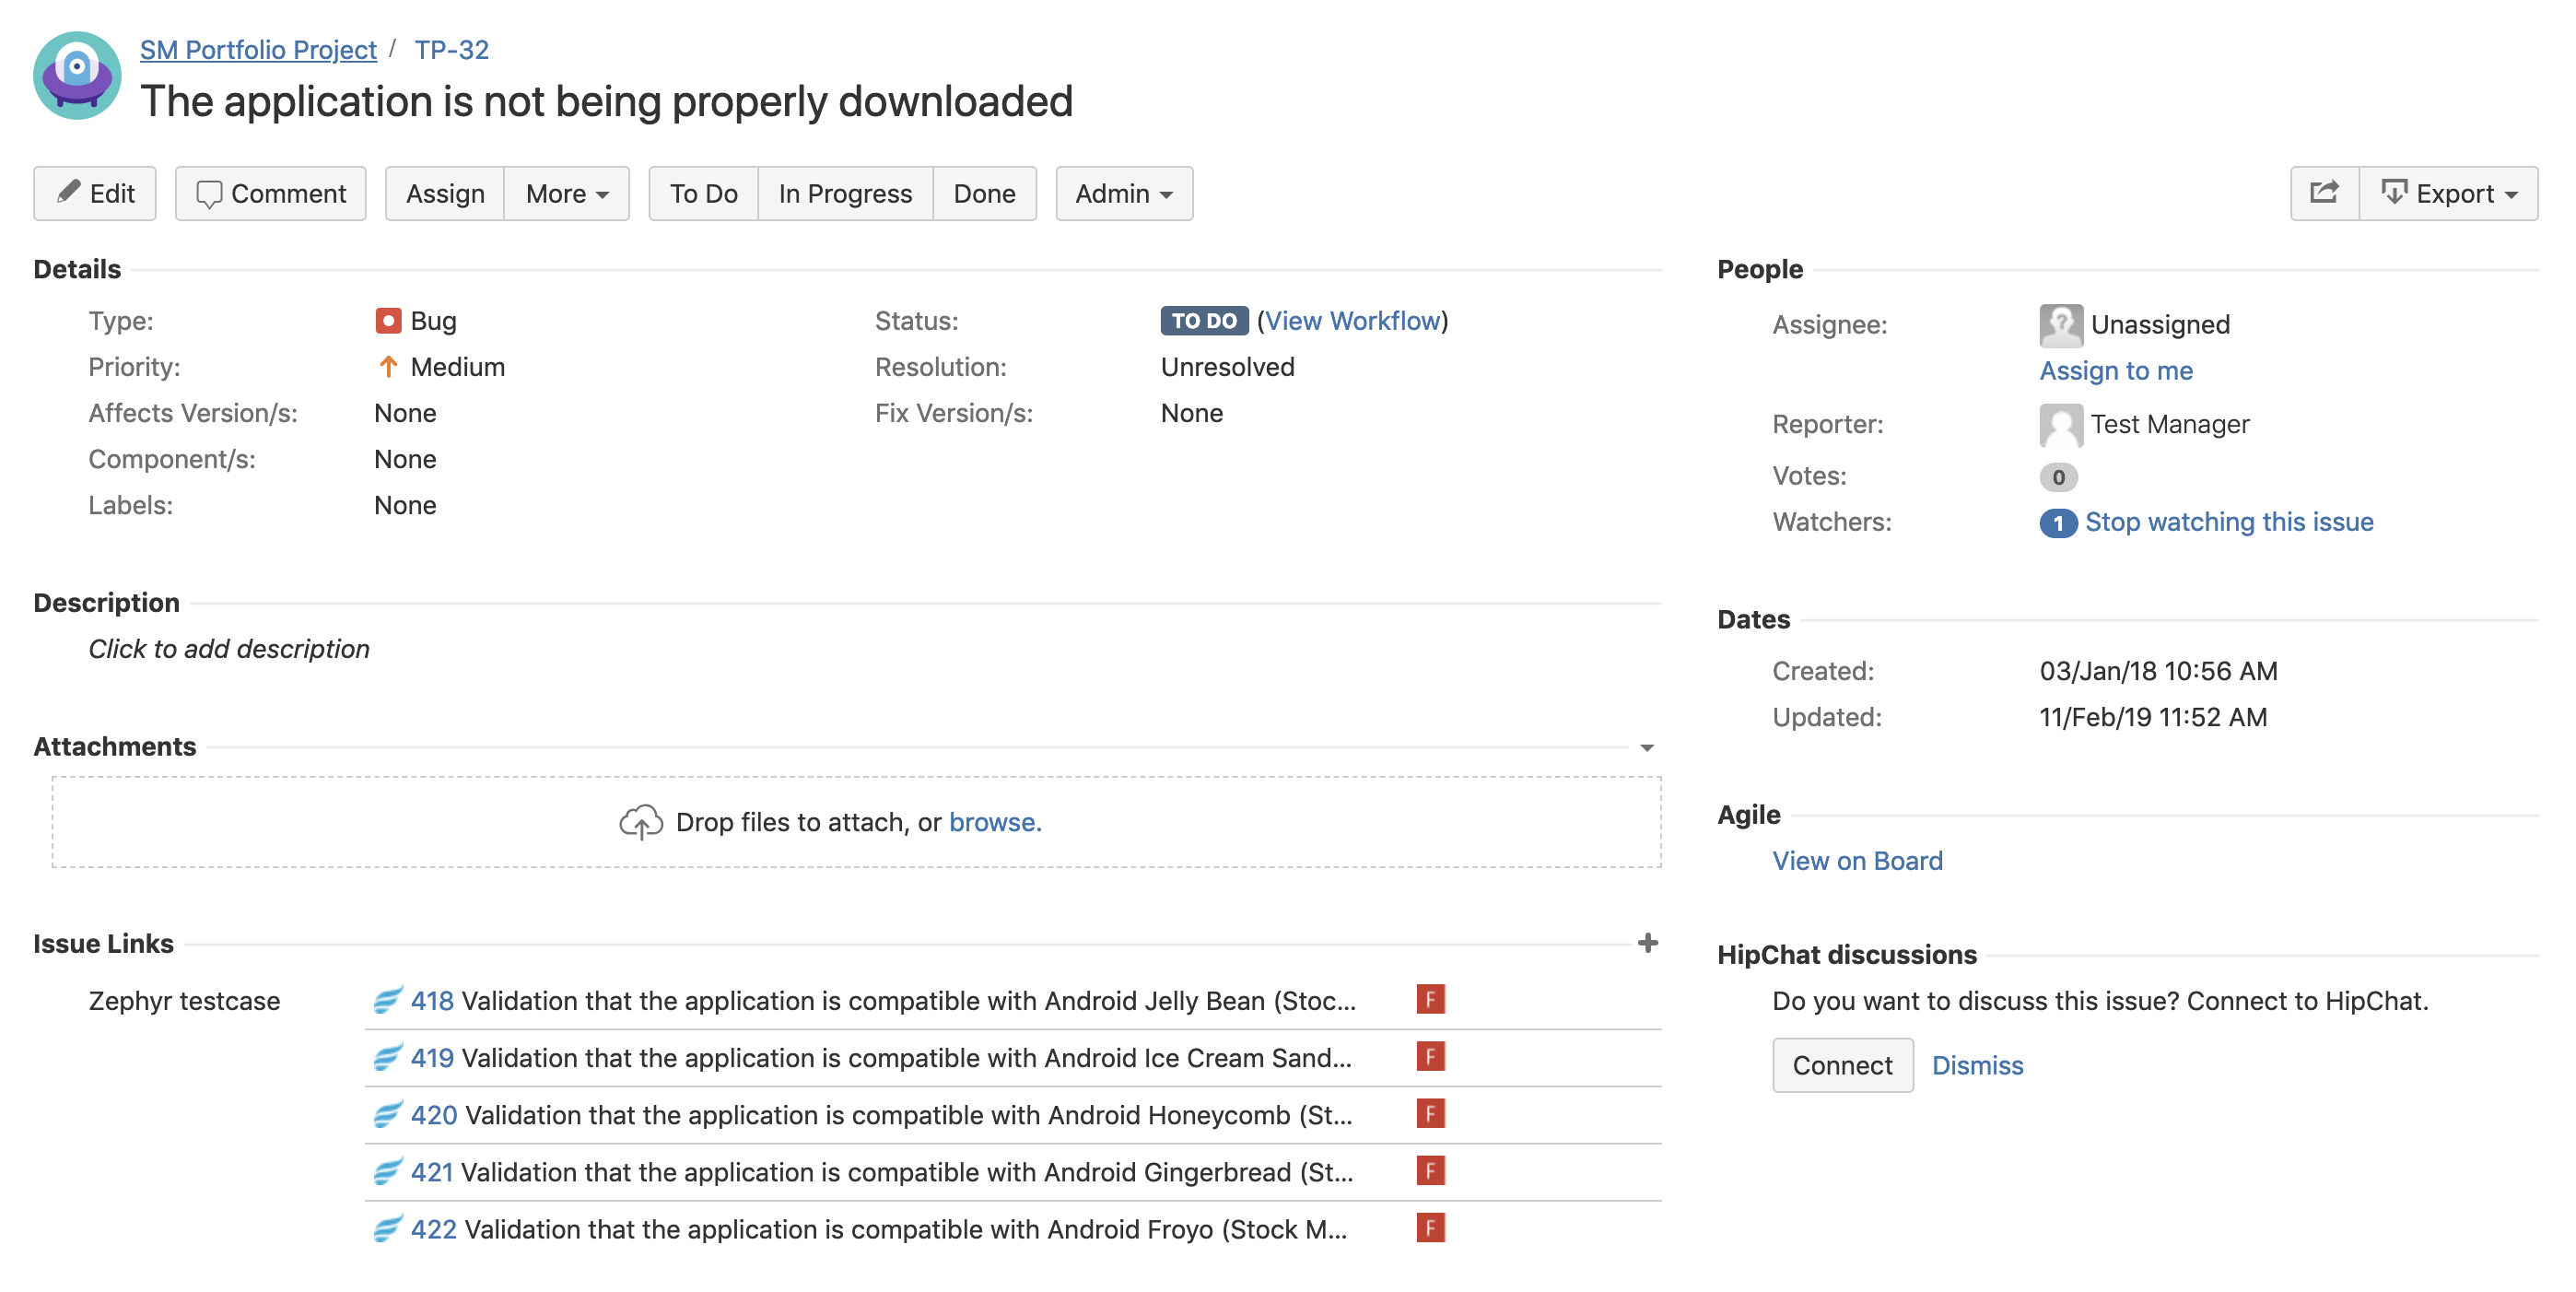
1. Find the defect you want to edit and select it by ticking the check box next to its ID. The defect details will be shown at the bottom of the page:
...
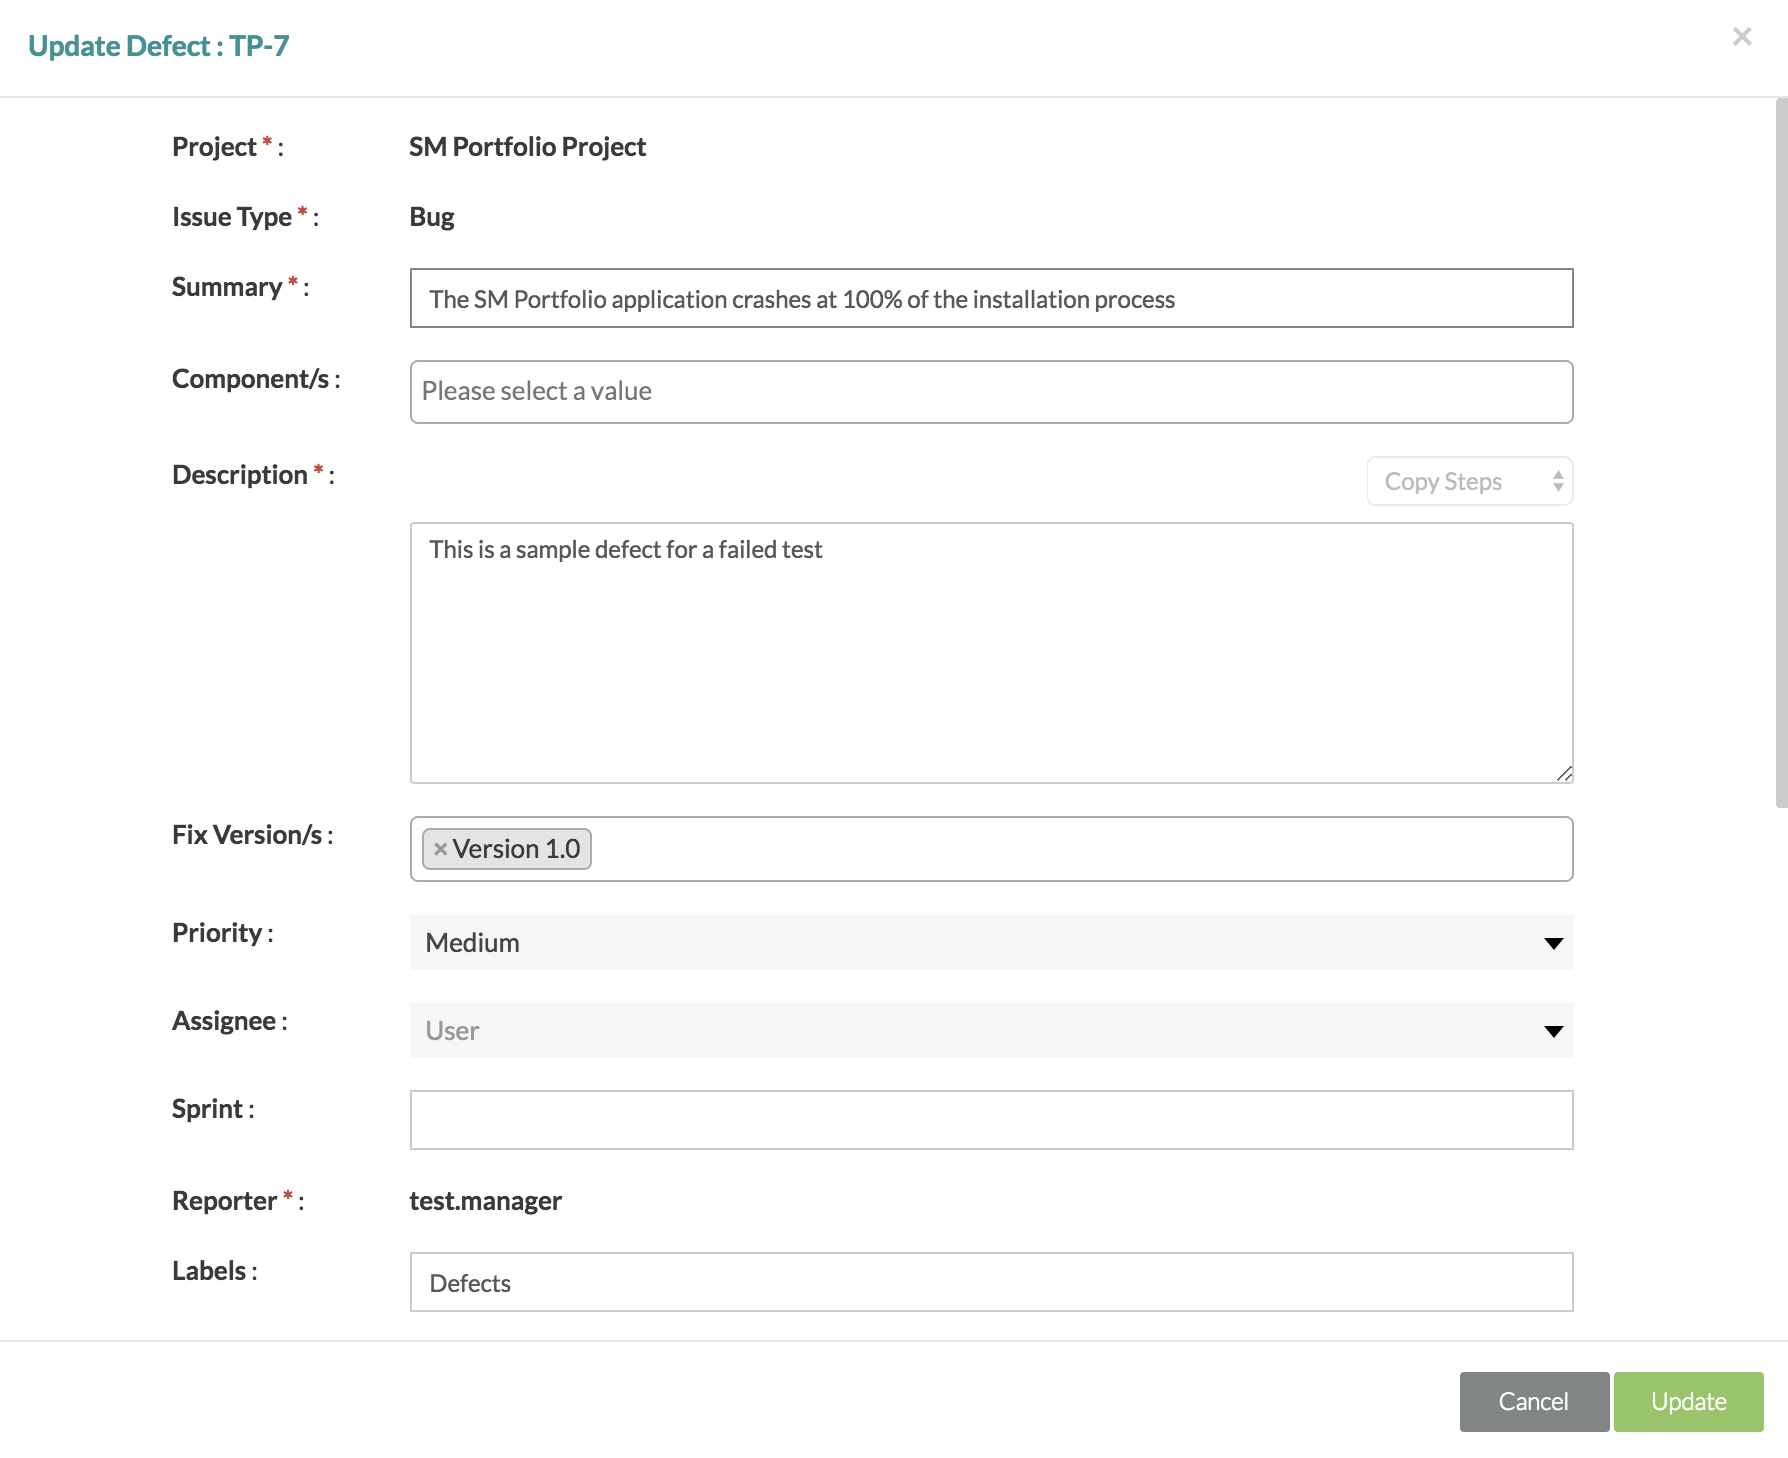
2. Here you can change any data directly in the fields or click Edit and update the values in the subsequent dialog:
...
Keep in mind that all the required fields must be populated.
| Info |
|---|
|
...
4. After the changes are made, the defect will be updated.
Bulk Editing Defects
...
|
3. Click Update to apply the changes.
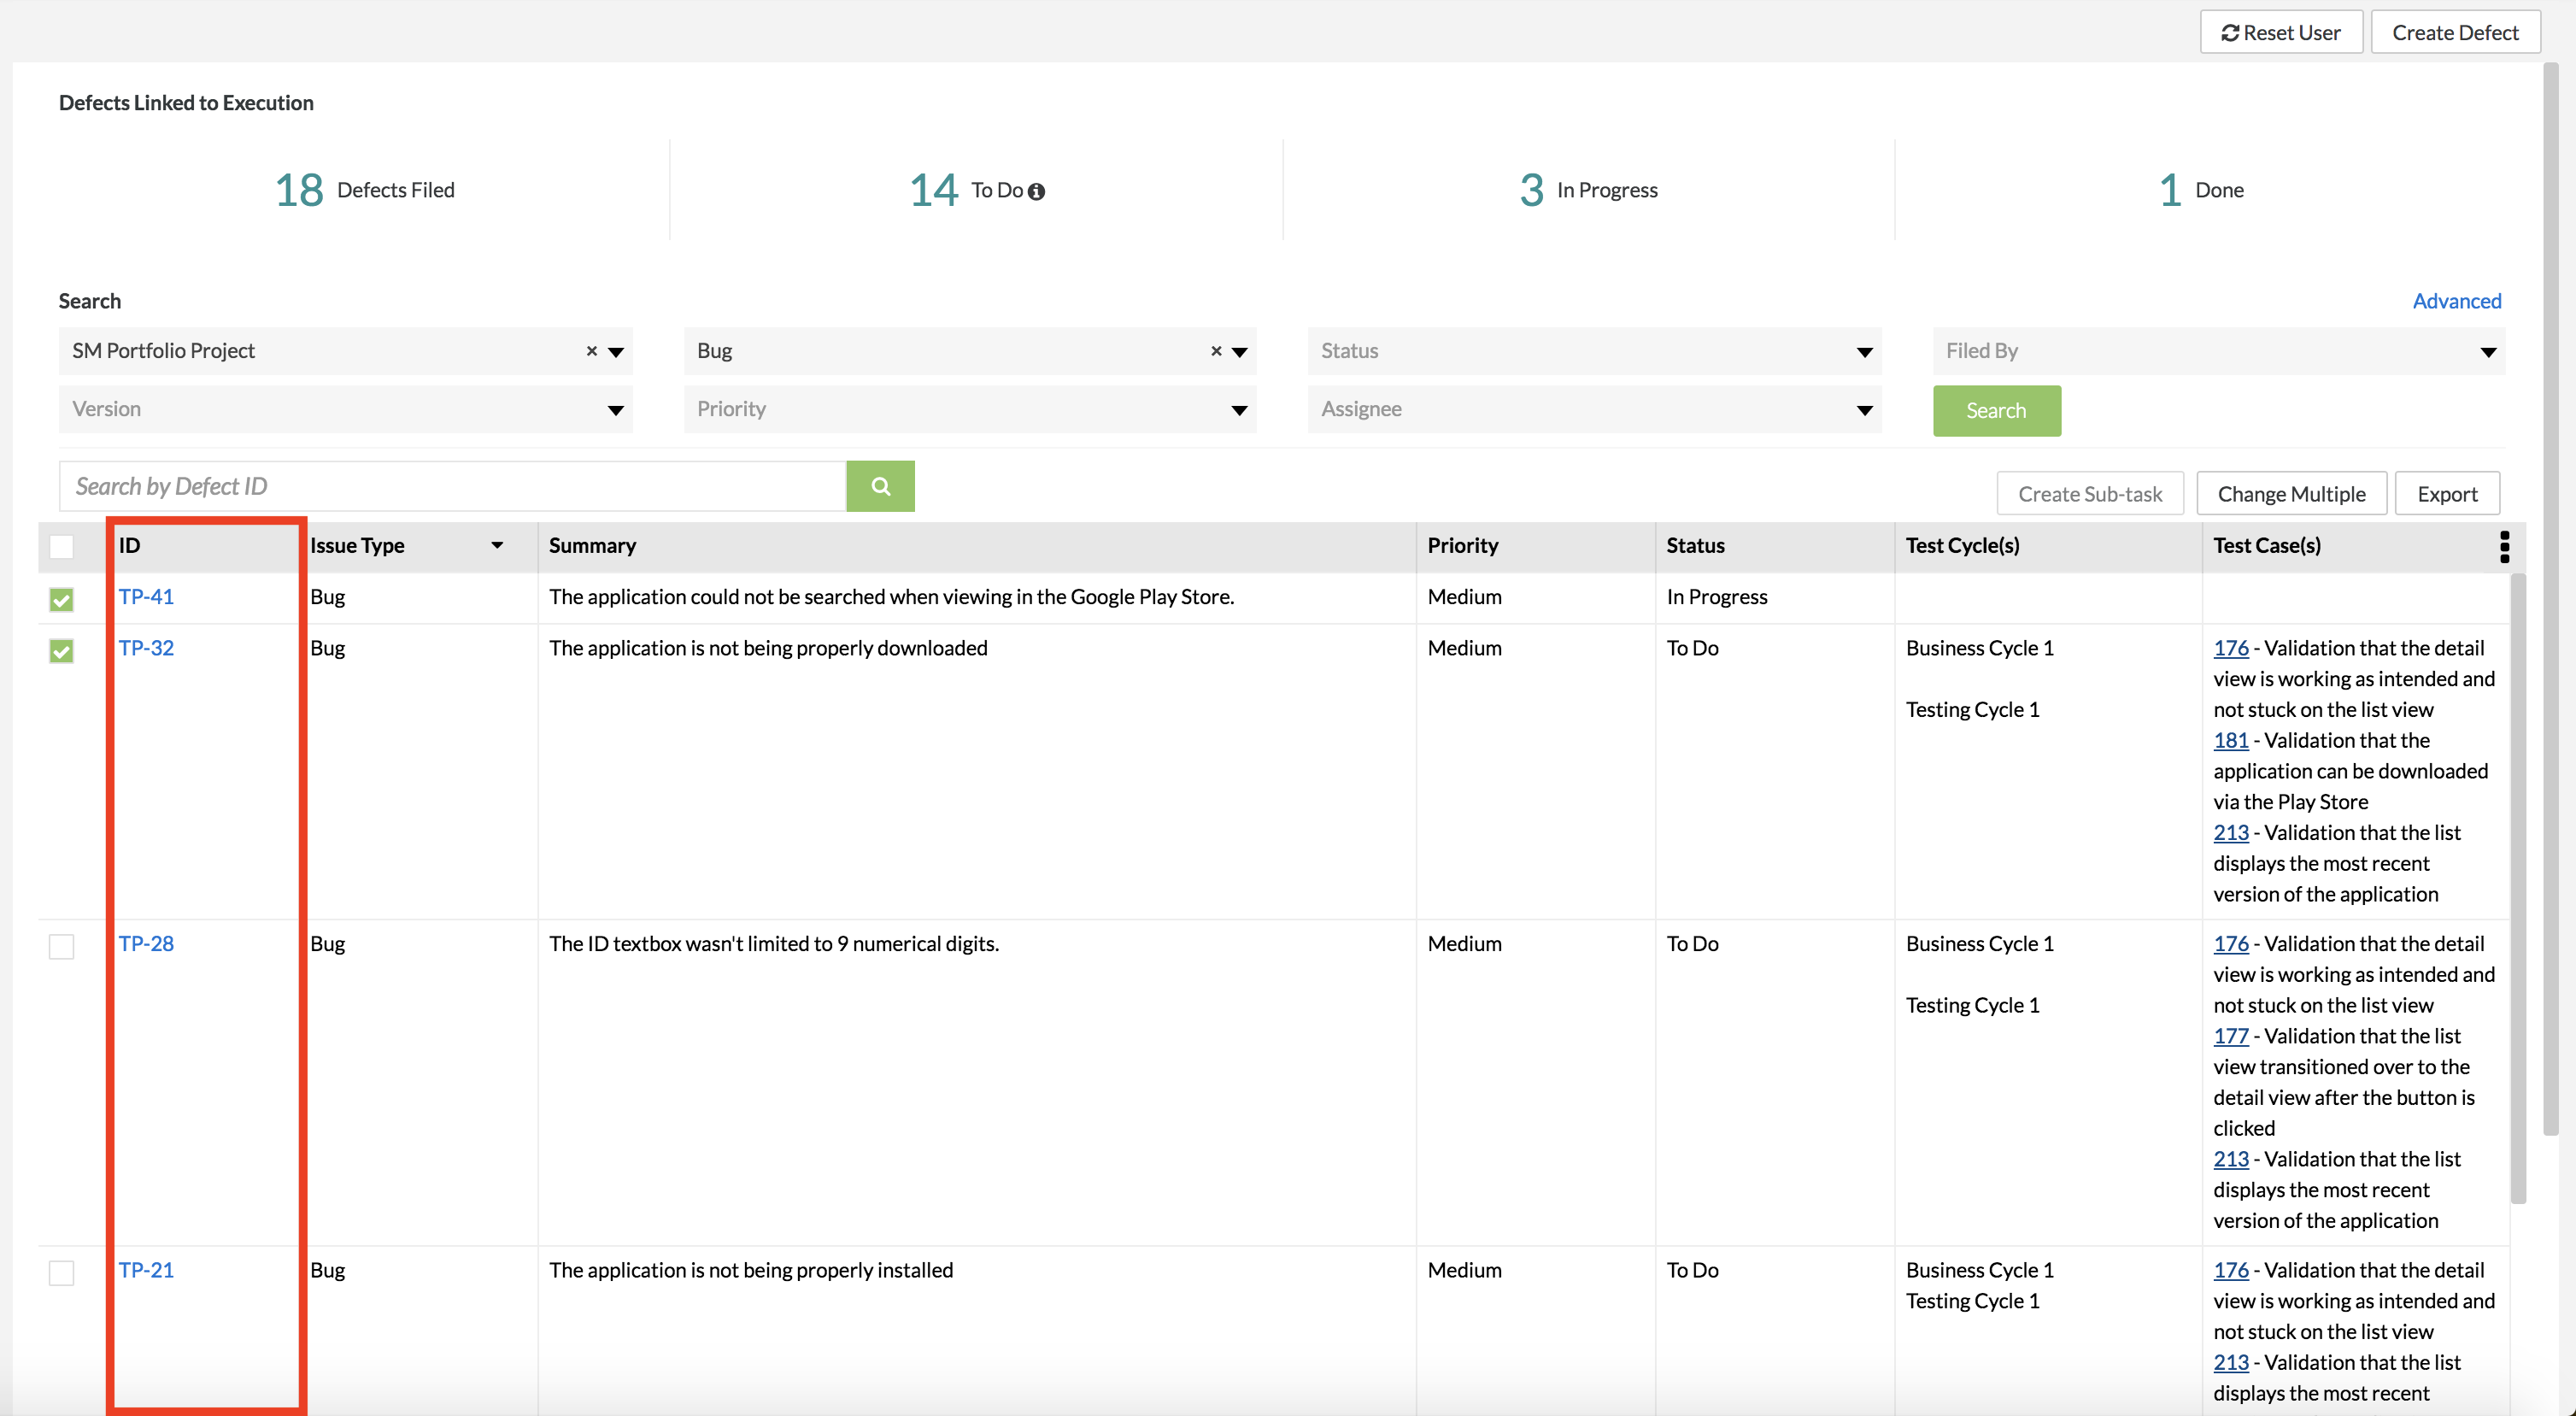
To edit multiple defects -
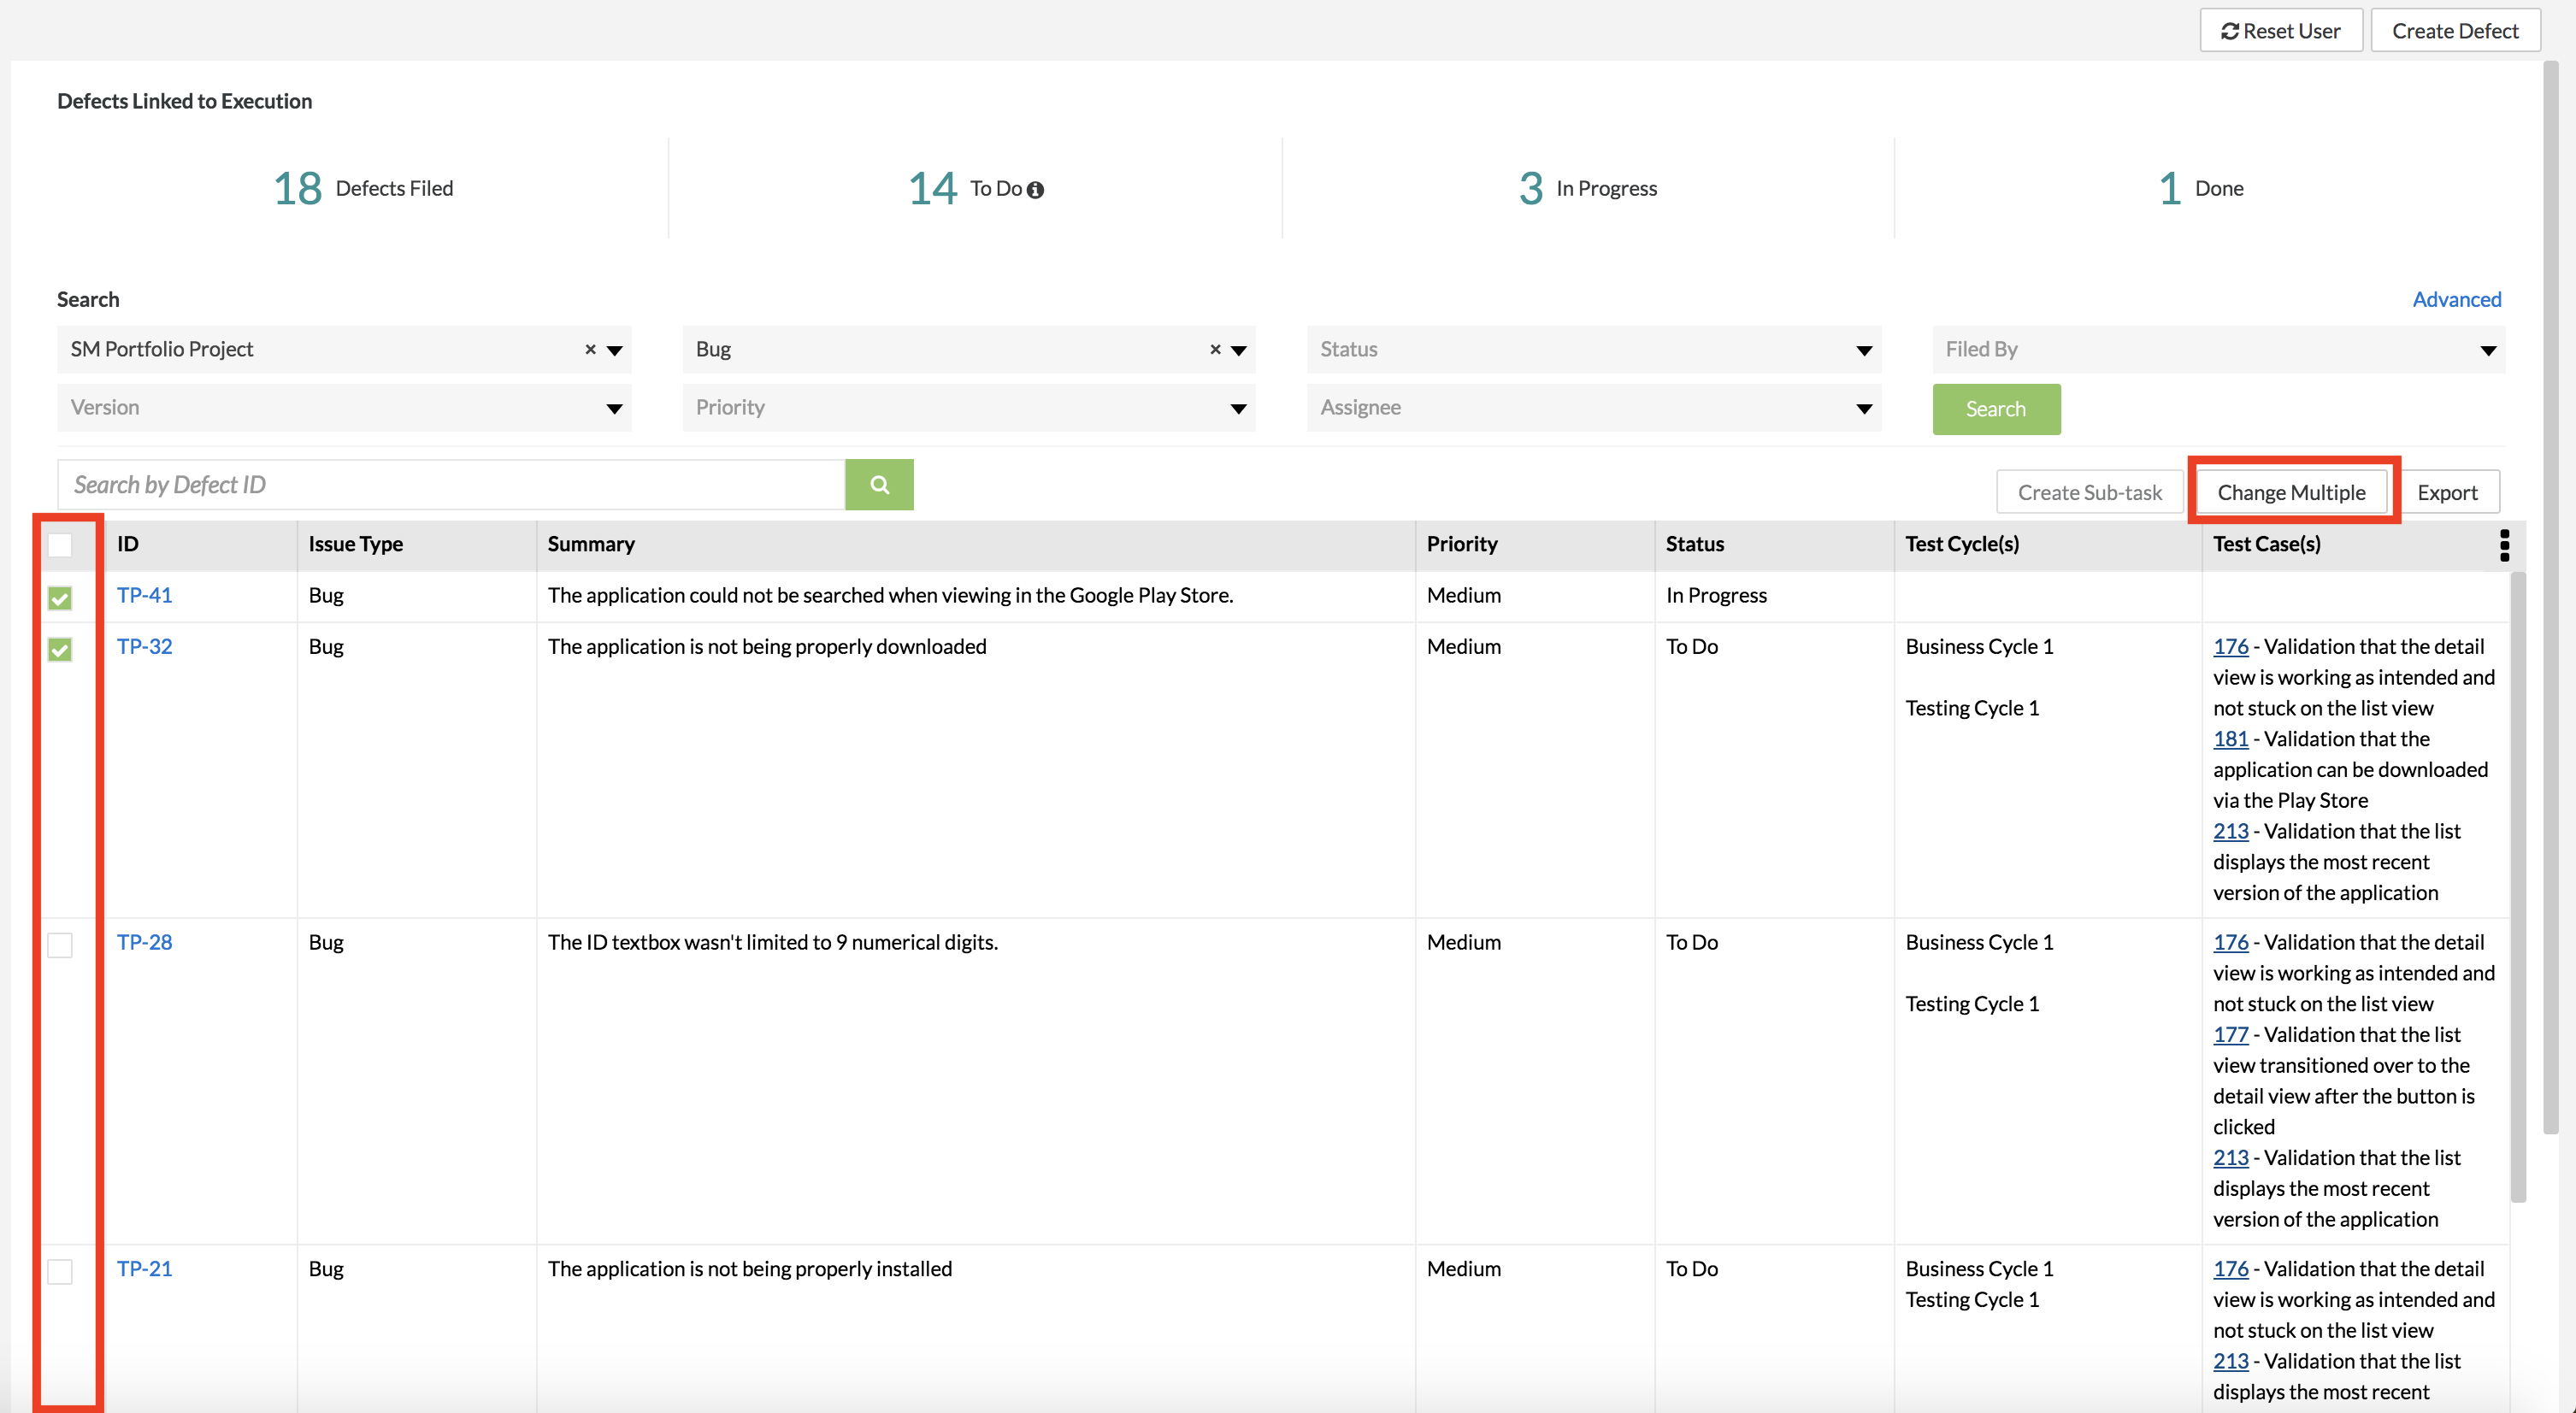
1. Find the defects you want to edit and select them by
...
2. Click on the  button.
- A pop-up/modal will appear with the fields for a defect. A user can use this to change the fields for the selected defects.
3. Change the values of the following fields using the provided text boxes and drop-down lists:
- Component, Status, Resolution, Version, FixVersion, Priority, and Assignee
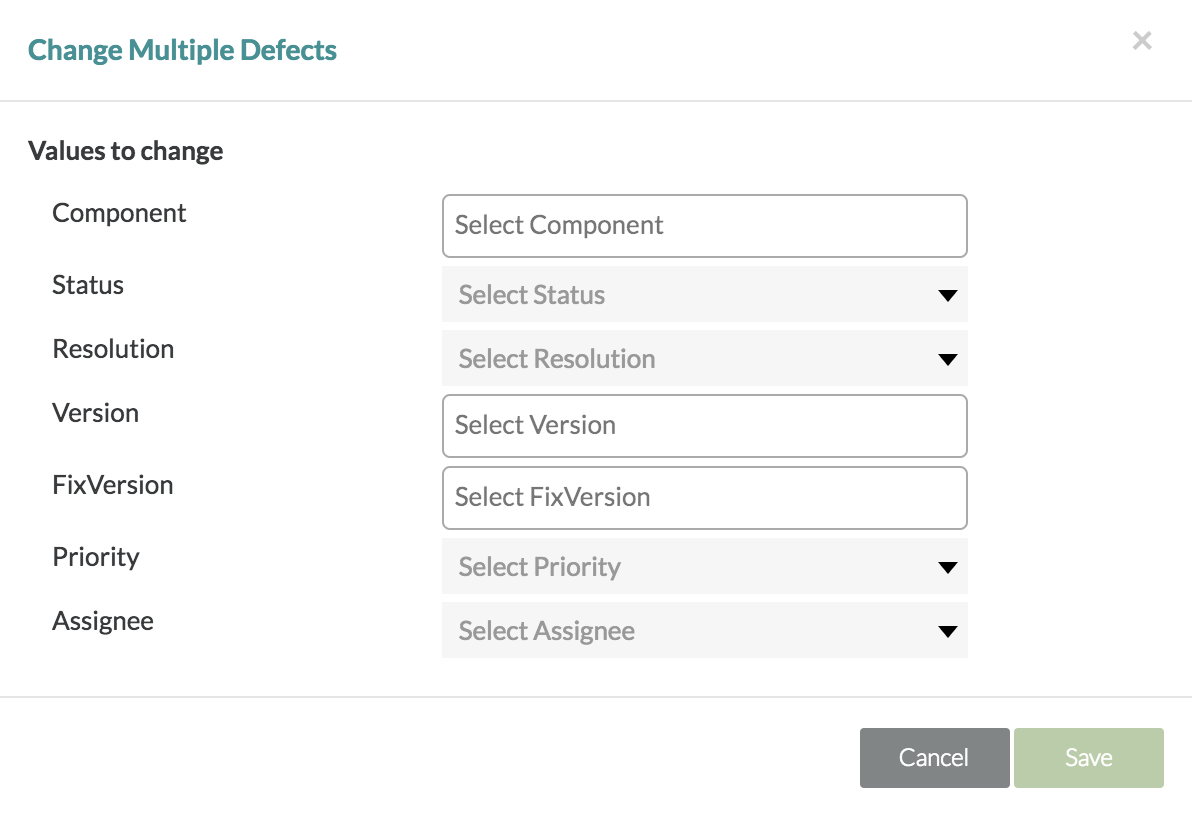
4. Click on the "Save" button to finalize updating and editing the selected defects.
Editing Defects in JIRA
1. Click on the ID link in the "ID" column for the defect that you want to view/edit in JIRA.
- This will open a tab and redirect the user to the JIRA instance that the defect is connected to.
- If you aren't already logged into the JIRA instance when you click the link, you'll be prompted to log into the instance with your JIRA credentials.
2. From here, you can view and edit the defect directly in JIRA.
- Make any changes that are necessarily.
| Info | ||
|---|---|---|
| ||
Updates and changes made in either Zephyr or JIRA will update and appear in both.
|
...
ticking the check box next to their IDs:
...
2. Click Change Multiple and update the needed values in the subsequent dialog:
...
3. Click Save toapply the changes.
To edit a defect in Jira:
1. In Zephyr, find the defect you want to update and click its ID:
...
2. The defect will open in Jira where you can edit it:
...
If you are not logged in to Jira, you will be asked to log in using your Jira credentials:
...
| Info |
|---|
|
Back to top
...
The built-in issue tracking system
To edit a defect created in the internal issue tracking system –
1. Find the defect you want to edit.
2. Choose it by selecting the check box next to its ID. The defect details will appear at the bottom of the page:
...
3. You can edit the values directly in the fields, or click Edit to bring up the edit form:
...
4. After changing the values, click Update to apply the changes.
See Also
Jira Integration
Creating Defects
Searching for Defects
Creating a Sub-task
Exporting Defects