| Table of Contents |
|---|
| Note |
|---|
When installing Zephyr on your nodes, keep in mind the following:
|
Prerequisites (apply to each node)
Make sure the computer meets the system requirements.
Ensure you have the license file (license.lic), as it will be required during the installation process. If you do not have it, please contact your Zephyr Account Manager or contact Zephyr Sales at sales@getzephyr.com.
Download the installation file of Zephyr Enterprise for Windows.
Download a JDBC driver and place it on each node where Zephyr will be installed.
Download and install Java JDK 8. JDK. You can use one of the following:
After you install itJDK, set the PATH and JAVA_HOME environment variables. To do that:
PATH variable:
Navigate to Start > Control Panel > System.
Click Advanced > Environment Variables.
Add the path to the bin folder to the PATH variable in the System variables section. A typical path looks like the followingas follows:
for OpenJDK: C:\some_folder\java-se-8u41-ri\bin
for Oracle JDK: C:\Program Files\Java\JDK_1.8.0_<version>\bin
JAVA_HOME variable:
Navigate to Start > Control Panel > System.
Click Advanced > Environment Variables.
Find the JAVA_HOME variable in the System variables section. If you cannot find it, add it to the System variables.
Add the path to the JDK root folder to the JAVA_HOME variable. A typical path looks like thisas follows:
for OpenJDK: C:\some_folder\java-se-8u41-ri
for Oracle JDK: C:\Program Files\Java\JDK_1.8.0_<version>
| Note |
|---|
...
Make sure you have specified the correct |
...
paths for PATH and JAVA_HOME. |
Zephyr installation steps
...
1. Install Zephyr Enterprise on the first node (the installation steps on the first node differ from the steps you perform on the other nodes):
...
Perform the steps described in Prerequisites.
Open the Command Prompt window as an admin and run the following command:
Code Block language bash zephyr_6.6_xxx_setup_iRev_xxx.exe -VzSkipStartupData=true
| Note |
|---|
The command is case-sensitive. |
...
| Expand | ||
|---|---|---|
| ||
In the file, before the web-app tag, add the tag <distributable />:  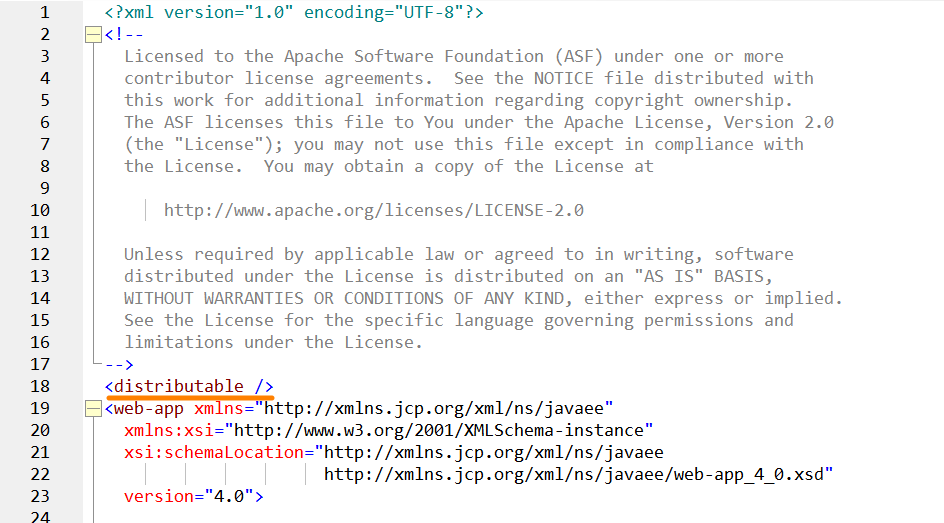 |
5. On all the nodes, open the folder zephyr/tomcat/webapps/flex/WEB-INF/template, copy the filecluster.properties.tmpl, paste it to the folder zephyr/tomcat/webapps/flex/WEB-INF/classes and change the file name to cluster.properties.
6. Make the following changes in Edit the cluster.properties file :
Remove the following lines:
| Code Block |
|---|
#unique identifier for the cluster node
cluster.aws.enable=false
HAZELCAST_PASSWORD=huser
HAZELCAST_USERNAME=hpass |
...
and update the following information:
| Code Block |
|---|
cluster.key=node1 (this should be a unique name of the node) cluster.node.1.key=node1 cluster.node.1.url=172.17.18.141 (the IP address of node 1) cluster.node.count=4 cluster.node.2.key=node2 cluster.node.2.url= 172.17.18.157 (the IP address of node 2) cluster.node.3.key=node3 cluster.node.3.url=172.17.18.223 (the IP address of node 3) cluster.node.4.key=node4 cluster.node.4.url=172.17.18.201 (the IP address of node 4) |
...
Now you can set up a shared folder. To learn how to do that, click Next Step below.
See Also