Templates and Variables
Template Overview
Templates enables you to capture issues even faster during testing, by automatically populating fields in issues with your predefined values. Templates stored on your JIRA server, so the saved templates remain the same regardless of which browser you are testing in. Templates are also shared, so you can create one template that your whole team can use.
Creating and Using Templates
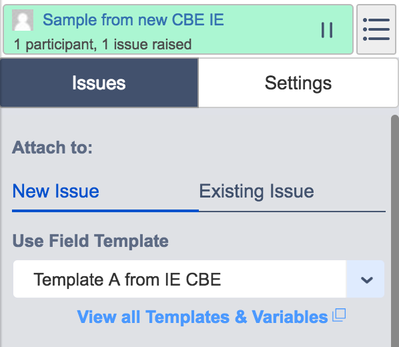
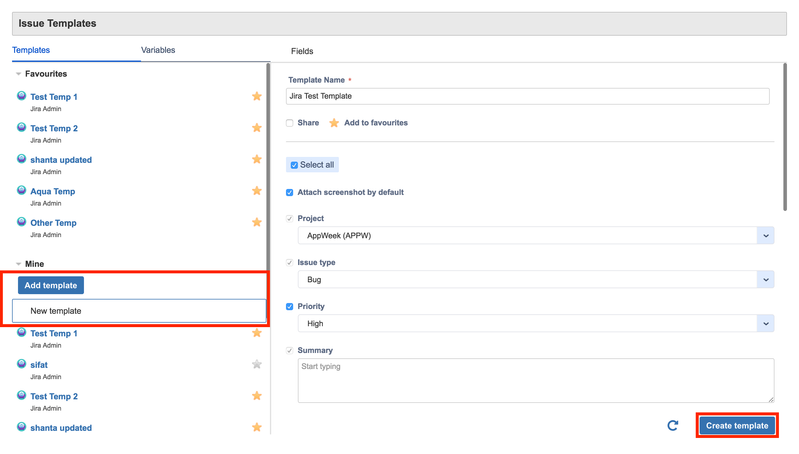
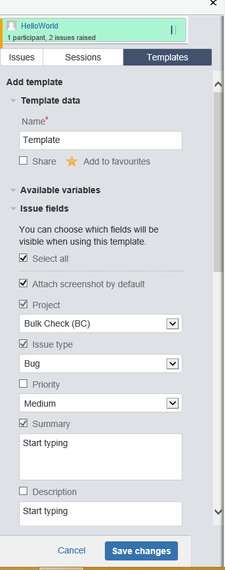
To create a new template, go to the "View all Templates and Variables" window in the Capture for JIRA browser extension by clicking the following button, then click "Add Template" under the "Mine" section.
- Here, you can pre-fill an issue creation form with any information you would like. (e.g. a particular project, version, or component you are working).
- Selecting the option "Attach Screenshot by Default" will include a screenshot attachment automatically when you are applying a template.
- You can have as many templates as you like, so you can have very specific templates for issues that you may wish to raise during testing.
For IE users, the user interface for viewing and editing templates may vary from other browsers. The 2 images below for viewing and editing templates are displayed for the IE browser extension.

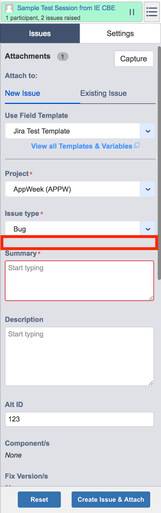
Templates are used when creating an issue. To do this, simply choose one from the "Use Field Template" menu on the Create Issue tab in the Capture for JIRA browser extension. The "Use Field Template" menu will only show templates that you have marked as "Favorite" with a star (![]() ). By default, all templates you create are marked favorite for you.
). By default, all templates you create are marked favorite for you.
Using a template will keep it selected until you choose otherwise – even across multiple uses of the browser extension.
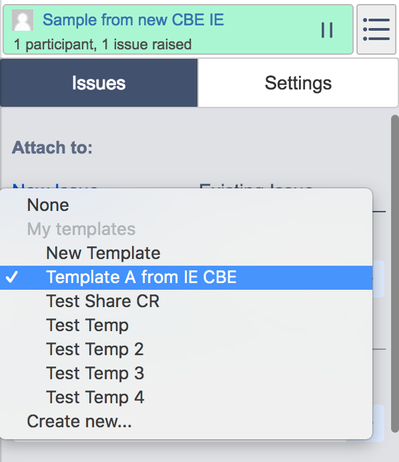
A template can also be assigned as the default template for a shared test session, allowing all participants of the test session to create consistent issues. For more information on creating test sessions, please read Working with Sessions.
Using Variables in Templates
Variables allow templates to contain dynamic information, and are only evaluated into actual values when the template is used during creating a new issue in the extension. Previously, variables only worked when used in a template, but now, they can be used at any time during the issue creation process.
To use a variable, enter the variable name surrounded by braces ("{" and "}") into a text field on the template or issue creation forms.
By default, Capture for JIRA ships with four variables:
- {cookies} - Are cookies turned on? Value is either true or false.
- {useragent} - Browser information
- {title} - Current page title
- {url} - Current page URL
Creating Variables for Templates
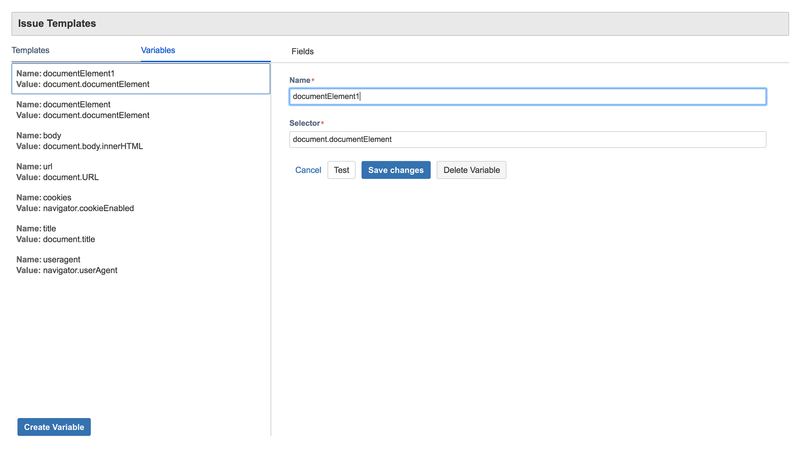
The default variables shipped with Capture for JIRA are only a start – you can also create your own variables to do different things. To create another variable, simply click the "Variable" tab in the Templates window. For each variable, you need to provide 2 pieces of information:
- Name - This is the variable name. You use the variable in templates by enclosing the variable name in '{' and '}'
- Selector (Javascript Selector) - This is the javascript that will evaluate when you run the variable. This happens when you select a template to use.
Some other examples:
Name | Javascript Selector | Explanation |
|---|---|---|
jiraVersion | document.getElementById('footer-build-information').innerHTML
| This is one specific to JIRA itself. In our JIRA footer, we always include the JIRA version and build numbers. This javascript selector will get this information for us |
date | new Date().toDateString() | Today's date. |
selectedText | Chrome & Safari window.getSelection().toString(); Firefox document.getSelection().toString(); IE document.selection.createRange().text; | Will insert any text that's already selected. Note that the javascript for this differs across browsers, so you will need to create separate variables for each browser you wish to use this in. |
Sharing and Favoriting Templates
Once you have templates working the way you want, you can also opt to share it with your team by marking the 'Share' checkbox and adding the template to favorites allows you to use the template as it appears in the "Use Field Template" menu.

Your team members will now be able to see this template in their list of available templates to use and can use the template however they see fit.
If they favorite the template, it will be made available for use when creating a new issue under the "Use Field Template" menu.
Using a shared template will also include any variables which are included in the template.
Control Field Visibility with Templates
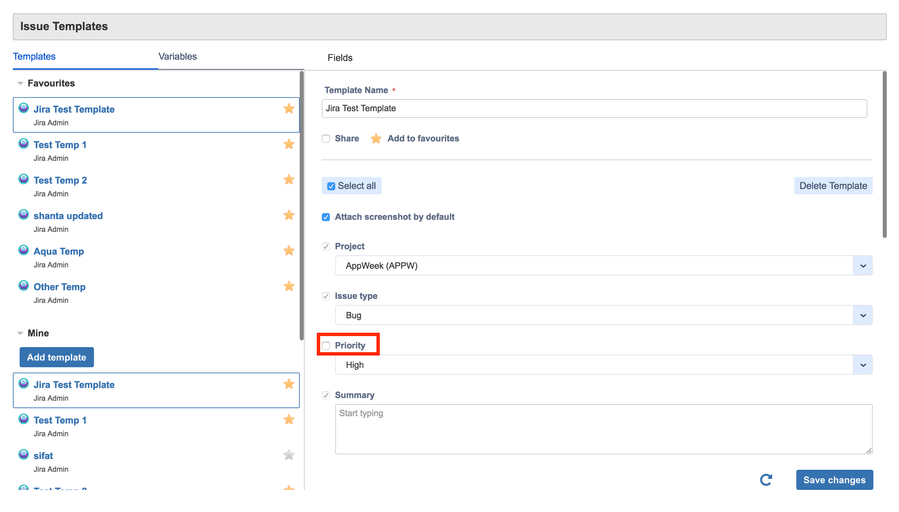
The checkboxes on the template form control the visibility of the field when the template is used. This means that you can choose to view only the fields that matter to you when using the template. These hidden fields will also apply for anyone using your shared template. Mandatory fields that are required for issue creation will always be visible, to minimize the chance of issue creation errors.
- View the example below. Note how we unchecked the 'Priority' field and now the priority field is not visible when using the Template.