| Table of Contents |
|---|
About the Plugin
Zephyr Enterprise Zephyr Enterprise Test Management Plugin for Jenkins integrates Jenkins and Zephyr Enterprise Zephyr Enterprise Edition / Zephyr Community Edition. This plugin creates test cases and publishes test results in Zephyr Enterprise Zephyr Enterprise for JUnit test cases in Jenkins.
This guide will cover how to create and execute test cases automatically in Zephyr Enterprise using this plugin; this includes
- Downloading and installing the plugin
- Adding Zephyr Severs in the Jenkins global settings.
- Configuring a standard Jenkins Job.
- Configuring Zephyr Enterprise Test Management Plugin as a post-build action.
- Triggering the job and publishing results in Zephyr
Requirements
- Zephyr Enterprise 4.7.X, 4.8.X, 5.0.X
- Jenkins installation
Downloading and installing the plugin
You can download the plugin from Jenkins repository or from Zephyr utilities repository. To install the plugin follow the instructions on Jenkins portal – How to install plugins.
Adding Zephyr Servers in Jenkins global settings
After installation configure Jenkins global settings to establish connection with Zephyr Server(s). Follow the below steps
- Launch Jenkins and access via a web browser
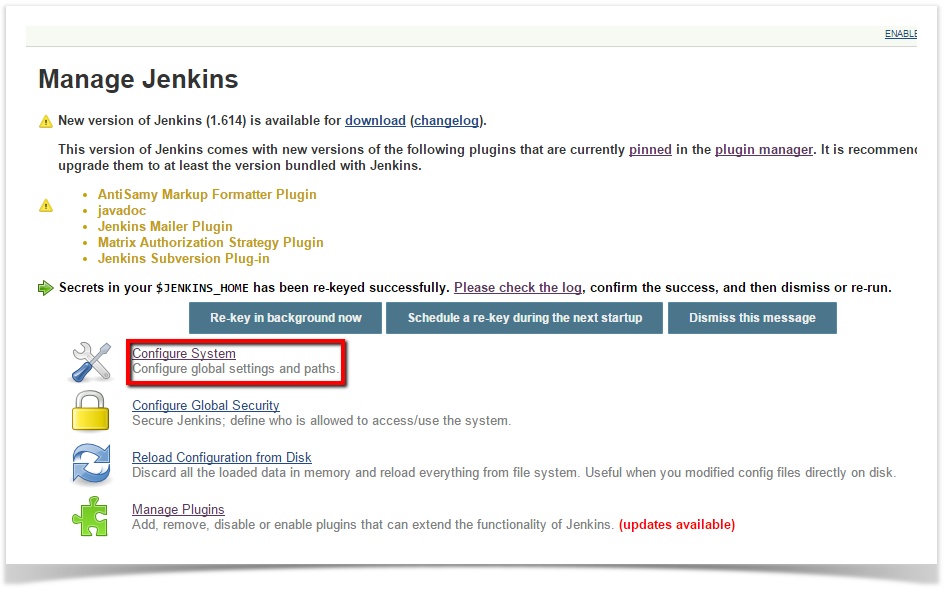
- Click on "Manage Jenkins" from the Menu as illustrated in the below screenshot
...
- Click on "Configure System"
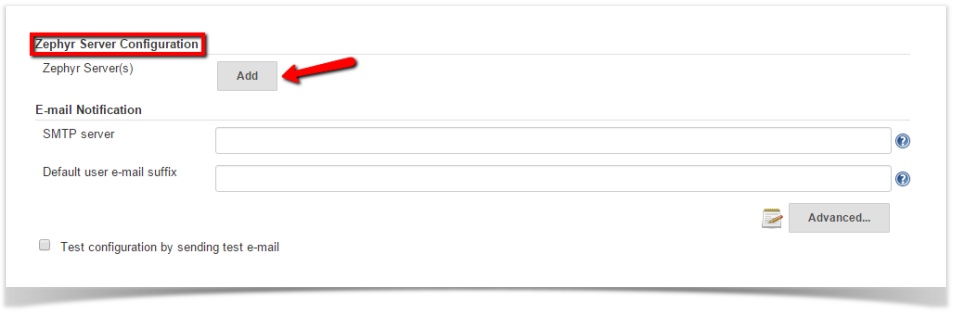
- Locate the section "Zephyr Server Configuration" and click "Add". You can add more than one Zephyr Server by clicking on "Add" button
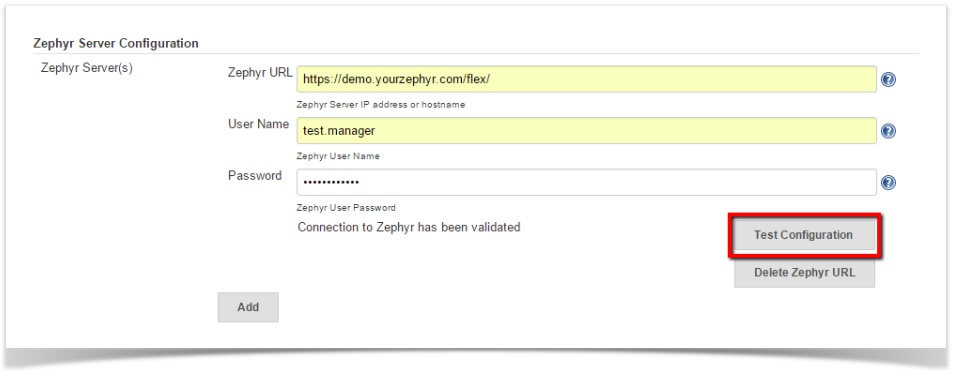
- Enter Zephyr Server URL and user credentials. Note that the user credentials must be that of Zephyr "Test Manager" or "Test Lead". Click on "Test Configuration" to validate connection to Zephyr Server
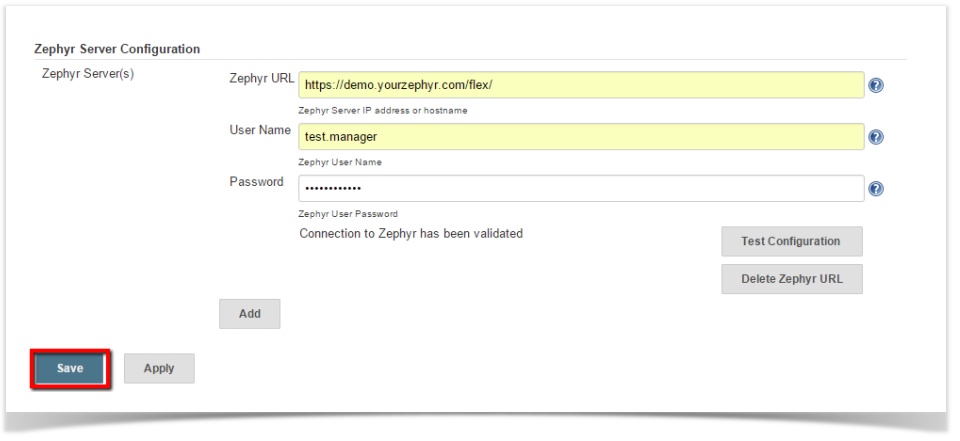
- Click on "Save" button to save the configuration changes
Configuring a standard Jenkins job
A job in Jenkins defines a sequence of tasks for Jenkins to perform. When a job is triggered, Jenkins looks for an Ant script or Maven build file and runs it. It also provides options to define post-build tasks. Follow the example below to configure a standard job and add a post build action:
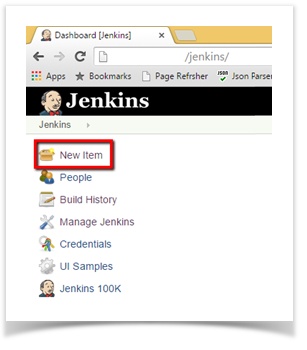
- Create a new Jenkins job by clicking the "New Item" link found on the menu
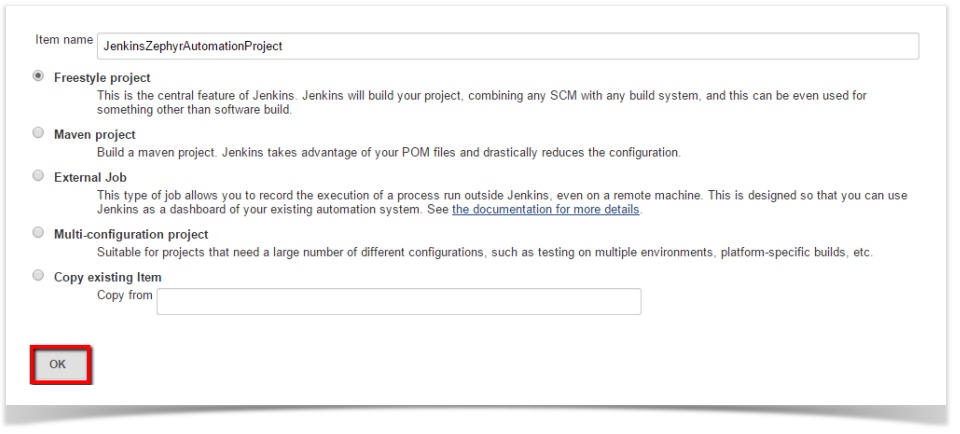
- Give a name for your job, check the box "Freestyle project" and click on "OK" button
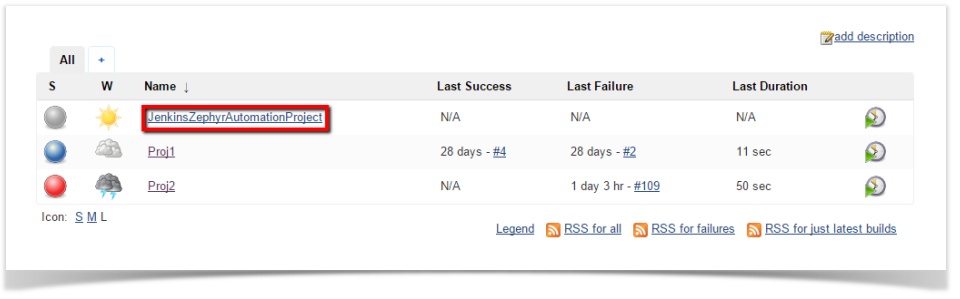
- To configure the job you just created, click the <job name> on the Jenkins home page
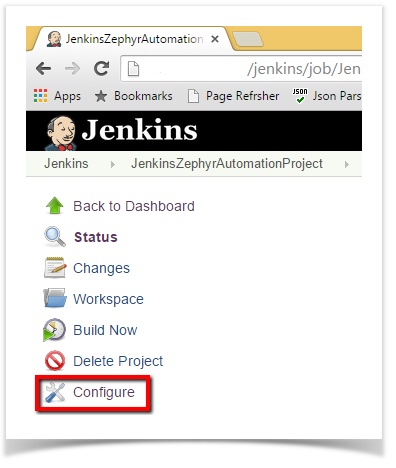
- Click the "Configure" link
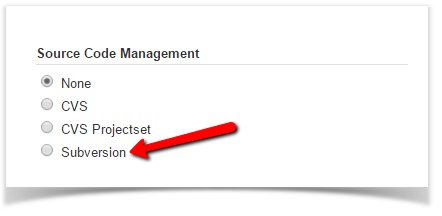
- Choose "Subversion" option in the "Source Code Management" section
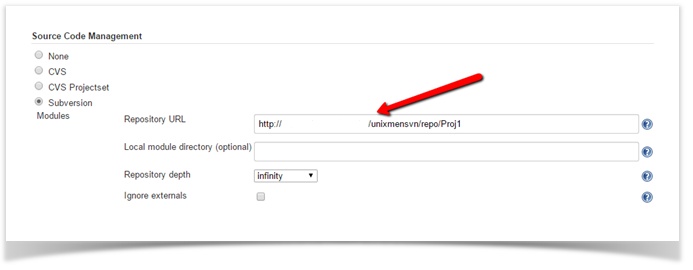
- Enter the subversion URL where the target project resides and press Tab
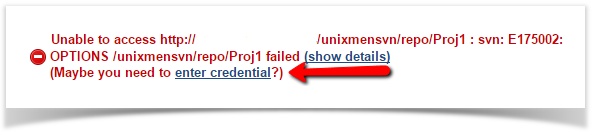
Note: User credentials needs to be setup to access SVN server. Click on "enter credential" link to set it up if you see below error
- To add a build step, locate the "Build' section and select "Invoke top-level maven targets" from the "Add build step" dropdown
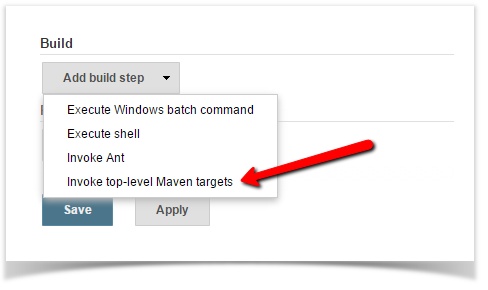
- Select "clean package" as your Goals

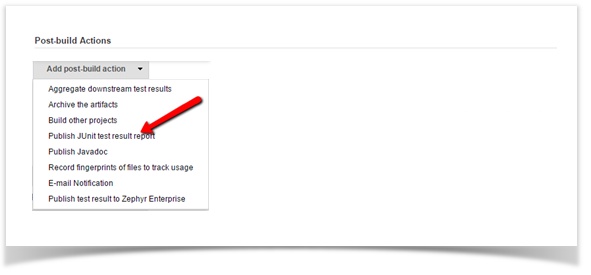
- The plugin requires JUnit test result. Locate the "Post-build Actions" section and select "Publish JUnit test result report" from "Add post-build Actions" dropdown
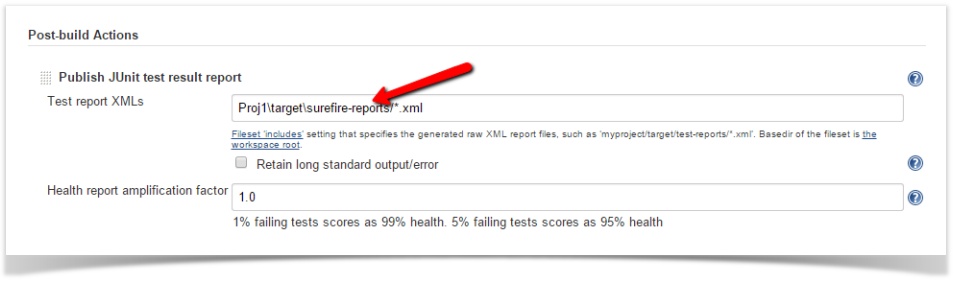
- Enter the path to the test report. In the example below the location is "Proj1\target\surefire-reports/*.xml" where Proj1 is the target project
Configuring Zephyr Enterprise Test Management plugin as a post-build action
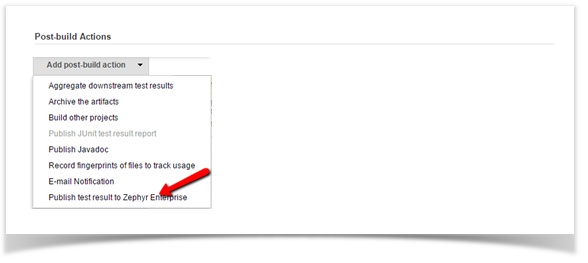
In order to publish results in Zephyr, define another post-build action.
- Select "Publish test result to Zephyr Enterprise" from "Add post-build Actions" dropdown
- Configure Zephyr plugin job
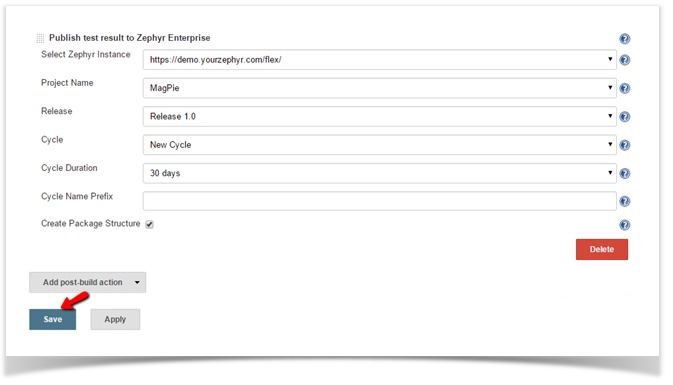
- Select the Zephyr URL from the dropdown. (Servers configured in the Jenkins global configuration are available here to select). This automatically pulls in Zephyr projects, releases and cycles
- Select the Project Name from the dropdown. This re-populates the releases
- Select the Release from the dropdown. Selecting a release fetches all its cycles
- Select either an existing Cycle from the dropdown or create a new cycle
- For existing Cycle the default Cycle Duration will be that of existing cycle in Zephyr and Cycle Name Prefix will be of the format "Automation_<Date><Time>" stamp
- For new cycle you have option to select Cycle Duration from the dropdown and to edit default cycle prefix name "Automation". In the absence of a cycle prefix name "Automation" is used for new cycles
- To create a package structure while creating and organizing the test cases, check the box "Create Package Structure"
- Click "Save"
Triggering the job and publishing results in Zephyr
...
License
This plugin is open source. It follows the Apache License version 2.0 (<http://www.apache.org/licenses/>).
It allows you to:
- Freely download and use this software, in whole or in part, for personal, company internal, or commercial purposes;
- Use this software in packages or distributions that you create.
It forbids you to:
- Redistribute any piece of our originated software without proper attribution;
- Use any marks owned by us in any way that might state or imply that we www.getzephyr.com endorse your distribution;
- Use any marks owned by us in any way that might state or imply that you created this software in question.
It requires you to:
- Include a copy of the license in any redistribution you may make that includes this software;
- Provide clear attribution to us, www.getzephyr.com for any distributions that include this software
It does not require you to:
- Include the source of this software itself, or of any modifications you may have made to it, in any redistribution you may assemble that includes it;
- Submit changes that you make to the software back to this software (though such feedback is encouraged).
See License FAQ <http://www.apache.org/foundation/licence-FAQ.html> for more details.
Feedback
...
Please provide feedback at Jenkins JIRA or at Zephyr Community
...
For more information about the plugin, how to set up Zephyr with Jenkins, and how to use Jenkins with Zephyr, please proceed to the following page: