About
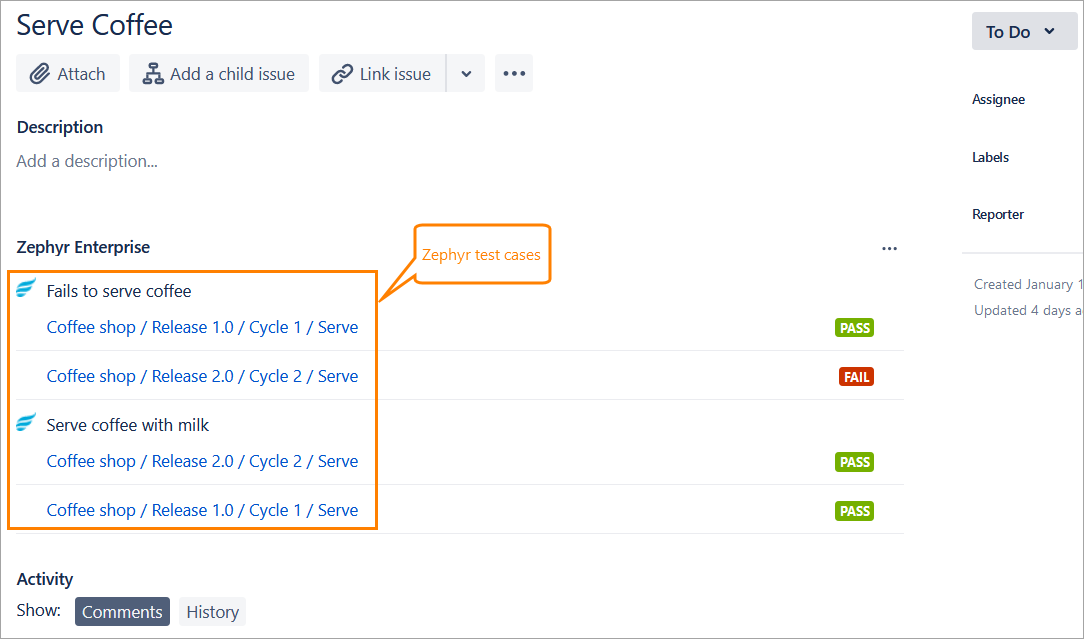
Jira Integration: Zephyr Enterprise is an app that shows allows you to view the traceability of Zephyr test cases and create BDD scenarios in sections it adds to the Jira issue view. When the app is installed in Jira, your Jira issues have the Zephyr Enterprise section with a list of test cases. Clicking the links navigates to these test cases in Zephyr. The test cases are those associated with Jira issue requirements:
| Note |
|---|
Currently, the Zephyr Enterprise section does not show defects associated with test executions. We are planning to make it possible to see defects in the future, so if you are interested in this ability, please vote for it on our Ideas Portal. |
The plugin adds the following sections:
Zephyr Enterprise - Traceability - this section is available if you installed the app into a Jira Cloud or Server/Data Center instance. Here you can view all the test cases linked to the issue with information on the test cases' release, cycle, phrase, status, and so on. Zephyr updates this table whenever it detects any changes in test case data:
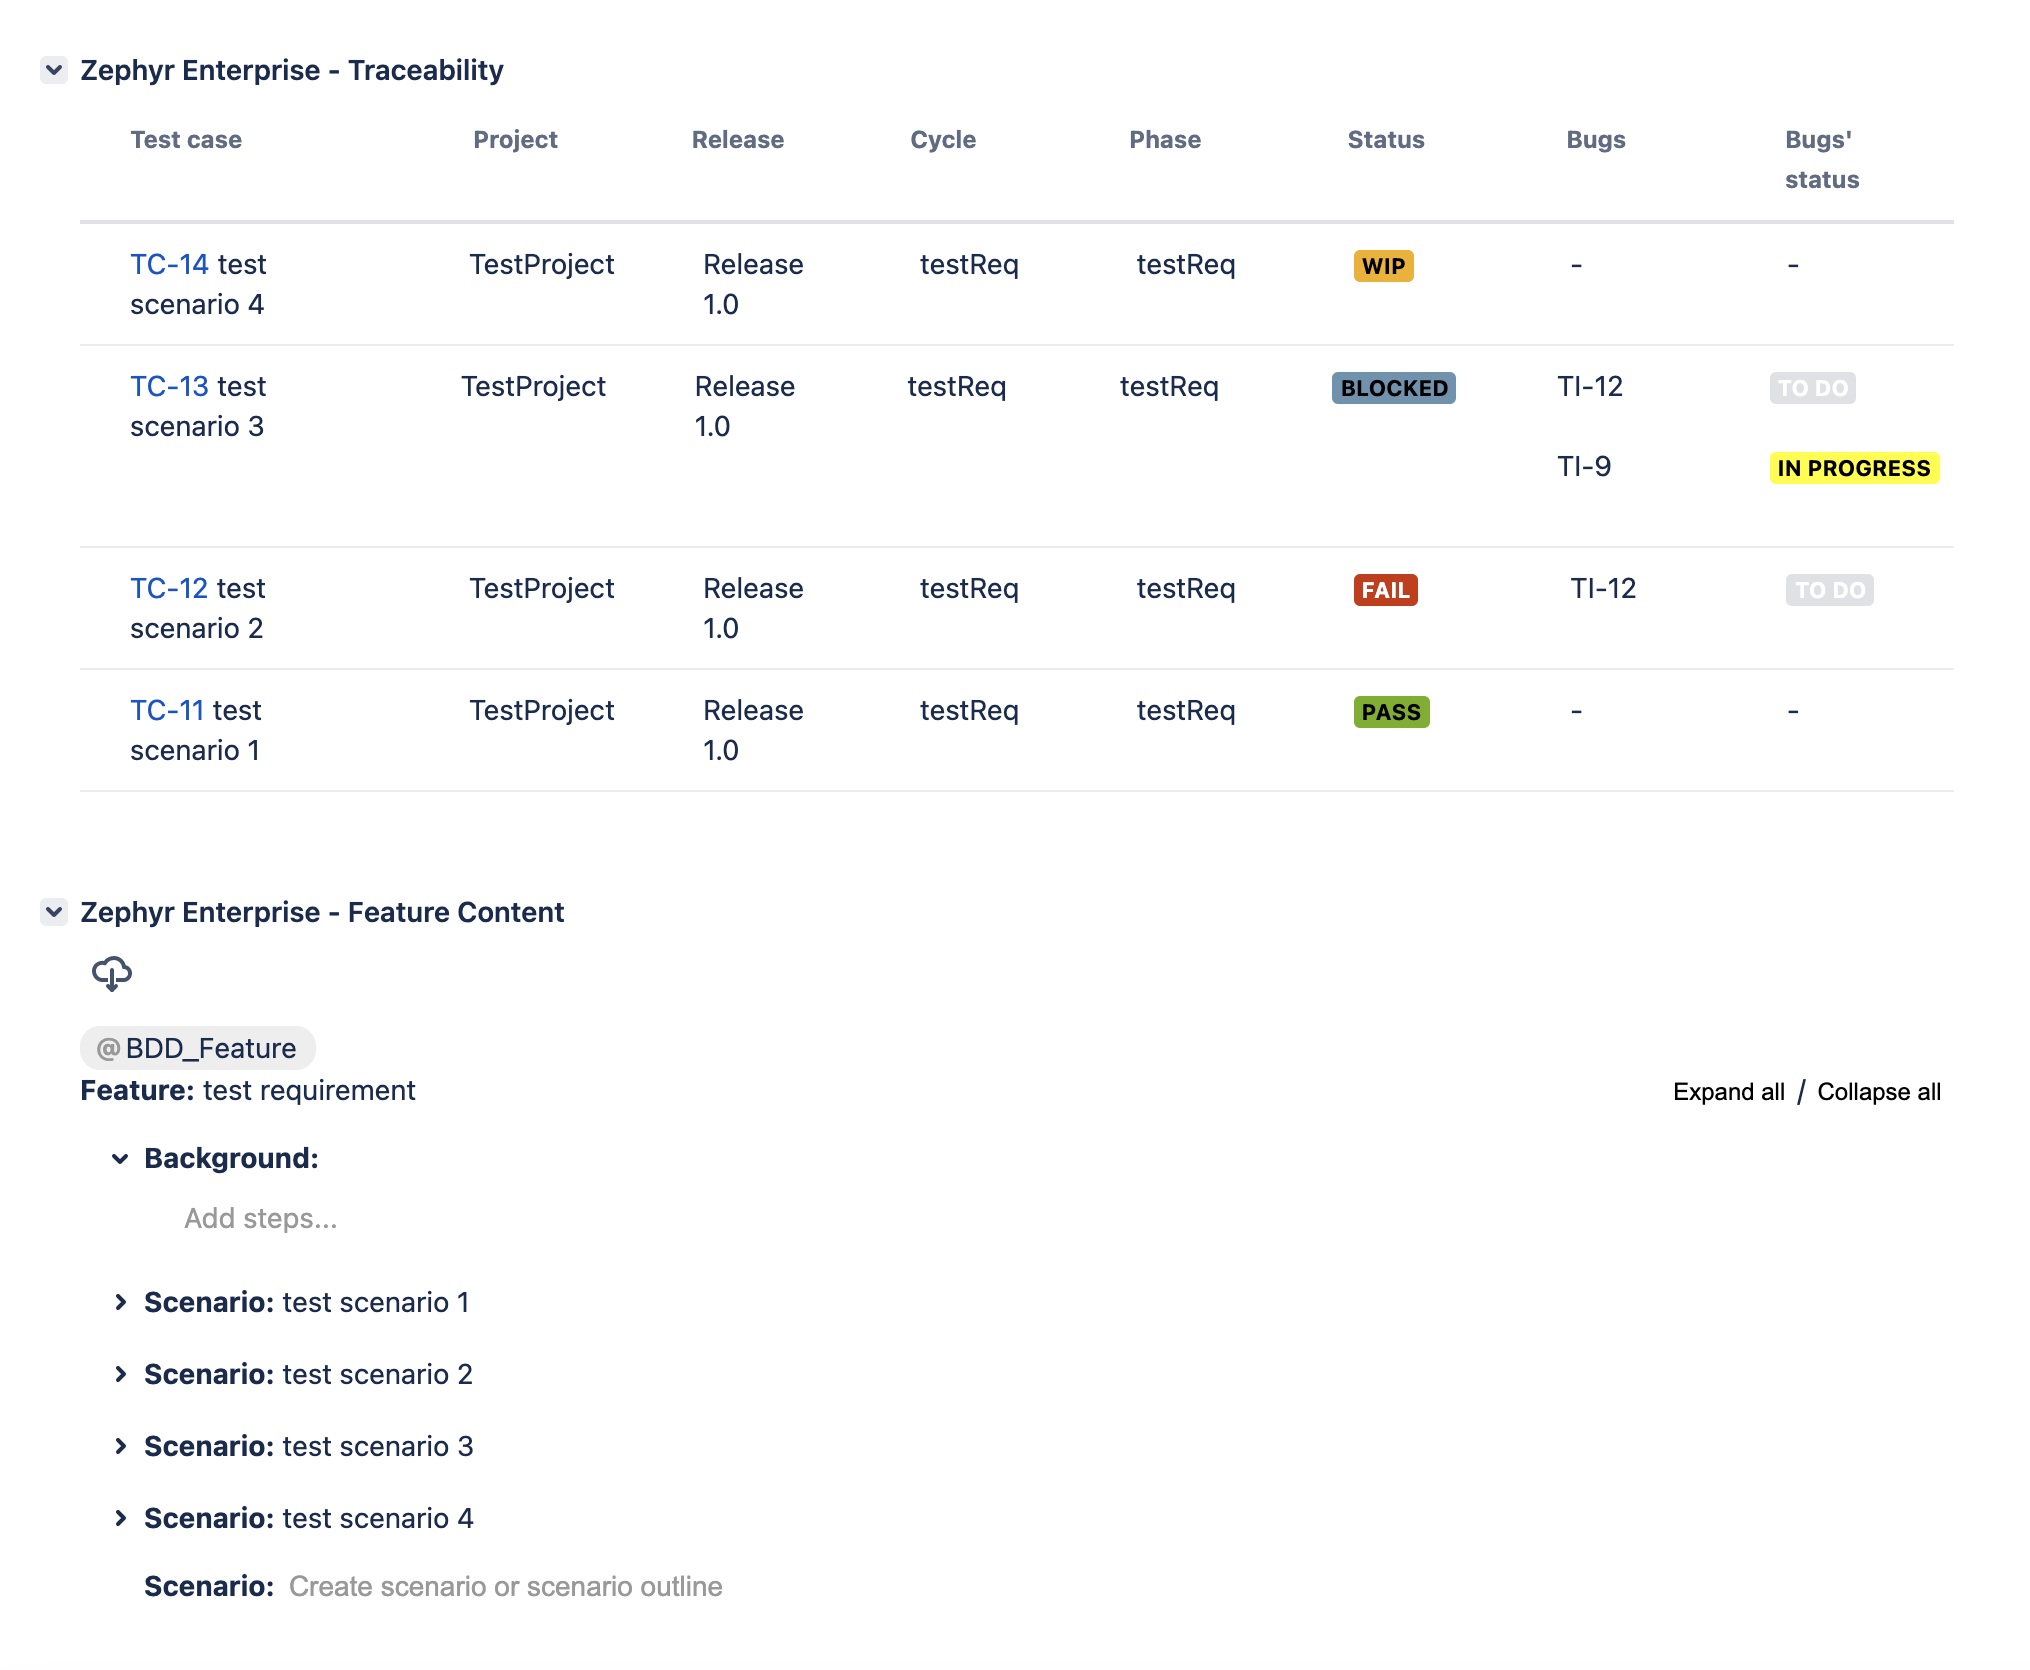
Zephyr Enterprise - Feature Content - this section is available if you installed the app into a Jira Server/Data Center instance. In this section, you can quickly create BDD scenarios. It is shown if your issue is mapped to Zephyr Enterprise requirements:

On this page:
| Table of Contents | ||||
|---|---|---|---|---|
|
Requirements
Zephyr Enterprise Cloud (
*.yourzephyr.comor*.zephyrdemo.com). Version 6.6 or later is required.Jira Cloud (
*.atlassian.net), Jira Server 7.0 or later, or Jira Data Center 7.0 or later.
Installation & Configuration
To install the add-onplugin, you must be an administrator in Jira. You may find the plugin at the Atlassian Marketplace here.
1. Install the plugin
Installation steps:
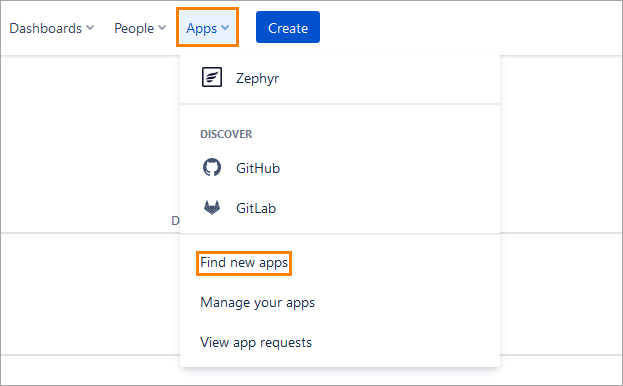
1. Click Apps > Find new apps in Jira:
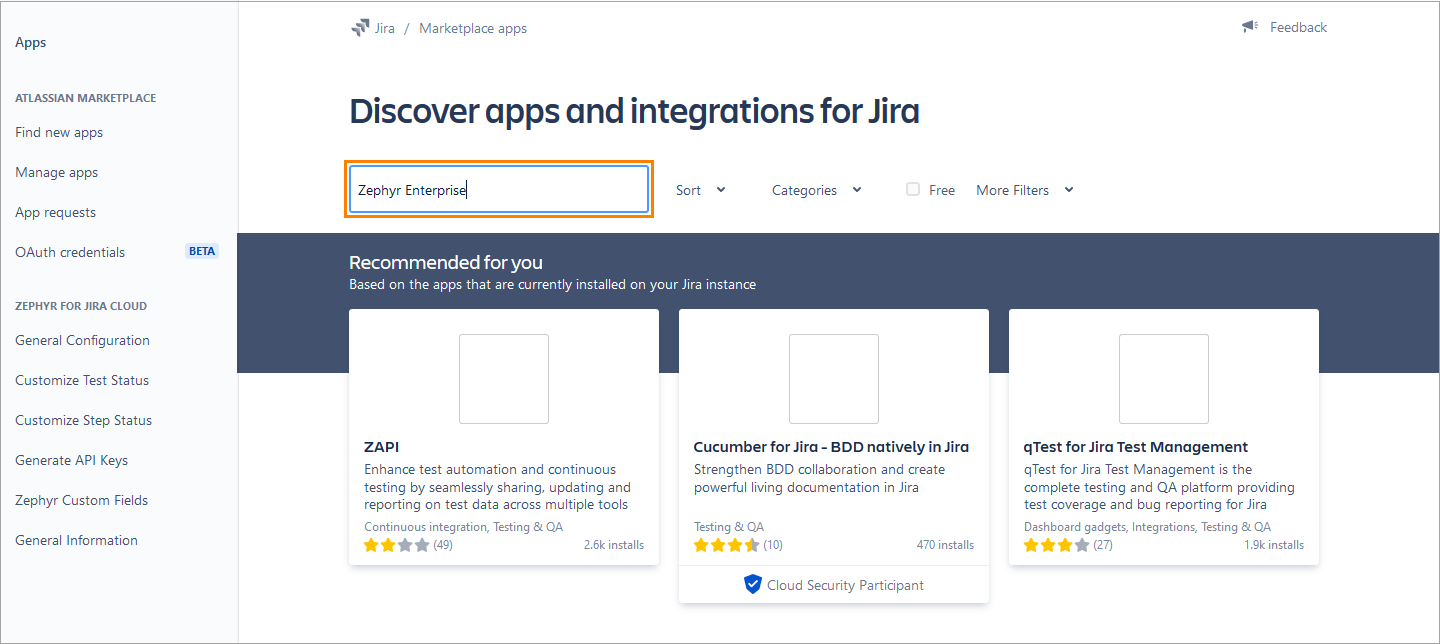
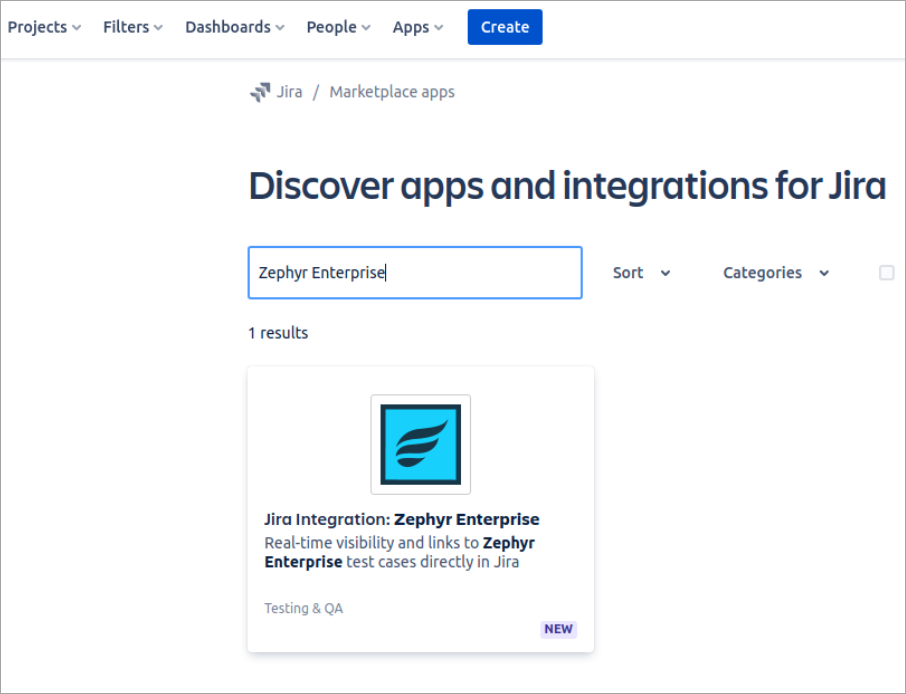
2. On the subsequent page, type Zephyr Enterprise in the search box and press Enter:
3. Click the found Jira Integration: Zephyr Enterprise app:
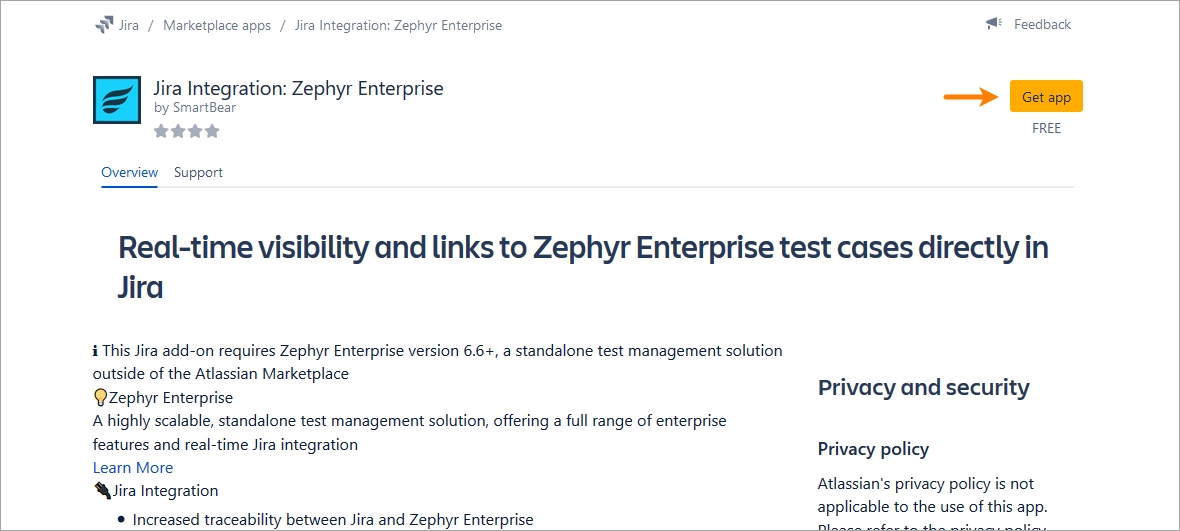
4. Click Get app in the top-right corner of the subsequent page:
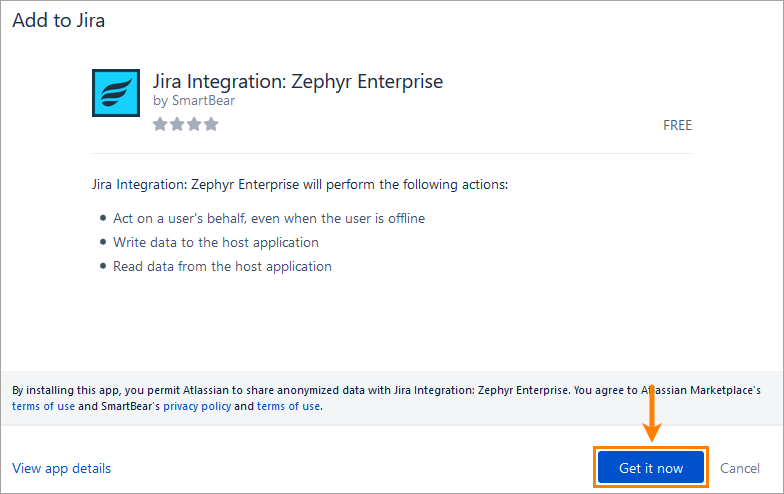
5. Click Get it now in the Add to Jira dialog:
6. A message informing that the add-on has been added successfully will appear in the top-right corner of the Jira window:
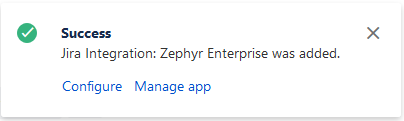
Now you can configure Zephyr Enterprise instances.
Configuration2. Configure integration with Jira
To configure integration with Zephyr, you must be an administrator both in Jira and in Zephyr. The configuration includes generating an API token in Zephyr Enterprise and configuring the connection in Jira by using this token.
Generate an API Token in Zephyr
1. Log in to Zephyr Enterprise as a Test Manager.
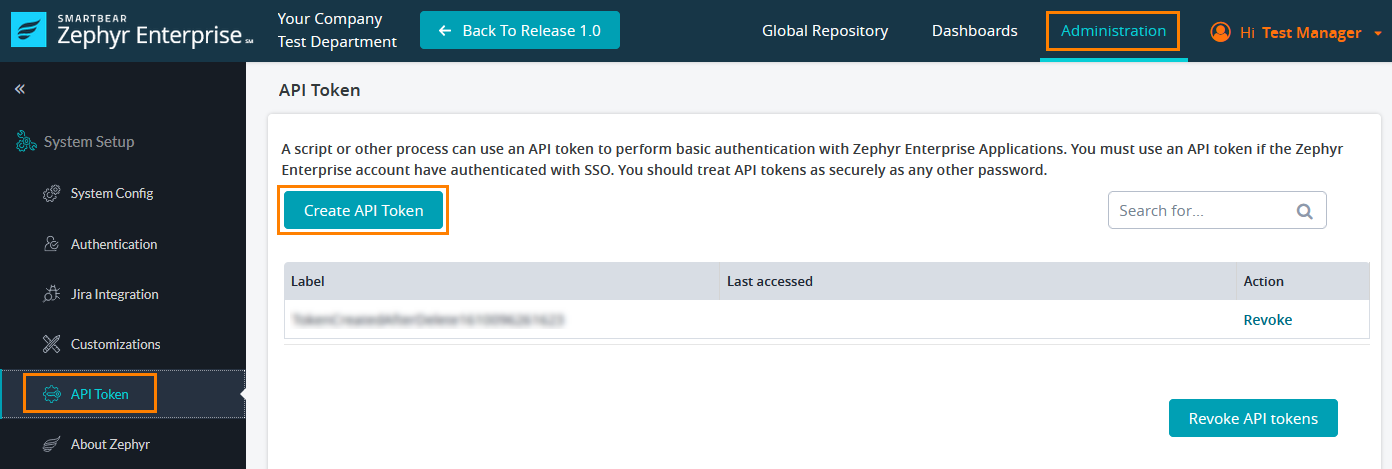
2. Navigate to Administration > API Token and click Create API Token:
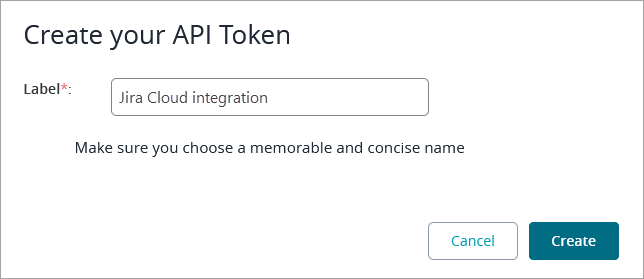
3. Enter a name for your token and click Create:
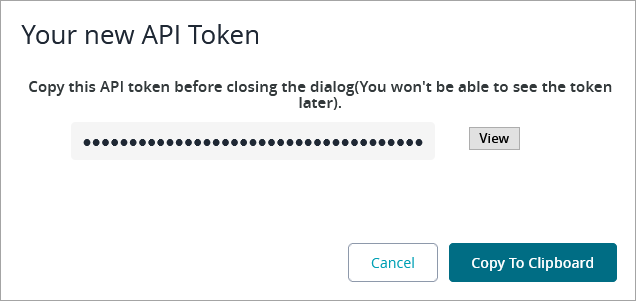
4. Copy the generated API token - you will need it to configure the connection in Jira:
Configure the connection in Jira
1. Log in to Jira as an administrator.
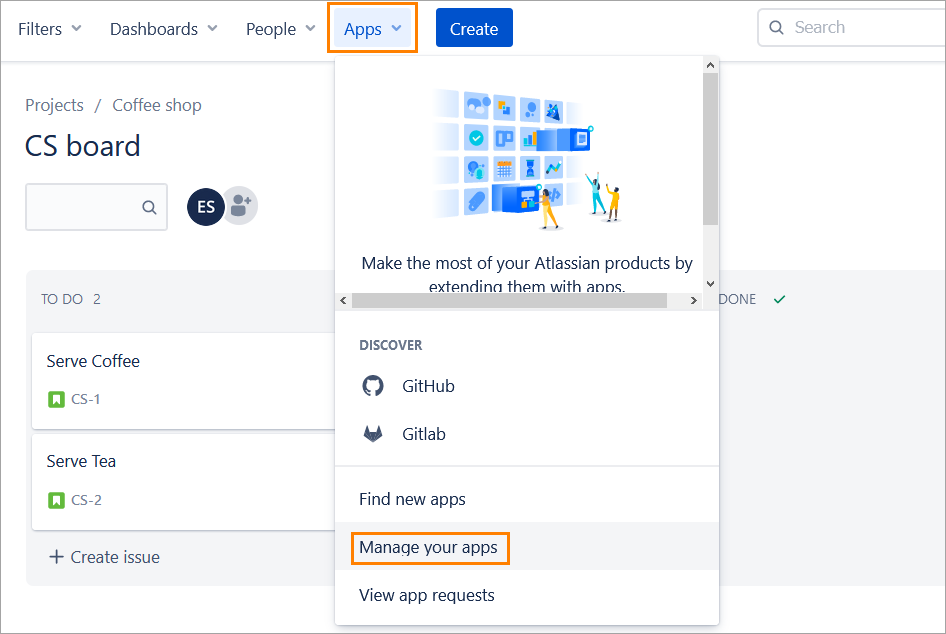
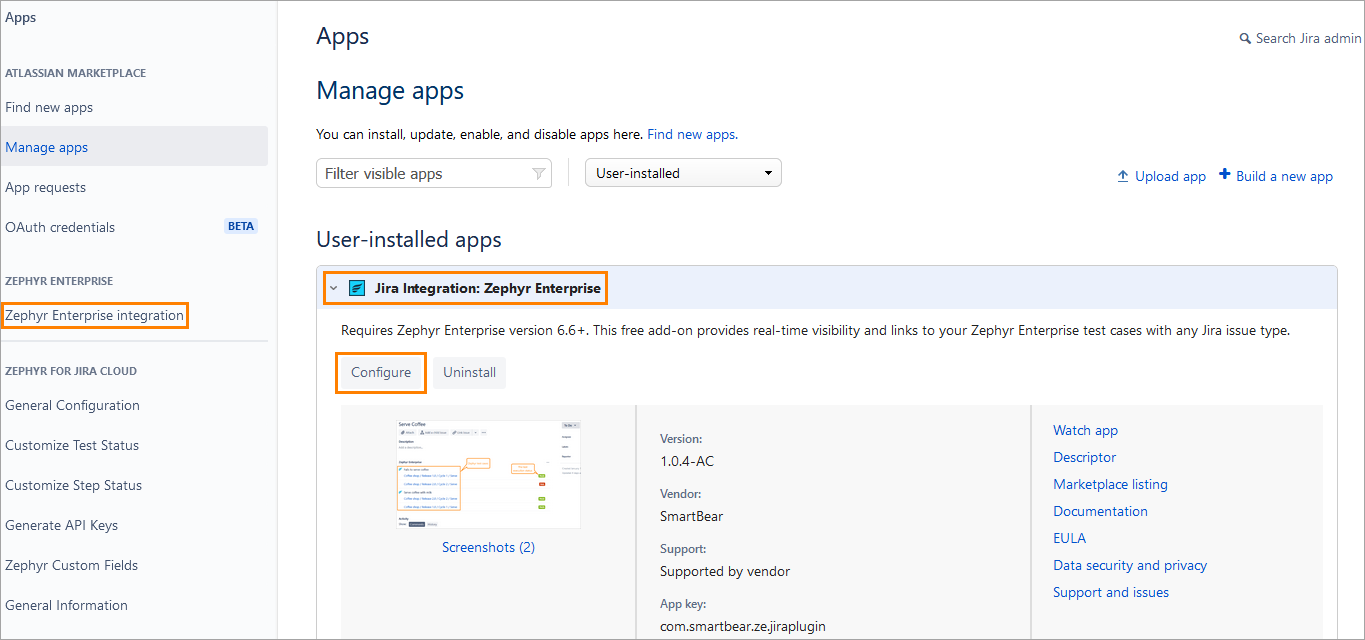
2. Navigate to Apps > Manage Apps:
3. Expand the Jira Integration: Zephyr Enterprise item and click Configure,or just click Zephyr Enterprise integration in the panel on the left:
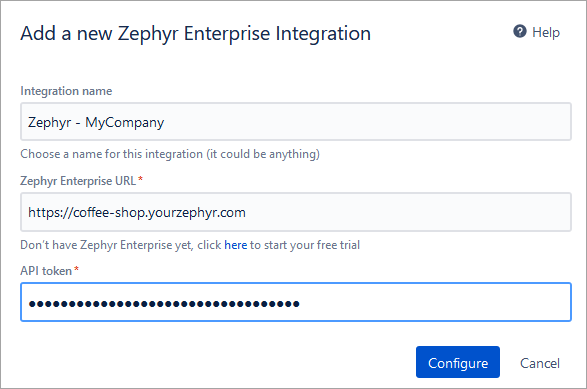
4. In the subsequent dialog, specify the following:
The configuration name (an arbitrary label).
The URL of your Zephyr Enterprise instance. Make sure to include
https://at the beginning.The API token previously generated in Zephyr.
Click Configure to save the information.
| Note |
|---|
When specifying your Zephyr URL, make sure the address has no suffix after … |
| Info |
|---|
In the dialog, you can also:
|
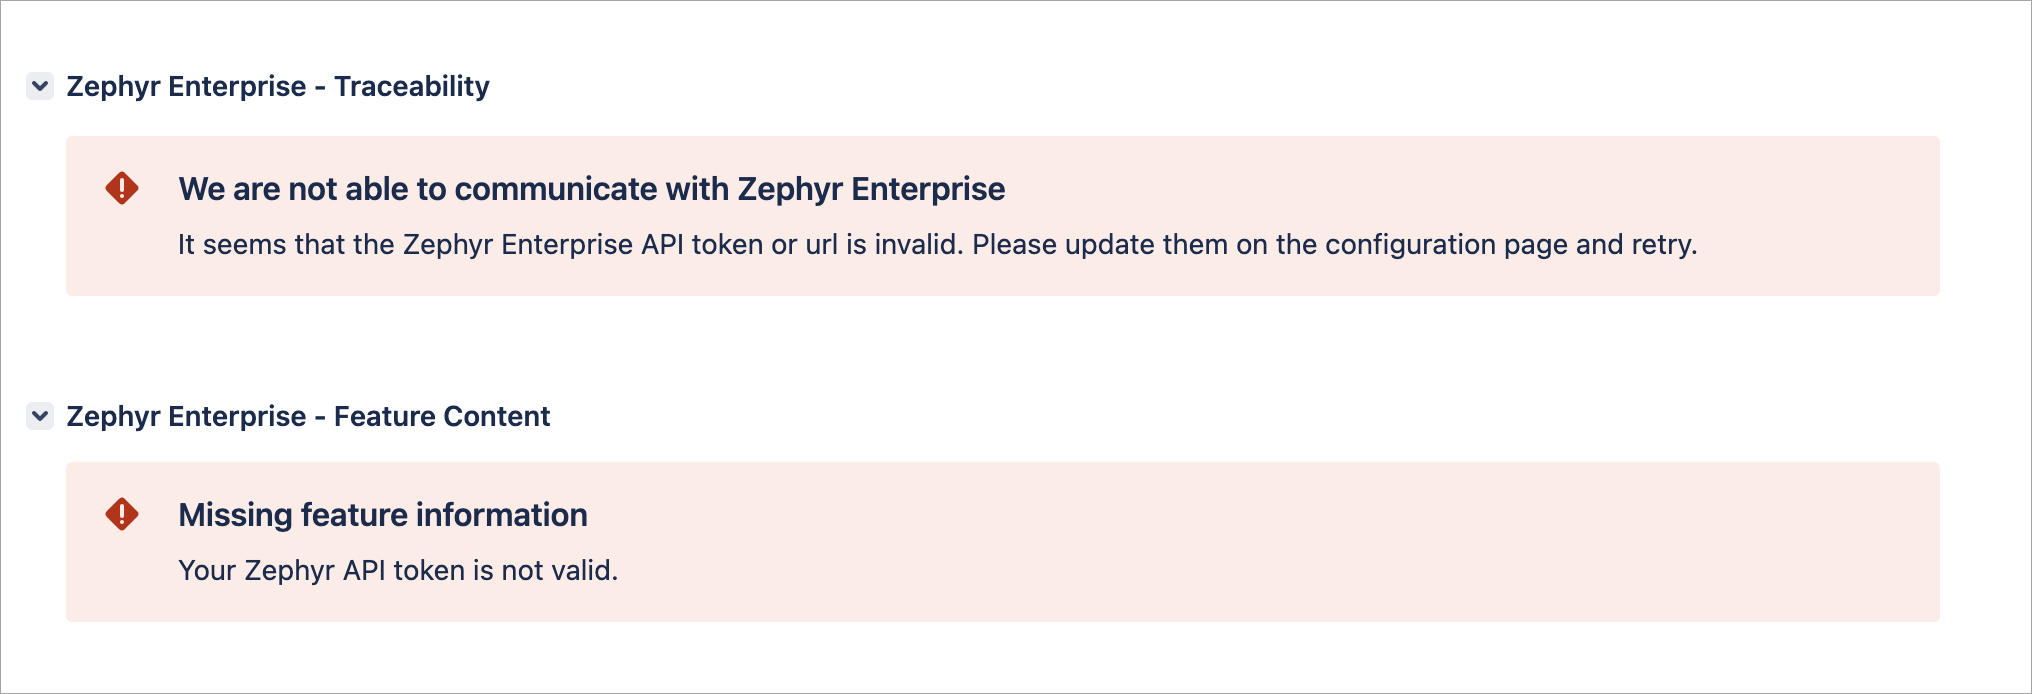
![]() If the connection with Jira is not set up properly, the sections show a warning informing about the issue:
If the connection with Jira is not set up properly, the sections show a warning informing about the issue:
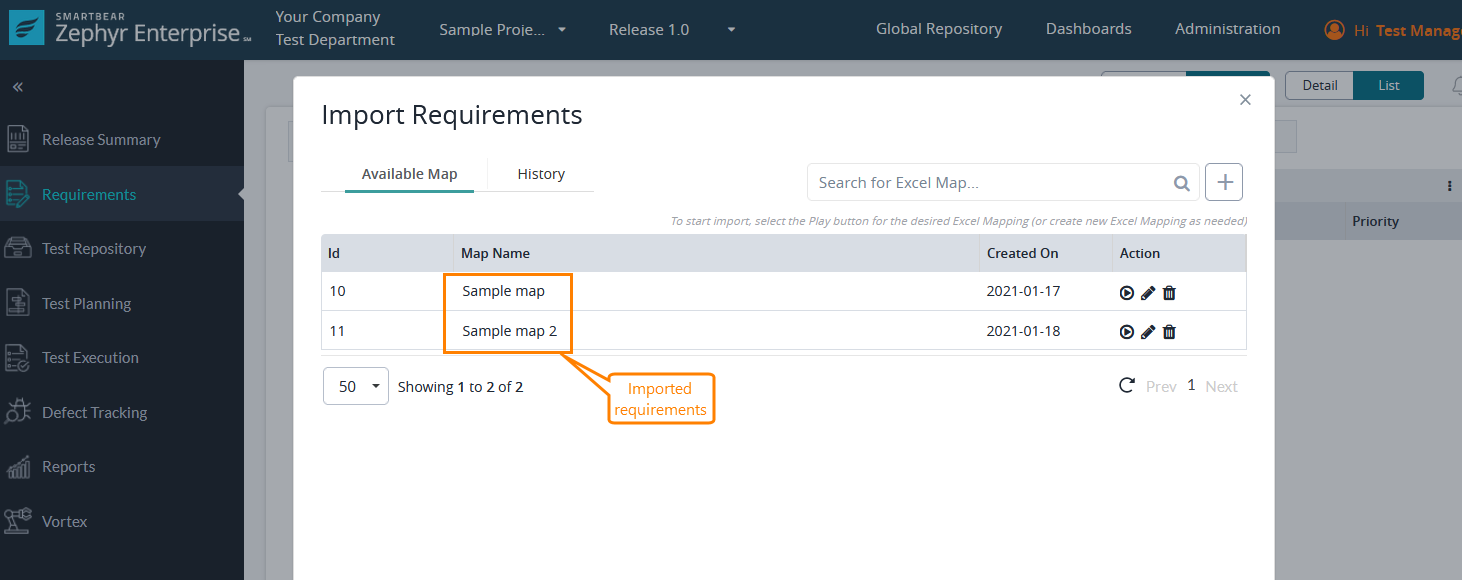
Import Jira issues as requirements and map them to test cases
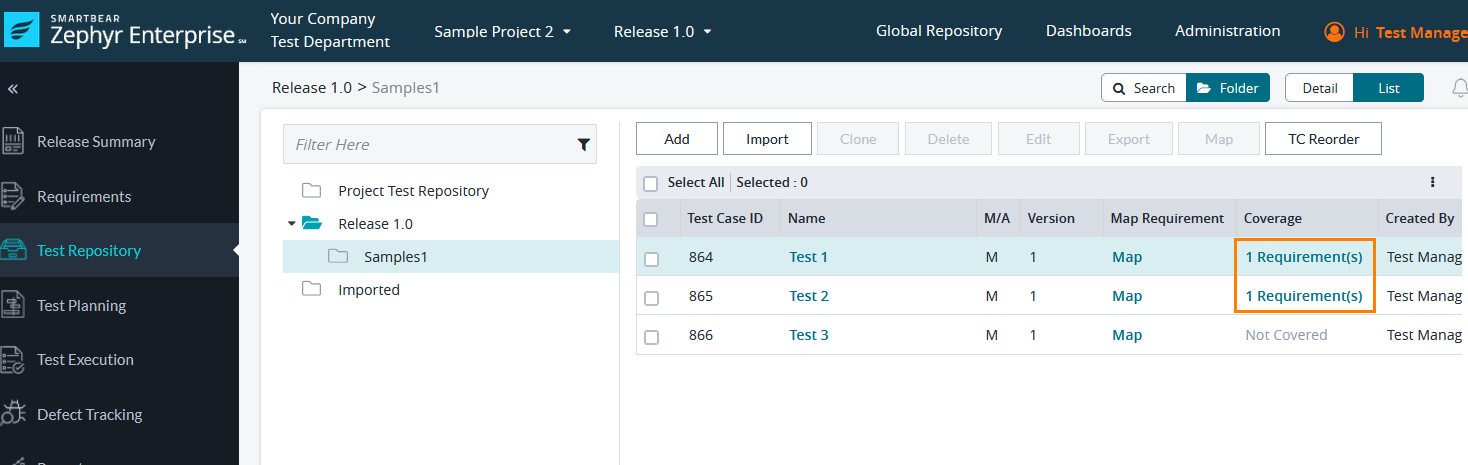
Both admins and non-admin users can import requirements to Zephyr and map them to test cases. To import requirements, follow the steps described in Importing Requirements. Below is a sample list of imported requirements:
Once done, map the imported requirements to the test cases the links to which you want to have in your Jira issues. To learn how to do that, see Mapping Requirements to a Test Case. Below is a sample list of test cases with mapped requirements:
| Info |
|---|
You can import a requirement to multiple Zephyr instances and map test cases to it in those instances, or import several requirements and map them to test cases. In either case, the Zephyr Enterprise section will contain links to all the mapped test cases. |
View test
casescase traceability in Jira
After configuring the integration , open a Jira issue whose requirements you mapped to Zephyr test cases and view the links in the Zephyr Enterprise section. Clicking the links will open the test cases in Zephyr:
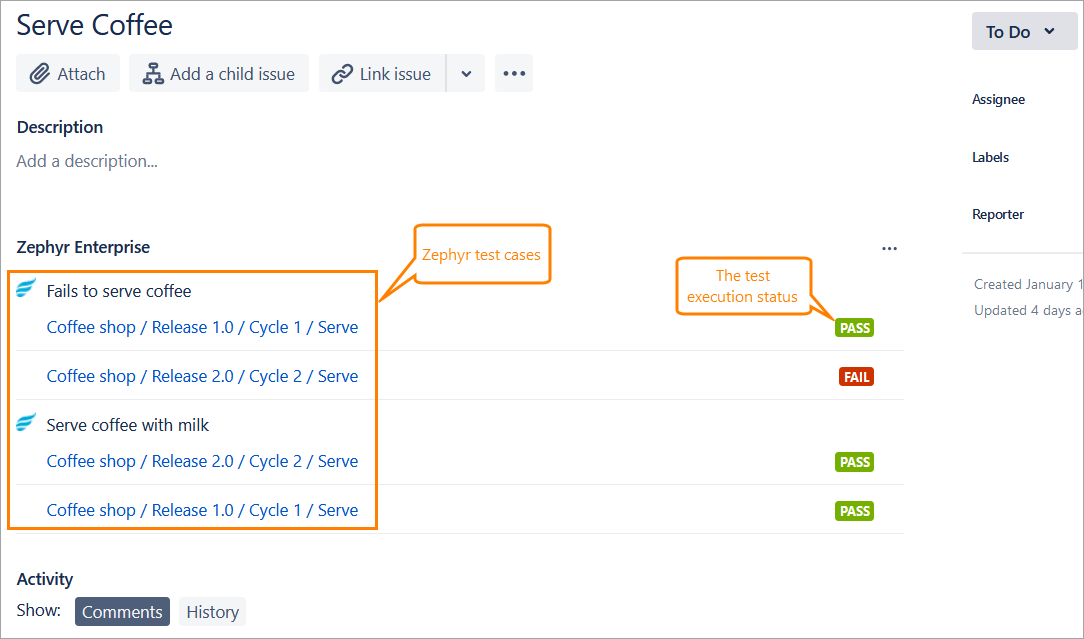
The links are grouped by test cases. Each link includes and mapping requirements to test cases, you can view test case traceability in your Jira instance. To do that, open your Jira issue and scroll down to the Zephyr Enterprise - Traceability section to view all the traceability details:
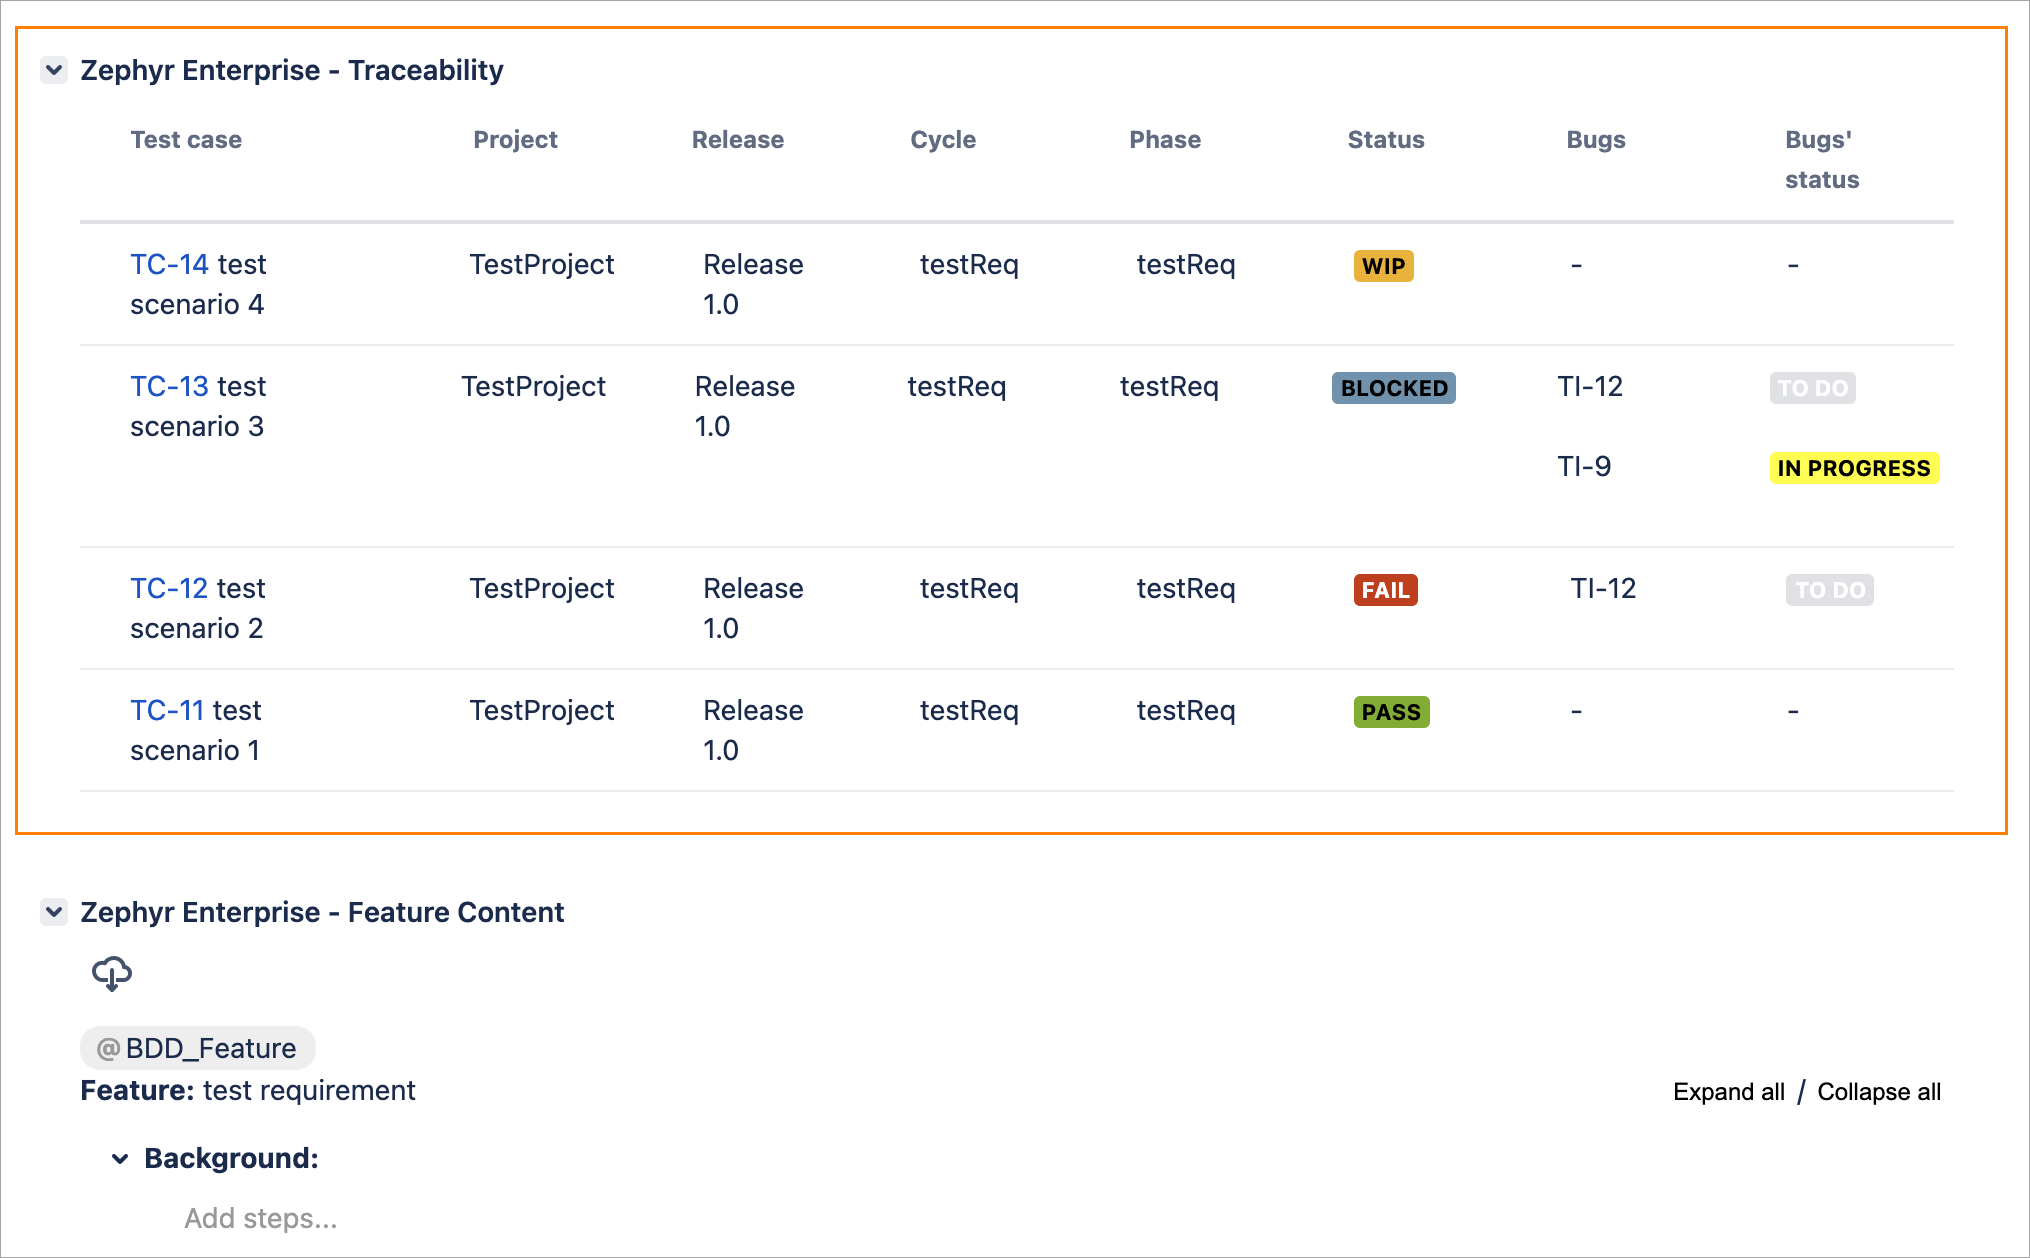
The table shows the name of the project, as well as the names of the release, cycle and phase it the test case belongs to. The section also shows the status of the last execution of each release, at that, the most recent execution is at the top of the list. Clicking the status will open the execution in Zephyr.
Create BDD scenarios
If you installed the Jira Integration: Zephyr Enterprise app into a Jira Server/Data Center instance, you can create BDD scenarios after configuring Jira integration. To do that:
Create a Jira issue you are going to work with.
Import that Jira issue as a requirement to any existing requirement in Zephyr Enterprise.
If you don’t have a folder in Zephyr’s Test Repository, create one. Otherwise, you will get an error in Jira when trying to create a scenario.
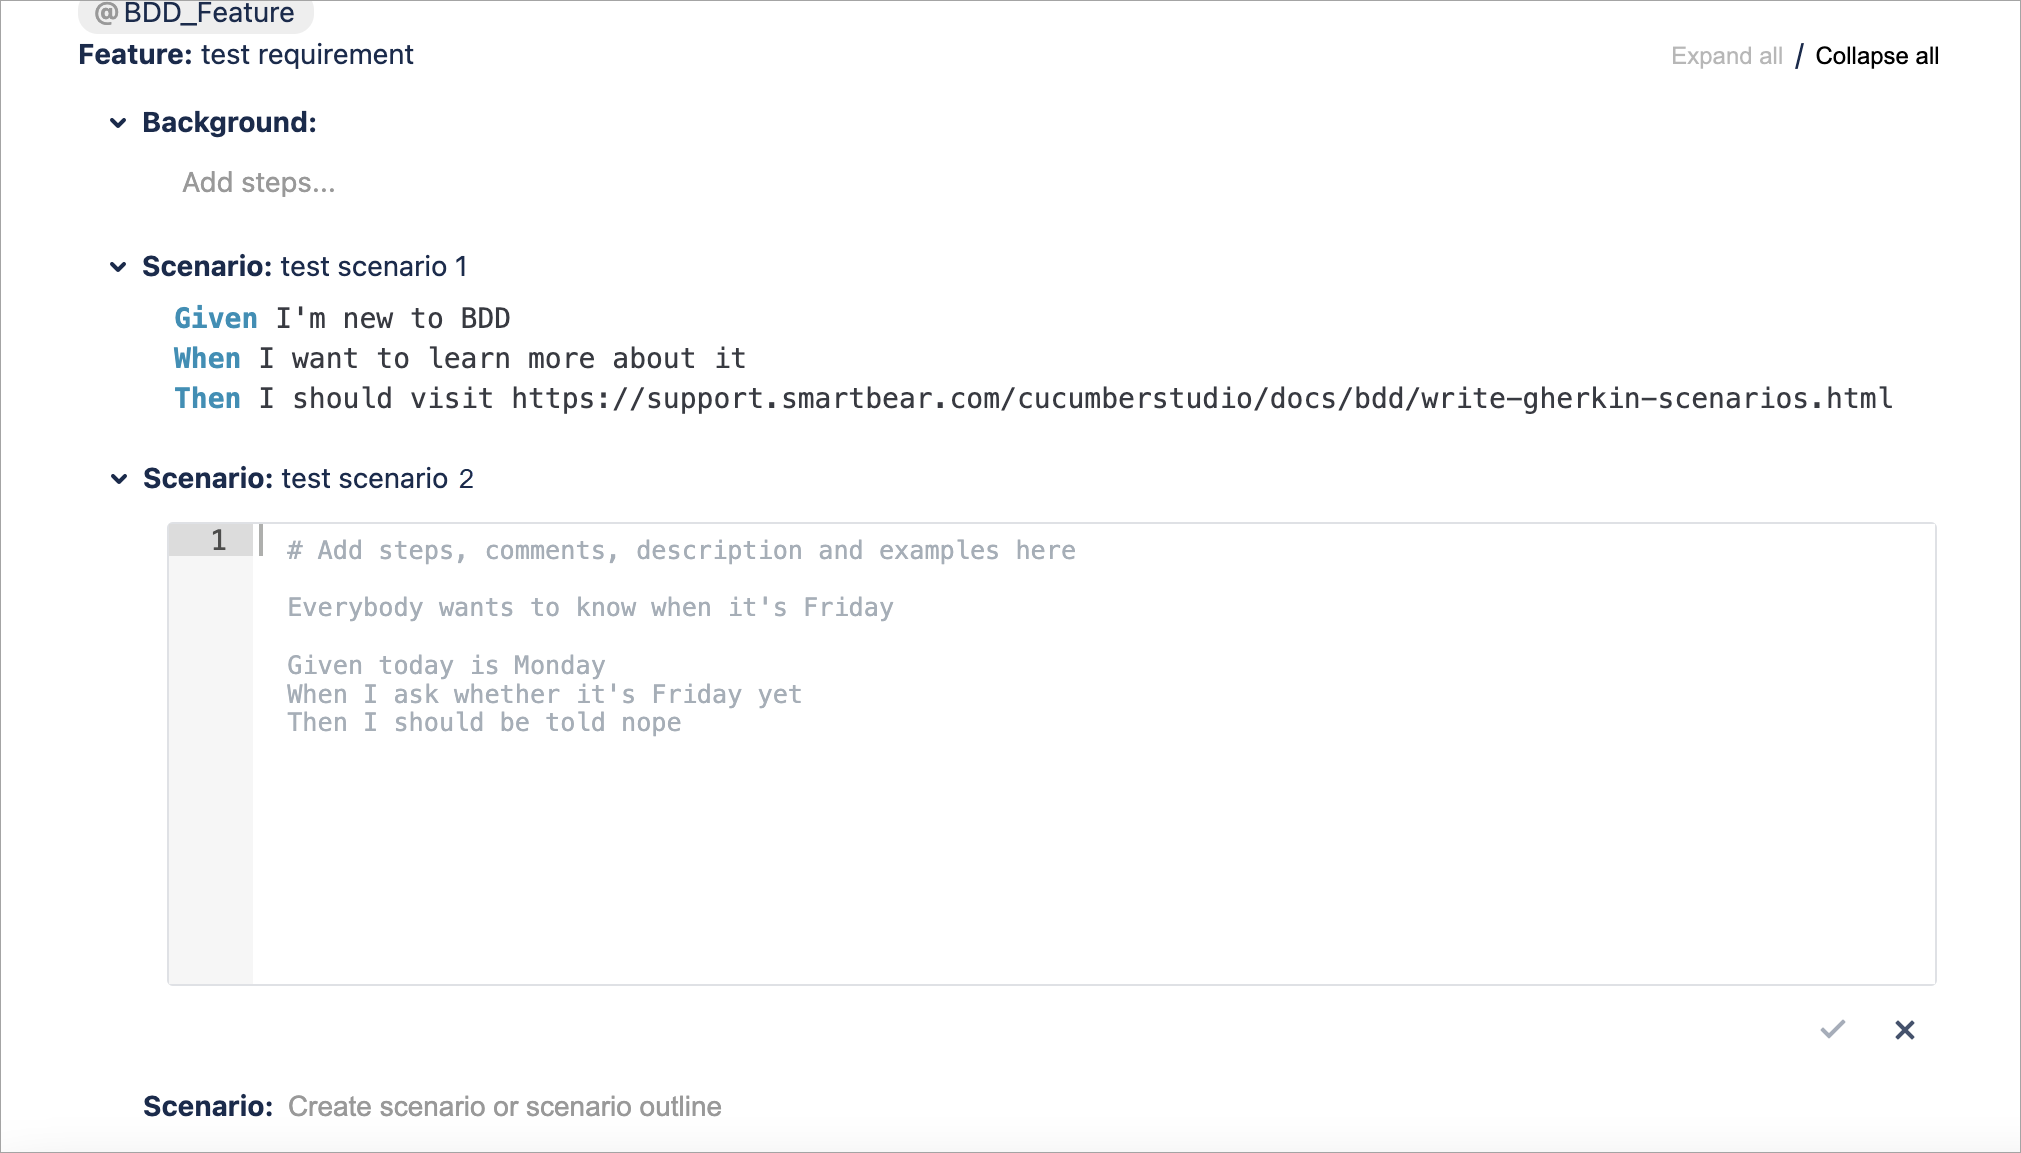
Go back to Jira and add the BDD_Feature label in the context fields of your Jira issue.
The scenario editor will appear under Zephyr Enterprise – Feature Content. You can now create BDD scenarios:
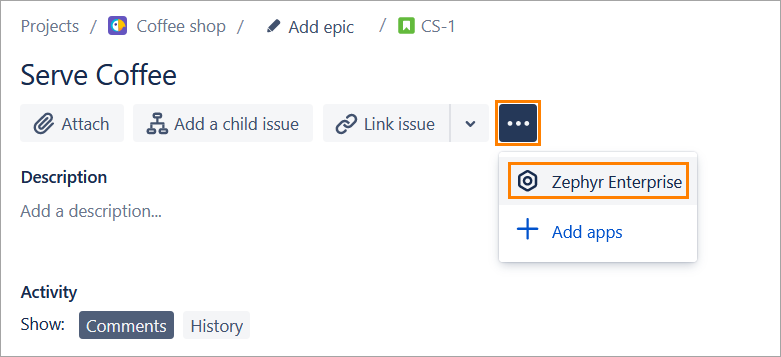
![]() If the Zephyr Enterprise section is not visible, you can open it by clicking the ellipsis button at the top and selecting Zephyr Enterprise from the dropdown:
If the Zephyr Enterprise section is not visible, you can open it by clicking the ellipsis button at the top and selecting Zephyr Enterprise from the dropdown:
See Also