...
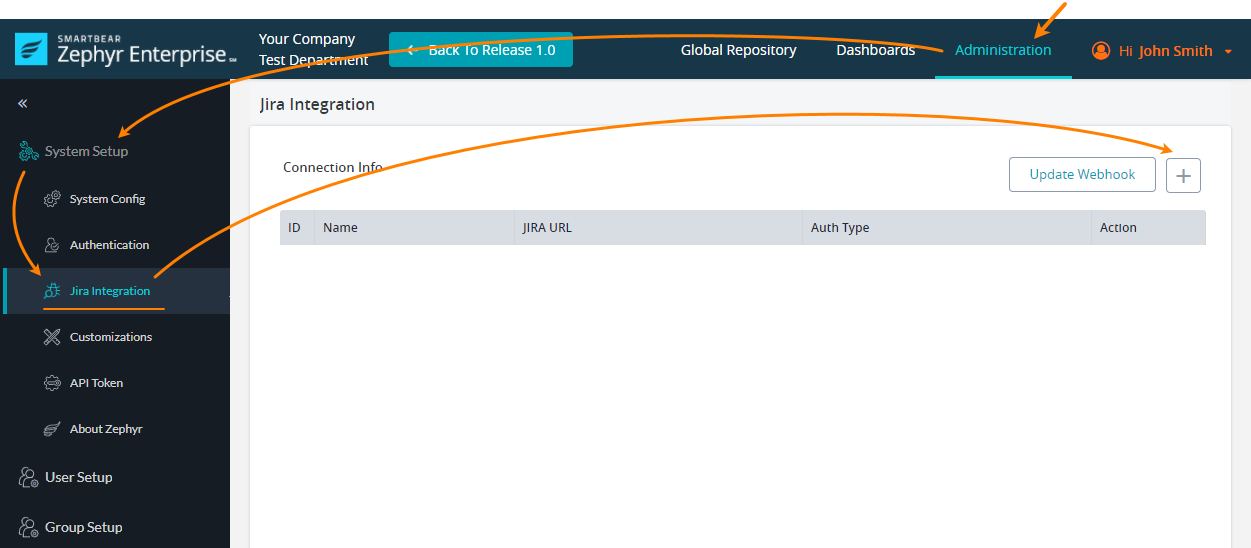
Log in to your Zephyr Enterprise instance as a user with administrator permissions.
Go to Administration > (System Setup) Jira Integration.
Click + above the Jira instance list:

In the subsequent dialog, specify the following values:

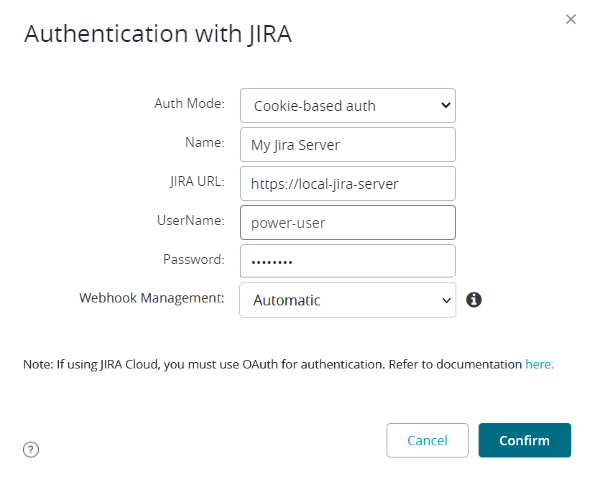
- Auth mode -Select Basic (cookie-based).
- Name – Any descriptive name for the connection. It will be used in the Zephyr UI.
- Jira URL – The URL and port number of your Jira server.
- Username and Password – The name and password of the account that Zephyr will use to communicate with Jira.
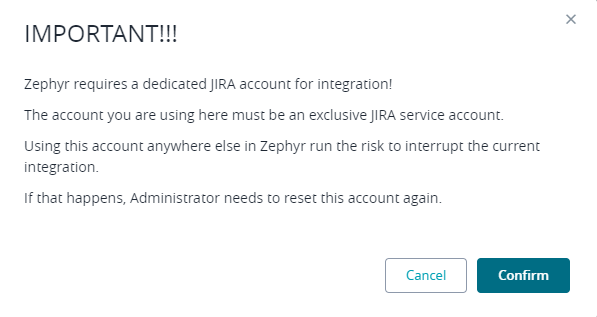
Click Confirm to continue.Click Continue in the subsequent confirmation dialog:
Zephyr will run some diagnostics and will report the results:
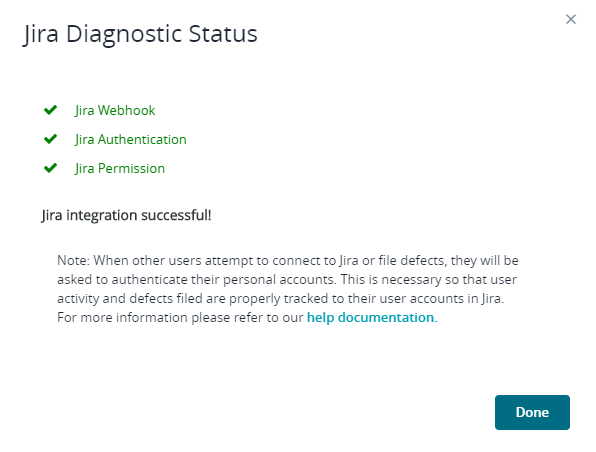
Click Done. You will see the newly created connection in the list of connections: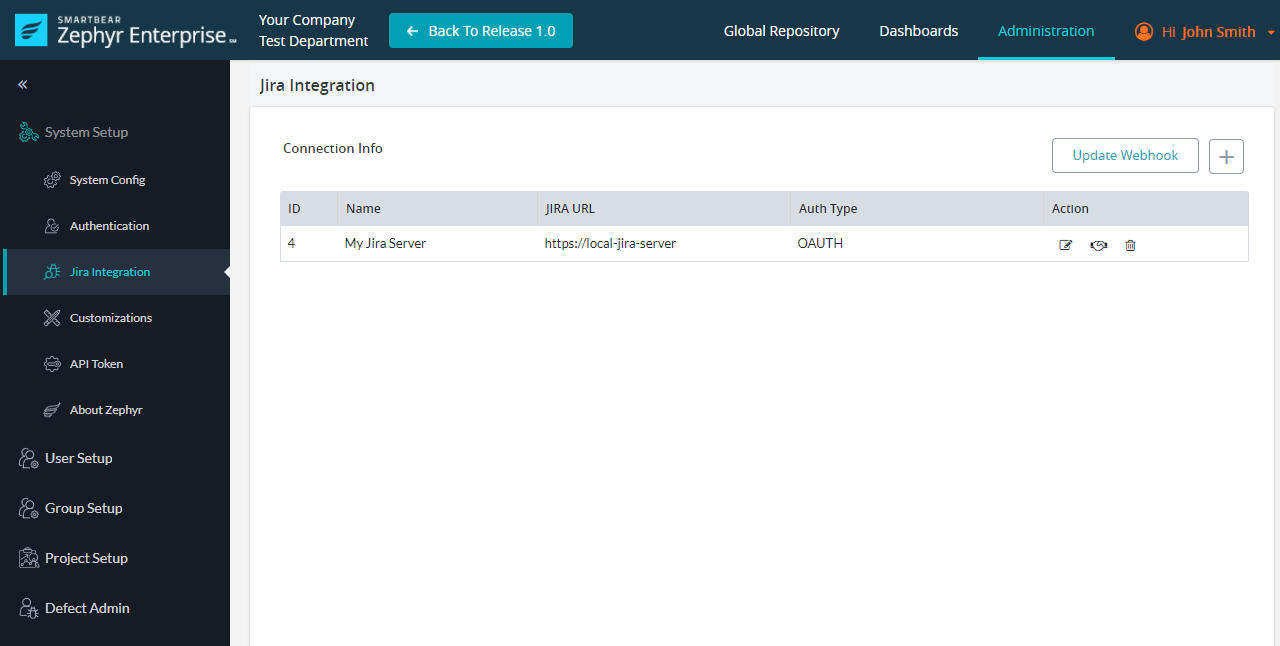

Further steps
![]() You have not yet completed integration setup. To complete it, you need to map your Zephyr project to a Jira project. Follow this link for details:
You have not yet completed integration setup. To complete it, you need to map your Zephyr project to a Jira project. Follow this link for details:
...