The Defect Admin shows up when JIRA has been selected as the defect tracking system.
- If a Jira instance is connected, ensure that the Jira remote links are enabled in the general configuration to be able to view the links within Jira. The settings that need to be enabled can be found here.
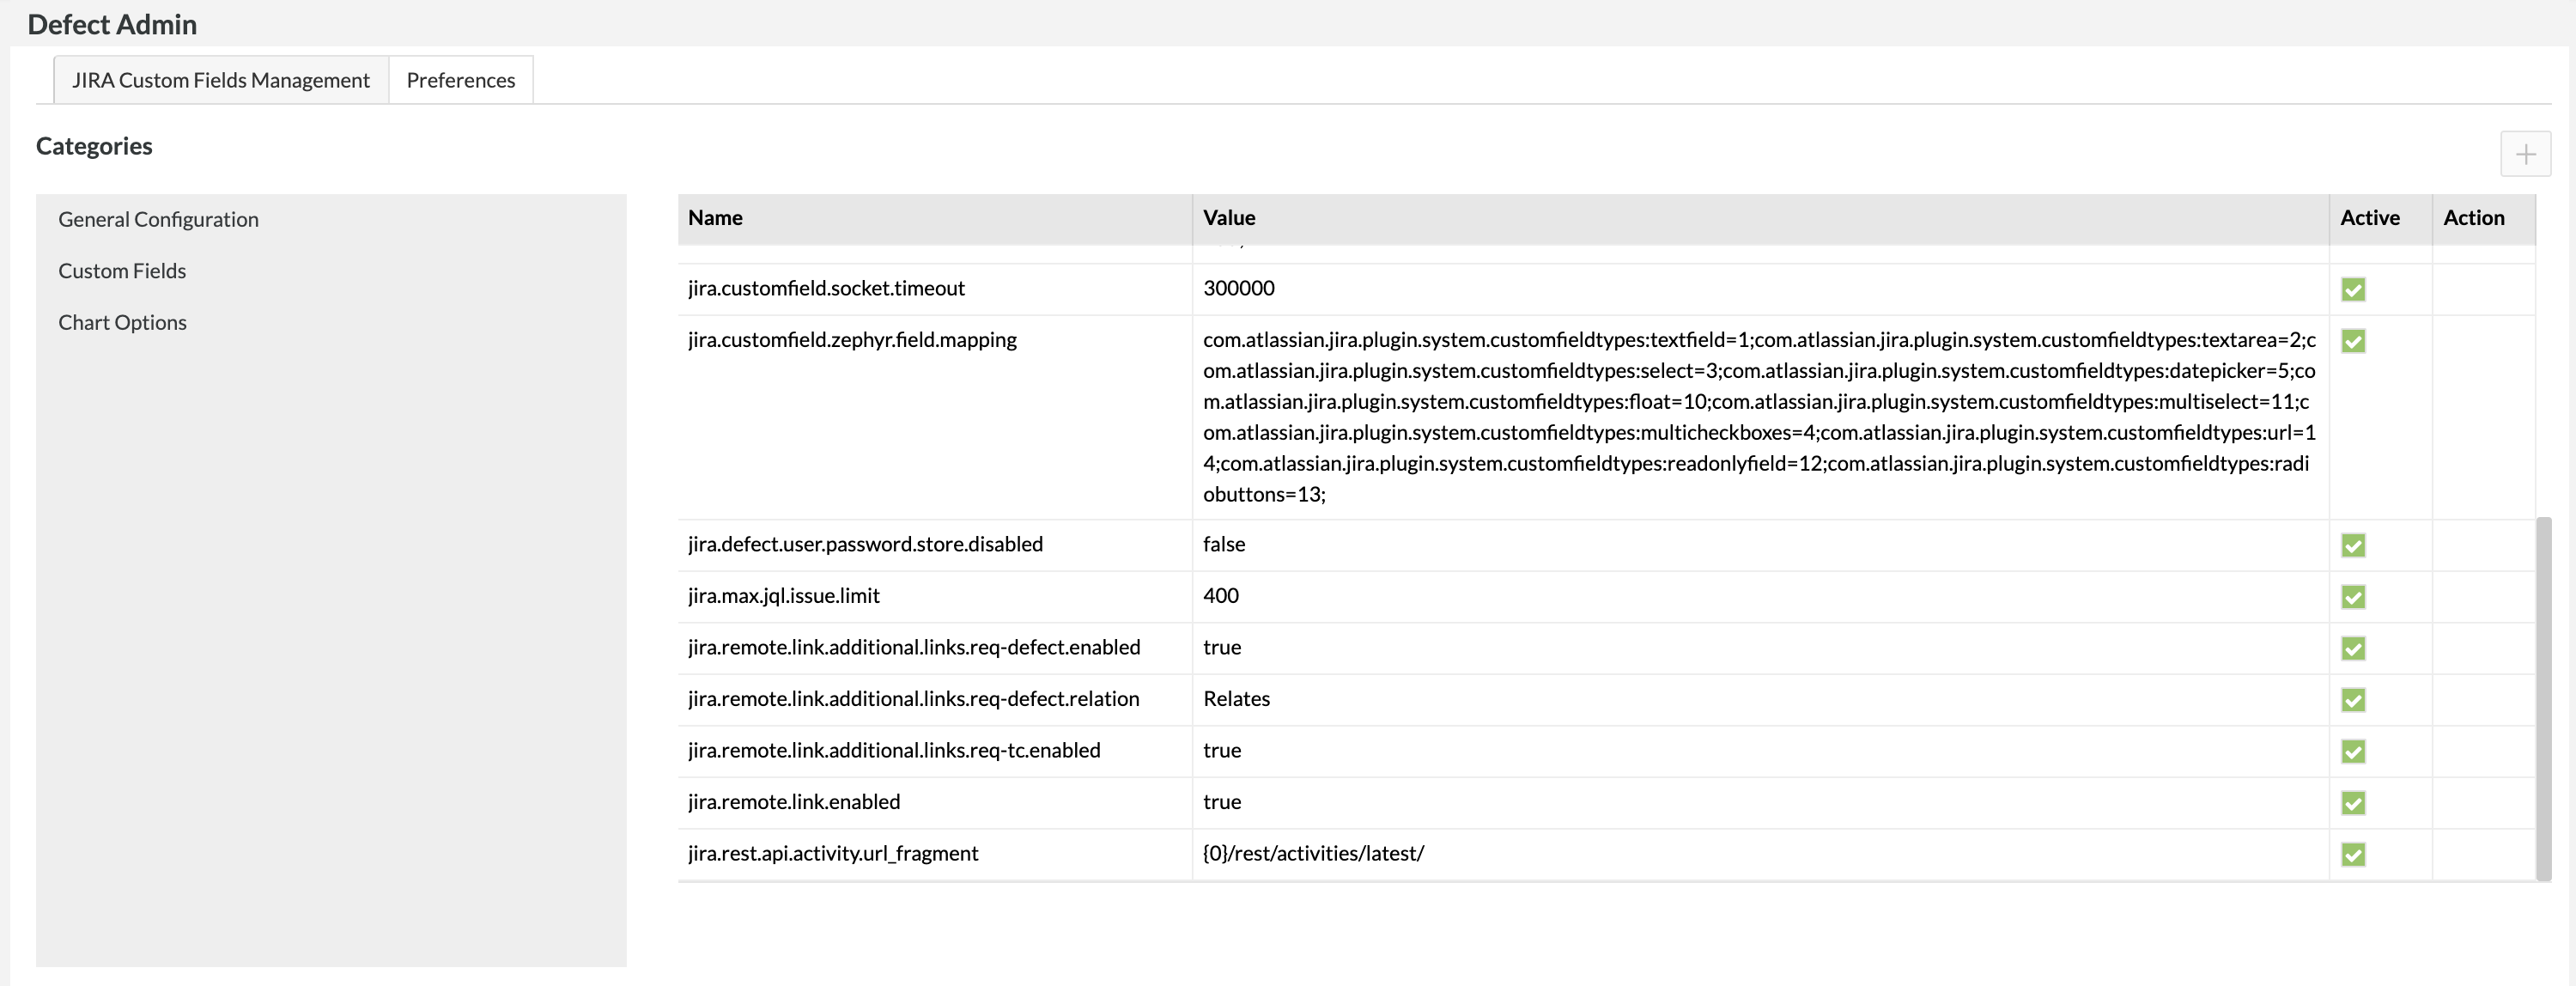
General Configuration, Custom Fields, Chart Options, and SSL Authentication preferences can be set here. The following actions can be taken:
- View entries in a specific category, select the category on the left.
- Modify a value, click on that cell and modify the text and click on 'Save'.
- Create a new line, click on the 'Add' button, enter your information and click on 'Save'.
- Deactivate a line, unselect the 'Active' box and click on 'Save'.
| Note |
|---|
The default value for the Jira remote links within the Defect Admin page is automatically set to 'True'. |
General Configuration
...
| Note | ||
|---|---|---|
| ||
If you're connecting a Jira instance to your Zephyr and want to be able to view the linked test cases to the user story within Jira, you must enable the remote links within the general configuration settings. The following needs to be enabled to view the linkages and mapping between the user stories, test cases, and defects in Jira:
|
...
Name
...
Value
...
Description
...
defect.timeout
...
60000
...
This is the http timeout for when the Zephyr server talks to the JIRA server, in milliseconds. Only modify this if you are getting timeout errors.
...
jira.remote.link.enabled
...
true/false
...
This turns on the functionality of sending remote issue links to JIRA. If this is enabled, whenever we create or link a defect in the Execution, then the test case execution remote link will get created in the external Jira with details of the test execution. If this is disabled, the remote link will not get created when creating or linking a defect in Execution.
...
jira.max.jql.issue.limit
...
400
...
400 or less is recommended to ensure JIRA performance is not impacted.
JIRA Custom Fields Support
Zephyr supports the display and modifications of some JIRA custom fields. If JIRA has any custom fields defined in it, Zephyr will show all system wide custom fields in its UI, whether they belong to the project that you have selected or not. Based on the project selected, it will show the appropriate custom fields. In order for that to happen, you will need to set the name-value pairs in Zephyr as described below.
The JIRA Custom Field types that are supported by Zephyr with appropriate UI elements are: Text Field, Free Text, Select List, Date Picker, Number
Other types that will also work but will show up as text fields in Zephyr are: Multi Check boxes, Multi Select, Radio Button, User Picker, Multi User Picker, Single Version Picker.
This is best described in the following example.
Example:
Here, a JIRA project with the project key "BA-xxx" has 2 custom fields set up. One is a text field, that is 50 characters long and is not mandatory. Its customfield ID in JIRA is 10000. The second is a drop-down list with 3 drop-down values (Garnet, Ruby, Perl) and is mandatory. Its customfield ID in JIRA is 10018.
If you desire these custom fields to show up in Zephyr's Defect Tracking screen when the "BA" project is chosen, then the following values have to be set.
...
Name
...
Value
...
Description
...
DTS.CUSTOMFIELD.BA.LIST
...
customfield_10000,customfield_10018
...
Set of custom fields for project whose unique project key is "BA", ID comes from JIRA (e.g. "10000", "10018")
...
DTS.CUSTOMFIELD.customfield_10000.TYPE
...
1
...
TYPE 1 =Text Field, TYPE 2 =Free Text, TYPE 3 =Select List, TYPE 5 =Date Picker, TYPE 10 =Number
...
DTS.CUSTOMFIELD.customfield_10000.MANDATORY
...
FALSE
...
TRUE is mandatory, FALSE is not
...
DTS.CUSTOMFIELD.customfield_10000.MAXLENGTH
...
50
...
Indicates length of field
...
DTS.CUSTOMFIELD.customfield_10018.TYPE
...
3
...
TYPE 1 =Text Field, TYPE 2 =Free Text, TYPE 3 =Select List, TYPE 5 =Date Picker, TYPE 10 =Number
...
DTS.CUSTOMFIELD.customfield_10018.MANDATORY
...
TRUE
...
TRUE is mandatory, FALSE is not
...
DTS.CUSTOMFIELD.customfield_10018.BA.LOV
...
Garnet:Garnet!Ruby:Ruby!Pearl:Pearl
...
List of values that go in the drop-down. Should adhere to this format: <value1>:<value1>!<value2>:<value2>. In this example, drop-down will show Garnet, Ruby, Pearl
Mappings
Here are the mappings between the fields that are supported by Zephyr UI and JIRA:
...
In Zephyr
...
JIRA Custom Field
...
TYPE=1
...
Text Field
...
TYPE=2
...
Free Text
...
TYPE=3
...
Select List
...
TYPE=5
...
Date Picker
...
TYPE=10
...
Number
1. You define the list of custom fields that belong to the project that you would like to see in the Zephyr UI:
DTS.CUSTOMFIELD.BA.LIST=customfield_10000,customfield_10018
The DTS.CUSTOMFIELD.BA.LIST property should be defined for all the projects in Zephyr that you would like to have custom field support for JIRA. You can have as many of this properties as you need as long as you change the "BA" part of it to reflect the projects that you want.
The "BA" part of the property defines the project "Key" which each project has a unique value for in JIRA, the customfield_xxxxx list separated by commas are the internal names of the custom fields that are in JIRA.
2. You find the IDs of those JIRA custom fields:
To get the internal custom field IDs of JIRA custom fields that you want to expose in Zephyr:
1. Login to JIRA
2. Launch a "Create Issue" page
3. "View source" of the "Create Issue" page
4. Search every custom field name to get the custom field IDs. You can also use the keyword "customfield_" and navigate through all matches.
3. Then you define the custom field types and their values:
Some of the custom field property elements are:
TYPE= 1, 2, 3, 5, or 10 : To indicate which supported field this is for in Zephyr
MANDATORY= true or false: To indicate whether this field is mandatory or not
MAXLENGTH=nnn: (not all supported types have this property) To indicate the length of the field
LOV=!: (only supported by Select List) To indicate the List of Values to show for the field
These are the other custom field types with workarounds (and will be displayed as Text Field in Zephyr).
1. Multi Checkboxes
2. Multi Select
3. Radio Button
4. User Picker
5. Multi User Picker
6. Single Version Picker
Single Version Picker can probably be implemented as a Select List.
Multiple values should be separated using the declared DTS.MULTIVALUE.FIELDSEPARATOR for these custom fields type that accepts multiple values.
Chart Options
...
Name
...
Value
...
Description
...
dts.trendchart.t8.defectSeries1.status
...
new,assigned,reopened
...
This affects the Backlog line shown in defect trend charts - statuses can be added or removed here.
...
dts.trendchart.t8.defectSeries2.status
...
resolved,verified,closed
...
This affects the Fixed line shown in defect trend charts - statuses can be added or removed here.
For information on Jira Integration settings, see Jira Management Preferences.