| Anchor | ||||
|---|---|---|---|---|
|
...
Microsoft SQL Server
- Versions: 2016, 2017/, 2019
- JDBC Driver Version: 4.2
- Versions: 2016, 2017/, 2019
...
This process has created a new Login user with the correct permissions.
Anchor step2 step2
| step2 | |
| step2 |
Step 2: Set permissions for remote access
In this step we will enable remote connections on the instance of SQL Server that you want to connect to from a remote computer.
...
| Tip | ||
|---|---|---|
| ||
| To learn how to Start, Stop, Pause, Resume, Restart the Database Engine, SQL Server Agent, or SQL Server Browser Service, follow the information here: https://msdn.microsoft.com/en-GB/library/hh403394.aspx |
Anchor step3 step3
| step3 | |
| step3 |
Step 3: Turn on the SQL Server Browser Service
Open SQL Server Configuration Manager and click on “SQL Server Services” in the left pane, right-click SQL Server Browser service and select Properties.
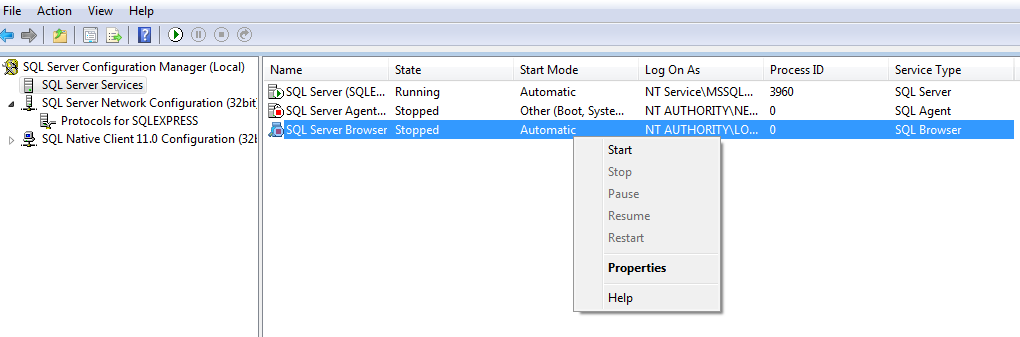
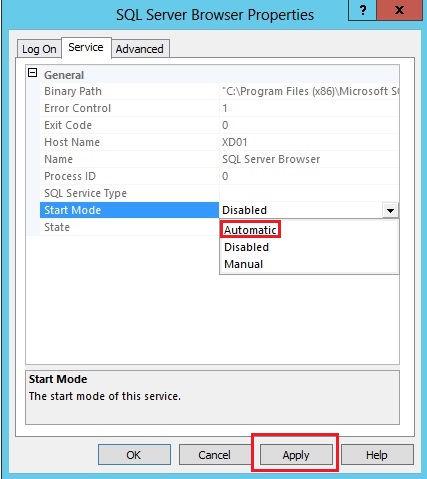
Go to the Service tab and for the Start Mode option change start the type to Automatic.
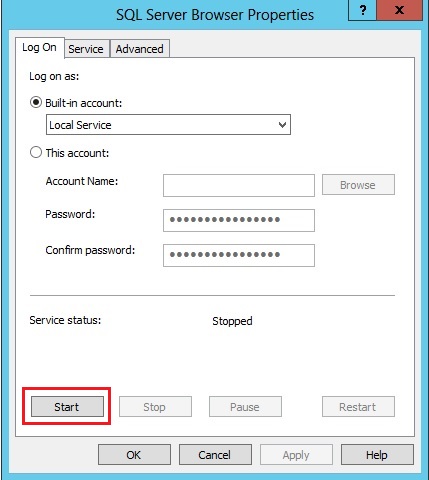
Click the Start button to start the SQL Browser service.
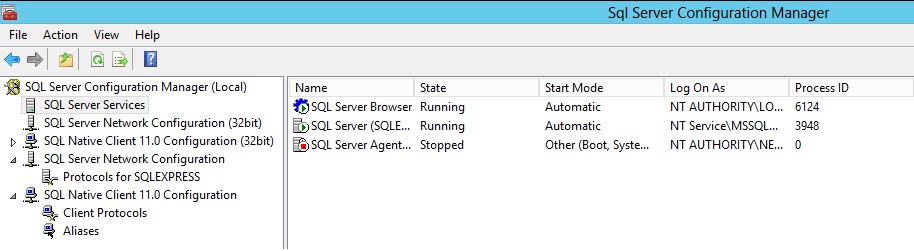
Confirm that the SQL Server Browser service is in the Running state.
Anchor step4 step4
| step4 | |
| step4 |
Step 4: Configure Firewall to allow network traffic
In this step we will configure the firewall to allow network traffic that is related to the SQL Server and to the SQL Server Browser service.
The following two ports will need to be set:
- A port exception for TCP Port 1433. In the New Inbound Rule Wizard dialog, use the following information to create a port exception:
- Select Port
- Select TCP and specify port 1433
- Allow the connection
- Choose all three profiles (Domain, Private & Public)
- Name the rule “SQL – TCP 1433″
- A port exception for UDP Port 1434. Click New Inbound Rule again and use the following information to create another port exception:
- Select Port
- Select UDP and specify port 1434
- Allow the connection
- Choose all three profiles (Domain, Private & Public)
- Name the rule “SQL – UDP 1434
...
| Tip | ||
|---|---|---|
| ||
|
.png?version=1&modificationDate=1586960603019&cacheVersion=1&api=v2&width=500)
Anchor step5 step5
| step5 | |
| step5 |
Step 5: Setting up Authentication
In SQL Server Management Studio, right-click on the server name in the left pane and select Properties.
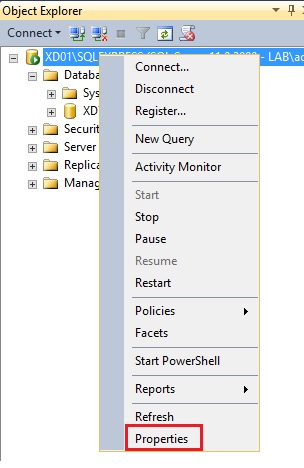
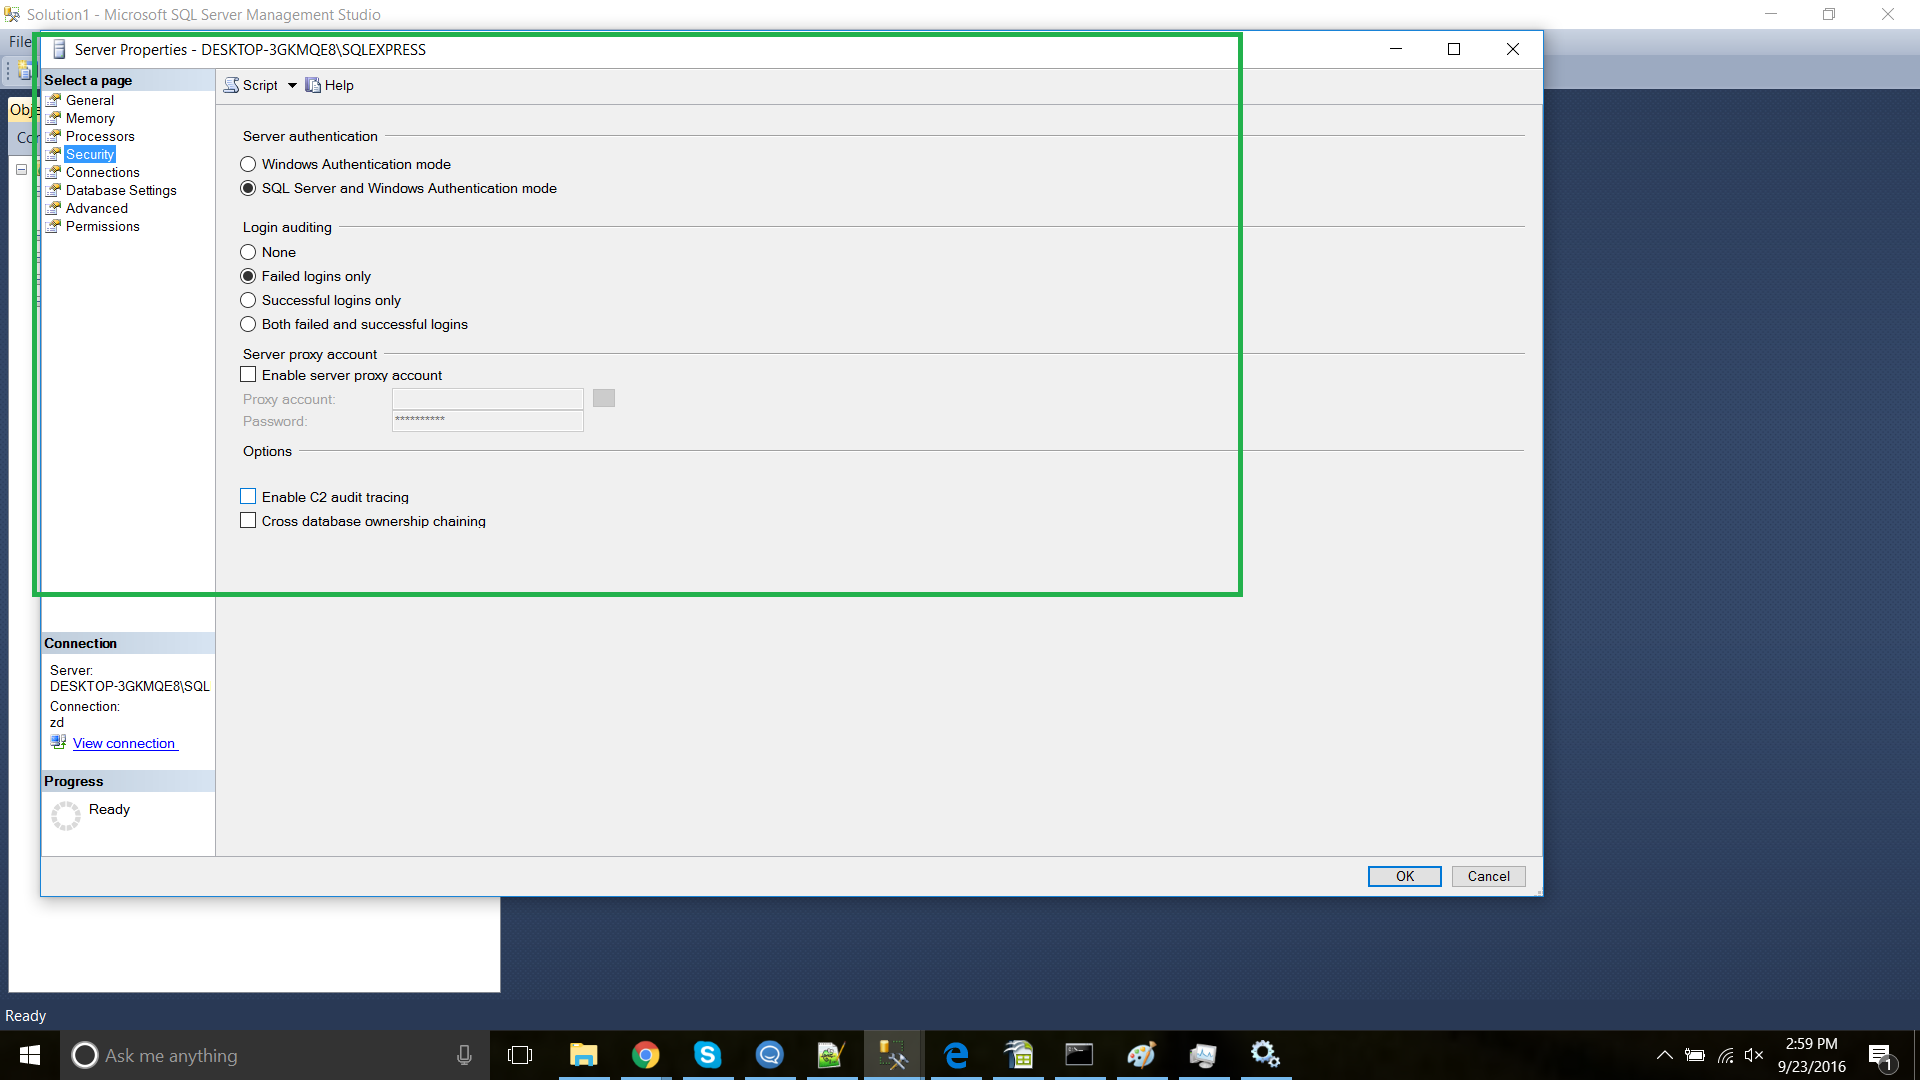
From here, select Security and under Server authentication, select SQL Server and Windows Authentication mode.
Anchor step6 step6
| step6 | |
| step6 |
Step 6: Install Zephyr and Connect to the Database
Now the Database is ready, open the Zephyr installer. The wizard will take you through the setup steps.
...
The Installation wizard will then provide Shortcut options, and install Zephyr.
After the install, follow these steps:
- For Windows : go to your Zephyr installation directory (the default is C:\Program files\Zephyr\):
...
(ii) Copy the cluster.properties.tmpl file to ..\usr\local:\Zephyr\tomcat\webapps\flex\WEB-INF\classes and rename the file to cluster.properties. Restart the Server.
Anchor step7 step7
| step7 | |
| step7 |
Step 7: Setting up Memory
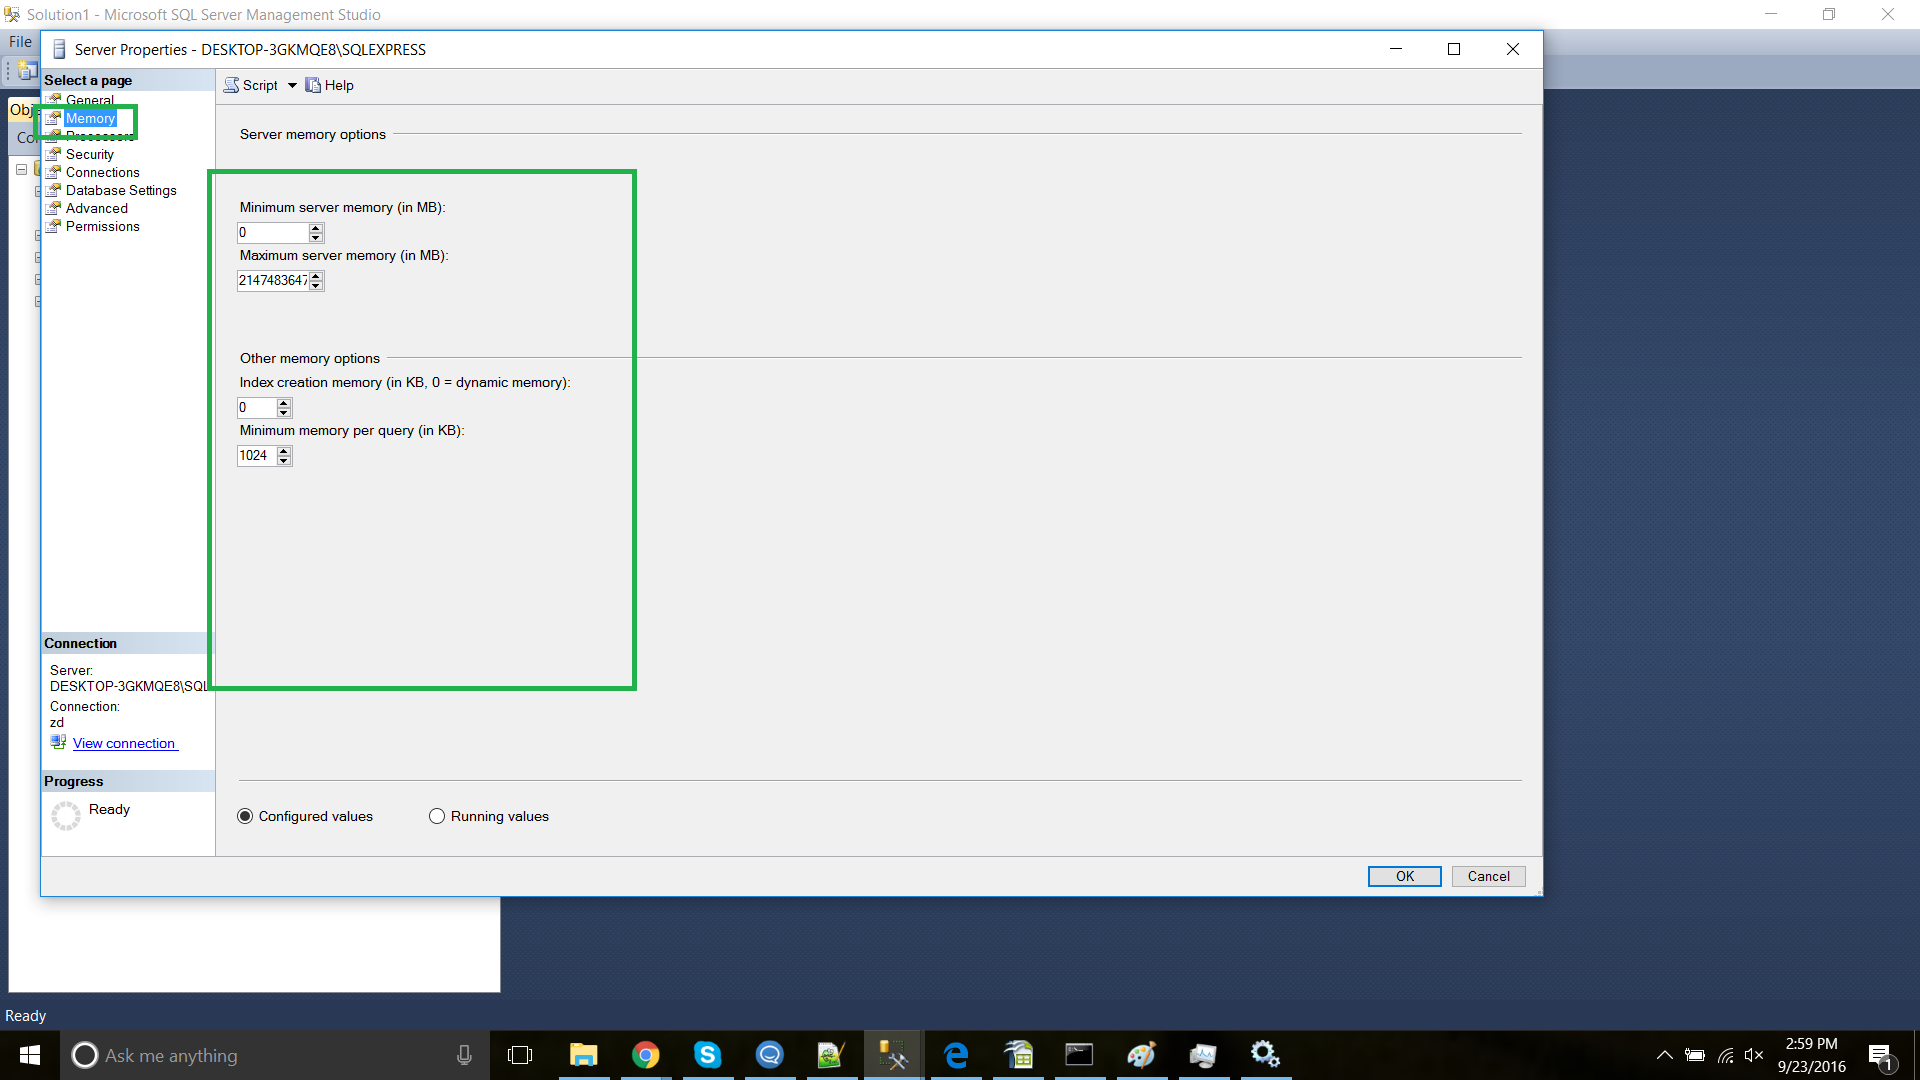
In SQL Server Management Studio, right-click on the server name in the left pane and select Properties.
Now select Memory, and set the Minimum and Maximum server memory to the desired level. 8GB is our recommended minimum.
Anchor step8 step8
| step8 | |
| step8 |
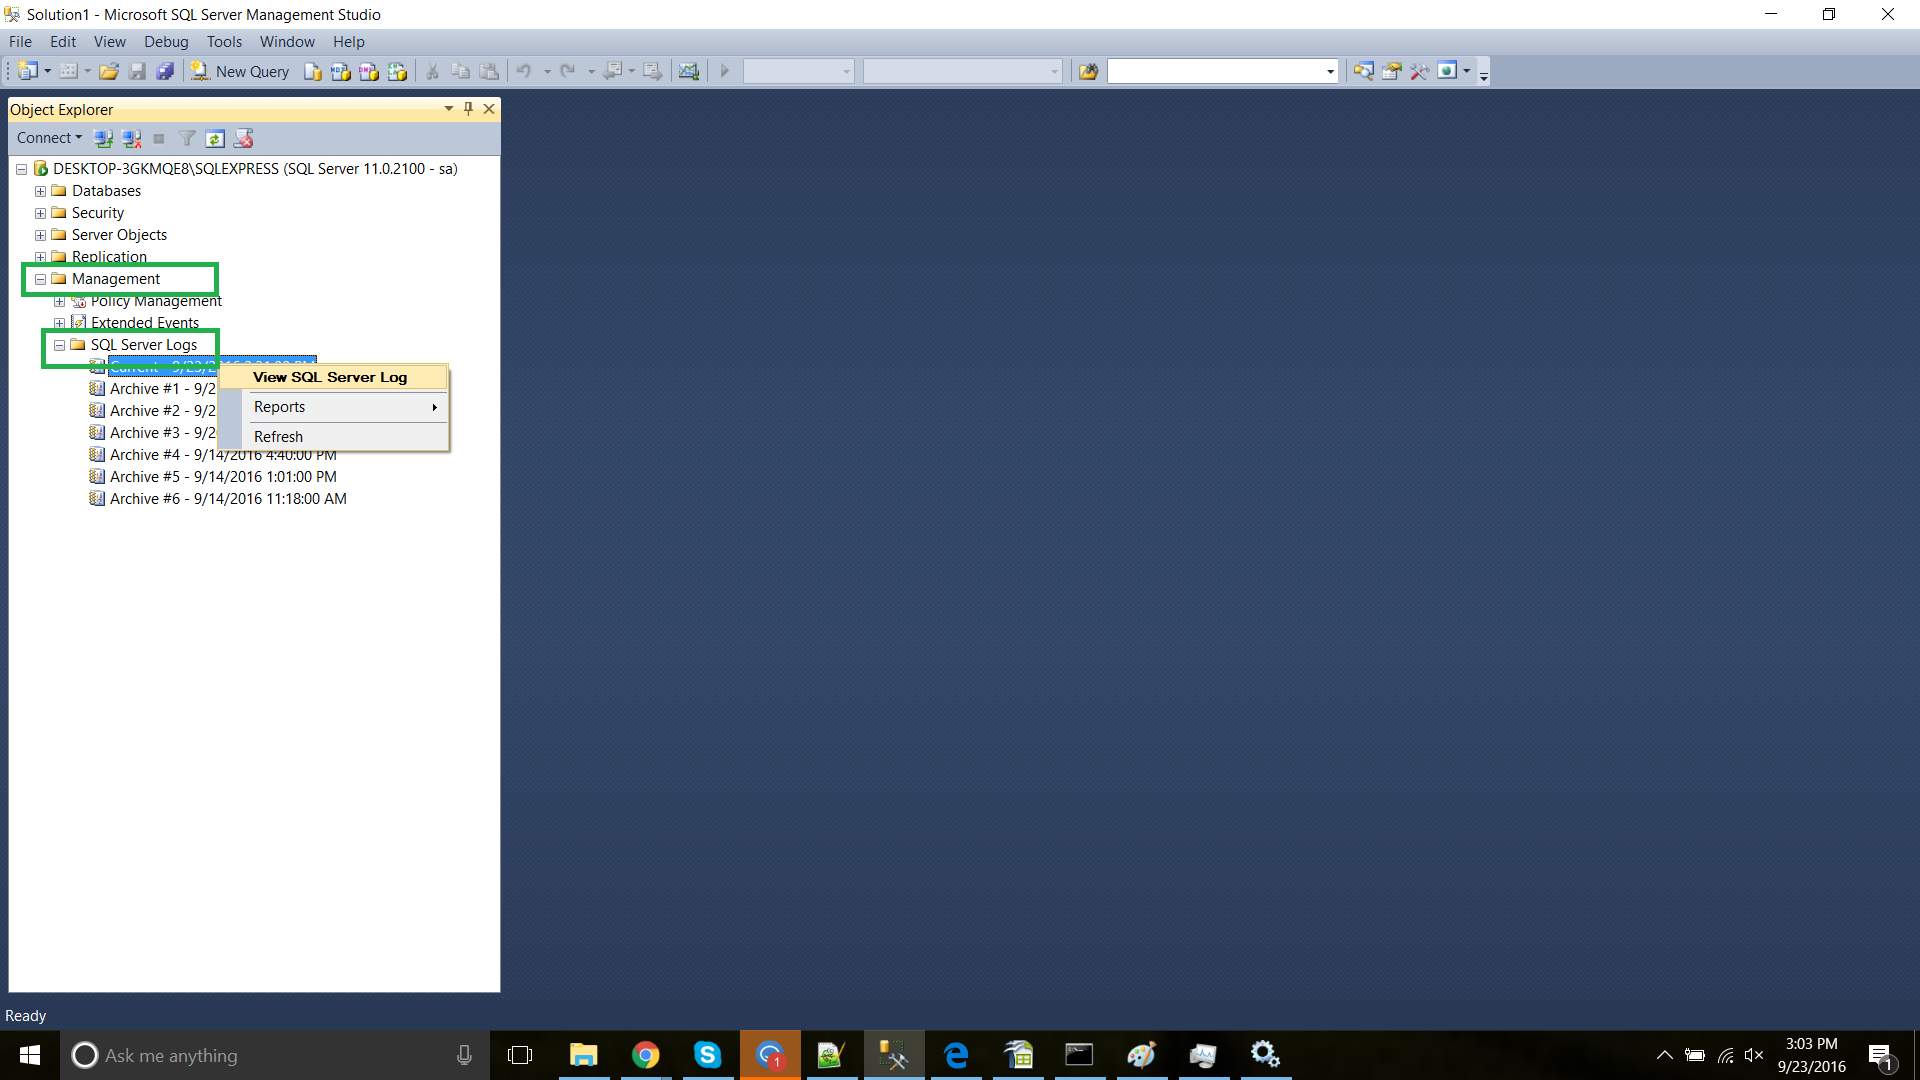
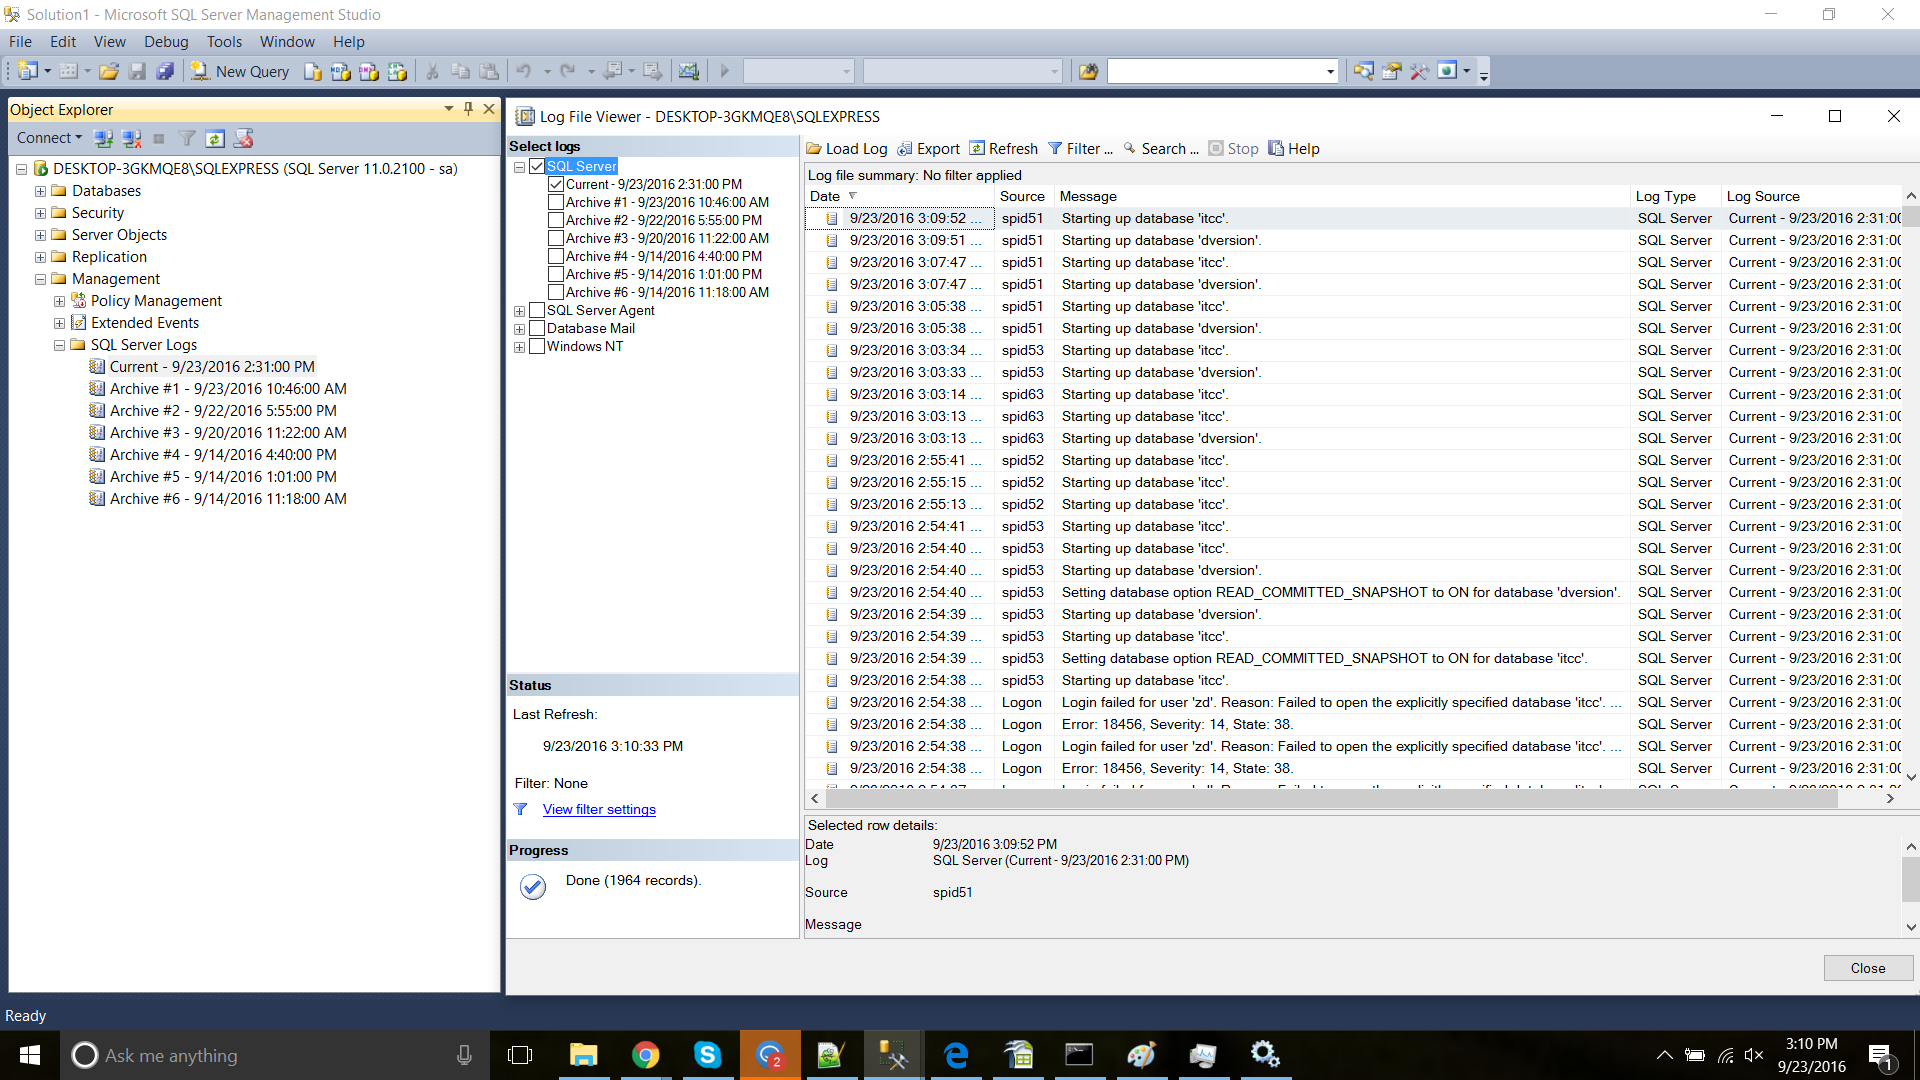
Step 8: Knowing where the Logs reside
Knowing where the Log files reside is useful when troubleshooting. To view the Logs in SQL Server, expand the Management tab, select SQL Server Logs. Click on View SQL Server Log.
Anchor step9 step9
| step9 | |
| step9 |
Step 9: Configuring additional nodes
Now that a Microsoft SQL Server Database is connected to one installation of Zephyr, Step 4 needs to be followed again for every additional application node of Zephyr.
Once this is complete, follow these steps:
...