...
To import test cases, perform the following steps:
1. Map Excel columns to Zephyr fields
...
A list of fields available in the dialog:
Field name | Description |
|---|---|
Map Name | The name of your Excel map. |
Description | Additional information about your Excel map. |
Starting Row Number | The number of the row to start importing from. For example, there might be some header rows that need to be ignored. |
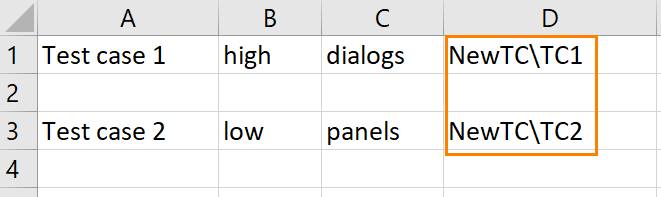
Select Discriminator | Discriminators allow Zephyr to distinguish between multiple test cases in an Excel file. Possible values:
|
The dialog also contains a list of Zephyr fields (Name* is the test case name) with empty fields next to them where you can specify a column letter of the Excel file. To map a field to an Excel column, just enter the column letter in the empty field (see the image above). The section can also list custom fields available in the project.
...
1. Click the Play icon on the right, and in the subsequent dialog, specify the job name, upload the file/attachment to be imported and click Start Import:
...
|
|---|

 In Zephyr, the imported hierarchy will be under the folder having the name of the import job: 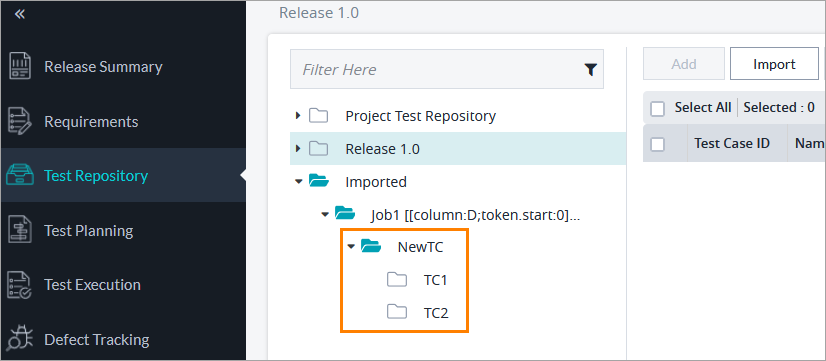 |
|---|
After the job run is over, Zephyr will show the details of the run:
...